When to sow cucumbers as seedlings for a greenhouse?
Cucumbers are in demand all year round. We add this heat-loving vegetable fresh to various salads, and pickled and pickled cucumbers add variety to a boring dinner or become the main ingredient in pickle soups.
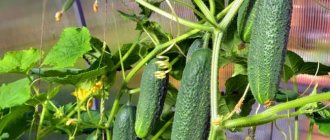
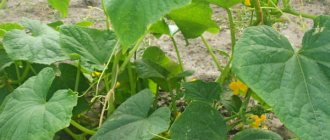
Growing cucumbers in a greenhouse
Delicious cucumbers can be grown in your own garden bed, and a greenhouse will provide a year-round harvest. In addition, the cost of cucumbers grown with your own hands will be several times less than vegetables purchased in the supermarket.
In winter, the price of a green vegetable increases three times, although the taste and quality of store-bought cucumbers deteriorate during this period. “Your own” cucumbers will fill the kitchen with an incomparable spring smell and the taste will not disappoint.
How to grow cucumbers in a greenhouse?
How to choose a greenhouse?
Have you read inspiring articles about growing seedlings in greenhouses and decided to run to the store for varietal seeds? Don't rush, because first you need to figure out some important points:
- can you create and maintain suitable heating conditions in the greenhouse?
- how a certain thermal regime will be maintained
A generous harvest can only be obtained by maintaining a special thermal regime. A greenhouse without heating is possible if the temperature inside does not drop below 13 degrees.
Scheme of planting cucumbers in a greenhouse
- The frame for a good greenhouse is plastic or other new modern material.
- The advantage of plastic over other materials is obvious: it will not rot like wood and will not rust like metal.
- Glass is placed on top of the frame, which will provide the plants with sufficient sunlight.
- An alternative option is film or polycarbonate.
Polycarbonate greenhouse
Seedling care
To get a good harvest and prevent plants from dying, they need to be looked after properly. Proper watering and fertilizing are the key to the absence of diseases and a guarantee that the cucumbers will sprout on time and be able to produce a harvest.
Watering
To maintain humidity and maintain a microclimate, the cups are covered with film to prevent drying out.
Important! You need to water the soil daily or every other day.
After removing the film, it is important to prevent the soil from drying out. Also, you should not allow a crust to form, which prevents the access of oxygen to the soil. It needs to be loosened at least once a week.
In the initial stages, watering should be done from a sprayer, after which you can start using a small watering can.
Feeding
As soon as the first cucumber leaves appear, the seedlings should be fertilized with a solution of mineral fertilizers.
Important! Fertilizers should be applied to pre-moistened soil.
Before planting cucumbers in the soil, it is also fertilized with humus, compost or specialized complex fertilizers. It is important not to overdo it with their quantity.
Landing in the ground
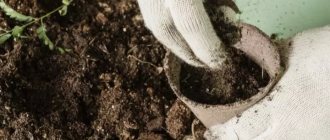
A couple of days before planting, the pots should be thoroughly watered to speed up the process of decomposition.
Holes are dug in the soil, slightly larger than the peat cups themselves. They are lowered below ground level by 3 cm. It is also worth breaking the pot a little to make it easier for the roots to get out of it.
Planting cucumbers in open ground
Video: How to make a polycarbonate greenhouse with your own hands?
When to sow seeds?
Often gardeners bypass the process of planting seedlings and immediately sow the seeds in a greenhouse. The optimal time for sowing seeds is from April 20 to April 28.
In three weeks, the seedlings will grow so much that they can be planted in all the beds of the greenhouse.
Recommendations for beginner gardeners:
- The substrate in which the seeds are planted must be of high quality. It is better to prepare it yourself: in the fall, fallen leaves are harvested and laid out in the greenhouse. In winter, the layer of foliage will begin to gradually settle and in the spring the soil will be ready for planting seeds.
- Plant the seeds in a large container.
- The seed material is immersed in pre-made holes in the ground (depth - 1-1.5 cm).
- Each seed is lightly sprinkled with earth, as if “pinched” a little on top.
- Perlite, seedling mixture or vermiculite are sprinkled on the seeds sprinkled with soil.
Planting cucumber seeds for seedlings
A few cons
There are not so many disadvantages of peat pots, but they still exist:
- During the period of active preparation for work in the garden, pots are not always on sale; they are taken apart very quickly. Therefore, it is better to purchase them in advance; you can buy them on the Internet, especially if you need a large number of them.
- These are disposable dishes, so you will have to buy a new batch of peat pots for each season. But the price of these products is not that high.
- If you do not follow the watering regime or keep the shoots at high humidity, then mold will settle on the pots. It is very difficult to remove it from the peat, and if no measures are taken, the seedlings will die from the fungus.
- Due to the porosity of the material, the soil in such containers dries out faster, so you need to make sure that the plants do not wilt.
- Peat changes the pH of the soil, it acidifies it, which is not suitable for all crops. Changing the acidity of the soil interferes with the absorption of potassium by plants, which is very necessary for the proper growth of young plants. You can adjust the acidity of the soil by adding chalk and lime to it.
- If you use too thin peat pots, less than 1 mm thick, they will soften from water and do not retain their shape well. The optimal wall thickness of products in which it is better to plant vegetables is 1.5 mm.
In addition, low quality products often appear on sale. Spontaneous markets are especially guilty of this. Such containers are not made from pure peat, but cardboard is mixed in. Such cups do not disintegrate easily, and their remains remain in the soil until the next season. In low-quality containers, plants do not feel well after planting; their root system cannot break through the wall. Often because of this, the planted seedlings die. Counterfeit products usually have a lighter color. Therefore, you should buy darker cups that are porous and a little soft to the touch.
Preparing and soaking cucumber seeds for sowing seedlings
Buying expensive branded seeds is not enough to get a rich harvest of delicious vegetables. Seeds need to be prepared for sowing by performing a few simple manipulations.
Preparing seeds for sowing
The process of preparing seeds for sowing includes the following points:
- selection of healthy seeds
- calibration
- carrying out disinfection
- using wood ash to treat seeds
- hardening
Let's start with the first point : selecting full-weight seed material.
- Seeds should be dropped 3-5 times into a glass of water (optimal temperature is room temperature). The second immersion of the seeds should be done in salt water (3 grams of salt per liter container of water).
- Next, you need to pour water with seeds 1-2 times so that the defective specimens float to the surface. The remaining seeds are washed and laid out on paper to dry.
- The readiness of seeds is determined by their good flowability. This procedure is mandatory to increase seed germination.
Seed calibration
The second point is seed calibration , which is also required to increase their germination. The seeds need to be sorted, divided into three parts. In one - the smallest, in the other - medium in size, and in the third - large. It is necessary to sow seeds in fractions.
What is the process of seed disinfection and why is it needed?
Disinfection of seeds will get rid of the “invasion” of all kinds of spider bugs and prevent the development of diseases. The disinfection process is as follows:
- the seed is heated for 3 hours at 60 degrees C.
- the heated seed is dipped into a solution of boric acid and potassium permanganate (0.2 g of acid and 1 gram of potassium permanganate are added to a 10 liter container of water) and kept in it for 15 minutes.
- the seeds are washed with clean water.
Seed disinfection
Disinfection of seeds in special preparations
In the absence of acid and unwillingness to bother with chemistry, gardeners use another method - the seeds are irradiated with ultraviolet rays. This method of disinfection significantly reduces the risk of disease and increases germination and germination. Ultraviolet rays promote good growth and development of plants.
What is the essence of the method?
- UV treatment lasts 1-5 minutes
- the seeds are placed in a dark bag that does not allow light to pass through (photo paper)
The seeds are also treated with wood ash:
- To do this, prepare a solution of 2 tablespoons of ash and 1 liter of water.
- The solution is infused for 2 days, and then the seeds are immersed in it for 3 hours.
- After processing, it is necessary to dry the seed thoroughly.
Cucumber seedlings in cups
The process of hardening the seed is as follows:
- the seed is wrapped in a rag, previously moistened with water and wrung out well, or covered with damp sand until the seeds swell.
- The temperature should be maintained at 20-25 degrees.
- “sucked” seeds (even if there are not many of them) are placed wrapped in the same rag on the top shelf of the refrigerator, where they should stand for several days
- There will be a slow defrost on the bottom shelf.
Hardening of seeds
Let's move on to the process of soaking seeds , which promotes rapid seed hatching and germination. The seed should be soaked for a day, and then the remaining water should be removed. The seeds are ready to be transferred to the garden beds!
Soaking the seeds
Helpful Tips:
- it is better to plant seeds that were collected 2-3 years ago (their ovary is more abundant)
- seeds that have been stored for a longer period of time lose their viability
- injured and small seeds have less germination than full-bodied ones
Growing rules
How to plant pepper seedlings in peat pots? Before transplanting, new pots are thoroughly washed and soaked in a solution of potassium permanganate.
.
Pots that have already been used do not need to be washed; it is enough to empty them of old soil and fill them with fresh humus-based soil. A layer of drainage can be laid out at the bottom of the containers: pebbles or expanded clay
. In very large flowerpots, only half of the soil can be changed.
There is no need to fill pots with purchased soil. It consists almost entirely of peat, which is poor in nutrients and does not retain water. If necessary, the finished substrate can be mixed with turf and garden soil. It is worth adding a little superphosphate or ash to the soil
. Some gardeners also add crushed charcoal.
A hole corresponding to the size of the peat pot is dug in the soil. The plant is moved into it and sprinkled with earth.
The edges of the peat container should not rise above the ground surface. After transplanting, the peppers are watered with warm water.
. In the first days, it is better to shade the transplanted plants from too bright sun.
The big advantage of pots is mobility. They can be rearranged anywhere on the balcony, veranda or garden. On particularly hot days, peppers move to partial shade, but plants should spend most of the day in the sun. Peppers are very light-loving; with a lack of ultraviolet light, they become smaller and the fruits do not set.
.
It is best to place the pots on the south, southeast or southwest side.
It is important to monitor the temperature. On warm days, you need to open the windows or expose the plants to the air.
With the onset of frost, the peppers are brought into the apartment or onto the glassed-in veranda. Peppers do not like cold temperatures below 15 degrees; the optimal temperature for them is 20-25 degrees during the day and 18-20 at night.
Peppers love moisture and need plenty of watering with soft, settled water.
room temperature. It is not recommended to water the bushes at the root; the best option is to irrigate the soil in a pot using a fine-mesh watering can. Mulching with humus, sawdust or walnut husks will help retain moisture in the soil.
It is worth taking care of fertilizers. The soil in the pot is quickly depleted; more nutritious soil is required for normal fruiting
. Twice a month the plants are watered with an aqueous solution of complex fertilizers. Peppers love nitrogen-containing complexes, but they should not be abused so as not to slow down flowering.
Grown bushes need support. It is better to place a peg for tying in a container when transplanting a young plant. Later insertion of the support into the ground may injure the roots.
Peppers in pots placed in an apartment or on a balcony may suffer from:
. The cause is too dry air, crowded plants, and insufficient watering.
Planting plants as seedlings shortens the period of vegetative growth in open soil and brings the harvest period much closer. Seedlings are especially applicable in cold territorial climatic zones, where the summer period is much shorter compared to warm regions.
A completely new product has appeared on the market for summer residents - peat pots for seedlings, which are convenient containers for them. Comfort is an acceptable property for the owner of the land; peat is more applicable in order to create the optimal conditions for the development of shoots and maintain minimal damage to the root system when planting them in open ground.
Peat containers can have a completely different appearance - round, square, in the form of cups and solid sectional pots, with the possibility of piece or block use, having completely different parameters of diameter and depth: 100 * 100 mm, 90 * 90 mm, 80 * 80 mm, 70*70 mm, 60*60 mm, 50*50 mm, with wall thickness from 1.5 mm to 2.5 mm.
High-quality peat containers are sold in packaged form in order to comply with proper storage standards and prevent premature soaking.
At what depth should cucumbers be planted?
So, we hardened the seeds. Now we prepare the beds:
- We make a hole, the width and depth of which is 30 cm.
- fill the hole with humus with a 15 cm layer of humus and add a mound of substrate and manure to act as drainage.
- We drop 2 seeds into each hole: planting depth - 2 cm, distance between seeds - 10-15 cm, distance between rows - 50 cm.
- The sprouted plants need to be thinned out, removing one sprout at a time.
Pre-treated cucumber seeds are colored and do not need to be and are immediately ready for planting
Growing cucumber seedlings in peat pots, plastic cups and eggshells
Growing cucumber seedlings in peat pots or disposable cups is simple and inexpensive. Cups are used to obtain early seedlings and transplant them into regular soil without damage.
Using peat pots to grow cucumber seedlings
- Peat pots are containers made from a mixture of peat and pressed cardboard.
- Seeds can be planted in single medium-sized cups, or purchased in combinations of 2 or more pieces.
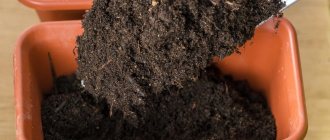
Peat pots are filled with soil
- Large cups should not be used: the substrate in them may turn sour, and seedlings will not develop normally in small ones.
To plant seeds, prepare:
- planting material
- potassium permanganate, from which you need to make a solution of low concentration (2 g per glass of water)
- nutrient soil
- containers (plastic cups, peat pots or tablets)
We immerse the planting material in a weak solution of potassium permanganate for half an hour and rinse it under running water.
Place the seeds on a saucer, placing a damp cloth on top and bottom (it is better to use cotton for this purpose). The seeds should stand in a warm place for 2-3 days, and do not forget to moisten them from time to time. We are waiting for the seeds to hatch.
Planting seeds
- If you have completed all the steps of preparing seeds for planting from the previous section, then you can skip this point and proceed directly to planting seeds in containers.
- We make holes in the cups and fill them with a nutritious, lightweight and moisture-permeable substrate (garden soil is mixed with humus, sawdust (a little) and vermiculite are added).
- We moisten the soil a little, make 2 holes 1.5-2 cm deep. We throw 1 seed into each hole and fill it with soil on top. Place containers with planted cucumber seeds in rows on a pallet and place them on the windowsill if it is sunny. If not, then we’ll choose a warmer place.
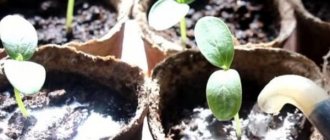
Peat cups with cucumber sprouts
Planting seeds in peat tablets is carried out in a similar way. But there are some differences:
- First, place the peat tablets on a tray and pour water into it. After the tablets swell (in a few hours), seed can be planted in them.
- The seeds are placed in special holes in the top of the tablet and covered with universal seedling substrate.
- To prevent peat tablets or substrate in peat cups from drying out quickly, you need to periodically water the seedlings. If you don’t do this, the plants will simply die.
Sowing seeds in peat tablets
- Usually, plants have enough sunlight, but in cloudy weather, seedlings need to be “added light” in the morning and evening. For this, fluorescent lamps are used.
- If you did not forget to water the seedlings and the sprouts are developing well, then 2 weeks after planting the seeds you need to fertilize. For this purpose, liquid complex fertilizers are used.
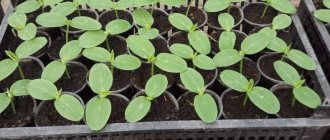
- After 2-3 strong leaves appear on each plant, the seedlings are strong and squat, they can be planted in the ground.
Cucumber seedlings in shell
Peat tablets: one hundred percent result
Peat tablets for cucumber seedlings are a more thoughtful option for growing cucumber seedlings. They are easy to use, accessible, and inexpensive. Planted plants do not need picking; they quickly take root in any soil.
The tablets are made from light, environmentally friendly peak peat mixed with useful substances: growth stimulants, components with a disinfectant effect, nutritional supplements.
The planted plants do not experience a deficiency of nutrients; they develop well . The shape of the products is maintained by a thin but durable mesh. Thanks to it, the soaked peat does not spread, and the seedling is firmly fixed.
Stores offer different options for tablets. They differ in diameter, which is chosen based on the size of the future seedling. For cucumbers, the largest options are suitable , giving a final volume of 400 ml.
For the successful development of cucumber seedlings in peat tablets, it is better to choose products from well-known manufacturers who use high-quality peat and do not skimp on useful additives.
The cheapest tablets consist of low-grade fibrous raw materials; they swell poorly and do not hold their shape. Another drawback of cheap tablets is an overly acidic environment, which is not very beneficial for cucumber seedlings.
How to distinguish seedlings of cucumbers from zucchini?
There are several ways to find out which vegetable is planted in the garden - zucchini or cucumber:
- if the plant has produced only cotyledon leaves, then the zucchini leaves are large, and the cucumber leaves are smaller
- The true leaves of zucchini are rounded, while those of cucumbers have a sharp tip.
- rub the leaf of the plant: cucumber leaves are odorless, but zucchini leaves have a specific aroma that is difficult to confuse with anything else
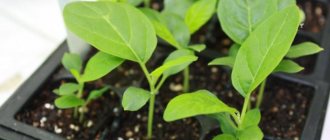
Cucumber seedlings
Pot volumes
High-quality pots should consist of 70% peat, the rest is a mixture of humus and cellulose. This peat mass is simply pressed into containers of the required shape and size. Peat pots come in different volumes (sizes).
The choice depends on the characteristics of the cultivated plants.
- The smallest containers of 50 ml or with a side of 5 cm are useful for seedlings of greenery. They grow dill and parsley, you can plant cilantro, basil, parsley or lettuce.
- Containers of 100 ml or dimensions 6x6 cm are the best option for cultivating seedlings of annual flowers.
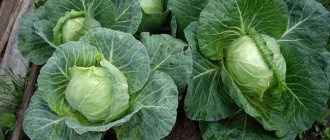
- Pots with a side of 7 cm or a volume of 200 ml are useful for strawberries, wild strawberries, melons and cabbage, also flowering plants.
- Containers measuring 8x8 cm or 250 ml are good for zucchini, cucumbers, and tomatoes. You can sow hydrangea and primrose, coleus, and cyclamens in them.
- Products of 350-400 ml or 500 ml are also good for tomatoes and cucumbers; peppers and eggplants are grown in them. You can grow different flowers in them.
Pots can be round or square; for plants this does not matter. But containers with a square cross-section are often produced in the form of whole cassettes, like egg trays. They are more convenient to use if cut into separate containers. In this form it will be easier to care for them, water and ventilate.
How to grow cucumber seedlings on toilet paper?
Growing seedlings on strips of toilet paper is as follows:
Growing seedlings on strips of toilet paper
- The film is cut into ribbons 10 cm wide (you need as many ribbons as will fit strips of toilet paper with planted seeds).
- A strip of toilet paper is spread over the strips of film (it is better to fold thin paper in half).
- Spray paper strips with water.
- Next you need to step back 1 cm from the edge and lay out the seeds. Planting material should not come into contact with each other, therefore it is necessary to place the seeds at a distance of 2.3-3 cm from each other.
- The seed is covered with a layer of paper, sprinkled with water, and again covered with plastic tape. The multilayer tape is rolled up, secured with an elastic band and placed in a plastic container with the seeds facing up.
- A little water is poured into the container (to prevent the seeds from drowning, water is poured so that it does not reach them). Moisture will flow to the seeds from the toilet paper.
- The container in which the roll of seeds will be stored is located in a warm place. The seeds will germinate within a week.
What care does sprouts in toilet paper roll require?
- It is necessary to periodically fertilize the plants with a weak solution based on humic acids.
- After the first leaf appears, feeding will be required again.
- Plants with two true leaves can be picked.
- The roll is carefully unfolded and the layer of polyethylene is removed. Seedlings are separated from each other by cutting toilet paper and planted in cups with soil. After this, the seedlings are grown as usual.
Cutting polyethylene strips
Watering a roll of seeds with water
Benefits of germinating seeds on strips of toilet paper:
- all sprouts are strong
- no damage to plants occurs during transplantation
- sprouts take root faster
What temperature can cucumber seedlings withstand?
- Cucumber seed germinates at a temperature of 10-12ͦ C. For normal growth and development of leaves, it is necessary to maintain a temperature of 15-16 degrees.
- Cucumber seedlings require a special temperature regime. During the day, the normal temperature for sprouts is from 25 to 30 ͦ C, at night the temperature is slightly lower and normally it should be from 15 to 18 ͦ C.
- If the temperature drops (for example, beyond +10 degrees during germination), then the seedlings stop growing and begin to turn yellow and rot.
| Temperature, °C | ||||
| air | soil | Additional illumination, hour | ||
| Growth phase | daytime (period when supplementary lighting is turned on) | night (additional illumination is turned off) | ||
| Sowing - shoots | 27 | 27 | 24-25 | — |
| The first 3 days after germination | 24 | 24 | 23-24 | 24 |
| Next 2 days | 23 | 22 | 23 | 20 |
| Subsequent period until the 3rd leaf phase* | 21-22 | 20-21 | 22 | 18* |
| The day before planting in the greenhouse | 19-20 | 17-18 | 22 | -* |
| The first 2 days after disembarkation | 21 | 21 | 21 | — |
| Subsequent period | 21 | 19 | 20-21 | — |
Seed preparation
Concerns about the new harvest of next year begin in the summer: lovers of their own seeds select large cucumber fruits without visible flaws from vines that are faster in growth and development for growing seed plants. Preparing your own seed material is justified: it becomes possible to select large seeds that will produce strong, viable seedlings. Engage in breeding work, improve the quality of the variety and productivity.
Read also: How to properly grow grapes in the middle zone
Hybrid varieties of cucumbers with the letter F1 are not capable of producing full-fledged seeds with full preservation of the properties of the variety. Every year you will have to buy seeds with a reserve - rejecting small seeds is justified. Seedlings that are lagging behind in development will produce weak plants that are unable to bear a bountiful harvest.
Long before cucumber seedlings are planted, the seed material is calibrated by size. Saturated saline solution is an unmistakable indicator for checking the density of the semen. The floating seeds are mercilessly rejected. Seeds must be checked for germination. Seeds of each variety are selected and germinated. Based on the test results, a conclusion is made about the suitability of the batch for planting. Seeds with a germination rate of less than 90% are not viable and will fail.
Planting cucumber seedlings in a polycarbonate greenhouse
After 25 days after sowing the seeds in plastic cups or peat pots, cucumber seedlings can be planted in a polycarbonate greenhouse.
An additional layer of film or other protective covering used to cover the greenhouse will help ensure a comfortable climate.
Further care of seedlings consists of the following operations:
- loosening the soil
- ventilation
- abundant moisture (automatic dripper is used)
- feeding
Plants in a polycarbonate greenhouse should be watered in the morning twice a week, and also additionally if the day is sunny. Warm water is used for irrigation. Otherwise, various diseases may begin to develop.
Water should not be poured directly onto the leaves, otherwise burns will occur. Therefore, it is recommended to use a drip irrigation system.
The soil should be loosened (carefully so as not to damage the root system) and breathable. This will ensure the development of the roots, which means the plant will grow well.
It is important to ventilate greenhouses by simply opening the windows.
How to enrich the soil with organic matter?
- fertilize the soil with manure
- Rotten garbage, peat, and sawdust are also used as fertilizer.
- also apply mineral fertilizers
Fertilizing cucumbers should be done a maximum of 5 times during the summer:
- during the flowering period, feed for the first time
- during the fruiting period - 4 times
Nitrogen fertilizers are also applied to sandy soil. In the floodplain - potassium. Cucumbers should be fed with ammonium nitrate in early spring (applied to previously made furrows).
Selection rules
In order for the seedlings to turn out strong and of high quality, you need to choose the right peat containers.
Good pots have a flat, smooth surface without protruding coarse fibers. The walls of the cups should not be too thick and hard, otherwise, when transplanting, the roots of the seedlings will not be able to break through the peat walls.
Excessively soft cups are also not suitable; with constant watering they will lose their shape. High-quality pots have a stable, flat bottom, a neatly processed top, and they are leveled in height.
These little things are very important. Carefully made cups will not tip over; the same height allows you to cover the plantings with glass or film, creating the microclimate necessary for the seedlings.
Advantages of peat pots:
- You can fill the containers with any soil, both purchased and prepared yourself;
- the cups hold their shape well;
- when transplanted into beds, peat quickly soaks and does not interfere with the normal development of roots;
- You can use mineral or organic fertilizers.
Despite the positive aspects, peat cups also have disadvantages:
- cheap samples contain too much cardboard;
- bulky cups take up a lot of space on the windowsill or balcony;
- The soil in containers dries out quickly; constant humidity control is necessary.
Lighting in greenhouses for cucumber seedlings
Lighting for cucumber seedlings is necessary in winter, even if the room is heated. As soon as the seedlings appear, it is necessary to provide them with additional lighting.
- Breaks between periods of natural and artificial light negatively affect the development of plants.
- Therefore, it is necessary to ensure continuity of lighting using a light relay, which reacts to a decrease in lighting intensity and automatically turns on the lamps.
- Natural and artificial lighting should total 12 hours.
- Plants also need periods of complete darkness (6 hours a day).
- The temperature difference between dark and light periods should not exceed 6-8 degrees.