Tomatoes are a vegetable civilization that loves warmth and careful care that does not tolerate errors. Therefore, many inexperienced gardeners make various mistakes when growing it. A particularly significant stage is planting tomato seedlings in open soil, since this process is a huge stress for the plant.
In order not to provoke the collapse of seedlings, it is important to take into account a number of key points. We will tell you in as much detail as possible about the timing of planting, preparing the soil and young plants for life in the garden, and in general how to properly plant tomatoes in open ground with seedlings.
The process of planting tomato seedlings in open soil involves many important points that must be observed to obtain a good harvest.
When can you plant tomato seedlings: timing for different regions
With the onset of May, gardeners begin the time to wait for stable warmth and the speedy retreat of night frosts. The hunt is to quickly remove all the prepared seedlings. After all, it seems that if you plant it early, the harvest will appear much faster. But that's not true.
Tomato seedlings can be planted in open soil only when truly spring-like warm weather sets in.
In this case, two main conditions must be met:
- Suitable temperature regime - daytime air temperature should remain at +20 - +22 °C, and nighttime temperature should not be lower than +15 °C. The ideal soil temperature near the roots is +15°C (minimum +10°C). You can find out whether it has warmed up enough by burying the thermometer 10-15 cm into the ground and evaluating its evidence.
- The occurrence of frost is completely eliminated. Tomatoes react negatively even to -1°C. At this temperature, they will not die, but their growth will noticeably slow down, and the onset of fruiting will be delayed by 10-15 days. To reduce the impact of return frosts (from which no one is immune!), gardeners cover planted tomatoes with a special covering material (lutrasil, agrospan, etc.) or film.
Therefore, in Ukraine and in the southern regions of Russia, summer residents can plant tomato seedlings in early May. In the central regions of the Russian Federation, this procedure is carried out from the end of May until June 10 inclusive. And in the northern regions (Ural, Siberia) the temperature returns to normal only in early June.
But not only possible return frosts and air temperature affect gardening work. Some gardeners decide when to plant tomato seedlings in open soil, guided by the lunar calendar.
The most successful dates for planting tomatoes in 2022 are:
- May – 4-6, 9-11, 13, 18-20, 24-29.
- June – 1-3, 5-8, 10-12, 14-16.
But there are also “bad” days for working with seedlings:
- May – 1-2, 14-15, 29-30.
- June – 12-14, 27-29.
The most suitable stages for planting seedlings are the days of the waxing moon. And the most unfavorable, stressful stages are the days of the new moon and full moon, as well as the days preceding and following them. It is believed that on such dates the planted seedlings will develop and bear fruit poorly.
Gardeners' opinion
Typically, gardeners are unanimous in their reviews of this method of growing tomatoes. Their reviews agree that growing tomatoes in open ground requires a lot of attention and careful selection of varieties. Many amateurs recommend planting some of the bushes in a greenhouse, and placing others in open beds. This approach will help extend the fruiting period; in the event of unfavorable weather conditions, there is no risk of being left without a harvest.
Much depends on climatic conditions. In warm regions, even varieties intended for growing under film are planted in the ground, but in areas with cold and short summers it is better not to take risks. Breeders offer a sufficient number of productive varieties suitable for open ground. At the same time, gardeners note that the fruits do not always fully correspond to the image in the photo; it is worth preparing for this in advance.
In open ground conditions, it is more difficult to protect plants from pests: aphids, naked slugs, thrips, and Colorado potato beetles. But tomatoes are less likely to suffer from late blight and viral diseases, and in general they are stronger and more resilient. The size and weight of the fruit is not affected by the place of cultivation; correct and timely pinching of the bushes is much more important. Confirmation of the words of amateur gardeners can be found in numerous video presentations and photos demonstrating an excellent harvest.
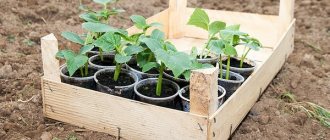
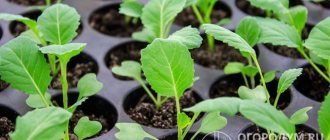
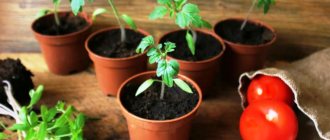
Signs of “adult seedlings” ready for planting in the OG
For some time, the seedlings grow and develop in containers, after which they are planted outside. The age of tomatoes ready for transplanting into the garden varies depending on the plant variety and its ripening time:
- early ripening varieties - while away in seedling status for 40-50 days;
- mid-season varieties – 50-70 days;
- late ripening - 70-80 days.
When planting, it is necessary that the root system has a well-developed structure. The stem should be thick and as strong as possible, 25-35 cm long. Any sprout should have 6-10 leaves, in some cases the first flower quintet appears (in determinate varieties it is allowed that it has already bloomed, in indeterminate varieties it is allowed to be ready to bloom). It is ideal if the seedlings are already hardened - the leaves and stem of such a plant darken, and near the root its color gradually turns into a bluish-red hue.
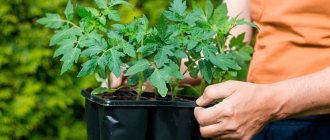
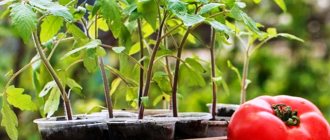
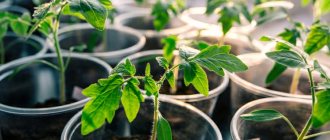
These tomato seedlings are already ready for planting for permanent residence
Caring for tomatoes in open ground
Subsequent care of plantings comes down to several mandatory procedures:
- Watering.
- Weeding.
- Mulching.
- Loosening (if there is mulch, optional).
- Depending on the variety - bush formation, pruning, pinching.
- Protection from pests and diseases.
At first, try to disturb the plants less to allow them to take root, but then weekly watering. For one bush: before flowering - 2-3 liters of water, after flowering - 5 liters. In hot, dry weather, the amount of watering is increased. The best time for water treatments is the morning or the first half of the day if the weather is cloudy. Please note: tomatoes are watered only at the root.
When tomatoes begin to ripen, it is important to maintain constant soil moisture. Mulch copes with this perfectly: compost, straw, humus, hay, sawdust, wood chips. If there is no such covering, do not forget to loosen the soil after each watering and remove weeds.
complex fertilizers for feeding tomatoes
Three feedings will be needed after transplantation:
- Nitrogen fertilizer. 2-3 weeks after planting in open ground. There are several effective options: nettle infusion (1 glass per 1 bush) or 1 tbsp. a spoonful of nitrophoska, 0.5 liters of mullein solution per bucket of water (0.5 liters of fertilizer per 1 bush). Another option: 2 tbsp. spoons of 10% ammonia per 10 liters of water (1 liter of solution per 1 bush).
- Potassium fertilizer. Fertilizing before the start of active flowering. Use either an ash mixture (a one-liter jar of ash per bucket of water) or potassium humate (20 ml of the drug per 10 liters of water).
- Potash fertilizer. The same fertilizers are applied during fruiting.
Before all fertilizing, be sure to water the plants - otherwise the products may burn the root system.
Another important job is stepsoning. But it is only necessary for tall, medium-sized bushes. It is most convenient to pluck stepchildren with the nails of the thumb and index finger. I always leave a small stump, otherwise a new branch will grow in place of the removed one. Low-growing plants do not need pinching (only the lower branches can be treated).
Do not forget to remove the lower leaves with scissors or pruning shears - this is an excellent prevention of phytospores. This work is carried out only after the start of fruiting.
That's all the secrets I would like to share with you. Tomatoes are not a capricious crop, but they still require care. Follow all my recommendations - and tomatoes will definitely thank you with a delicious and abundant harvest.
Choosing a site for planting tomatoes
It is best to choose a point in the garden for subsequent planting of tomatoes in the fall, when all the harvesting work has already been done. When choosing a site, you need to consider several basic rules:
- It is not recommended to plant tomatoes in the same bed for several years in a row (they can only be planted in the same place after 3 years).
- The place should be well lit and sunny; it is advisable that there are no fences or buildings nearby that would shade the ridge in the summer.
- Tomatoes grow well in most soils. The best harvests are produced on chernozems and fertile loose loams. Sandy soils are too poor; they will have to be fertilized more often. At the same time, roots in a loose sandy environment are well saturated with oxygen (breathe) and are less exposed to the risk of decay. Clay soils, on the contrary, are nutritious, but too dense, and it will be difficult for roots to develop in them. This soil is improved by adding peat, coarse sand, crushed bark, wood chips, vermicompost, turf and leaf soil, vermiculite, and perlite.
- Another important indicator is soil acidity. Tomatoes prefer neutral and slightly acidic soils with a pH of 6.2-7.
- When choosing a site for tomatoes, the rules of crop rotation are also significant.
Tomatoes should not be planted in beds after nightshades: peppers, potatoes, eggplants and, of course, tomatoes. The fact is that these related plants are affected by the same diseases and pests. Among the diseases, the most severe are late blight, alternaria, and anthracnose. Pests include the Colorado potato beetle and wireworm. All these troubles will 100% fall on tomatoes if you plant them, say, after potatoes. Because pathogens and insect larvae overwinter well in the soil and will be released in search of food in the spring.
Plus, related civilizations consume the same nutrients from the soil, respectively, when growing only nightshades in a garden bed, the soil on it will be depleted. And this will lead to a significant reduction in yield.
That’s why tomatoes are planted after other crops: cucumbers, onions, carrots, turnips, beets, cauliflower, peas, green manure (mustard, lupine, alfalfa, mouse peas, etc.).
Tomato growing technology. Secrets of planting and care
Different plants have their own growing characteristics, their own preferences for climate, weather, soil, humidity, heat or coolness, etc. The same applies to garden crops, in particular tomatoes. To grow healthy and strong plants, to get a rich harvest of very tasty tomatoes, you need to try and make some effort. But, most importantly, you should study and know: what tomatoes love and what they do not tolerate.
As in any business, the agricultural technology of growing this popular crop among gardeners has its own nuances, secrets, and techniques that help plot owners successfully cope with all sorts of unfavorable conditions, diseases, pests, but at the same time grow beautiful bushes and collect and enjoy the most delicious a wide variety of tomatoes.
Often in the reviews of gardeners about different varieties of tomatoes there are very useful and practical advice, tips based on personal practical experience in growing your favorite vegetable. There are also recommendations from breeders and agronomists that significantly help summer residents to properly care for tomatoes.
Growing tomato seedlings
For the successful cultivation of tomatoes, the technology for obtaining strong and healthy seedlings is of great importance .
This is especially important for our country, because the climate in the middle zone and colder regions (and tomatoes are successfully moving further and further north) requires growing tomatoes through seedlings to obtain a rich and quick harvest.
In the south, this stage of crop cultivation is less acute. However, in the warmer regions of the Russian Federation, many, in order to enjoy their favorite tomatoes early, also try to sow the seeds first in boxes (or another container), and then transplant the sprouts into the ground.
Preparing soil for tomato seedlings
Seedlings usually begin to grow one and a half to two months before transplanting them to a garden bed or indoor ground. You should take care of high-quality, safe, nutritious soil in which the seeds will germinate. Sprouts need to create comfortable conditions for growth.
Now you can find any kind of soil on sale: for every taste and for all occasions. An experienced gardener knows very well: which company’s soil can be safely used, and which one needs to add at least part of the garden soil. It happens that the manufacturer indicates the composition on the packaging, but in reality it turns out that there is only peat inside, and even, it happens, it is sour, which is completely contraindicated for tomatoes. It is clear that it is impossible to obtain high-quality seedlings on such supposed soil.
If there is no confidence in the honesty of the manufacturer, purchased soil should be diluted with soil taken from your own plot.
Clue! Some experienced gardeners successfully use so-called mole soil. It should be taken only from freshly dug mounds, and not overgrown with grass.
Composition of soil for seedlings:
- base (2/3 or 1/2 of the total volume): purchased soil mixture, leaf soil, turf soil, garden soil, mole soil.,
- baking powder: perlite, river sand, expanded clay, crushed polystyrene foam, fine bentonite (can be used from cat litter),
- fertilizing: organic matter and mineral fertilizers (the main thing is not to overdo it with them, less is better).
You can also take land where nettle grows (on the advice of Doctor of Agricultural Sciences E.P. Lisavenko): this grass is a good indicator of soil quality - it grows exclusively on fertile, non-acidic, healthy soil.
What kind of soil should it be:
- loose;
- air and water permeable;
- fertile (moderately, there should be no excess nutrition);
- neutral acidity or slightly acidic;
- healthy: should not contain harmful microorganisms, toxic substances, weed seeds, fungal spores, larvae, insect eggs, worms.
Several soil recipes for tomato seedlings:
Recipe 1 (the simplest)
- turf soil – 1 hour;
- river sand – 1 hour;
- humus - 2 hours.
Recipe 2 (universal + fertilizers)
- river sand – 1 hour;
- lowland peat – 1 hour;
- rotted compost – 1 hour;
- garden soil - 2 hours.
40-70 g of any complex fertilizer (Agricola, Kemira, nitrophoska, azofoska) - per 10 liters of prepared soil mixture. To neutralize the acidity of lowland peat, it is useful to add lime (100-200 g) to the soil mixture (10 l).
Recipe 3 (for tomatoes and peppers)
- rotted humus – 1 hour;
- garden soil – 1 hour;
- river sand (washed) – 1 tsp.
Mix all ingredients and sift through a large sieve (d - 5-6 mm). The resulting soil mixture should be steamed for 2 hours in a water bath; then it must be placed in a clean container to cool. Next, add sifted ash (200 g) and crushed eggshells (100 g) to the resulting substrate (10 l).
Clue! It is most beneficial to prepare any soil mixture in the fall. By spring, the resulting substrate will “ripen”, the ash will be neutralized, and will have time to saturate the soil with useful substances.
Organic substances that are most beneficial for the soil (for tomatoes and peppers):
- meadow and (or) turf land;
- peat (preferably lowland, or high or medium peat);
- leaf humus (fallen leaves of fruit trees, ash, birch, oak, poplar, willow, crushed pine litter are perfect; but, for example, walnut foliage is not suitable at all);
- humus from cattle (well frozen and rotted);
- sphagnum (moss);
- coconut fiber or sawdust (rotted).
Attention! You cannot use bird and horse droppings (the former contains too much nitrogen, and the latter makes the tomatoes absolutely tasteless).
There are many components for soil mixture. On the Internet you can find many different recipes in addition to those presented here. Everyone empirically selects the most suitable option for themselves.
Preparing seeds for sowing
The quality and condition of the seeds significantly affects what the seedlings will turn out to be and what the tomatoes will ultimately be like. Therefore, it is extremely important to properly treat the seeds before sowing.
And here there are several useful recipes, several cunning techniques for increasing the germination of seeds and for obtaining healthy seedlings from them, as well as a ultimately higher yield:
- Classic method of processing: soaking seeds in a pink solution of potassium permanganate for 30 minutes; then the seeds are soaked in clean water for a day (it needs to be changed every 3-4 hours so that the seeds do not suffocate). Then the seeds are slightly dried on a paper towel (you can use napkins or toilet paper). Now they can be sown.
- Before sowing, the seeds are soaked in growth stimulants (see instructions for the preparations).
- Seeds are treated with hydrogen peroxide before sowing (accelerates the germination process, disinfects, nourishes).
- Disinfection: used mainly for seeds obtained from questionable sources.
- Biological products (Fitosporin, Baikal M, etc.); You can use Zircon, Epin, Potassium humate.
There are a lot of recipes for seed treatment, you can find any on the Internet.
This is, for example, the method of Prof. A.V Alpatyev, who hardened the soaked seeds (he kept them in the refrigerator for about 2.5 days at a temperature of 3o-5oC); then about a day at room temperature. Next day, the seeds are kept in a nutrient solution (the professor’s solution is quite complicated).
You can proceed as follows: after cold treatment, the seeds are immersed in a solution of potassium permanganate (1%) for half an hour, washed with clean water and immersed in a nutrient solution for two days. Nutrient solution:
- copper sulfate – 2 g;
- boric acid – 2 g;
Add the preparations to 10 liters of water.
To disinfect seeds, you can use a 1% iodine solution: immerse the seeds in it for 20 minutes.
You can also get acquainted with the following varieties of tomatoes: “Bull's Heart”, “Intuition”, “Lyubasha”, “Banana Legs”, “Red Red”.
Sowing seeds
A container with soil should also be prepared for sowing: the soil should be loose, moderately moist, but not flooded with water. The soil should be slightly compacted so that the seeds do not sink to depth.
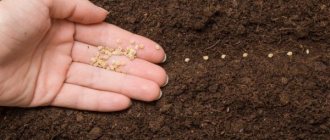
- Spread the seeds on the surface of the soil (it is more convenient in a square-cluster method), 2-3 seeds together at a distance of at least 2.5 cm from each other.
- Gently sprinkle the same slightly damp soil on top to a height of 1.5 cm, no more.
- The container is covered with film or placed in a plastic bag until germination.
- Once or twice a day, you should open the shelter slightly for 5-10 minutes so that the soil “breathes” and moss or mold does not form.
- After the seedlings emerge, the shelter must be removed and the container placed closer to the light (on the windowsill).
- Young sprouts need to be provided with good lighting. It is useful to illuminate them with phytolamps or fluorescent lamps (no more than 14-15 hours a day).
Attention! It must be taken into account that plants also need sleep: they cannot be provided with additional light around the clock (in this case, the chemical and metabolic processes in the stems and leaves are disrupted).
Picking tomatoes
Gardeners still argue about picking.
Some argue that it is necessary to pick tomatoes, because this procedure deepens the sprouts and forms additional roots. Others authoritatively prove that, in principle, the sprouts do not pick up, but simply add soil between them close to the stems. And there is only one transplant: from the seedling container into the ground. The bushes take root well, because when planting they are still buried in the soil in the garden bed, and with one transplant the plant begins to grow and bear fruit faster.
The sprouts sprout as soon as two true leaves appear on them. The soil should be moist and stick to the roots. Essentially, picking is a transfer from one container to another, larger one. In this case, you should try not to disturb the roots too much, and slightly bury the sprouts into the soil.
Hardening of seedlings
In order for seedlings to take root faster and better in a new place, especially if it is open ground, they must be hardened off, accustomed to fresh air, direct sunlight, etc.
This procedure begins a couple of weeks before planting in an open garden bed. On relatively warm, cloudy days, containers with sprouts are taken out into the fresh air, first for a couple of hours, then the time spent outside is gradually increased. Cloudy days are needed so that the sprouts gradually get used to open light and do not get sunburn. If the weather is clear, you should first shade the boxes with seedlings. Several days before planting, seedlings should be outdoors not only during the day, but also at night.
High-quality tomato seedlings should be about 25-30 cm in height, stems should be no thinner than 5 mm, with a slight purple tint, each sprout should have 5-7 leaves (real). Tomatoes usually begin flowering approximately 45 days after germination. By this time, buds may appear on the sprouts. This is a sign that it is time to plant tomatoes in the garden.
Clue! If the seedlings stretch out, it is useful to pinch them. Most likely she lacks light.
We are preparing the ground. Soil for tomatoes
It is best to prepare beds for tomatoes in the fall.
If the acidity level of the soil is exceeded, during autumn digging the following must be added to the soil per 1 m2:
- lime (0.5-0.9 kg);
- superphosphate (40-60 g);
- organic matter (bird droppings, compost, manure or peat - 5-7 kg).
If the soil has already been fertilized (in the spring of the previous season), it should only be thoroughly dug up in the fall.
In spring, the following is added to the soil allocated for tomatoes (per 1 m2):
- superphosphate (30-40 g);
- potash fertilizers (25-30 g);
- nitrogen fertilizers (30-40 g).
The soil should be loose, crumbly, moderately moist.
The place for tomatoes should be sunny, quiet, protected from cold winds. If every season the land for tomatoes is well (but not excessively!) fertilized, they can be grown in one place for 2-3 years. This is also possible if the plants were not sick and were healthy.
Advice! It is best to plant tomatoes where they grew before: zucchini, cabbage, cucumbers. onion. In the same place where other nightshades grew (eggplant, peppers, potatoes, physalis), tomatoes can only be planted after three years.
Growing tomatoes in a polycarbonate greenhouse
It is very good if the greenhouse is located at the end from north to south, and its side walls face east and west. This way the plants inside are exposed to the sun better and longer.
Transplanting. Planting schemes
The place for tomatoes should be changed every year. If possible, it is advisable to follow the rules of crop rotation. The ground should be disinfected in the fall - it is treated with a solution of copper sulfate (1 tablespoon of the drug + 10 liters of water; per 1 m2 - 1 liter of solution).
In spring, organic matter and minerals are added to the soil:
- humus, peat, sawdust (1 bucket each);
- phosphates (2 tbsp);
- ash (2 cups).
The soil is carefully dug up and watered with bleach (warm solution) for disinfection (2 liters per 1 m2).
It is best to prepare the beds about a week before planting the seedlings. Plants are planted when the soil has warmed up to 14°C. If the seedlings are very elongated, they need to be buried or generally planted lying down: with the tops towards the north, part of the stem with roots should be buried ¼ of the way. After planting, water the plants generously.
The growth of tomato varieties when planted in a greenhouse also has its own characteristics.
- Indeterminate (tall) varieties : in two rows using the square-cluster method. Between bushes - at least 60 cm, between rows - about 85 cm
- Determinate (low-growing) (in one stem): between bushes 25-30 cm, between rows - 50 cm or more.
- Low-growing: in two rows; between rows - 45 cm or more, in a checkerboard pattern.
- Mixed plantings: near the outer wall there is one row of low-growing and determinate tomatoes. The next row, 45 cm apart, contains indeterminate varieties.
Standard varieties can be planted between the first and second rows (25 cm between bushes).
Caring for mature plants
The bushes are planted and growing. Now the main concerns are: watering (regular), fertilizing, loosening, and plant formation.
- Watering . It should be rare, but plentiful. It is better to water in the evening or in the afternoon; under the root, slowly - the water should go to the entire depth of the roots.
- Loosening . To prevent root rotting, especially on heavy, excessively moist soil, the soil should be loosened and weeded between rows over the entire area under the tomatoes. Loosening should not be deeper than 4-6 cm, so as not to injure the roots. Loosening and weeding should be done every 10-12 days.
- Feeding tomatoes . Fertilizers for them. They are fed for the first time 10-12 days after planting with organic matter and minerals. The next ones (2nd and 3rd) - every two weeks; Dry minerals are added either during hilling or after loosening. Ingredients are selected for specific varieties. The main thing: do not overfeed the plants to the detriment of the harvest. If there is too much fertilizing, the bushes begin to grow green mass, not fruits.
Formation of bushes. Growing tomatoes. Pinching tomatoes
To get a guaranteed harvest of quality fruits, tomato bushes should be shaped. This mainly applies to indeterminate varieties.
- Indeterminate varieties. It is better to form one stem, or at least two. The lower leaves break off to the first fruit cluster. Stepchildren should be removed regularly. You can also remove the first two or three fruit clusters so that the next ones develop better and faster. The tops need to be pinched to limit the growth of these tall tomatoes. The same applies to tomatoes grown in open ground.
- Standard varieties do not require stem formation; Pinching is done extremely rarely. There may be a need for pinching and removal of lower leaves.
- Determinate and low-growing varieties . There is virtually no need to pinch the tops. Mostly pinching is carried out, cutting off the lower leaves.
If you want to get larger fruits, some of the fruit clusters on the plant should be removed. It is best to form bushes in the morning on sunny days, so that the resulting wounds dry out and heal by the evening. These rules also apply to tomatoes growing in open ground.
Clue! In order not to injure the roots of grown bushes, supports for tying should be installed near the plants during the process of planting them. In greenhouses, supports are most often installed first, to which the sprouts are then planted.
Pollination of tomatoes
Tomatoes, especially modern varieties, are self-pollinating. For your own peace of mind, it is useful to shake each bush every two or three days during flowering, carefully holding the plant by the main stem.
However, the best option would be to sow annual honey plants in the rows: marigolds, basils, low-growing calendula, mustard, etc., which attract butterflies and bees, drive away insect pests, and mustard also cleanses the soil of wireworms, etc., and serves as a good fertilizer .
It would be useful to remind you that it is very important to constantly monitor and maintain the required level of humidity and lighting, and favorable temperature conditions.
Features of growing tomatoes in open ground
Among the variety of varieties, some of them are more suitable for growing in protected ground, while others are more suitable for growing in open beds.
The best varieties for open ground:
Betalux, Maximka, Marisha, Sanka, Gina, Budenovka, Stolypin, Raspberry Giant, Stick, Mushroom Lukoshko, Puzata Khata, Flyashen.
In order to grow tomatoes in open areas and get the desired harvest, you should first of all follow generally not particularly complex and low-burdensome agricultural techniques.
- The rows in the beds should be arranged from north to south.
- Strictly observe the distance prescribed for each variety between bushes and between rows.
- It is best to plant seedlings in open ground when prolonged cloudy weather is forecast. If this is not expected, at first the tender sprouts should be shaded (by any means).
- It is good to immediately install supports for tying into the planting holes and moisten the holes well.
- It is useful to mulch the row spaces almost immediately: this will prevent the soil from drying out quickly, prevent the growth of weeds, and increase the time between waterings.
It is useful to plant garden beds with tomatoes that will repel insect pests, which are also carriers of various viruses and diseases: spicy and green crops, tagetes, calendula, catnip, snakehead, cilantro, nasturtium, chives, mustard, garlic and etc.
Harvesting tomatoes
Before the final harvest, three weeks before it begins, all flowering brushes, shoots, and buds should be removed from the bushes. This procedure will speed up the ripening of the remaining fruits.
The ugliest ones, even the ugliest ones, are removed first. In the fall, the brown fruits are harvested - these are the ones that are placed for ripening. Tomatoes are harvested until the night temperature is not lower than 8 C. If it is already below eight, the risk of developing tomato diseases increases.
Watch the video! "10 mistakes when growing tomatoes."
The video clearly shows the most common 10 mistakes that are most often made by inexperienced gardeners or beginners. If these mistakes are not made, the bushes will grow healthy and the harvest will be abundant and of high quality.
Conclusion
As is clear from all of the above, there is nothing particularly difficult about growing tomatoes. The most important thing: follow the rules of agricultural technology, water, loosen, weed on time, carry out preventive treatments against diseases and pests with fungicides and insecticides, or perhaps use folk recipes (herbal infusions, decoctions, solutions, etc.), do not forget to feed the tomato bushes.
Very important to remember! Don’t get carried away with watering and fertilizing - everything is good in moderation. Regarding tomatoes: it is better to underwater, especially underfeed, than to overwater and overfeed.
Mulching between rows, for example, will help maintain moderate soil moisture and reduce the appearance of weeds. It is useful to observe crop rotation, symbiosis of useful plants and other secrets and techniques described in the article. And the tomatoes will grow healthy, tasty, and the harvest will be plentiful.
Favorable weather and excellent harvests!
Neighborhood of tomatoes with other plantings
When placing and planning the location of beds on your site, it is necessary to take into account the compatibility of different crops with each other.
In this regard, tomatoes go well with spinach, beans, carrots, radishes, asparagus, onions, radishes, lettuce, beets, zucchini, garlic, cabbage, pumpkin, celery, parsley, basil, marigolds, mint, sage, and calendula.
Basil goes perfectly with tomato. It protects it from parasites and helps improve the taste of the fruit. Garlic and radish protect tomatoes from spider mites and late blight, which is why gardeners often plant the sides of beds with these crops. Onions will be an excellent protector against flea beetles.
Asparagus effectively destroys nematodes, to which tomatoes are extremely susceptible. Proximity to gooseberry and bird cherry bushes will help prevent cutworms, moths and sawflies.
If the area is very windy, then the beans will be able to protect the plant from the wind. But in this case, you should not choose tall varieties, since tomatoes do not grow and bear fruit well in the shade. In addition, any plantings placed next to tomatoes will grow much more intensively, since this plant contains saponin, which effectively affects any planting crops.
Undesirable neighbors of tomatoes include:
- Potatoes, eggplants and peppers belong to the same nightshade group, which means they are susceptible to the same diseases (especially late blight). Therefore, these vegetable crops should be placed away from each other.
- Fennel and dill will deplete the soil and take all nutrients from neighbors.
- Corn - tall plants shade the beds, in addition, these crops attract equal pests.
- Turnips, grapes, sorrel and quinoa are also “bad” neighbors, as they negatively affect the development of tomatoes.
What is the difference between hybrids and other tomato varieties?
Today, for every thousand varieties of tomatoes, there are about eight hundred hybrids. A variety is usually represented as one or a group of plants, with the sole condition that these plants can be used for reproduction. Hybrids are a crossing between selected parent plants, during which a new species is obtained. A species is an evolutionarily established set of individuals characterized by a single... plant hybrid. Regular tomato varieties may not be as productive as hybrids, but they have excellent taste and can also be used to produce seeds and further produce tomatoes of this variety.
Many farmers support the method of hereditary cultivation of tomatoes on their plot, that is, they plant only those seeds that have proven themselves to be the best, and from generation to generation, have given a good harvest and are highly productive. Such varieties can be safely called family heirlooms among tomato varieties.
Hybrids, on the other hand, are tomatoes whose breeding was obtained under control, in the process of long and complex breeding work. Hybrids can be called the same tomato varieties, only with improved qualities, for example, increased resistance to disease or a high yield threshold. In fact, if you approach the process of growing tomatoes on a production scale, then hybrids will greatly benefit from conventional varieties. They will produce good yields, rapid ripening, increased shelf life and shelf life, as well as high quality fruit. However, hybrids have one significant drawback. Hybrid varieties are deprived of the ability to reproduce.
If you want to plant hybrid seeds obtained from the original source, then most likely something similar to a tomato will grow, since in the second generation of plant hybrids there is a complete loss of its hybrid qualities. Also, care for tomato hybrids must be appropriate, since the plant will reveal its hybrid qualities only when appropriate care is organized for it. So if you do not have tomato varieties that differ in any qualities that attract you, but want to get a high yield of tomatoes, then the solution would be to cultivate hybrids on your plot. When purchasing hybrid seeds, carefully study the packaging, which will indicate what hybrid qualities the future plant will have.
Soil preparation
The soil for tomatoes is prepared in advance, starting in the fall. At this time, the main filling of the soil is carried out, introducing organic matter and mineral fertilizers into it.
Rotted manure is most often used as organic matter, which is added for digging in the amount of 4-5 kg per 1 m2. To saturate the soil with phosphorus and potassium, mineral components are also added during digging: superphosphate - 60-80 g/m2 and potassium sulfate - 20-25 g/m2.
Note!
The proportions of fertilizing and the fertilizers used can vary greatly. Some people prefer to use only organic matter for these purposes, others prefer more nutritious fertilizers with the addition of minerals. What will happen in your garden is up to you to decide!
In the spring, about 5 - 7 days before planting tomato seedlings in open soil, the ground is dug up again, all weeds and roots are removed.
2 days before planting, spill the soil with a hot solution of copper sulfate or potassium permanganate. This measure allows you to destroy fungal pathogens and some pests that may be in the soil.
Then, during planting, one or more nutritional components are added to each hole:
- superphosphate (phosphorus) – 1 tsp;
- ash (potassium-phosphorus fertilizer) – 0.5-1 cup;
- crushed shells (calcium) - a handful;
- compost - a handful;
- vermicompost – 1 glass.
Note!
A common scheme for applying fertilizer to a hole is: superphosphate + ash.
Fertilizers are added to the planting hole
Transplanting into the ground: sequence of actions
To successfully grow tomatoes, it is important to choose the right site. Tomatoes love bright, but diffused light; in dense shade their growth stops. It is important that water does not stagnate in the soil, this can lead to unpleasant consequences: black leg, root, apical or gray rot. In beds for growing tomatoes, you can pre-sow green manure to enrich the soil with nutrients. Their role is played by lupine, legumes, mustard or alfalfa. You should not plant tomatoes in areas that were previously occupied by eggplants, potatoes or other members of the nightshade family.
Planting tomatoes in open ground begins when the soil has completely warmed up. Its temperature should not fall below 15 degrees; night frosts are undesirable. Usually the soil reaches this temperature towards the end of May. It is possible to speed up the heating of the soil by covering the tomato beds in advance with two layers of thick plastic film. It not only promotes rapid warming of the soil, but also prevents the proliferation of weeds.
Selection of tomato seeds
A week before planting, the soil must be thoroughly loosened, clearing it of plant residues. Then add humus or peat to the soil, dig it to the depth of a bayonet shovel and cover it again with film. Under the polyethylene, the soil will maintain the required level of moisture, and the tomatoes will begin to grow faster after transplanting. Tomatoes are planted in the ground in warm, but not too hot weather, preferably in the morning. After planting, the film must be removed from the beds and the soil must be dug up again.
Tomatoes ready for planting should be strong and not overgrown. It is desirable to have at least one flower brush and 6-7 strong leaves. It is important to ensure that the seedlings are not sick or affected by pests. Detected aphids or thrips must be removed before transplantation by treating the seedlings with soapy water or insecticides.
Planting is carried out according to a scheme that depends on the height and spreading of the bushes. There is a space of at least 60 cm between especially tall plants; more compact bushes can be planted after 40-45 cm. Planting rules also depend on the characteristics of the variety. You can plant tomatoes in open ground using the trench method, leaving row spacing of about 70 cm.
Some varieties prefer planting in holes. The distance between them should not be less than 40 cm; superphosphate or birch ash is laid out in advance in the holes. You can understand how to plant seedlings from detailed master classes from experienced gardeners. Beginners need to act carefully, relying on intuition and common sense.
Tying tomatoes to stakes and watering tomato seedlings with warm water
Before planting, seedlings need to be inspected. The 2-3 bottom leaves of overgrown tomatoes are removed; this allows the seedlings to be slightly deeper, preventing them from stretching out. The seedlings are moved into the hole along with a lump of earth; overgrown roots can be carefully pinched. The roots should not bend, they must be placed freely. Tomatoes in peat pots are placed in the hole along with the container; the peat walls must first be cut so as not to limit root growth.
After planting, tomatoes should be watered with warm water. The hole is filled with earth, the surface is compacted by hand. The top of the soil is sprinkled with a thin layer of peat. After peat mulching, there is no need to water the plantings, otherwise a crust will form on the soil, preventing normal air exchange. Particularly heat-loving varieties can be covered with film for 1-2 days.
Immediately after planting, the tomato stems are lifted and tied to pegs dug in advance near each hole. If you dig in stakes later, they can damage the roots. Another mounting option is tying to trellises. This option is especially good for tall indeterminate varieties. Tomatoes need to be tied with soft shreds or special adhesive tape; convenient plastic clips are also suitable. Do not use wire or fishing line; hard material can cut the delicate tomato stems.
You can understand how to plant tomatoes correctly after watching a thematic training video.
Such mini-films are ideal for beginning gardeners; they explain the sequence of actions in detail, allowing you to avoid most common mistakes. Usually the video tells how to plant tomatoes correctly, explains the intricacies of preparing open ground, the technology of growing tomatoes by variety, and the features of watering and fertilizing. Video lessons provide answers to all the typical questions of beginning gardeners.
Preparing seedlings for planting
The seedlings also need to be prepared. Then the adaptation process in the open ground will take place as quickly and painlessly as possible.
10 - 14 days before planting tomatoes, they begin to harden them, then get used to the outdoor climate. To do this, containers with seedlings are moved to a rather cold room, for example, to a ventilated balcony or summer veranda. At the same time, it is impossible to expose the seedlings to the open sun, otherwise the tender leaves will burn and the plants themselves will suffer. It is necessary to bend a shady place or one that can be shaded artificially, for example, with the support of curtains, blinds or a newspaper/cardboard screen.
Hardening begins gradually. On the first day, the seedlings are taken out for a walk for literally 1-2 hours, but this time is increased every day. From the second week, the tomatoes are left in the atmosphere all day and brought in only at night.
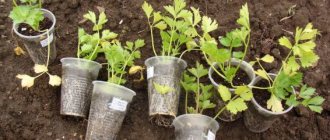
Tomato seedlings can be hardened on an open veranda or terrace
In 5-7 days, if the seedlings have outgrown and need to be buried, the cotyledon leaves are cut off. When the depth of the trunk is greater, the lower pair of true leaves are also removed, leaving small petioles (they should fall off on their own or dry out by the time of replanting). When growing tall, indeterminate varieties that tend to overgrow, more leaves can be removed.
One day before planting, the seedlings are watered abundantly. This makes it easier for the roots to emerge from the seedling container. At the same time, the leaves of the seedlings are sprayed with Epin, which will reduce the stress from transplanting.
Why I decided to plant tomatoes in open ground with seedlings
I always grow tomato seedlings - both for the greenhouse and for open beds. Plants are not afraid of transplants - you can sow seeds in common boxes, and then “move” them into separate cups or pots.
Boxes will save space if you have a small apartment, but there are a lot of seedlings. But the grown seedlings will then have to be transplanted into separate containers. Planting each seed in a separate cup will take up more space, but then you won't have to waste time planting.
For many years I have been choosing mixed soil for tomato seedlings: peat and humus (about 2:1). Place a glass of sand on a bucket of substrate. Before planting seeds, I always fertilize the soil:
- ash – 1 glass;
- double superphosphate – 2 tbsp. spoons;
- urea – 1.5-2 tbsp. spoons;
- potassium sulfate – 1 tbsp. spoon.
This preparation is quite sufficient for tomato seedlings.
Schemes and distances for planting seedlings
Tomatoes need plenty of sunlight to develop; shading is not recommended for them. Therefore, tomatoes should be planted in open ground at a certain distance. Which? Sample recommendations for eating:
- Low-growing tomatoes - the distance between plants in a line is 30-40 cm, in row spacing - 50-60 cm.
- Tall - 50 cm between plants, about 70-80 cm between rows.
- Low-growing standard ones - 20 cm between plants, 30-35 cm between rows.
The following schemes are most commonly used for arranging beds:
- Ordinary is the simplest scheme. The bed is formed in the form of a simple row of tomatoes with a constant distance between plants and between rows. As a sample, a distance of 40 cm is always maintained between bushes, and 60 cm between lines.
- Checkerboard - the bed consists of two rows of tomatoes planted in a checkerboard pattern. The width of the beds and the distance between them depend on the variety of tomatoes and the preference of the gardener. Thus, the popular planting scheme according to Mitlider involves the formation of narrow beds with a width of 45 cm, with a distance of 90-100 cm between them.
- Ribbon-nesting - the same double beds as in the checkerboard pattern. But in this case, the plants in the lines are located opposite each other, parallel.
Checkerboard scheme for planting tomatoes in exhaust gas
Which varieties to choose
Specially bred, most productive varieties and hybrids are suitable for growing in garden beds. They must be resistant to weather changes: sudden frosts, drought, heat. Usually, early and mid-early tomatoes are planted in open ground; later varieties do not have time to ripen before frost. Among the varieties and hybrids you can find a variety of options; they differ in the color and shape of the fruit, pulp density, and size. nuances of taste.
For open beds, low determinate bushes that do not require pinching and shaping are more suitable. Indeterminate plants planted in unprotected soil grow more compact, do not branch or stretch. Tomatoes in open ground need to be tied up, and not only the stems need to be tied up, but also branches with heavy fruits.
Determinate and indeterminate tomatoes
The following tomato varieties are suitable for open ground:
- Black Prince. A very productive variety of Russian selection, the tomatoes are red-brown, large, with a rich sweet taste. The bushes are resistant to late blight, scab and other dangerous diseases.
- Korneevsky Red and Korneevsky Pink. Large-fruited varieties with a pleasant sweet taste. Resistant to diseases, require mandatory tying and bush formation.
- Altaic. There are options with red, pink, honey-yellow fruits. All of them are cold-resistant and easy to care for. The bushes are compact, neat, and the yield is very high.
- Bells of Russia. A promising variety of Russian selection, resistant to short-term frosts and drought. The fruits are pink, medium-sized, and have a beautiful elongated shape. Tomatoes are good for canning.
- Bullfinch. The bushes are compact, standard type, very unpretentious. The yield is good, the tomatoes are juicy, pleasant to taste, suitable for canning or preparing salads.
- Marfa. High-yielding mid-season hybrid of Russian selection. It is drought-resistant, rarely affected by pests, bears fruit until frost, and has excellent keeping quality.
Scheme for planting tomatoes in open ground
Most varieties suitable for open ground were bred by Russian breeders. They are perfectly adapted for regions with a temperate or warm climate; in cooler areas, it is recommended to cover the plants with film in the first days. The most productive varieties and hybrids require especially careful care and abundant feeding.
To avoid unpleasant surprises, you need to choose seeds whose bags clearly indicate that they are suitable for open ground. It is worth considering that there is no need to sow seeds directly into the beds; it is preferable to grow seedlings at home, moving them to a greenhouse when all the seedlings have developed and become stronger.
Technology for planting tomato seedlings in open soil
It is necessary to start planting on a cloudy day or late in the evening, when the air temperature drops and the rays of the sun can no longer burn the pampered leaves.
- Holes are dug in the garden bed, 15-30 cm deep - depending on the volume of the root system and the planned length of the stem.
- Fill any hole with fertilizer (ash, superphosphate, compost, crushed shells, etc.), and pour water into it.
- Transfer the bushes one by one into the prepared holes.
The tomato bush is placed in the hole and the root ball is covered with soil.
Overgrown seedlings are usually buried - either to the cotyledons, or to the first two true leaves (they are removed in advance). Such seedlings are planted vertically or lying down.
Vertically - only if the planned depth is small. It is impossible to place the root system of tomatoes too deep into the soil - otherwise it will rot. At depth, the soil will not have time to warm up, and it will not be good for water and air to flow there.
When planting lying down, dig a trench, and place the root ball and the overgrown stem, freed from leaves, almost horizontally (at 30 degrees). The top of the tomato should be directed to the north, so that the bush can then rise towards the sun. Then the stem and root are covered with earth. Planting with deepening helps the overgrown bushes become quite normal: squat and squat. And not just visually. On a buried stem that enters the soil, adventitious roots are formed. A very powerful root system contributes to the fact that the bush grows quite thick stems and leaves enlarge.
Planting tomatoes with depth, reclining
Note!
When buried, the onset of fruiting of tomatoes is delayed by 1-2 weeks. This is explained by the fact that after planting, the plant spends some time intensively growing roots on the buried stem.
- During ordinary planting, the bushes are installed vertically to the level at which they were in the seedling container. Fill the hole with soil and water it.
- It is advisable to mulch the top of the soil - cover it with dry straw, sawdust or hay with the addition of compost.
- You can install supports next to the bushes at once or do it later, as they grow. These can be pegs, fittings, trellis.
After planting, a small depression must be left at the point of each hole; water will collect in it when watering.
This is what beds with planted tomatoes look like in a decisive version
About planting tomatoes seedlings in a continuous place, watch the video:
Another interesting story about planting tomatoes (growing beds are used):
Step-by-step instructions for planting in open ground
I choose calm, cloudy weather for planting seedlings. If the day is sunny, I work only in the morning or in the second half of the day, or even late in the evening.
Tomatoes love high beds (25-35 cm) with an optimal width of 1-1.2 m. I make the holes “checkerboard”: 50-70 cm between rows, 30-40 cm between plants in one line. If the seedlings are large and tall, I increase these distances by another 20-25 cm.
I have prepared for you a step-by-step algorithm for planting tomato seedlings:
- Before transplanting, water the plant - this will make it easier to pull the soil ball out of the cup.
- To make it easier to remove the plant from the pot, lightly tap the bottom. I use plastic containers - their walls wrinkle, which allows the lump of earth to separate more easily.
- The base of the seedling should be lightly pinched between your index finger and thumb. With a quick and sharp movement, turn the pot with the plant over.
- If the earthen lump has not separated from the walls of the container, very carefully pull the base of the plant stem towards you, slightly rocking it from side to side. At this time, do not stop kneading the walls of the pot with the fingers of your other hand.
- When you cannot remove the seedling, do not pull it too hard. It is better to cut a plastic or cardboard cup with a knife or scissors.
- Place the earthen ball in the already prepared hole: fertilize the soil in advance with a special fertilizer.
- Deepen the stem approximately 10-15 cm below the previous level.
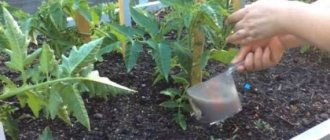
- Tilt the young tomato slightly to the side and water thoroughly. I do this in several stages: I wait until the water is completely absorbed into the substrate and again take up the watering can. Watering is the most important part of planting. The better the soil is moistened (but not swamped), the faster the root system adapts and begins to develop. For one hole, 3-4 liters of water (preferably warm) is enough.
- Leaving the seedling on its side, fill its hole with soil. Lightly compact the substrate, and then sprinkle with loose soil.
- After planting, there is no need to water the plant, otherwise a soil crust will form.
- If the tomato is tall, tie it to a stake. Low-growing tomatoes are not tied up, but the soil around them is mulched with straw or hay.
- Place arches and protect the beds with covering film.
For large tomatoes, mulching when planting is not necessary. The need for it appears after the seedlings have already taken root - they use forest litter. The next mulching is after removing the lower leaves.
Caring for planted tomatoes
After planting, it is necessary to create suitable conditions for the tomatoes for their further development and growth. And also, if possible, reduce stress and the adaptation stage in new conditions. Proper care plays a vital role in this.
Watering
In the first few days (7-10 days), it is advisable not to water the tomatoes; they have already been flooded with water during the planting period. Excess moisture can harm the roots and even require rotting processes.
Next, watering is not frequent, but quite abundant, only after the top layer of soil has dried.
The first watering after planting is carried out no earlier than a week later.
Feeding
Fertilizers for tomatoes can be selected or made independently. At the same time, at different stages of plant development, the ratios of the main mineral elements (nitrogen N, phosphorus P, potassium K) will change.
- After planting in a continuous place - the recommended NPK ratio is 1 - 5 - 1;
- After the appearance of 4-5 flower brushes - NPK 1 - 0.5 - 1.7-2;
- After the appearance of tomato fruits – NPK 1 – 0.5 – 1.5.
All these ratios are compiled “according to science” and are not observed by all gardeners. As fertilizers, you can use mullein or chicken manure infusion, EM preparations. Ash solution is quite effective as a source of potassium and phosphorus. To find out how to prepare and use it, watch the video:
According to the standard, fertilizing for tomatoes is applied once every 2 weeks. But, if symptoms of deficiency (excess) of nutrients occur, corrective feeding has to be done. For example, the tops of tomatoes die off due to a lack of calcium or boron. Flowers and young ovaries dry out due to boron-nitrogen deficiency. For any symptom of starvation, immediate addition of the missing elements is required. And with a symptom of excess - a decrease in the content of the excess element in the usual fertilizer.
Stepsoning
During this manipulation, shoots that grow in the interval between the true leaves and the tomato stem are removed. When forming a plant into a single stem, all stepsons must be removed. In two stems, one stepson is left, growing under the first inflorescence. In three stems, two stepsons are left, one under the first inflorescence, the second one at the bottom.
The principle of pinching tomatoes
Properly planted tomato seedlings guarantee their rapid survival and accelerated appearance of fruits. There can be no trifles in this matter. Therefore, try to study all the subtleties outlined above. And a rich harvest of tomatoes won’t have to wait long!
Choosing a place to plant tomato seedlings
This or that plant likes certain conditions and soil characteristics. The success of growing garden crops depends on this. When choosing a site for young tomatoes, you should know what soil and location are required for successful cultivation of the crop:
- The plant loves places that are well lit by the sun.
- The site must be protected from winds and drafts.
- The soil should be loose, fertile, rich in nutrients, and should also absorb moisture well.
- Sandy loam soils are most suitable.
- The soil must have good water and breathability properties.
- For growing tomatoes, it is better to choose areas with neutral acidity (6-7 pH).
- It is necessary to avoid areas with excessive amounts of fertilizer, shady, waterlogged, and swampy areas.
When choosing a site for replanting, also pay attention to crop rotation (that is, alternating crops on the site). It is recommended to transplant the seedlings to a bed where legumes, cabbage, onions, cucumbers, and carrots previously grew. Bad predecessors are nightshade crops - tomatoes, potatoes, peppers, eggplants. If, nevertheless, nightshades grew in the garden bed you liked, it is necessary that the time interval between planting tomatoes and bad predecessors be three to four years.
Advice! If you do not have the opportunity to observe crop rotation, for example, the territory is limited, then you can annually remove the top layer of soil and replace it with a new one.
How to prepare the soil and bed for tomatoes
As noted above, this culture requires certain conditions. Unfortunately, it is not always possible to boast that the soil is in ideal condition for gardening. But fortunately, every problem can be solved. If your site does not have a suitable site and soil, then preparation can be made to improve the properties of the substrate. It is best to start in the fall.
To prepare the ground for transplanting tomato seedlings into open ground, the following steps should be taken:
- Sanding - This is the treatment of the top layer of soil with sand to improve air and water permeability; the procedure is relevant for dense, heavy clay soils. For sanding, it is necessary to add sand in the fall in the following proportions: a bucket of sand per square meter. After sanding, the bed should be watered.
- Liming is the improvement of acidic soils by adding lime fertilizers. Such preparation is required when the soil is highly acidic. It is necessary to add lime in proportions - half a kilogram per square meter. The procedure is carried out when digging up the earth in spring or autumn.
- Disinfection — prevention and control of pathogens found in the soil. The procedure is necessary due to the fact that pathogenic microorganisms can live in the soil, which can harm the plant and crop. Disinfection can be carried out using a solution of copper sulfate (the temperature of the solution should be about 70-80 degrees) - one liter per square meter.
- Fertilizer application — introduction of nutrients into the soil to increase soil fertility. Before planting seedlings, it is recommended to apply organic fertilizers: rotted compost or humus. This must be done during autumn digging in a ratio of 3-4 kilograms per square meter.
- It is also recommended application of mineral fertilizers when digging the soil in the spring. For example, you can add superphosphate (50 grams per 1 sq.m.), potassium sulfate (15 grams per 1 sq.m.), ammonium nitrate (20 grams per 1 sq.m.).
You can also plant spring green manure in the spring or winter green manure in the fall; they improve the structure of the soil and enrich it with nutrients.
Advice! Before planting in the spring, be sure to dig up the soil and remove the roots of the weeds.
Growing tomato seedlings
Due to the climatic conditions of our country, the seedless growing method is suitable only for the southern regions, therefore most of the tomatoes are grown using the seedling method. You can plant seedlings at home, placing the pots in a warm, well-lit place, or in a greenhouse right on the site. The simplest greenhouse can be made from polyethylene film.
Growing tomato seedlings takes about 55-65 days, so you need to sow the seeds in late March or early April, depending on the climate. There are no special requirements for the soil - purchased peat soil is perfect. Seeds are sown either in a common container, followed by picking. Seeds should be planted in a common container at a distance of several centimeters from each other, in separate pots - one at a time. The planted seeds are sprinkled on top with a thin (up to 1 cm) layer of soil. Tomatoes should be picked after the first two true leaves appear.
Planting seedlings in the ground
Seedlings are planted in the ground in June, when the seedlings will have 8-9 true leaves. One bush should contain 0.6-0.7 square meters of land.
Care
The first watering of seedlings planted in the ground is carried out approximately ten days after planting, the first hilling - another four to five days. In general, after planting seedlings, caring for tomatoes is quite simple.
Watering
Tomatoes require abundant but infrequent watering; in the first time after planting (after a ten-day acclimatization period), watering is carried out once a week; in the hottest period, watering should be done once every two to three days. Water the plants in the evening.
Top dressing
The first feeding of tomatoes is carried out two weeks after planting the seedlings in the ground, then once every ten days. For the first feeding, a mullein solution (1:10) is used, for subsequent feedings - mineral fertilizers (60 grams of nitrophoska per 10 liters of water).
Selection of seeds and seedlings
Seeds
Buy tomato seeds of proven varieties. Before planting, it is better to sort them, choose the largest ones with the correct shape; small seeds are not suitable for planting. When choosing a seed variety, rely on your personal taste preferences. Before planting, it is recommended to soak the seeds in a weak solution of potassium permanganate and then rinse with running water.
Shoots and seedlings
You can either grow seedlings yourself or purchase them in specialized places and greenhouses. When choosing seedlings, pay attention to the stem and foliage of the plant. The color of tomato seedlings should be uniform, light or dark (depending on the variety), the leaves should be undamaged, strong, and elastic. It is better not to buy seedlings with brown or wilted leaves. Also, special attention should be paid to the root system of the tomato. The root should be developed, uniform in color, without damage.
A plant that will bring you a good harvest in the future must be healthy, without signs of insect attack or disease infection. When growing seedlings yourself, prepare soil enriched with organic fertilizers, approximately 2:1. The container for seedlings can be disposable cups or small pots. Make special holes to drain excess water at the bottom of the container and fill with prepared soil. Then plant the seeds at a depth of no more than 2 centimeters. Maintain the temperature of the seedlings at least +25 degrees and provide sufficient watering. After a week, with proper care, you should be pleased with the friendly shoots of tomatoes.