Why is it worth planting tomato seedlings in open ground?
Some gardeners are accustomed to planting tomato seedlings in a greenhouse, believing that in a greenhouse it is easier to create favorable conditions for a capricious crop. Despite this, it is also advisable to transplant tomato seedlings into open beds. There are several reasons for this:
- after adaptation, the bushes become strong and healthy due to increased immunity;
- thanks to the open space, a normal level of humidity is created;
- earlier harvest - the seedlings first grow at home, and after transplanting the tomatoes ripen 25 days earlier than if the seeds were sown in the beds;
- saving seeds - with the seedling method of growing, you will definitely transfer bushes ready for further development to the beds;
- optimal temperature regime - seedlings are transplanted into the garden when warm weather stabilizes, so the plants quickly take root.
Is it possible to deepen stretched tomato seedlings?
Sometimes it happens that by the time of planting in open ground, tomato seedlings are slightly overgrown. Or, simply put, stretched out. Naturally, in this case, the gardener is worried about replanting the plants. After all, stretched seedlings can easily break from wind or heavy rain.
However, in this case there is one trick. The holes need to be made a little wider and deeper, and the seedlings should be placed in them almost horizontally (somewhere at an angle of 30 degrees). The soil should be added approximately to the first leaves.
ON A NOTE. If there are a lot of elongated seedlings, then they need to be laid in one direction.
Rules for planting tomato seedlings in open ground
There are certain requirements when transplanting seedlings into the garden, on which the future harvest depends:
- strictly adhere to the deadlines, otherwise the seedlings will freeze and the plants will become susceptible to disease;
- choose only high-quality seedlings - they should have from 6 to 8 true leaves, not be withered, rotten, or damaged;
- observe crop rotation - it is optimal to plant tomatoes after cabbage, beets, carrots, beans, herbs, undesirable predecessors - potatoes, tomatoes, eggplants, peppers (you need to wait at least 3 years after them);
- consider the neighborhood - beans, spinach, garlic, parsley, zucchini, celery, radish, carrots, asparagus, pumpkin grow well with tomatoes;
- herbs such as mint, sage, basil, calendula are excellent at repelling pests - plant them next to or between seedlings;
- You should not sow nightshades, dill, fennel nearby, as they feed on the same nutrients as tomatoes; they are also bad neighbors - corn, quinoa, sorrel, grapes, turnips;
- disinfect the soil, which will protect against infections;
- Apply fertilizers, as tomatoes love fertile soil.
What not to plant after tomatoes
Do not plant plants of the same family after tomatoes (potatoes, tobacco, vegetable peppers, eggplants and physalis - crops remove similar nutrients from certain layers of soil, have the same pests and similar diseases). They don't plant strawberries either.
It is advisable not to plant melons with roots at the same depth after tomatoes. These are pumpkin, melon and watermelon. When deciding to plant melons, the soil must be thoroughly fertilized.
Timing for planting tomato seedlings in open ground
The time for transferring seedlings to the garden depends on various factors - weather and climate, the ripening time of the tomato variety. Many gardeners and summer residents adhere to the lunar calendar.
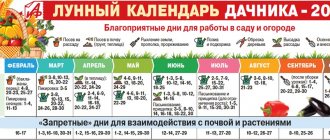
According to the lunar calendar
Every year, the numbers in the lunar calendar change for favorable and unfavorable transplantation of crop seedlings into open ground. The best days for tomatoes are those when the moon is waxing. Seedlings develop and bear fruit poorly during the full moon and new moon.
For different regions
Climatic conditions play the most important role in determining the timing. Be sure to stick to the following numbers:
| Regionality | Date of transplantation of early varieties | Transfer time for middle and late varieties |
| Southern part of Russia | from April 25 to May 10-12 | from 10 to 15 May |
| Central regions, Chernozem | from May 25 to June 10 | from May 20 to June 10 |
| Middle lane | from 1 to 10 June | from 5 to 15 June |
| Siberia, Ural | from 5 to 10 June | from 10 to 15 June |
| Far East | from May 1 to May 25 (with mandatory shelter) | from 10 to 25 June |
When using covering material, the replanting dates are shifted 7-8 days earlier, but the soil, regardless of the air temperature, should be at least +12-14°C to the depth of a spade bayonet.
Influencing factors
There are other indicators that affect the timing of transplanting tomato seedlings into open beds. Among them:
- air temperature during the day is stable from +20 to +22°С;
- night weather – minimum +15°С;
- temperature of the earth layer - from 12 to 14 ° C (how to check - lower the thermometer 12-15 cm deep, hold for 5-8 minutes);
- Frosts should not be expected, since at a temperature of -2°C the tomatoes die and cannot be restored; if the thermometer readings are slightly higher, the seedlings stop growth and development, so the fruiting time is extended by 10-14 days;
- age of seedlings - early ones are transplanted after 40-50 days, middle ones - after 55-70 days and late ones - after 70-85.
Be sure to pay attention to the condition of the seedlings. What it should be:
- root system with a well-developed structure;
- stem – thick, strong, length minimum 25 cm, maximum – 35 cm;
- number of leaves – from 6 to 10 pieces;
- the presence of a blooming flower raceme in determinate types of tomatoes, the presence of only a raceme in indeterminate varieties, but this requirement is not mandatory.
The seedlings must be hardened. When purchasing, this is easy to determine - inspect the leaves and stem - they will be slightly darker than those of unhardened seedlings, and there may be a blue-red tint near the root.
Planting seedlings of mid-season varieties
Mid-season varieties are those that produce a harvest approximately 108-116 days after the first shoots appear. When purchasing seeds, the packaging must indicate what variety it is, when the first shoots appear and the harvest date. The dates may not coincide, since everything will depend on the growing conditions of the crop.
How to plant such tomatoes correctly? Mid-season varieties are demanding in terms of nutrition, lighting, and watering. They definitely need to be tied up.
When to plant tomato seedlings in open ground? Planting on the beds is carried out 1.5-2 months after the appearance of the first shoots. Landing takes place in May, in the middle of the month. The date is coordinated with the lunar calendar and weather conditions. It is recommended to take all this data into account so that you do not have to plant already overgrown seedlings, which can negatively affect the acclimatization of the plant.
To stop the growth of tomatoes, you can reduce watering, reduce the amount of sunlight, lower the temperature, and do not use fertilizing.
Preparing the soil for planting
The area where tomatoes are to be grown should be sunny but windless. Soil structure – chernozem, sandy loam, loam. If the soil is sandy, clay soil is added to it; if it is heavy, sand and peat are added.
Pay attention to acidity. For tomatoes, the optimal pH level is 6.5 to 7. If the indicators are higher, reduce the acid level with lime (500 g per 1 sq. m); if it is highly alkaline, use sulfur in the same ratio.
The first preparatory work is carried out in the fall. Procedure:
- Remove all debris, fallen leaves, branches, etc.
- Apply organic fertilizer while digging your garden. For this purpose, rotted manure is used - per 1 sq. m about 5 kg.
- To saturate the soil with potassium and phosphorus, add minerals - per 1 square. m 25 g of potassium sulfate and 70-80 g of Superphosphate.
What to do in spring:
- A week before replanting, dig up the soil again and remove all debris.
- Conduct disinfection 2-3 days in advance. To do this, pour a hot solution of manganese (dark pink color) or copper sulfate (1 tbsp per 10 liters of water).
- Level the beds, form holes into which add the following fertilizers: Superphosphate - 1 tsp, wood ash - 70-150 g, crushed eggshells - 3 tbsp. l., vermicompost – 200 ml, compost – 100 g.
How to prepare seedlings for transplanting
In addition to preparing the place for tomato seedlings, you need to properly prepare the seedlings themselves for the procedure.
About a week before planting, you need to treat the seedlings with Epin or Zircon and begin to harden them. The hardening process is quite simple. It is necessary to take containers with seedlings out into the open air, daily increasing the period of time the plants stay outside the house.
ON A NOTE. If on some day the weather is inclement, then hardening is not necessary.
Preparing tomato seedlings for planting
Seedlings should be prepared for transplanting 12-15 days in advance. The first thing experienced gardeners do is harden off the plants. Rules:
- start taking the container with seedlings out onto the street or balcony (or place it in front of an open window), first for a short period of time - 20-30 minutes;
- the next day increase it by 60 minutes;
- on the third day, leave the plants for 3 hours, then 5, etc.;
- do not expose the boxes to direct sunlight - the delicate leaves will get burned.
What to do next:
- 24 hours before transplanting, moisten the soil generously, making it easier to remove the bush along with the lump of earth.
- If the seedlings are weak, then within 2-3 days before transferring to the beds, apply nitroammophoska under the roots and on the greens (1 tsp of the drug per 5 liters of water).
- To increase immunity, which will make it easier to adapt to new conditions, fertilize with Trichoplant (60-80 ml per 10 liters of water). Fill the soil mixture with the solution until it is completely wet.
Prepare in advance the necessary tools for removing seedlings from pots.
Helpful tips for planting tomatoes
In order for the planted tomato bushes to take root well and soon produce a bountiful harvest, it is worth knowing about some recommendations for their cultivation:
- In the autumn, the soil must be fed (possibly with phosphorus or potassium compounds) and dug up, saturating it with a sufficient amount of oxygen.
- If for some reason autumn fertilizing was not carried out, you will have to fertilize the soil in early spring, using 200 g of nitrate per 10 m² of area.
- If possible, it is advisable to plant plants in the second half of the day, since overnight the tomatoes will get stronger and take root better.
- To facilitate the process of removing bushes from the seedling container, the soil is spilled with warm water about an hour before the intended transplant.
- It is better to remove seedlings together with a ball of soil from the previous place of growth, which causes much less damage to the root system of plants.
- When using organic fertilizers placed in the holes, be sure to cover them with soil so as not to burn the tender roots of the seedlings.
- After planting tomatoes, be sure to water them and, if possible, mulch the soil around the bush.
- When choosing a planting scheme, one cannot ignore the requirements of the selected variety: some tomatoes need a free space of 40 cm, others will require a distance of 60 cm or even more.
Despite all these nuances, there are no serious problems with planting and further caring for tomatoes, so even a beginner can easily cope with this task. The main thing is to choose the right crop variety, decide on the timing and location of planting.
Which tomato planting scheme should you choose?
There are several basic technologies for planting tomato seedlings. The choice depends on the variety of tomatoes, as well as the method of planting - in a row, in a checkerboard pattern, etc. The first ones were developed by specialists to create the most favorable conditions for growing the crop.
Low growing varieties
Low-growing varieties usually include early-ripening varieties of tomatoes. It is profitable to plant them, since after harvesting the area can be used again this season. Such tomatoes are not subjected to pinching, so they are usually planted using the 2-row method. How to do it:
- Using a hoe, draw 2 stripes with a distance between them of 20-25 cm.
- Dig holes along lines with a distance of 35-40 cm.
- Make 2 more stripes (two lines) every 70-100 cm - this will be the row spacing.
Medium and tall tomatoes
Tomatoes of medium and tall height are usually planted on one stem with a mandatory garter, which many gardeners consider a huge disadvantage. In fact, growing such varieties significantly saves space in the garden, allows air to reach all the bushes, simplifies care and does not allow the fruits to rot.
Scheme:
- distance between rows – from 70 to 90 cm;
- the distance between holes in one row is from 40 to 50 cm.
Be sure to immediately place support posts (pieces of wood, etc.) at a distance of 2-4 m from each other. Pull the wire. If desired, a support can be installed near each bush.
Planting methods
Tomato beds are arranged using 3 main methods. One of them is used for low-growing tomatoes and is called two-line. Other 2 options:
- In a row. A simplified scheme in which seedlings are planted in rows. They are located at a distance of 50-70 cm from each other.
- Chess. It is advisable to make a two-row row, between which the distance to the next 2 stripes is at least 80-90 cm. Tomatoes are planted in a checkerboard pattern. This method saves space, since the distance between rows is only 30-45 cm, depending on the size of the bushes.
Variety selection
Methods for planting tomato seedlings largely depend on the variety. It is customary to distinguish several varieties of tomatoes:
- greenhouse;
- varieties for open ground;
- universal;
- short;
- tall;
- standard;
- early;
- mid-early;
- late.
Greenhouse varieties can be sown for seedlings earlier, as they are less affected by frost. The distance when planting low-growing varieties may be less than that of tall ones. When choosing a variety, it is very important to take into account the climatic zone and ripening time. The optimal growing season for central Russia is considered to be 100-105 days. For northern latitudes it is better to choose early varieties. In the south, you can plant any tomatoes, including late ones.
How to plant tomato seedlings in open ground?
It is not always possible to grow normal seedlings, which can lead to certain problems during transplantation. For example, if the plants are too overgrown. But gardeners have learned to easily correct the situation. The main condition for all types of tomatoes is to carefully pull the bushes out of the glasses.
Planting normal seedlings
To quickly and without damaging the root system remove the seedlings from the pot, you need to loosen the areas near the walls of the container with a wooden skewer, then pry the bush with a spatula from the very day and pull it out, holding the stem with your fingers at the base.
If you used peat cups, there is no need to remove the bushes - plant them together with the container. When sowing in tetrapacks or disposable cups, simply cut the containers.
Further actions:
- After adding fertilizer to the holes, water them generously and allow them to be completely absorbed.
- Immerse the seedling in the hole so that it is 10-12 cm lower in the ground than in the seedling container.
- Slightly tilt the seedlings and moisten them on all sides with a spray bottle.
- Place it straight again.
- Sprinkle with soil and compact with your hands.
- Water again with warm water and cover with mulch.
Planting overgrown tomatoes
If the tomato bushes are very overgrown, about 6-7 days before moving them into open ground, cut off the cotyledonous foliage, which is located in the lowest row. Be sure to leave the petioles 0.5 cm and make sure they dry out during this time.
Such seedlings are planted in 2 ways:
- Lying down. When planting bushes in holes, make an elongated depression. Place the plant on the soil, cover with substrate so that only the top is visible. The seedlings will grow upward, so the bushes will not be lying, but standing.
- Spiral-shaped. Dig a hole not according to the size of the root and stem, but only according to the length of the root system, but make it a little wider than usual. Place the bush exactly in the center, wrap the trunk in a wide spiral, while adding soil mixture. When you reach the bottom leaves, tamp down.
If you plant tomato seedlings using the spiral method, do not moisten the plants for 2-3 days before planting, as the trunk should wither a little. If it is strong and juicy, it will break.
Planting tall varieties
Tall tomatoes are transplanted identically to the previous methods, but they can be placed much closer to each other. A prerequisite is the installation of a trellis or an individual support peg.
Tall varieties almost always overgrow greatly during the seedling period, so in addition to the cotyledon leaves, it is allowed to remove others.
How to plant tomatoes for seedlings
In order to grow strong seedlings that are resistant to adverse conditions, it is very important to take into account the optimal timing of sowing seeds and properly prepare the substrate. It would also be useful to know the basic rules for caring for emerging plants, of course, in accordance with the requirements of the selected variety.
Deadlines
Early-ripening and mid-ripening varieties of tomatoes are usually sown for seedlings in early March, placing boxes of tomatoes in a warm room with temperatures not lower than +22–23 °C during the day and +17–18 °C at night. In the first week after sowing, it is advisable to organize round-the-clock lighting.
Transplantation into open ground is most often carried out at the beginning of June or, in extreme cases, at the end of May, as soon as the likelihood of return frosts has passed. However, in this matter it is very important to take into account the selected tomato variety.
Priming
Tomatoes love nutritious soil, so the substrate for sowing seeds must be appropriate. It is best to prepare the soil yourself by sifting humus through a sieve (the cells of the product should not exceed 4–6 mm), turf soil and peat, taken in equal proportions. For preventive purposes, it is advisable to pour the finished mixture with a solution of potassium permanganate or calcine it in the oven, which will help eliminate all pathogens and fungal spores.
Care after disembarkation
After transplanting tomato seedlings into open ground, the main task is to create the most favorable conditions, which will speed up and improve the process of adaptation and survival. Pay attention to further care of the crop, which increases productivity.
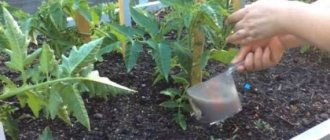
Shelter
If the weather is as favorable as possible (corresponds to the temperature required for transplantation), there is no need to provide shelter, but since it often gets very cold at night, it is necessary to protect fragile plants. Various methods are used for this:
- metal arcs are installed on which a polyethylene film is stretched;
- a plastic bottle is cut, turned upside down and placed on a bush;
- a 3-liter glass jar is used;
- the film is stretched over wooden pegs installed on 4 sides of the bed, covered with polyethylene, the edges of which are sprinkled with soil and stones (so as not to be blown away by the wind and provide warmth).
If the air temperature is slightly below normal, leave the shelter for 3-5 days. Watering is prohibited at this time.
Watering
Depending on weather conditions, soil moisture after transplanting tomato seedlings is not carried out for 3-10 days. The humidity level will remain normal, as watering was carried out during planting. Mulch additionally retains moisture.
When the plants are fully strengthened, it is enough to moisten 2-3 times a week in extreme heat, 1-2 times in cloudy weather. From 5 to 12 liters of warm and settled water is poured under one bush (depending on the age of the bush).
The main condition is that a dry crust should not form on the surface of the earth. After each watering, loosen.
Mulching
This procedure will retain moisture. Additionally, this will prevent the rapid growth of the weed, and low-growing tomatoes growing on the ground will not rot. What is used:
- hay/straw;
- unseeded dried weeds;
- mown grass;
- fallen leaves;
- peat;
- tyrsa;
- sawdust.
Mulch is laid in a layer of up to 2-3 cm.
Formation: pinching and pruning
This procedure is necessary to increase productivity - extra shoots that do not produce color simply draw juices and nutrients from the plant, which is why the yield decreases and the fruits become smaller.
Rules for pruning and pinching:
- remove only those shoots that grow between the stem and leaves;
- if a tomato is grown with one stem, all the stepsons are cut off;
- if there are two stems, you need to leave 1 shoot, if there are three, 2 stepsons, etc.;
- formation time - no later than the period when the fetus is formed;
- removal is carried out with pruning shears or pinching off;
- a petiole of 0.5-1 cm should remain in place of the stepson.
Carry out the pinching procedure early in the morning.
Feeding and fertilizing
Tomatoes need to be fed three times a season, due to which the harvest will be plentiful and the fruits will gain juiciness and sweetness. In what order to apply fertilizers:
- First time. It is carried out 10-12 days after transplanting into open beds. To do this, mix 10 liters of water, 500 ml of mullein and 15 ml of Nitrophoska. Pour 400-500 ml of solution under one bush.
- Second time . Carried out 20 days after the first feeding. Make a mixture of 1 tsp. potassium sulfate, 400 g chicken manure, 1 tbsp. l. Superphosphate preparation and 10 liters of water. Apply 900-1000 ml per plant.
- Third time. Produced 20-21 days after the second feeding. For 10 liters of water, take 15 g of Nitroammofosk, 15 ml of potassium humate. One seedling needs 5 liters of solution.
If the soil is depleted, be sure to add Superphosphate on the 15th day after the third feeding (1 tablespoon per 10 liters of water), which is necessary for one bush.
Gardeners recommend foliar spraying three times a season. To do this, dilute 15 g of urea and 1 g of manganese in 10 liters of water. This will help destroy pathogenic microorganisms and protect against pests and diseases.
Garter of tomatoes
To prevent infection of young plants, be sure to disinfect the garter material - pour boiling water over it, rinse in a dark pink solution of potassium permanganate. When tying, try not to crush the stems, as the upper part of this trunk will wither.
Most often, summer residents use hemp ropes, pieces of soft cotton fabric or nylon tights as garter material, since they do not pinch the plant (do not cause harm).
The duration of the procedure depends on the variety of tomatoes - do this when the stems and leaves just begin to bend towards the surface of the soil.
Garter methods:
- Individual support. Near each bush, insert a wooden stick, iron rod or other available material. Its height should be equal to the future bush. If you are planting tall varieties, use a powerful support pole.
- The trellises are horizontal. Throughout the entire row, install supports at a distance of 2-4 m. Secure twine or wire to the stakes. Bottom height – at least 30 cm.
- Net. A mesh structure is installed between the rows, it is attached to support posts, and the plants are tied up not with fabric, but with clothespins.
If you have the financial opportunity, buy a ready-made structure - a wire frame, a pyramid cap, etc.
What can you plant after tomatoes?
Tomatoes are a crop with an average level of nutrient uptake from the soil. They do not deplete the soil much, but they remove almost all the nitrogen. Therefore, after growing tomatoes, it is necessary to fertilize with nitrogen as required by the new crop.
After tomatoes develop well:
- peas, beans (saturate the soil with nitrogen);
- all types of cabbage (tolerate nitrogen deficiency well);
- cucumbers (add manure or compost before planting);
- zucchini, zucchini, squash;
- onion garlic;
- carrots, beets, radishes, turnips, rutabaga (compared to tomatoes, they have deeper penetrating roots and feed from other layers of the soil).
Tomatoes are returned to their original place after 3-4 years, before which one of the mentioned crops is planted. Ideally, the crop rotation should include legumes. They restore and cleanse the soil well.
Prevention and control of diseases and pests
During the growing season of tomatoes, various pests attack the bushes. But the most common are the following:
- Medvedka. Loves increased moisture and fertility. For destruction, insecticides, tincture of red hot pepper or vinegar are used.
- Wireworm. It eats the root system and prefers acidic soil, so to prevent it, alkalization with lime is necessary before replanting.
- Scoops. They love an abundance of weeds. It is impossible to get rid of them - you will have to collect them manually and burn them.
Tomatoes are attacked by the Colorado potato beetle, thrips, melon aphids, and whitefly spider mites. For control, insecticidal agents are used (the range in stores is huge).
To prevent any pests, spray once a week with safe products - 3% Bordeaux mixture, onion or garlic infusion (300-350 g of crushed products per 10 liters of water, leave for 24 hours).
Among the diseases, the most common are powdery mildew, brown spot, late blight, fomoz, anthracnose, mosaic, blossom end rot, black leg, etc. These are mainly fungal infections, so they are controlled with fungicides (Fitosporin, Ordan, Ekomik, Barrier Barrier).
All drugs are diluted in accordance with specific instructions for use. The following is important for disease prevention:
- disinfection of seeds, soil, etc. at all stages of growing tomatoes, starting with pre-sowing preparation;
- maintaining a hydration regime;
- planting tomatoes in accordance with the rules of crop rotation.
Transplanting into the ground: sequence of actions
To successfully grow tomatoes, it is important to choose the right site. Tomatoes love bright, but diffused light; in dense shade their growth stops
It is important that water does not stagnate in the soil, this can lead to unpleasant consequences: black leg, root, apical or gray rot. In beds for growing tomatoes, you can pre-sow green manure to enrich the soil with nutrients. Their role is played by lupine, legumes, mustard or alfalfa. You should not plant tomatoes in areas that were previously occupied by eggplants, potatoes or other members of the nightshade family.
Planting tomatoes in open ground begins when the soil has completely warmed up. Its temperature should not fall below 15 degrees; night frosts are undesirable. Usually the soil reaches this temperature towards the end of May. It is possible to speed up the heating of the soil by covering the tomato beds in advance with two layers of thick plastic film. It not only promotes rapid warming of the soil, but also prevents the proliferation of weeds.
Selection of tomato seeds
A week before planting, the soil must be thoroughly loosened, clearing it of plant residues. Then add humus or peat to the soil, dig it to the depth of a bayonet shovel and cover it again with film. Under the polyethylene, the soil will maintain the required level of moisture, and the tomatoes will begin to grow faster after transplanting. Tomatoes are planted in the ground in warm, but not too hot weather, preferably in the morning. After planting, the film must be removed from the beds and the soil must be dug up again.
Planting is carried out according to a scheme that depends on the height and spreading of the bushes. There is a space of at least 60 cm between especially tall plants; more compact bushes can be planted after 40-45 cm. Planting rules also depend on the characteristics of the variety. You can plant tomatoes in open ground using the trench method, leaving row spacing of about 70 cm.
Some varieties prefer planting in holes. The distance between them should not be less than 40 cm; superphosphate or birch ash is laid out in advance in the holes. You can understand how to plant seedlings from detailed master classes from experienced gardeners
Beginners need to act carefully, relying on intuition and common sense
Tying tomatoes to stakes and watering tomato seedlings with warm water
Before planting, seedlings need to be inspected. The 2-3 bottom leaves of overgrown tomatoes are removed; this allows the seedlings to be slightly deeper, preventing them from stretching out. The seedlings are moved into the hole along with a lump of earth; overgrown roots can be carefully pinched. The roots should not bend, they must be placed freely. Tomatoes in peat pots are placed in the hole along with the container; the peat walls must first be cut so as not to limit root growth.
After planting, tomatoes should be watered with warm water. The hole is filled with earth, the surface is compacted by hand. The top of the soil is sprinkled with a thin layer of peat. After peat mulching, there is no need to water the plantings, otherwise a crust will form on the soil, preventing normal air exchange. Particularly heat-loving varieties can be covered with film for 1-2 days.
Immediately after planting, the tomato stems are lifted and tied to pegs dug in advance near each hole. If you dig in stakes later, they can damage the roots. Another mounting option is tying to trellises. This option is especially good for tall indeterminate varieties. Tomatoes need to be tied with soft shreds or special adhesive tape; convenient plastic clips are also suitable. Do not use wire or fishing line; hard material can cut the delicate tomato stems.
Such mini-films are ideal for beginning gardeners; they explain the sequence of actions in detail, allowing you to avoid most common mistakes. Usually the video tells how to plant tomatoes correctly, explains the intricacies of preparing open ground, the technology of growing tomatoes by variety, and the features of watering and fertilizing. Video lessons provide answers to all the typical questions of beginning gardeners.
The main mistakes when growing tomatoes in open ground
If you make mistakes, major crop losses are possible. Therefore, it is important to know what an inexperienced gardener may do wrong:
- violation of the timing of sowing seeds and transplanting seedlings into open beds;
- using tomato varieties that are not intended for growing in your region (for example, southern varieties are planted in the north, and they are completely unadapted to cold climates);
- purchasing low-quality seedlings;
- lack of disinfection measures;
- violation of lighting and watering regimes;
- not carrying out pinching and pruning;
- pouring too much water, causing the roots to rot;
- overfertilization or nutrient deficiencies.
When to sow tomatoes in the ground with seeds
Planting tomatoes with seeds in the ground is not carried out in the same time frame as for seedlings. The soil at this time is still frozen. Of course, you can plant tomatoes without seedlings in a heated greenhouse, but it’s scary to think how much the harvest will cost, taking into account energy prices.
Tomatoes for the seedless growing method should be planted as early as possible. But if there are no tunnel shelters in the garden bed, and the gardener does not intend to use other devices, he will have to wait until other farmers begin planting seedlings. In the Middle Zone this is the end of May or the first ten days of June. Many focus on the bird cherry - it has bloomed, you can plant the seeds in unprotected ground. By this time it will warm up to about 12°C.
Considering the period from sowing and germination of tomatoes to setting the first fruits and harvesting, gardeners should think carefully about whether the seedless method is suitable for them. You can use available means to protect young plants from unfavorable conditions. Otherwise, tomatoes planted with seeds will begin to bloom when the neighbors are already harvesting, and even early varieties are guaranteed to fall under late blight.
Tomatoes for growing without seedlings are planted much earlier in warm beds in greenhouses or under cover in the ground. In the middle zone - by the end of April or beginning of May. By this time, at least during the day, warm sunny weather should have established itself.
Southerners sow tomatoes for growing without seedlings already in March - early April. But they must also be prepared to protect the planting from frost, which often gives way to long thaws. In early spring, you can sow there in protected soil on beds with biofuel, or in the garden - under temporary shelter.
Harvesting
Tomatoes are harvested based on ripening time, variety, climate zone and other indicators. But there are general rules for collecting fruits:
- if the tomatoes are intended for long-term storage, pick them with the stalk; if for eating, preparing salads or clogging, leave the stalk on the branch;
- harvest daily, as tomatoes ripen unevenly;
- It is better to remove fruits early in the morning or in the evening.
Tomatoes tend to ripen after they are picked, so if you want to preserve the crop for a long time, pick the fruits when they are not ripe. If you put them in a dark and cool place, ripening will be delayed, if in a warm and light place, they will turn red in 2-4 days.
If the planting of tomato seedlings is carried out correctly, and subsequently the standards for caring for the bushes are followed, you will receive a bountiful harvest of large tomatoes. The main thing is not to forget about all the rules, apply fertilizers in a timely manner, carry out preventive spraying and harvest on time.
Which varieties to choose
Specially bred, most productive varieties and hybrids are suitable for growing in garden beds. They must be resistant to weather changes: sudden frosts, drought, heat. Usually, early and mid-early tomatoes are planted in open ground; later varieties do not have time to ripen before frost. Among the varieties and hybrids you can find a variety of options; they differ in the color and shape of the fruit, pulp density, and size. nuances of taste.
Determinate and indeterminate tomatoes
The following tomato varieties are suitable for open ground:
- Black Prince. A very productive variety of Russian selection, the tomatoes are red-brown, large, with a rich sweet taste. The bushes are resistant to late blight, scab and other dangerous diseases.
- Korneevsky Red and Korneevsky Pink. Large-fruited varieties with a pleasant sweet taste. Resistant to diseases, require mandatory tying and bush formation.
- Altaic. There are options with red, pink, honey-yellow fruits. All of them are cold-resistant and easy to care for. The bushes are compact, neat, and the yield is very high.
- Bells of Russia. A promising variety of Russian selection, resistant to short-term frosts and drought. The fruits are pink, medium-sized, and have a beautiful elongated shape. Tomatoes are good for canning.
- Bullfinch. The bushes are compact, standard type, very unpretentious. The yield is good, the tomatoes are juicy, pleasant to taste, suitable for canning or preparing salads.
- Marfa. High-yielding mid-season hybrid of Russian selection. It is drought-resistant, rarely affected by pests, bears fruit until frost, and has excellent keeping quality.
Scheme for planting tomatoes in open ground
Most varieties suitable for open ground were bred by Russian breeders. They are perfectly adapted for regions with a temperate or warm climate; in cooler areas, it is recommended to cover the plants with film in the first days. The most productive varieties and hybrids require especially careful care and abundant feeding.
Further care
After planting tomatoes in the ground, they need to be cared for:
Watering
The first watering of plants after planting is carried out after 2 weeks. Use only warm, settled water. Watering is carried out strictly at the root. This procedure is recommended to be carried out in the late afternoon, when the sun is not so active. Otherwise, the plantings may burn, which will lead to the death of the plants. Up to 1-2 liters of water are poured under each bush.
Then watering is carried out once a week. If the summer is hot and dry, you can water the plants up to 3 times a week.
Top dressing
Since organic fertilizers were applied before planting, the first fertilizing is recommended during the budding period. For this purpose, mineral fertilizers are used.
The next feeding is carried out during the fruiting period. To ensure that the fruits grow large, juicy and are stored for a long time after harvesting, the bushes are fed with potassium fertilizers.
Planting tomatoes
Tomatoes are planted following a certain pattern. There should be a distance of 20-30 cm between plantings. This will allow the tomatoes to develop well and allow air to circulate, which will prevent the development of the disease. If seedlings are planted in several rows, the distance between plants should be at least 30 cm.
For planting tomatoes, you can use several schemes, taking into account the height of the bush and the variety.
Square-nested
If tall varieties are planted, choose this planting scheme. Plants will feel comfortable. There will also be virtually no weeds, and the soil will be loose. To do this, visually draw a square and plant at its corners.
Tape-nested
Using this method, you can plant many tomato bushes on one square meter. Furrows are made in the garden bed and plants are planted on both sides. The distance between each of them should be 20 cm.
After the plants are planted, the soil around them must be compacted and watered thoroughly. Each bush needs to use up to 2 liters of water.
Then arcs are installed on the beds and the beds are covered with film. Plants should grow under cover until mid to early June. You can shoot the film in the daytime. But at night the plants are covered again.
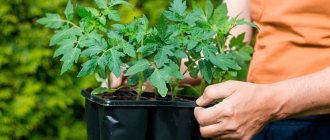
How to plant tomatoes
Before planting, plants are watered abundantly. When buying seedlings, you need to choose plants about 20 cm high with dark green leaves. It is better to buy tomato seedlings grown in special peat pots. Tomatoes are heat-loving plants, so the best place for them is on the south side of the house, preferably protected from the wind. The soil is dug up in the fall, adding compost and peat, and shortly before planting, complex fertilizer is applied.
Preparing a bed for tomatoes
Before planting in the ground, prepare the bed by digging holes about 30 cm deep and filling them halfway with rotted manure. Then they place the pot with the plant and sprinkle it with soil so that the first leaf is immediately above the ground.
Planting tomatoes
Before planting, the ground can be covered with a dark mulch cloth, and the seedlings can be planted in cross-shaped slots. Or you can simply mulch the soil after planting.
How to understand that seedlings are ready for planting
First, regardless of where and when you want to plant, the seedlings need to be raised at home for some time
And it is important to understand that tomatoes are ready to be outside. Moreover, the time for their “preparation” needs to be known in advance in order to include it in your plan
The numbers below are approximate because different varieties may have different characteristics.
- Late-ripening varieties need to be kept in seedling state for 2.5 months.
- Mid-season varieties last 2 months.
- It is enough to keep the early ripening ones for one and a half months.
But don't just look at the hard numbers - it's imperative to visually examine your young tomatoes to know for sure that they are ready:
- They should have at least six leaves on each sprout, and even the first flower cluster may already appear.
- The root structure must be well developed.
- It will be ideal if the leaves and stem have already darkened a little, this is a sign that the seedlings are hardened.
Pros and cons of growing tomatoes from seeds
The disadvantages, probably, include the fact that for growing seeds, both in greenhouses and in open beds, it is more advisable to use early varieties of tomatoes. The second, either a minus or a plus, depending on the wishes of the owner and weather conditions, is the delay in the formation and redness of the fruit, for at least two weeks. If the goal is to get tomatoes closer to autumn, then this fact indicates the benefits of seed growing of tomatoes.
There are many more advantages to the seed method; we will list just a few of them:
- the root system is strong, well developed, flowering is abundant, there are many ovaries and fruits;
- there is no “violence” in the form of transplants, there is no injury to either the roots or the stems;
- there is no need to use indoor window sills to place pots of seedlings;
- no need for artificial lighting;
- watering is rare, loosening is not deep;
- fertilizing is practically absent;
- there is almost no damage from diseases and insect pests;
- The care is not labor-intensive and pleasant.
Conclusion, growing tomatoes directly from seeds is not a troublesome and “working” process, so feel free to experiment and have a good harvest!
Choosing a landing site and preparing it
The planting site should be well lit, because tomatoes love light. Therefore, it is better to choose areas that are not shaded by neighboring trees or structures.
Regardless of where you will plant tomatoes (in a greenhouse or in open ground), it is advisable to place the beds on the site from east to west. With this placement, the tomatoes will be provided with uniform lighting and warming throughout the day.
Attention! It is not advisable to plant tomatoes in a greenhouse together with neighboring plants that need high humidity. For example, with cucumbers. Tomatoes get sick from high humidity.
Soil preparation consists of the following steps:
| Gardener actions | Execution Features |
| Soil disinfection | It is advisable to completely replace the soil in the greenhouse on which tomatoes were already grown last year. If this is not possible, then to disinfect the soil, pour boiling water or a solution of copper sulfate (at the rate of one tablespoon per liter of water). |
| Digging the soil and fertilizing it | Digging involves mechanically turning over layers of soil. When digging, it is advisable to add humus (up to 5-6 kg per square meter) and sprinkle the ground with ash or ashes (1 cup per square meter). |
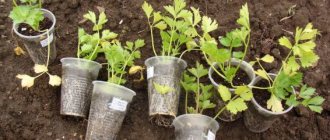
Growing seedlings
Since the tomato is propagated by seeds, in order for it to turn into a full-fledged plant, the seedling method is used. You can grow seedlings yourself or purchase them at the market. The main thing is to carefully examine the product for various diseases. The leaves should not be yellow or spotted, and the root should not be dry.
Before planting seedlings, the seeds must be prepared, the soil and planting containers must be disinfected. The timing of planting seeds depends on the variety and region of residence. You can prepare soil for tomatoes yourself or purchase it from a farm store. Purchased soil has many advantages:
- It has already been disinfected;
- No need to apply fertilizer.
In order for the soil to be better distributed in the box, it is steamed. To do this, place the soil in a bucket, pour boiling water over it, cover with a lid and allow to cool.
Sowing time for seedlings depending on the region
Each gardener calculates these terms independently and knows how to grow tomatoes. The standard period for sowing seeds for seedlings is from the end of March to the end of April. It all depends on the variety of tomatoes: ultra-early ones are planted in April, early ones - in mid-April; mid-season - at the end of March; middle and late - in mid-March. Planting seeds for seedlings occurs approximately 2 months before the intended planting in the ground.
Residents of the Middle Zone often plant ultra-early and early varieties of tomatoes, as they bear fruit faster. It is not recommended to grow late varieties of tomatoes in this region, as they will not have time to ripen and produce a harvest.
Preparing for landing
It’s not enough to grow seedlings. Equally important is preliminary soil preparation for tomatoes. It is also important to prepare the seating area. Firstly, it should be well lit, but in moderation. Despite the fact that tomatoes love light, they do not tolerate direct rays of the sun well. The ideal place for future bushes would be a place next to a greenhouse or tree.
If you dig up and enrich the soil with fertilizers in the fall, the tomatoes will grow well, practically without diseases, and will give a good harvest. If the acidity level in the soil is elevated, the tomatoes will soon wilt and become diseased. But how do you know the acid level in the soil? It’s very simple: buy a special test. For tomatoes, the optimal level is 6-7. And to reduce the acid level, lime is used. For one sq. a meter takes half a kilogram.
In order to prevent most diseases, rye or mustard is planted in the soil, and a solution of copper sulfate is also poured. The beds for tomatoes themselves are formed about a week before planting.
Varieties of planting
In total, there are 3 types of landing. There are different types of landing:
- Square-nested;
- Tape-nested;
- Tape.
Square nest planting
Planting tomatoes according to the square-cluster pattern is carried out like a square. Its size must be at least 80*80. Approximately 3 plants are planted in the prepared square, with a distance of 50 cm from each other. The distance between each square should be approximately 80 cm.
Tape-nest planting
This variety is usually used when planting potatoes, but can also be used for tall types of tomatoes. To do this, long trenches are dug in the soil, with the same width and depth of at least 30 cm. Young seedlings are planted on both sides with a distance of 40 cm. The distance between the trenches is up to one and a half meters.
Tape
The last landing scheme is slightly similar to the previous one. Here, too, trenches are dug, but with a smaller distance - about 80 cm. Shallow holes are dug in the trenches.
Seed preparation
Before planting seeds, many carry out pre-sowing preparation. It includes two stages:
- Warming up;
- Disinfection.
At the first stage, the planting material is soaked for 20 minutes in a thermos with hot water. Then they cool quickly so that the heat stops. The benefit of this procedure is not only to prevent infection by pathogens, but also to accelerate seed growth. At the second stage, the seeds are soaked for several minutes in aloe juice or a special preparation or potassium permanganate. Some people use other methods:
- Saline solution to identify unsuitable seeds;
- Seed stimulation;
- Soak;
- Germination on a saucer or cotton pad.
Sowing
The process of sowing seeds is simple: fill the planting container with moist substrate and compact the soil. The landing itself consists of the following stages:
- Planting depth - 1 cm, distance between seeds no more than 2 cm;
- Mandatory leveling of the soil after sowing;
- Irrigation from a spray bottle;
- Covering with glass or regular film to create a greenhouse effect;
- Cleaning in a warm place, with a maximum temperature of 25 degrees.
Picking
Picking is planting seedlings in separate containers. It is needed so that the seedlings become more independent and receive more light and freedom. It is carried out when the seedling has formed a pair of true leaves. Before planting in a separate container, it is disinfected.
The seedling is carefully removed with a lump of earth or new soil is added. Make a small hole in the soil and plant a seedling there, then water it a little. Then the container with the sprout is taken for a couple of days to a place protected from direct sunlight. After the required time has passed, the seedlings are brought out into the light.
Care
Sometimes it’s amazing to watch how a tomato grows: first it’s a small seed, then it’s a tiny sprout, which eventually turns into a small plant. Caring for seedlings includes moderate watering, moistening with a spray bottle; ventilation; a couple of fertilizing with phosphorus, potassium and nitrogen; preventive examinations for diseases; regular loosening of the soil after watering.
Hardening
Many people consider this procedure optional, but it is very important. Without it, plants will adapt poorly and grow more slowly. Hardening helps the seedling to quickly get used to environmental conditions. What you need to do for hardening: take the seedlings out into the fresh air every day. Every day the time the seedlings spend in the air increases. The duration of hardening is two weeks before planting in a permanent place.
General conditions for a bountiful harvest
In each specific case, the speed of ripening, variety and height of the bush must be taken into account individually, but there are a number of conditions that must be observed when planting any tomato, regardless of the listed factors. The quality of fruits, their quantity, as well as their ability to resist diseases and pests directly depend on these conditions.
The next step is lighting. If a tomato is planted in a shady place, its above-ground part will be deformed due to stretching. To get a bountiful harvest, you need to plant tomatoes in an open area with maximum sun exposure.
Now you should pay attention to the humidity of the soil and air. Even though the sun is necessary for a good harvest, it can easily dry out the air and soil, as a result of which the plants will begin to feel “thirsty.”
The ideal air humidity is 45-60%, and soil moisture is 60-75%. Therefore, it is recommended not only to water tomatoes at the root, but also to moisten the air and soil by installing sprinklers nearby.
Fertilizers for yield
Complex fertilizers that contain large quantities of nitrogen, potassium and phosphorus are ideal. These elements will be very useful both at the stage of rapid growth and during the immediate formation of the fetus.
You can give useful advice to those on whose plot peas also grow. After collecting the pods, the aerial part along with the rhizome can be used to fertilize the tomato. Green natural fertilizers can be much healthier than chemical ones.
It is also necessary to monitor the cleanliness of the area and promptly clear it of various weeds, because they not only take away a significant part of the nutrients from the tomato, but also attract many pests.
Determining the readiness of seedlings
The ideal moment for planting seedlings can be determined visually, and you do not have to be an experienced gardener. Seedlings ready for planting look like this: a strong stem more than 25-30 cm high (at least 20), on which a flower cluster can be formed and must have 6-8 true leaves.
If the distance between the leaves is approximately 5 centimeters, this is an indication that the plants have received proper care and will be able to produce a good harvest. And if this distance is greater, the care or feeding of the seedlings was incorrect. Such seedlings will not grow into a healthy bush that produces a large harvest.
For any plant, replanting and adaptation to new soil is stressful. Tomato is no exception. Therefore, seedlings require special care during preparation for planting. It's best to start preparing a few weeks before you plan to plant your tomatoes.
First of all, you should start regularly ventilating the room in which the seedlings are located to ensure that the temperature drops by several degrees. 7-10 days before planting tomatoes in open ground, it is necessary to reduce watering, and on the day of transplantation, on the contrary, increase it to abundant watering.
If flower clusters have already formed on the seedlings at the time of transplantation, then before transplanting them into open ground, they must be treated with boric acid. To do this, add 1 teaspoon of boric acid to 1 liter of hot water, and spray the seedlings with this solution a few days before planting.
Protecting seedlings from fungi and diseases
Tomatoes are so susceptible to late blight that this can be called their weak point. As this disease progresses, gray-brown spots appear on the stems and leaves, which subsequently spread to the fruits themselves. Treating seedlings before transplanting into open ground will greatly help in the fight against late blight.
Fungicides, penetrating into plant tissues, are not washed out of them by precipitation. Such drugs as Kvardis, Previkur and Tattu have the best reputation. Treatment with fungicides most effectively protects tomatoes from late blight.
To effectively protect tomatoes from various diseases and fungi, 10 days after diving, it is worth spraying the seedlings with a solution of the following components:
- water - 10l;
- zinc sulfate - 2g;
- copper sulfate - 3g;
- boric acid - 3g;
- potassium permanganate - 10g.
Further treatment is carried out every 10-15 days. After planting the seedlings in open ground, treatment is stopped.