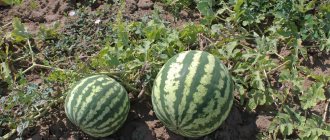
How is hardening useful?
Very often, when describing their varieties, producers miss such a point as the need to harden off the bushes before planting them in a permanent place. Out of ignorance, novice gardeners do not carry out this important procedure, which is why some of the seedlings are lost or the yield is significantly reduced.
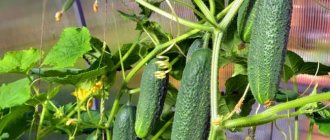
Hardening off tomato seedlings for most varieties is considered an integral part of care. This simple procedure allows you to strengthen the root system of the tomato, make the surface layer denser and more resistant to external influences and accumulate a sufficient amount of sugars, and this will have a positive effect on the taste of the fruit in the future.
Hardened seedlings are more resistant to weather changes. Therefore, if bushes are purchased on the market, you should choose those options that have signs of hardening. Such specimens are stronger in appearance, well pubescent and have a purple tint to the tops. Such bushes should not be too elongated.
Who is guilty
The seller, of course, is to blame for bringing unhardened seedlings to the market. But the buyer is also wrong. When choosing seedlings, you must first evaluate the prospects inherent in its stems and leaves.
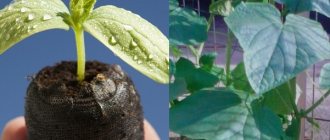
The seedlings must be stable. The stem should not sag or fall under its own weight. Its weakness indicates that the seedlings were not thinned out, and they were not accustomed to relying on their own strength. Then what will the tomato rest on after transplantation? Moreover, its root is weak, because only after diving (transplantation with natural breaking of the tip) does the plant begin to form a strong root system.
The color of the stem and leaves says a lot. In hardened seedlings, it has a dark green color with a purple tint.
The presence of shaggy hairs on the stem also indicates the tomato’s readiness to accept all the hardships of life in the garden.
It will become this way only after properly hardening. How to properly harden tomato seedlings? You need to start with seeds. The hardened ones are not afraid not only of the cold, but also of drought and late blight.
How to harden tomato seedlings by reducing watering?
As for how to harden seedlings, it is worth remembering that the procedure should be gradual. With proper measures, you can successfully prepare tomatoes for the upcoming tests that await them in the spring and early summer. Hardened seedlings tolerate temperature changes much better. Therefore, such procedures will be especially useful for those varieties that are whimsical.
Most often, the hardening process is recommended to begin 3 weeks before the expected transplant date.
But even before that, you can start some procedures. For example, you can prepare for hardening using the shock method. We are talking about limiting watering a week before the upcoming event. The time between watering should be gradually reduced. This will allow the plant to get used to possible drought.
See also
When to sow tomatoes for seedlings in Siberia, timing and favorable days
Read
It is worth noting that in this way they not only harden the plant, but also develop its root system. Roots that have to extract water from the ground will be stronger. But you have to be careful not to overdo it during dry periods. They can be harmful to some varieties of tomatoes. Tomatoes should not look lethargic when preparing for replanting.
Vladimir Anderson tomatoes
Hardening of seedlings is necessary due to the peculiarities of the climatic zones of our country. For most garden crops, the growing season is 140-200 days, which is significantly lower than the number of days with optimal temperature for plant growth and development (approximately 150 days a year).
Sowing seeds can be done from April to May; they are not afraid of possible frosts, which cannot be said about seedlings. Thus, young shoots planted at the end of May - beginning of June have time to gain strength and produce a harvest before the onset of cold weather.
A man with a huge range of interests, doctor and gardener Vladimir Anderson grows tomatoes that grow at a temperature of 8 ° C and easily survive frosts down to -5 ° C. He shares some secrets on how to harden off tomato seedlings.
The secret lies in collecting the seeds. He collects them from fruits that have ripened in the garden and survived several frosts, and not from tomatoes that have been lying on the apartment window for a long time.
He pays great attention to the selection of large and strong seeds. After all, small plants will not grow into strong plants.
As a result of selection, he receives hardened seeds with 100% germination and good immunity. As proof, Vladimir advises paying attention to self-sown plants, which are usually stronger than greenhouse plants.
He hardens the seedlings with a temperature difference from 35 °C during the day to 4 °C at night. Water only with cold water.
There is another similar method. Dry seeds are wrapped in cotton cloth, the name of the variety is written, rolled up and placed in a stable container. Sprinkle snow on top and leave it on the window or balcony. When the snow melts, the water is drained and covered with snow again. When it melts, the water is drained again, without bringing it to 20˚C, and the seeds are set for germination. This is two frosts in the garden. The seeds germinate quickly and grow strong.
Temperature hardening
This is one of the main stages that is necessary for a high-quality tomato bush. Hardening can only be carried out at a temperature of at least +18 °C. If the temperature outside is lower, you should wait. If you rush to change the temperature regime, you can simply lose all the seedlings. In addition, it is important to ensure that the tomatoes are not exposed to the wind. While the trunk and root system are quite weak, they need to be protected from excessive exposure to air masses so that the bushes do not break.
Tomato seedlings should be hardened by temperature gradually. The first day you need to limit yourself to 10 minutes, and then increase the time. After a week, the time spent outside can reach 3 hours. Before planting hardened seedlings in a permanent place, they should be left in pots outside for a couple of days.
This will allow the bushes to fully adapt to weather conditions and replanting will not be such a shock.
It should be borne in mind that a sudden change in temperature can be very stressful for tomato seedlings. Therefore, you should not be surprised if the bushes change their appearance somewhat. As a rule, they lose some of their greenery, and the seedlings begin to grow upward more slowly. But their root system becomes more developed.
General information about culture
The history of tomatoes goes back several centuries.
The first information about this vegetable appeared during the time of the Spanish conquistadors, who, according to historians, brought them to Europe from Peru and Ecuador. There, this crop was grown for decorative purposes for a long time and was called “tomatl”. In many countries of the world, it received a name consonant with the word “tomatto”, equivalent to the Russian “tomatoes”. Tomatoes are characterized by relatively long periods that pass from the moment when the first seedling appears until the final ripening of the fruit. This drawback did not prevent this crop from becoming the most popular all over the world (at least among vegetable plants).
A characteristic feature of this vegetable is also the fact that its seasonal cultivation is organized by planting young shoots, which at first are quite underdeveloped and practically helpless.
How to harden tomato seedlings at home
That is why hardening of tomato seedlings at what temperature is carried out at home is one of the most important provisions of agrotechnical culture, which should be given close attention. Let's look at everything related to hardening in more detail (including a step-by-step plan for carrying out the relevant procedures).
Sun hardening
After the seedlings have been hardened off by a short dry period, a sun test can be carried out. For plants that previously grew quietly in the shade, this will be stressful, so it is important to act very carefully here.
Experts recommend starting in the evening or morning hours. You should not immediately expose tomato seedlings to the sun at noon, as this will be detrimental to the plant. At first, it is enough to keep the bushes outside for 20 minutes. Gradually, the hardening time needs to be increased.
See also
How to properly plant tomatoes in a greenhouse and open ground step by step
Read
This process is important for the plant because in such a situation, tomatoes can adapt faster after replanting to a permanent place. The bushes will most likely lose some of their green mass, but this will be insignificant. If the plant has not been hardened by the sun, then after replanting it will immediately receive burns, and the leaves will begin to rapidly fall off.
What is it and what is it for?
Hardening is a procedure that increases the resistance of planting material to cold and unfavorable environmental conditions. Tomato is a heat-loving crop. At low soil and air temperatures, seeds that have not undergone preliminary preparation die after planting.
Hardening allows you to plant tomato seeds in open ground several days earlier than usual , speed up the emergence of seedlings, and also increase the plant’s resistance to the harsh conditions of the unpredictable Russian spring.
How to harden tomato seedlings at home?
Gardeners who save their time have the opportunity to save themselves from the need to move pots of seedlings from place to place. If a summer resident lives in an apartment with a loggia or balcony, you can leave the tomatoes there and simply open the windows for a while to harden them.
This will be similar to the hardening that is carried out in the garden. Nevertheless, experienced experts recommend not limiting yourself to one balcony, since seedlings there may not have enough sun and coolness. For better hardening, 3 days before planting tomatoes in a permanent place, you should move them to the garden. Only after this can the transplantation procedure be carried out.
Hardening can also be carried out in a greenhouse. To do this, the seedlings are left in place, without being taken outside, and the doors and windows are simply opened. But you need to take into account that in this way you can harden plants with temperature, but not with the sun.
Where to harden off seedlings
It is better to harden tomato seedlings in a greenhouse or hotbed, but not all gardeners have this opportunity. In a city apartment, tomatoes are kept on a balcony (preferably glazed) or on a loggia.
Plants should first be taken out for hardening for a short time, no more than 2-4 hours. Every day the time spent in the fresh air is increased, by the end of the adaptation period leaving the hardened tomatoes in the cool place around the clock.
It is necessary to monitor the weather forecast, bringing tomato seedlings into the house if the temperature is expected to drop below +10 degrees.
If there is no balcony or loggia, you will have to sacrifice part of the hardening room by fencing off the area near the window with plastic film. The window is opened, lowering the temperature in the fenced off section of the room.
It is very important to isolate tomatoes from hot radiators located under the windowsill. The screen can be made using a piece of plywood with foil glued on it or a sheet of polyethylene.
When hardening begins, the temperature is reduced gradually, avoiding sudden cooling and the appearance of drafts. You need to open the window in the evening or at night. Night cooling is the most physiological for tomatoes.
To take tomato seedlings into a greenhouse or greenhouse, choose a warm and cloudy day. Homemade tomatoes do not tolerate not only cold, but also bright sun. Tender foliage may get burned (the leaves become covered with yellow spots).
If the weather is clear, the seedlings are shaded with white lutrasil or a tulle curtain. You can expose tomatoes to direct sunlight for 3-4 days of hardening.
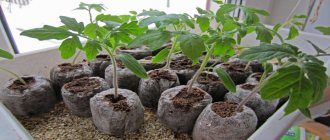
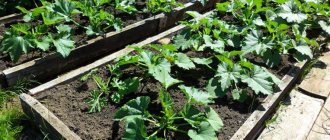
What soil is best for tomatoes?
You can grow tomatoes with or without picking. When growing with picking, at the beginning, poor soil with a low nutrient content is selected for sowing seeds. In this case, it is enough to mix the peat substrate and sand in a 1:1 ratio. Ideally, 1 kilogram of peat is mixed with 1 kilogram of sand.
In fact, few people will use a scale when mixing soil components. You can use any measuring container. For example, an old cup, a children's bucket, etc. Simply put, to prepare the soil for growing tomatoes in seedlings, mix one cup of peat with one cup of sand. Add a little perlite or vermiculite to this mixture to make the soil looser. This is enough for good growth of tomatoes in the initial development before picking.
If seedlings are grown in separate containers without picking, then they will grow in a certain container for a long time, about 50 days, and therefore the soil must be well filled with nutrients. In this case, mix the peat substrate with sand in a ratio of 3:2. For 10 kilograms of this mixture, add 2-3 kilograms of vermicompost for additional plant nutrition, as well as about 2 kilograms of vermiculite or perlite.
If it was not possible to prepare sand, it can be replaced with ordinary soil, but it is better to take it not from garden beds, but to bring it from the forest or meadow. You can add a tablespoon of wood ash to a bucket of soil mixture to reduce acidity and enrich it with potassium, calcium and microelements.
Sometimes you can use sawdust as a loosening material, but you should remember that they must lie for at least a year to allow the resins and essential oils to erode. It’s even better if the sawdust was previously spilled with a solution of nitrogen fertilizers at the rate of 20 grams per bucket of water. All components are thoroughly mixed and mechanical impurities are removed - large peat fibers, small stones, wood debris.
Unacceptable additives
- To prepare the soil, you cannot use unrotted cattle manure, which could be fed by rotten potatoes or stale vegetables. Pathogens passing through the gastrointestinal tract of an animal do not die, but pass into the soil.
- You cannot use soil from a compost heap as plant remains of diseased plants could be used for composting.
- Do not use soil from greenhouses where tomatoes were grown.
- Also, do not use the soil where potatoes were grown since they have common diseases with tomatoes.
It is not advisable to use any soil at all from garden beds where any agricultural crops were grown.
Disinfecting the substrate at home
The ideal option for growing tomato seedlings is to use sterile soil. To sterilize, the soil is spread in a thin layer on a metal sheet and placed in the oven for about an hour maintaining a temperature of about 100 degrees.
This procedure is lengthy, labor-intensive, and accompanied by an unpleasant odor. In addition, along with the phytopathogenic microflora, beneficial soil microorganisms also die. It is much easier to disinfect the soil using certain drugs. Before sowing the seeds, the soil is watered with Previkur, Vitaros, and Maxim.
You can use the joint application of biological preparations Gamair and Alirin. Solutions for use are prepared strictly according to the instructions. After treatment, the soil is mixed well and you can additionally pour furrows for sowing seeds.
How to prepare the soil mixture?
You can use the following folk method of preparing soil. Mix the following components in equal parts
- Rotted three-year-old manure. It is better if horse manure is used, since horses are fed mainly with oats and are not given rotten vegetables; they can simply die from such feed.
- The second component is turf soil from under clover. Why exactly from under the clover? Nitrogen-fixing bacteria that are found on clover roots enrich the soil with nitrogen.
- Old sawdust is used as loosening material.
- To reduce the acidity of the soil, add crushed eggshells.
All components are mixed and left for the winter in an unheated room for deep freezing. To disinfect the soil, you can spill it with a strong solution of potassium permanganate.
Preparing seeds for germination
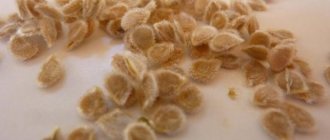
Before you start planting, you should pre-sort the seeds.
Empty seeds, those that are of the wrong color, or that are too small in size should be selected so as not to sow the precious area with previously rejected material. You can also use special techniques that help increase seed germination. Seed treatment methods. Table
| Name | Description |
Soak | To stimulate germination of seeds, you can soak them in water. For these purposes, warm water is needed. The seeds are placed in gauze or bandage and soaked until they swell. To harden the seeds, you can soak them in cold water for 24 hours, which should be changed after 3-4 hours. |
Preliminary feeding of seeds | To speed up the germination of seeds, you can soak them in microelements dissolved in water 10-12 hours before planting. This method is good because the resulting seedlings are of high quality and strength. |
Seed disinfection | For these purposes, ultraviolet light and potassium permanganate are used. Onions and legumes can be placed under open sunlight or an ultraviolet lamp. A 1% aqueous solution is prepared from potassium permanganate and water, into which the seeds should be placed for 20-30 minutes. To disinfect seed, you can use garlic water: 20 grams of chopped garlic per 100 grams of water. It is recommended to keep the seeds in this solution for an hour. After the procedure, it is advisable to rinse the selected planting material. |
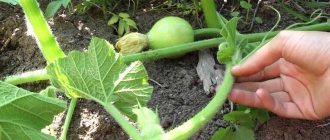
How to water tomatoes after planting?
Newbies to gardening sometimes face many different questions.
If you decide to start growing tomatoes, and it doesn’t matter whether you grew the seedlings yourself or bought ready-made ones, you should know some rules of care immediately after planting them in the ground, in particular, you may be interested in such issues as whether to water the tomatoes after planting, how often, how much water they need a lot more
How to water tomatoes after planting in the ground?
Correctly chosen watering tactics will protect the plant from many diseases, contribute to their rapid and proper development, and adaptation to a new place. For the well-being of young seedlings, you need to follow a number of rules regarding watering, as well as temperature conditions.
If you purchased seedlings from someone, ask in what conditions they were grown - in a greenhouse or hotbed. Your further actions depend on this. And if you grew the seedlings yourself, you can easily find your way around and provide proper care.
Watering the planted seedlings depends on a number of factors, such as weather conditions at that moment, the composition of the soil and the quality of the seedlings themselves. If it is hardened, the bushes do not need to be shaded, but need to be watered once a day and quite generously. You need to pour 2-3 liters of water into the hole where you planted the seedling. If you choose the trench planting method, calculate the water consumption according to the number of plants.
It is better to water in the morning, when there is no hot sun yet. If the sun dries out the soil before the evening, you can additionally water the seedlings when the heat subsides. In this case, you can pour 1-2 liters under each bush.
Such watering will provide the seedlings with the necessary moisture and keep the soil light, because the roots need a lot of oxygen. If the soil is too dense, the roots will have nothing to “breathe” and the plant will suffer as a result. Watering too much will negatively affect the soil and the plants themselves.
When planting tomatoes, the soil should be moist, and this is enough for good rooting of seedlings. There is no need to over-water the beds - this will only damage your plants.
How often to water tomatoes after planting?
We have decided on planting, but now we still need to find out what day after planting to water the tomatoes again. So, over the next 7-10 days after planting the seedlings in open ground, it must be watered daily. This is necessary for the plants to take root, take root and begin to grow. As soon as you notice that the tomatoes have taken root, you need to carefully loosen the soil around them
Just be very careful not to damage the roots
The depth of loosening in the holes is no more than 3 cm. This process is called dry watering. You break capillary formations and reduce evaporation from the ground, and also help oxygen reach the roots of the tomato.
conclusions
- The seeds should remain moist during hardening, so it is recommended to lightly moisten them with water if necessary.
- Old seeds are not suitable for the procedure, most of which, after hardening, lose their ability to germinate; only 1-2 year old grains are suitable for hardening.
- Before hardening, the seeds must be kept in water to swell.
- Before the procedure, sorting is necessary, due to which small grains of irregular shape will be eliminated.
- To obtain the maximum effect from hardening, it must be combined with disinfection, bubbling and soaking.
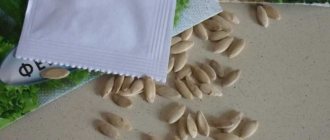
- If you use purchased planting material, you need to carefully study the information on the label; maybe the seeds have already been hardened.
- The time spent by planting material at low temperatures should be gradually increased, then the grains will quickly adapt to the cold. Also, do not forget about the temperature regime for seedlings.
Selection of tomato seeds
First, let's figure out what seeds we need to select. If the seeds are large and heavy, then they contain a lot of nutrients and, as a result, healthier and stronger tomatoes will grow from them.
The easiest way to select good seeds is to prepare a solution of table salt (1 tablespoon of salt per glass of water), pour the seeds into it and mix, then let it stand for a while. Good tomato seeds will settle to the bottom, while empty ones will float on top.
The settled seeds are washed and dried, and the small and empty ones that remain floating on the surface are thrown away. But you need to be careful, sometimes there are situations when the seeds are very dry, in which case even very high-quality and large ones will still remain on top. Therefore, before throwing away, visually make sure that they are really bad.