It is not difficult to grow bell or hot peppers, but you need to try hard to get large and beautiful fruits. If not properly cared for, peppercorns become distorted, their size is unimpressive, and their taste is mediocre. To ensure a satisfying result, properly organized care is important.
We'll tell you how to grow peppers so that there is a high yield and beautiful looking fruits. We’ll share the secrets of planting seedlings, give you ways to form a bush, and tell you which crops are best to plant with.
Preparation for growing pepper seedlings, planting seeds and further care
Pepper is a heat-loving crop with a rather long growing season, so even in warm southern regions, planting seeds in open ground is impractical. The timing of planting seeds depends on several factors:
- Variety type. Early ripening pepper seedlings are considered suitable for planting at the age of 60–65 days; later varieties require 70–75 days.
- Place of cultivation. When cultivated in a temperate climate, peppers are transferred to heated greenhouses in the last ten days of April, and to ordinary ones - in the second half of May. Seedlings are planted in open beds in early June. In the south, the dates are shifted back by 10–15 days, in more severe regions - on the contrary, forward.
- Picking. If it was carried out, the seedlings take about 12–15 days longer to form. In general, this is an undesirable procedure for peppers. The roots of the seedlings are very weak and there is a high risk of their death.
Most often, pepper seeds are sown for seedlings in late February or early March. They do not have very good germination, so culling and preliminary preparation are necessary. When buying seeds, pay attention to the date of manufacture. If they were collected more than two years ago, mass shoots can not be expected.
When choosing pepper seeds, pay attention to the harvest date and expiration date
To select viable seeds, they are immersed in a salt solution (2 tablespoons per liter of water) for 7–10 minutes. Those without embryos quickly float to the surface.
Immersion in a saline solution is a simple and reliable way to reject those seeds that definitely will not sprout.
The next stage is disinfection. To prevent the development of diseases, pepper seeds are kept in a bright pink solution of potassium permanganate for 5–6 hours. Biofungicides (Alirin-B, Bayleton, Fitosporin) have a similar effect. Processing time is reduced to 20–30 minutes.
Potassium permanganate solution is one of the simplest and most affordable disinfectants
A week before sowing, the seeds begin to germinate. The easiest option is to wrap them in damp gauze or cotton wool and leave the container on the battery. Germination increases if you replace water with a solution of a biostimulant, purchased (Epin, Heteroauxin, Kornevin) or natural (honey, aloe juice). “Shock therapy” acts on pepper in the same way. The seeds are covered with damp sand or peat, kept on a radiator or windowsill on the sunny side during the day, and put in the refrigerator at night.
Germinated pepper seeds have better germination, seedlings appear faster
A less common method is bubbling. The seeds in a linen bag are immersed in water at room temperature and a regular aquarium compressor is turned on, saturating it with oxygen. Processing time is about a day.
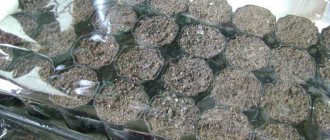
Pepper does not tolerate pickling very well. Therefore, it is better to immediately plant the seeds in separate containers with a volume of about 150 ml. Both purchased Solanaceae soil and a self-prepared mixture of humus, peat chips, rotted sawdust and sand (4:2:1:1) are suitable for them. Any substrate is pre-sterilized.
Peat cups for seedlings are convenient because plants can be transplanted into the ground right along with them
Planting seeds follows a simple algorithm:
- Make holes in the bottom of the container for water drainage, add a little expanded clay or other drainage material, and fill it with soil about two-thirds.
- Water the substrate moderately and compact the soil slightly. Wait until the water is absorbed.
- Plant two seeds in each glass at intervals of 2–3 cm. Sprinkle a mixture of humus and sand (1:1) on top, creating a layer no thicker than 1 cm. Sprinkle with water from a spray bottle.
- Create a “greenhouse effect” in any way: cover the containers with glass, film, and place them in a mini-greenhouse. Remove the cover daily for ventilation for 5–7 minutes, spray the soil every 2–3 days.
A home “greenhouse” can be created from many available materials; the main thing is that it ensures the maintenance of high humidity and the desired temperature
Before emergence, place in a dark place, providing bottom heating and a constant temperature of 25–27°C. The seeds germinate unevenly and take 7–15 days. After this, move the containers to the brightest place in the apartment. Remove the film. Reduce daytime temperature to 23–25°C, night temperature to 16–18°C. Provide 9–10 hours of daylight. If necessary, add additional lighting.
To illuminate seedlings, it is better to use special phytolamps, but ordinary fluorescent ones are also suitable.
How to properly disembark
Pepper seedlings can be planted in completely open ground only at the end of May. For planting work, it is better to choose a cloudy day, the second half of it. If the weather is rainy, you can plant in the morning. Seedlings grown in a greenhouse in the same garden where they are transplanted must be watered abundantly the day before and dug up immediately before transplanting. Planting material purchased in advance should be stored with a lump of earth, also moistened with plenty of water.
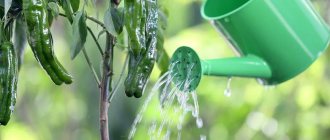
After planting, you need to water with warm, settled water.
Planting pattern: 60-70 cm between rows and 20-30 cm between plants. 1-2 liters of water are poured into each hole. If the seedlings were purchased in one lump of earth, you must first very carefully separate the roots of each plant. Picked seedlings are removed from the cups along with the soil.
Each individual plant is placed vertically on the bottom of the hole and covered with earth so that 2-5 mm remains from the surface to the lower leaves.
Nuances of caring for seedlings
Pepper seedlings are quite demanding on cultivation conditions. Therefore, she requires careful care:
- Provide protection from drafts and sudden temperature changes.
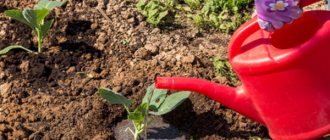
- For watering, use only warm, settled water. It is better to carry out the procedure early in the morning. Peppers need relatively rare (once every 4-5 days), but abundant watering. Do not allow drops of water to get on the leaves.
- After each watering, loosening is necessary. The roots of seedlings are the weakest point. If oxygen does not reach them, growth is sharply inhibited.
- Apply fertilizer twice: in the phase of appearance of the second and fourth pair of true leaves. Use either specialized seedling products (Rostock, Master, Effecton) or a weak solution of mineral nitrogen fertilizers (2–3 g/l). Natural organics will not work.
Seedlings are never fed with organic fertilizers - there is a high probability of infection
Picking, if carried out, is done in the phase of the second pair of true leaves, 2–3 weeks after seed germination. Do not pinch the roots or otherwise injure them.
Picking pepper seedlings is a rather risky procedure; if possible, it is better to do without it
Start hardening 10–12 days before transplanting into the garden bed. Take the seedlings outside first for 2-3 hours, gradually increase the time spent in the fresh air. In the last few days, you can even leave the seedlings to “sleep” outside.
Hardening will help pepper seedlings quickly adapt to new living conditions.
Video: growing pepper seedlings
What problems can you encounter when growing pepper seedlings:
- Stunted development, slow growth. Associated with damage to the roots during the process of picking or loosening, or with the use of an inappropriate (too heavy) substrate.
- Pale green leaves that roll up into tubes. Indicates nutrient deficiency.
- "Blackleg". Softening of the base of the stem, its darkening due to infection. The source can be undisinfected soil; abundant watering and increased acidity of the soil contribute to the development of the fungus.
“Black leg” is one of the most dangerous diseases for seedlings, capable of destroying the future harvest already at this stage
Yellowing and falling leaves. The problem is caused by a lack of light and/or heat. Excessively elongated seedlings. The seeds were planted too early and the room temperature was too high.
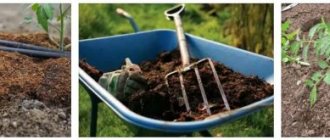
Preparing the soil for pepper
A properly prepared soil mixture is the key to strong seedlings, and therefore to the good development of an adult bush. You can buy ready-made soil, or collect it from the garden, but the best result is obtained by a kind of fermentation of the soil.
Preparing high-quality soil for sowing pepper requires labor. You can adhere to the following algorithm (volumes are indicated per 5 kg of land):
- Take soil from the garden. Soil from cucumber ridges is best suited.
- Add a liter jar without a heap of well-rotted sawdust. Fresh ones cannot be used; they will absorb nutrients for some time.
- Add a glass of ZeoFlora. This is a soil improver that contains flint. It affects the strength of seedlings.
- Add any biological product, a source of microorganisms. For example, Baikal or Siyanie-3.
- Mix everything, moisten it (the soil should be crushed in your fist, but crumble when you unclench your fingers), put it in a plastic bag. It is important that it is intact, otherwise the soil will dry out during the preparation process.
The bags are stored in a barn for 20 days. It is important that they do not have access to sunlight and that the air is warm. On day 21, the soil can be taken for sowing pepper.
You can determine the quality of prepared soil by its smell: ideally it smells like mushrooms.
Transplanting plants into the garden bed and further care
Pepper seedlings are ready for planting in the ground if they reach 17–20 cm in height, have 8–10 true leaves and a stem 3–4 mm thick. The existing buds are not an obstacle to transplantation. The substrate at a depth of 10–15 cm should by this time warm up to 14–16°C.
Do not rush to plant pepper seedlings in open ground - heat deficiency will negatively affect the yield
Pepper yield is determined by how much heat and sunlight the plants receive. Therefore, an open but protected from the wind area is allocated for the garden bed. The substrate is desirable to be nutritious, fairly loose, with neutral acidity. Lowlands and other places where water accumulates and air stagnates are absolutely not suitable.
Choose a sunny place for the pepper bed, but keep in mind that gusts of cold wind are harmful to plants
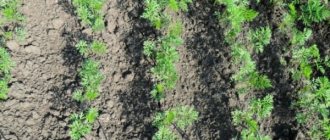
The best predecessors are any herbs, pumpkin, cruciferous, onions, garlic, root vegetables. Other nightshades (potatoes, tomatoes, eggplants) are undesirable. To avoid cross-pollination, beds with sweet and bitter peppers are placed as far apart as possible. The minimum distance between plantings is 3 m.
Any spicy herbs are good predecessors and neighbors for bell and hot peppers
The main preparation of the bed takes place in the fall. The soil is dug up and fertilizers are applied (20 g of nitrogen and 40 g of phosphorus and potassium per 1 m²). With increased acidity, dolomite flour or another deoxidizing agent is also needed. In the spring, about a week before planting, the soil is loosened and watered with a thick crimson solution of potassium permanganate for disinfection.
The best time for the procedure is early morning or evening after sunset. How to transplant peppers into a garden bed:
- About 2 hours before the procedure, water the plants generously, especially if they are to be removed from the pots.
- Make holes 10–12 cm deep. The planting pattern is determined by the description of the variety. Tall and large-fruited varieties are placed at intervals of 40–50 cm with a row spacing of 60–70 cm. Short peppers are planted more closely, according to a pattern of 30*40–50 cm.
- Pour 1.5–2 liters of water into each hole and throw in a tablespoon of wood ash. Peppers are planted in the resulting “mud”.
- Remove the seedlings from the container (if it is not a peat pot or eggshell). Place the seedlings in the holes, carefully cover them with soil, and compact the substrate. There is no point in deepening the root collar - pepper will not produce additional roots.
- Water the peppers, spending about 1 liter of water per plant, mulch the soil with humus, peat, freshly cut grass, and rotted sawdust. To minimize stress, spray the seedlings with Epin or another biostimulant.
- Install arcs over the bed and stretch breathable covering material over them. It will protect plantings from heat, cold and sunburn. If frost is expected, replace it with plastic wrap. The cover is removed for the day when the peppers take root in the new place and begin to grow. It can finally be removed in July.
When planting peppers in the garden, follow the recommended pattern; if you have reasonable doubts about your own eye, it is better to mark the holes in advance
Video: planting pepper seedlings in open ground
Caring for the crop after transplantation includes:
- Watering. Pepper is a relatively drought-resistant crop. Overwatering is much worse for it than excess moisture. The first time the procedure is carried out 10–12 days after planting in the ground, then as it dries. The need for watering is signaled by darkened leaves that have lost their tone. You can check it yourself by digging a hole about 10 cm deep in the garden bed and squeezing the soil in your fist. The dry substrate crumbles in your fingers. Before the ovaries form, 1.5–2 liters per bush is enough, then the norm is increased by 1.5 times. Do not allow drops to get on the plant itself. Each time after watering (except for the first), the soil is loosened.
Drip irrigation is the most suitable method for bell peppers; there are automated systems that do not require the presence of a gardener on the site at all
Feeding. The culture responds gratefully to any feeding. It is best to use both mineral fertilizers and natural organic matter. The former are a source of potassium and phosphorus, the latter – nitrogen. Peppers need nitrogen before flowering, during the active formation of green mass. The plants are watered with an infusion of manure, droppings, nettle or dandelion leaves 12–15 days after planting. Two more feedings are carried out after the formation of the ovaries and after the first harvest.
Fertilizers for Solanaceae take into account the specific needs of crops for certain macro- and microelements and are distinguished by a balanced composition
Bush formation. Only dwarf varieties that are not prone to branching do not need it. Pruning of other varieties of pepper is carried out every two weeks throughout the season. If the summer is rainy - even more often, once every 8-10 days. In medium-sized varieties, only weak, deformed, barren shoots growing deep into the bush are removed. In tall ones (1 m or more), in addition, upon reaching 30–35 cm, the tip of the shoot is pinched to stimulate branching. From the first fork, the two strongest shoots are left, with subsequent branches - 3-4.
Forming a pepper bush is not a one-time procedure; the process continues throughout the season.
Video: tips for caring for peppers in open ground
Biological features
This herbaceous plant is essentially a perennial, but is grown as an annual. In total, there are four types of peppers in nature. And only one of them, Mexican, is a cultivated crop. The flowers are white, bisexual, the fruits of sweet peppers are from 5 to 22 cm, and those of hot peppers are smaller - from 1.5-2 to 5-7 cm. A sweet variety, when crossed with a hot one, can produce bitter fruits.
To maintain the purity of the variety, two different types of pepper are grown at a distance of at least 2 meters from each other.
Peppers are a heat-loving crop, predominantly neutral or short-day; seed germination occurs at a temperature of +8-13 C. The most favorable environmental factors for plant development are temperature conditions in the range of 18-25 C, air humidity not lower than 60 percent.
Lack of moisture in the soil leads to slower growth and, ultimately, to the death of the plant. For high yields, intensive feeding with humus and moderate illumination are required. It is better not to plant pepper on heavy soils, as well as on soils with high acidity and rich in salts.
It is recommended to grow peppers in areas that require improvement.
Growing peppers in a greenhouse
Agricultural technology for growing peppers in a greenhouse is not much different from what is required for the crop in open ground. But there are some nuances:
- Change the top 10 cm of soil annually, and change the entire soil every 4–5 years.
- Every autumn, clean the bed of plant debris, disinfect the substrate by spraying it with a solution of potassium permanganate or any fungicide.
- Tie plants over 0.5 m high to a wire stretched from the ceiling so that they do not collapse under the weight of the fruit. Peppers in a greenhouse are more productive than in the garden.
- When weather permits, open doors and windows. Stale air is a suitable environment for many pests and fungi.
- Peppers in greenhouses are more susceptible to sunburn. To prevent this, in extreme heat, spray the inside of the glass with a solution of slaked lime.
- Maintain a constant temperature of 25-28°C and humidity of 70-75%. Sudden changes have a negative impact on yields. At temperatures up to 20°C and above 32°C, pollen becomes sterile; at low humidity, flowers and ovaries fall off en masse.
Growing sweet peppers in a greenhouse for many regions of Russia is the only way to get a harvest
Video: recommendations for cultivating peppers in a greenhouse
Recommendations for choosing a variety
Depending on the timing of ripening, pepper varieties are divided into three groups: early-ripening, mid-ripening and late-ripening.
Early ripening varieties of sweet peppers:
- Lumina;
- Ivanhoe;
- Marinkin Tongue.
Mid-season varieties
- Atlant;
- Ultraviolet F1;
- Atlas large-fruited.
Late varieties of pepper
- Night F1;.
- Paris F1;
- Albatross F1.
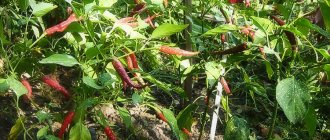
Hot peppers
- The Dragon's Tongue fully lives up to its name. The fruits weigh about 60 g, 12 cm long, bright red.
- Pepper For Mother-in-Law is very similar to Dragon's Tongue, only the weight of one pepper is a little more - up to 65 g.
- The smaller (only 25 g) early-ripening hybrid Gorgon is rich, with fleshy pulp.
- Spicy varieties also include Chinese Fire, Dagger, Adjika, Indian Summer and others.
Semi-hot pepper
Red Lightning F1. The plants of this hybrid are tall and spreading, long dark red fruits ripen on them in the shape of a narrow cone, weighing 100 g, with a wall thickness of up to 4 mm.
There are varieties of this vegetable intended for cultivation only in greenhouse conditions. However, below we will talk exclusively about those varieties that are capable of producing a harvest without requiring isolation from the external environment.
Pepper varieties for open ground
Varieties that feel great in open beds can be either early, mid, or late. With different yield indicators, fruit sizes, trunk heights, they have different taste qualities, wall thickness and color. Of the most popular, three varieties can be distinguished:
- Chardash is very early, characterized by high yield (13-17 fruits on one trunk, 200-220 g each);
- Funtik is a low-growing plant, red peppers, cone-shaped, walls up to 7 mm thick, weight of one - about 180 g;
- early ripening Yunga is a very tasty variety with red fruits, weighing up to 180 g, yielding a harvest of 8–15 pieces. from a plant.
Gift of Moldova, Silver, Cockatoo, Orange, Leader of the Redskins, Prince, Swallow, Red Elephant, Corvette, Siberian Prince are also suitable for growing in open ground.
The best varieties for open and closed ground
When choosing a variety, consider the following:
- Duration of summer in the region. Only early and mid-early varieties are suitable for Siberia and the Urals. If summer lasts about 2–2.5 months, plant mid-season peppers. But for gardeners in warm southern regions this question does not arise at all.
- Fruit shape. Cone or cylinder peppers have thicker walls and are better suited for salads, while cube peppers are better suited for stuffing. There are also small fruits that are suitable even for whole-fruit canning.
- Skin color. The darker and richer the color, the sweeter the pepper.
- Dimensions of bushes. Tall varieties are not planted under arches; low, compact peppers are suitable for open beds.
Tall varieties need support
Sweet pepper varieties that are tall require staking. Low-growing varieties of pepper do not need to be tied up, but the presence of support contributes to uniform ripening of the fruit, easier care and high-quality harvesting. Traditional wooden pegs are used to create support. The plants themselves are protected by other tall crops. The wind will not blow as strongly through such protection. Forming a bush - increasing vegetable yield
Plant formation is very important to obtain high yields. Many breeders believe that without a properly created form it is impossible to get the maximum benefit from a plant. Methods for forming a bush:
- They create the skeleton of the bush: only the two strongest shoots are left in the first fork. 2 branches are also left on the skeletal shoots, one of which will grow vertically, and the second - directed towards the outside. It is recommended to remove internal shoots. When properly formed, a pepper bush can grow up to 1.2 m in height.
- Create a bush skeleton: two shoots are tied in a vertical direction. At each node, 1 external shoot is left. With this formation, it is necessary to plant the plants at a distance of up to 50 cm, install supports and pull horizontal twines. The bush is capable of rising in height by more than 2 m.
The nuances of growing peppers in different regions
Conditions in central Russia are, in principle, favorable for growing early and mid-ripening varieties of pepper both in open ground and in greenhouses. But occasionally recurrent spring frosts are possible in this region; plantings must be protected from the cold.
In the Urals, Siberia, and the Far East, the only way to cultivate pepper is in a greenhouse or in warm beds. Select varieties that are specially zoned for these regions. The main danger to peppers is temperature changes. Summer here is short, so already in the last ten days of July it is recommended to remove flowers, small ovaries and pinch the top of the main shoot of the bush so that the peppers have time to ripen before the cold weather.
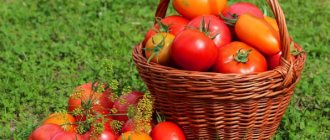
How to harvest
There are no difficulties in harvesting sweet and hot peppers, but some tricks will allow you to harvest more. The fruits ripen from the beginning of August, it is already possible to collect them little by little, but mass harvesting in the central zone will begin from the middle of the month to mid-September.
Some tricks will help prolong the ripening of peppers:
- Remove it on time, do not leave ripe specimens on the branches, they take away the strength of the plant.
- It is better not to pick the pepper, but to cut it along the stalk with scissors, so the plant will not be injured.
- If frost is expected in the forecast, the entire crop must be harvested, even unripe ones.
Collected peppers are stored in cool rooms or in a special compartment of the refrigerator for no more than two weeks. Then you need to either preserve it or freeze it. It is not advisable to wash the fruits before storing them: moisture reduces the keeping quality several times.
Decorative pepper at home
Peppers on the windowsill look very pretty and will be a valuable addition to the home garden. There are also perennial varieties that produce crops within 8–10 years. Choose varieties with compact, low (up to 50 cm) bushes - Ogonyok, Aladdin, Poinsettia.
Peppers are most often grown at home for their harvest, but there are also purely decorative varieties.
The optimal temperature for plants in winter is 18–20°C, in spring and autumn - about 25°C. In summer it is useful to take the pots out onto the balcony; it responds favorably to fresh air and natural temperature changes. The container is kept in a place well lit by the sun, but not under direct rays; additional lighting is provided if necessary.
Seeds, soaked for an hour or two in a biostimulant solution, are planted in a pot of about 5 liters in February, this will avoid further transplants. A drainage layer is required at the bottom. The soil is store-bought for Solanaceae. You will have to wait 2–3 weeks for germination. When 3 pairs of leaves appear, pinch the top to stimulate branching.
If you provide pepper with the right conditions, proper care and choose the right variety, the plant will delight you with a harvest for many years.
Water the plant once every 2-3 days and spray it weekly with a spray bottle. In winter, spraying is stopped and watered once a week. Fertilizers are applied every 15–20 days from March to October, and complex fertilizers for Solanaceae are used. After the first fruiting, the tops of all shoots are pinched, those that stand out from the general configuration are cut off completely. In perennial varieties, each shoot is shortened by half every year at the end of autumn.
Video: cultivating peppers on a windowsill
Proper feeding is the key to successful cultivation
During the growing season, peppers are fed no more than 4 times. The plant reacts painfully to the abundant content of organic matter and minerals in the soil, although it still needs nutritious soil for successful fruiting. The first application of fertilizers is carried out at the time of the first loosening of the soil - 2 weeks after transplanting the seedlings into open ground. When first fertilizing, it is necessary to add manure solution or chicken droppings: 1 part of manure is diluted in 5 liters of warm water, 1 part of chicken droppings is diluted in 15 liters of warm water. You can add 1 tbsp to the prepared organic matter. wood ash or phosphorus-potassium fertilizers. First feeding:
- 10 l of prepared organic solution;
- 60 g superphosphate;
- 20 g of potassium chloride;
- 1 cup wood ash.
Peppers can also be fertilized without using organic matter:
- 10 liters of settled warm water;
- 20 g ammonium nitrate;
- 60 g superphosphate;
- 30 g of potassium chloride.
Fertilizer is applied at the root at the rate of 1 liter per plant. The second time the bell pepper is fertilized with the same compounds during the period of bud formation. At the moment of ovary formation, the plant needs organic matter. That is why professional gardeners advise fertilizing the plant with organic fertilizers at the moment of fruit formation. The plants are fed the fourth time when the fruits decrease in size. Very often this happens with early varieties closer to autumn.
Pepper does not tolerate chlorine. That is why it is recommended to replace potassium chloride with wood ash. Any varieties for open ground should be fertilized especially carefully.
Cultivation of black peppercorns
In nature, black peppercorns are a long climbing (up to 15 m) vine. The plant is very thermophilic, temperatures below 10°C are destructive for it, so in Russia its cultivation is impossible even in the southern regions. The vines have large, hard leaves and the fruits grow in clusters. Unripe peas are green, they gradually turn red.
The Russian climate is definitely destructive for the vine on which peppercorns grow.
You can try to grow this pepper at home. For planting, ordinary spice, which is sold in the store, is suitable. Pay attention to the expiration date; a year or less must have passed from the date of collection. The procedure is carried out in May-June. Suitable soil for orchids.
The plant requires the same conditions as decorative homemade peppers. The plants are watered as the soil dries, and mineral fertilizers are applied twice a month during the active growing season. Transplantation is carried out every two years, the length of the vine is regulated by pruning. The first harvest is harvested after 2–3 years.
Few people know, but the well-known spice looks exactly like this before being collected and packaged in bags; black, white, green, and pink peppers are obtained from peas
Small whitish “grains” on the underside of the leaves are normal for the plant, and not some kind of exotic disease.
Video: how peppercorns grow in natural conditions
Diseases and pests
- The most dangerous pest for peppers is aphids. It settles on the leaves of the plant and feeds on its juices. It looks like very small (up to 3 mm) light green or black droplet grains stuck to the surface of the leaf, and especially on the buds. Treatment of plants affected by aphids with karbofos or keltan (1 tbsp per 10 liters of water) is very effective. It is important to remember that you cannot spray plants with them during flowering, as well as during the period of fruit ripening. In such cases, a folk remedy is suitable: a glass of tobacco dust or wood ash is steamed in a bucket of hot water. After 24 hours, filter the solution, pour in 1 tbsp. liquid soap and spray the plants (it is advisable to do this in the morning).
- If lightened spots appear on the leaves, they dry out, turn yellow, there are barely noticeable pests on their undersides, and in some places, and in advanced cases around the entire plant, a network of cobwebs is spread out - this indicates that the plantation has been attacked by a spider mite. The following mixture will help against it: onion or garlic (1 tbsp), dandelion (1 tbsp), liquid soap (1 tbsp). Vegetables and herbs are minced through a meat grinder and mixed with liquid soap in 10 liters of water. You can spray at any stage of plant development.
- Naked slugs eat not only the leaves, but also the pulp of the pepper. The resulting damage may cause the plant to die and the fruits to rot. Slugs have difficulty moving on loose soil, almost never cross deep obstacles, and are afraid of bitterness. If prevention in the form of deep furrows around the bed, frequent loosening to a depth of 3-5 cm does not help, then a teaspoon of dry mustard or ground red pepper, sprayed on each square meter of pepper plantation, will repel the slug.
- Blackleg - damage to the trunk of seedlings by bacteria under unfavorable weather conditions (lower temperatures and increased air humidity), which promote their reproduction. Sometimes it is enough to loosen the soil and sprinkle it with wood ash.
- More dangerous than blackleg are fungal diseases such as sclerocinia and fusarium. No remedies will help here - as soon as the pepper leaves begin to fall, all infected bushes should be burned immediately. The following year, this area cannot be replanted with pepper.
Non-standard ways to grow peppers
Planting peppers in barrels allows you to save space on your site. The bottom of the container is removed and several drainage holes are made. It is half filled with earth in layers about 10 cm thick, alternating turf, ordinary soil and raw materials for compost. The bush is planted in early May. The lower leaves are torn off, covered with a layer of earth about 10 cm thick, and covered with film. When the pepper grows, the procedure is repeated. And so on several times until the barrel is filled to the brim with the substrate. After this, the film is removed and the plant is cared for as usual.
The Chinese method allows you to get more powerful bushes. The seeds are planted in “cassettes”, a layer of soil no more than 6 cm thick. When the 7th true leaf appears, the tops are pinched. The bushes slow down their growth by an average of 3 weeks, during which time the root system develops. The fruits on such plants ripen 2.5–3 weeks later than usual, but the overall yield is greater. After planting, the soil is covered with a thick (6–7 cm) layer of mulch.
Protecting peppers from frost
It happens that frosts continue until the end of May, and even at the beginning of June. In any case, you need to be prepared to effectively protect pepper plantings from temporary cold spells, especially at night. Any of three methods will do: tent shelters, smoke screens and sprinkling.
- You can prepare in advance frames from thin bars, trellises, onto which you need to stretch any light but warm material - plastic film, cardboard, burlap.
- Smoke is provided by smoldering fires located along the edges of the beds.
- Sprinkling is the very fine dispersal of water over plants.
All these activities should begin in the evening and stop only after sunrise.
Pepper is a very capricious crop. Without certain knowledge it is very difficult to get a good result. However, with great desire and maximum effort, you can provide your family with this tasty and very healthy vegetable not only in the summer, but for the whole year.
Sowing pepper seeds
Then you can start sowing the seeds. Plant the seeds to a depth of 1-2 cm, the soil should be slightly damp (you can spray it with a spray bottle), cover the seeds with soil on top and lightly compact them. The containers must be covered with film and placed in a warm place. As soon as the sprouts appear, remove the film and place the seedlings indoors for 4-5 days in a room with a temperature of 22-23°C during the day and 17-18°C at night so that the seedlings do not stretch. The optimal temperature for subsequent cultivation of pepper seedlings should be 23-27°C during the day and 10-15°C at night.
If the daylight hours last less than 12 hours or the weather outside is cloudy, the seedlings need to be illuminated with fluorescent or phytolamps; this usually happens in February - March. The distance from the seedlings to the lamp should be no more than 15 cm. But in the late spring evening, the seedlings, on the contrary, should be protected from light. Pepper seedlings love ventilation, but at the same time it is necessary to protect the seedlings from drafts.
Picking with pinching the central root of peppers is contraindicated. And if the seeds were planted in a common container, the pepper seedlings are simply transferred to a larger container when 4 true leaves appear on it. This must be done carefully. And a few days before transshipment, the seedlings need to be fed with Agricola. Before transplanting, water the container with seedlings with water, take out the seedlings with a lump of earth, and without damaging the root system, plant each one in a separate cup.
Water the seedlings once a week, always in the morning with warm, settled water (25-28°C).
The first feeding is carried out only after two weeks after transshipment with the following composition - 1 tsp. urea, 2 tbsp. l. superphosphate per 10 liters of water, the second 3-4 days before planting in open ground, its composition is 3 tbsp. l. superphosphate, 1 tbsp. l. potassium fertilizer per 10 l. water. You can use special preparations for feeding “Kemira Luke” or “Ideal”.
Before planting seedlings in open ground 2 weeks before, they need to begin hardening to avoid stress for the plant. To do this, take it out onto the balcony for 20-30 minutes, and at the end you can leave it there for the whole day.
Seedlings ready for planting in a permanent place should be 60-75 days old, 18-25 cm high, have from 7 to 12 leaves, the color of the leaves is dark green, they may already have buds. The same seedlings must be purchased in specialized stores (markets), if they are not grown independently. The day before planting, the seedlings must be treated with a growth stimulant, this will increase its immunity (Energen, Epin).
Arrangement of beds
Before growing bell peppers, carefully prepare the area.
In the fall, the soil is dug up and nutrients are added. You can use manure, humus, compost. Fertilizer is applied before digging at the rate of 4-5 kg per m².
In the spring, a mixture of superphosphate, potassium sulfate, and urea is used. In order for the sun to better warm the planting bed, it can be raised by covering it with boards.
A bed with plants can be covered with boards
How to increase the yield of sweet peppers
To get a decent amount of vegetables from each bush, it is important to follow the rules of sowing and caring for seedlings. It is important to plant, water, and feed seedlings in a timely manner.
Additional recommendations for increasing productivity:
- Plant the seeds in a separate container with a diameter and depth of 8-10 cm. In such containers, plants do not need picking, after which growth slows down for 2 weeks.
- Choose a site for the crop on the leeward side to provide gentle conditions for the capricious plant.
- Do not allow flowering before planting in the ground.
- Carry out pinching throughout the season, pinch the top after the first ovaries form.
- Peppers grow best in pairs. Experienced gardeners sow 2 seeds in one container and plant 2 plants.
- The distance between planted bushes should be at least 30 cm so that the peppers do not interfere with each other.
- Collect vegetables during the period of technical ripeness (the fruit has not yet acquired its final color, but has reached average weight). This way, less nutrients are consumed and the remaining peppers ripen faster.
Care during fruiting
During the period of mass ripening, the plant needs timely moistening and feeding. With a lack of moisture, small wrinkled fruits are formed. The plant is inspected daily and ripened vegetables are collected.
Fertilize the crop with a solution of wood ash and fermented grass. To nourish the bush and improve the taste of the crop, potassium supplements are added before the end of fruiting. Nitrogen is added during the ripening period and gradually removed by the end of August.
The quality of the garter is checked regularly. The plant may break under the weight of the harvest. The stem must be securely fixed.
Barren shoots and yellowed leaves are removed to enhance the nutrition of ripening vegetables.
To obtain a rich harvest, it is important to follow all the necessary recommendations for sowing seeds, growing seedlings, and caring for an adult plant.
Stepping and bush formation
The lower shoots of bell peppers are removed (with the exception of non-sprouting varieties). The procedure is performed throughout the summer using scissors. It is better to trim the stepsons in hot weather for faster wound healing. You can lubricate them with charcoal.
When most of the fruits have set, pinch the top of the plant and remove the inflorescences. The vegetables from them will no longer have time to ripen; they will only take up part of the nutrition.
Compact pepper grinds do not require shaping. It is necessary to carefully monitor the growth of highly branching varieties. They remove excess shoots and those that grow inside the bush. Pruning is carried out for the purpose of additional lighting, since thickening does not contribute to a high yield. Large varieties require garters to stakes to prevent plant breakage.
Choosing the right landing site
Careful care of bell peppers will be in vain if the wrong place for planting it is initially chosen. The place for gardening must meet the following requirements:
- The soil is fertile, drained, with the ability to retain moisture.
- Sufficient sunlight, but diffused.
- Protection from strong winds and drafts. If such a place cannot be found, you can build a protective curtain for the vegetable, which is used on windy days.
You also need to pay attention to your garden “neighbors”. It is recommended to plant peppers next to garlic and onions; they will protect the plant from harmful insects. Tansy, thyme, basil will attract pollinators to the pepper.
Attention! It is not recommended to plant eggplants, tomatoes and potatoes next to peppers. These vegetables need the same nutrients as peppers, and they suffer from the same diseases.