Author's rating
Author of the article
Yakov Pavlovich
Professor, Head of the Department of Vegetable Growing
Articles written
153
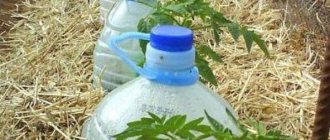
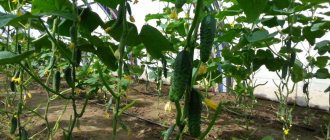
Many gardeners are engaged in growing cucumbers. As you know, this vegetable consists of more than 90% water. At the same time, the plant itself is very sensitive to waterlogging. Therefore, you need to water it correctly: regularly, abundantly, but under no circumstances allow it to overflow. For this purpose, summer residents organize drip irrigation, making an irrigation system for cucumbers from plastic bottles with their own hands.
Watering cucumbers using plastic bottles
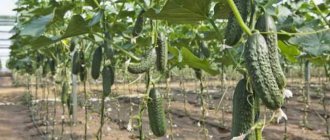
Cucumbers are a moisture-loving crop; without timely watering, you won’t get a good harvest. The fruits, even if they are born, will be bitter and tasteless; what can you do if you are constantly unable to stay at your summer cottage? Do-it-yourself drip irrigation of cucumbers using plastic bottles is a good solution to the problem, both for a greenhouse and in open ground. In dry summers, it is a real salvation for summer residents if there is no time to visit the garden regularly.
Watering cucumbers using bottles is very convenient
The principle of operation of agricultural technology
The essence of the method is to supply moisture to the lower layers of fertile soil to the roots. As a rule, the rhizomes of weeds are located in the upper layers of the soil, and when using a drip system, all the water goes to the cucumber vine. Dosed supply of liquid reduces its consumption.
Structurally, all systems can be divided into two large groups:
- Individual. In this case, a watering container is installed for each plant. Designs for this type of watering of plants are very quickly made, but require a lot of time for regular filling.
- collective. When choosing this system, one large container (barrel, large canister or 19-liter bottle) is installed on the cucumber bed, from which liquid is supplied through tubes to several plants. Designs for collective watering of cucumber vines are more complex to manufacture, but filling them takes much less time.
Note! By installing a drip irrigation system of 4 19 liter bottles in a small greenhouse, a gardener can visit the beds once a week.
Pros and cons of a drip irrigation system
Making your own drip irrigation system has its advantages and disadvantages.
Advantages of a homemade design:
- The drip system prevents the formation of a hard crust on the surface of the cucumber ridge. The loose soil surface freely allows the oxygen necessary for root development to pass through;
- Drip watering of cucumbers can be done at any free time, without waiting for the evening or cloudy weather. Drops of water will never fall on cucumber leaves and will not cause sunburn;
- The gardener is spared the tedious task of watering the cucumbers every day. Using drip systems, you can fill containers with water every few days;
- Easily available materials and widely used tools are used for manufacturing. The required number of old plastic bottles can be found in almost any kitchen;
- The design is very simple. It is easy to make it yourself and install it in a garden bed in a few hours;
- water goes directly to the root system and is not spent on feeding and growing weeds;
- When using drip irrigation, water does not evaporate from the surface of the beds. Less liquid is required for watering;
- the use of a drip system saves the time required for watering the garden;
- At the same time as water, solutions of mineral fertilizers can be supplied to the roots of plants.
Disadvantages of a homemade design:
- a set of tools is required for manufacturing;
- small diameter holes become clogged and require periodic cleaning;
Note! To reduce the frequency of cleaning the system, wrap the outside of the hole with old nylon tights.
- the system must be regularly filled with water;
- bottles have a small volume, so to fully provide plants with moisture, it is necessary to place several devices on the ridge.
A drip irrigation system made independently using plastic bottles can be successfully used in open ground and greenhouses, watering vegetables, shrubs and trees.
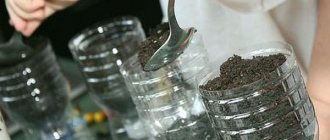
Required materials and tools
Bottles of various sizes are required for work. Their number depends on the area of the beds. To water individual plants, use containers with a volume of 1-3 liters; to water several cucumber bushes at the same time, you will need a container with a volume of 5-19 liters.
What do you need:
- small scissors;
- thin awl;
- stationery knife;
- soldering iron with a power of 40-60 W;
- glue gun with rods, silicone sealant;
- tape or tape.
In order not to spoil the table covering, before working it is necessary to lay a sheet of plywood on it.
What is the advantage
Drip irrigation using plastic bottles has a number of advantages:
- the material is available, organizing the system costs practically nothing;
- the procedure is so simple that anyone can do the task with their own hands;
- significant savings not only in money, but in effort and time, because filling bottles with water is not difficult;
- you can safely leave the site for the city without worrying that the soil in the greenhouse will dry out and the seedlings will die;
- the plant receives moisture directly to the roots;
- water flows evenly and in doses, the roots are not washed away by a strong stream of water;
- Drip irrigation in a greenhouse is especially good: thanks to this method, the surface of the earth remains dry, which does not allow weed seeds to germinate, it does not become compacted, if it is covered with a layer of mulch, then there is no need to loosen it;
- there is also less evaporation, this prevents dampness and diseases from developing in the greenhouse;
- when there is no central water supply at the site, this significantly saves water resources;
- if tap water is used, meters are installed in the house, this will have little effect on payments;
- the liquid in the bottles warms up, which is important for the growth of cucumbers; cold water causes stress and illness;
- The system is easy to install, replacing damaged containers is simple.
The intensity of watering can be adjusted by making additional holes in the lid
Drip irrigation - what is it: device and principle of operation
Before you start watering, you need to become more familiar with the structure of the system and the features of its functioning. The operating principle of this design is that it ensures the flow of liquid directly to the roots of the planted cucumbers. In this case, water can be supplied not only to the lower layers of the earth, but also to its surface. If it is necessary for water to flow into the fertile layer of soil, a dripper is installed. To irrigate the soil surface, the system is equipped with drip tapes.
Many irrigation systems are equipped with a special pump responsible for the flow of liquid. Without it, the water will take longer to travel through the main pipes.
Are there any disadvantages
Despite the positive qualities of the method, it also has disadvantages:
- on a large area in the open ground, it is difficult to organize such a system with your own hands, and it is also impractical;
- this type of moistening is more suitable for temporarily maintaining the required soil moisture in a greenhouse and in open ground while the owner of the beds is absent, but it cannot replace high-quality, full-fledged watering;
- When used on heavy soils with a lot of clay, the holes often become clogged.
Irrigation rates
When installing drip irrigation for cucumbers in a greenhouse, you need to take into account the fact that moisture in a film or polycarbonate cover evaporates slowly.
In cloudy weather, the temperature in a closed structure is higher than outside, as well as during hot periods. As soon as the first leaves appear on the plants, the application rate should be no more than 2 m per square meter. When ovaries form on cucumber seedlings, watering is increased to 4-5 liters. In hot weather, cucumbers in a greenhouse need to be watered every 2 days, and in cloudy weather it is enough to water once every 4-5 days. If drip irrigation for cucumbers is installed in open ground, then the hole will differ from the greenhouse one. During flowering and fruit formation, at least 6-10 liters of settled cool water should be used. In hot weather, agronomists advise watering the crop every day or at least every other day, and on cloudy days the norm is reduced to 1-2 times every 5 days. By the end of summer, when fruiting ends, 5 liters of water per m2 will be enough.
Types of watering from plastic bottles
Although the advantages of this type of irrigation are obvious, it is worth considering its capabilities in more detail, choosing the method that is most suitable for the situation. It should be taken into account what is acceptable for greenhouse conditions, what is better suited for open ground. Plastic containers can be:
- dig into the ground to a shallow depth;
- install close to bushes with cucumbers;
- secure to suspended structures.
Types of drip irrigation with bottles: hanging, in-dig, standing, with a canister dispenser, a bottle dispenser and a tube dispenser
Method 1
This type is suitable for open ground and greenhouses at the same time. To make a miniature irrigation system from a bottle with your own hands, you need:
- Measuring 3 cm from the bottom of the bottle, using a needle or thin nail heated to redness, holes are pierced with an awl.
- They are arranged in 3-4 rows, they can be placed in a checkerboard pattern. You will have to determine how many punctures to make yourself; it depends on the type of soil: the denser it is, the more holes there are, but the exact number is determined over time. If the ground is too damp, the bottle is replaced with another one with fewer punctures.
- Bottles are buried upside down between cucumber bushes.
- It is allowed not to put on the cap, if you want to leave it, you need to make a hole in it, otherwise, after the bottle is empty, it will shrink and lose its shape.
Bottles are dug between cucumber bushes
Method 2
The second method resembles the previous one, but in this situation the bottom is removed:
- Holes are made at the top of the container, close to the neck,
- There is no need to make punctures; foam rubber is tightly inserted into the neck of the bottle; this option is acceptable for very heavy loams; in sandy open soils, liquid will leak out almost instantly
- Screw the cap on and drop the bottle upside down.
- To prevent rapid evaporation of moisture, the cut bottom can be placed on top; it is more convenient to simply turn it over. Some advise not to cut it off completely, but to pour water, bending it a little.
Method 3
If it is not possible to appear on the site often, during periods of long absence five liter plastic bottles are used:
- holes are pierced in them on one side over the entire area of the container;
- a hole is cut in the wall on the opposite side, large enough to make it convenient to pour water;
- The bottle is instilled in a lying position, with small holes down.
In this case, the period of self-watering will extend for several more days.
Five-liter bottles will provide cucumbers with water for several days
Method 4
There is another option when the bottles are not placed in the soil, but suspended above the plant. The method is good for greenhouses:
- the soil near the roots is not washed away;
- the water in the container warms up well;
- optimal humidity is created.
Here holes are made in the lid itself or near the neck; you don’t have to make them at all; you just need to adjust the cap so that water flows out on its own in a small amount. After filling the container with water, hang it upside down. Watering will occur independently.
But this method is more complicated due to the installation of supports with your own hands, and water sometimes gets on the leaves, which is undesirable. This can lead to burns in sunny weather. To avoid this, containers are hung close to the ground.
In open ground, the bottles can simply be laid out on the beds, after first making holes.
The irrigation structure can be made suspended
System manufacturing
Craftsmen have developed and successfully use several options for irrigation systems made from bottle plastic. A step-by-step manufacturing master class is shown in the video.
Neck down
The system is used for individual watering of plants. To make it, you need a 1-3 liter bottle with a narrow neck and a piece of foam rubber.
Operating procedure:
- the container is filled with water;
- the neck is tightly plugged with a piece of fine-pored foam rubber;
- Use a thick peg to make a cone-shaped hole in the soil next to the plant;
- The bottle is turned upside down and inserted vertically into the ground.
Moisture seeps through the pores of the foam and goes directly to the roots of the plants.
Neck up
The system is also applied to each plant. The volume of the watering bottle is selected based on the frequency of visiting the site. If it is possible to add liquid daily, then a volume of 1-1.5 liters will be enough, but if the site is visited once a week, then it is better to take a container with a capacity of 5-10 liters.
Operating procedure:
- Use a thin awl to pierce several holes in the bottom of the container;
- in the garden bed, next to the plant, make a hole 10-15 cm deep;
- The bottle is filled with water, the cap is screwed tightly, and placed in the hole.
The liquid from the bottle gradually seeps through microscopic holes to the roots of the plants, nourishing them.
Watering at the root
The method is used to supply water directly to the roots of plants. To use it, bottles with a volume of 1.5-3 liters are required.
Operating procedure:
- Bottles have their bottoms cut off;
- Make several holes in the cork with an awl. For sandy ridges, make 1-2 holes, for clay ridges - 3-4;
- when planting plants, holes are made between them every 25-30 cm;
- the bottles are placed neck down in the holes;
- between plants the soil is covered with mulch;
- During irrigation, water heated by the sun is poured into bottles. Through the holes in the plug, moisture enters the soil, forming a moist horizon in which plant roots comfortably grow and develop.
Big bottles on the side
To quickly organize drip irrigation in a cucumber bed, large rectangular or square bottles of water or coolant are used.
Operating procedure:
- the bottle is placed on its side;
- the upper part is cut off;
- several holes are made in the lower part with an awl;
- the container is placed on the bed next to the trunk of the plant;
- When watering, water is poured into a bottle with a bucket, it slowly seeps down through the holes, gradually feeding the root system of the cucumber vine.
Suspended irrigation
When the system is buried in the ground, plant roots are injured. To avoid this, install a suspended irrigation system.
Operating procedure:
- the garden bed is dug up and plants are planted;
- two pillars 1 m high are buried at the ends of the ridge;
- a water pipe with a diameter of 20-25 mm or a metal profile with a cross-section of 20 by 40 mm is placed on top of the pillars along the entire ridge;
- hooks are bent from thick (6-8 mm) wire;
- several holes are made in the bottom of a 5-liter bottle with an awl;
- a bottle filled with water is hung on a pipe by the handle;
- water trickles out of micro-holes, watering the soil next to the plants.
Watering to the base of the trunk
The method allows you to deliver liquid directly to the base of the plant stem. To use it, you need a 5 liter plastic container and a small diameter plastic tube (for juice, a used rod, etc.).
Operating procedure:
- at a distance of 5-7 cm from the bottom of the bottle, use a soldering iron to burn a hole with a diameter slightly smaller than the diameter of the tube;
- cut a piece 7-10 cm long from the tube;
- At a distance of 1 cm from the end, a hole is pierced in the body of the tube with an awl. Next, a wooden plug is hammered into this end;
- the second end of the tube is inserted into the hole in the body of the bottle and fixed with silicone sealant;
- water is poured into the bottle. It is installed next to the plant, directing the tube under the root.
On a note!
Instead of a straw, you can attach a flexible dropper hose to the bottle, and hang the container itself on a pole or cucumber trellis. This design allows you to direct watering from one container of water to the roots of different plants.
Irrigation system with dispenser
The method makes it easier to water the plants and allows you to visit the dacha for watering less often. To use it, you need a 3-5 liter canister and a drinking water bottle.
Operating procedure:
- in the lower part of one of the sides of the canister, several holes are pierced with an awl;
- make a filling hole with a diameter of 10 cm in the bottom of the bottle;
- The neck of the canister bottle is connected. The junction is sealed with silicone sealant;
- a 70 cm long section is cut from a board 10-15 cm wide;
- the bottle and canister connected together are taped with tape or tape to the board;
- during spring planting, a canister is dug in next to the hole;
- The liquid poured into the structure slowly oozes through the micro-holes, saturating the plant with moisture. A large volume of water allows the gardener to visit the dacha less often.
Watering with wicks
The simplest option for drip irrigation is watering with wicks or bundles. For production you need a container with a volume of 1.5-5 liters and ropes or strands. The design allows you to water several plants at the same time. It is especially convenient for watering cucumber seedlings.
Operating procedure:
- the container is filled with water and placed on the garden bed (or windowsill) in a place convenient for the gardener;
- a long tourniquet is rolled up from the bandage;
- one end of the rope is lowered to the very bottom of the container, the second is placed in a pot with seedlings;
- The top of the container is closed with a wooden stopper that prevents water evaporation;
- water is supplied through gauze strands exactly under the roots of the plants.
On a note!
The higher above the ground level the neck of the vessel is located, the more intense the watering.
Automatic watering from drippers
Automatic watering of cucumbers can be made from medical droppers. The system is used at home for seedlings or in a greenhouse.
Operating procedure:
- a 5-19 liter bottle is filled with water and placed in a high place. In the greenhouse, special stands are built for this; at home, the bottle can be placed on a high chair or stool;
- A weighting agent is taped to one end of the medical IV tube. To do this, take a nut, a fishing sinker or a small pebble. The weighted end is lowered to the bottom of the bottle. The second end is lowered into pots with cucumber seedlings or attached next to the trunk of the vine;
- adjusting clamps are hung in the middle of the tube;
- The water flows through the tubes exactly under the roots of the plants; clamps help regulate its pressure.
Secrets of watering preparation
The main secrets of preparing irrigation include:
- Ordinary plastic bottles are suitable for watering directly into the ground, but it is important to organize the preparation process with your own hands correctly; for this you should know a few secrets:
- For drip irrigation of cucumbers, two-liter bottles are best suited; sometimes you can use 5-liter containers.
- The punctures in the plastic must be made very small, the size should not exceed 1, maximum 1.5 mm, otherwise the water will drain out too quickly.
- To prevent soil from getting into the bottles, you can wrap them with non-woven material, burlap, or use unnecessary stockings.
- How much plastic container is needed for high-quality irrigation depends on the number of plants. Ideally, take a bottle for each bush; if there is little space, 1 container for 3 or 4 bushes is enough for cucumbers.
- The frequency of site visits, weather conditions, and soil characteristics should also be taken into account. In open ground, at the beginning of the growing season, 3 or 4 liters of liquid per week is sufficient for the bush; as soon as flowers appear and the first cucumbers begin to form, the norm increases to 6 liters. If the weather is hot, sometimes 12 liters are required at intervals of 3 days. During rain or cold weather, the standards are reduced. In a greenhouse, the evaporation process is more intense, so slightly more water is required.
- The best time to install the system is when the seeds are planted, then the roots will definitely not be damaged.
- The containers are located at a distance of about 15 cm from the bush; the depth of its embedding should not exceed 10, maximum 15 cm. It should not be too deep; cucumbers have roots located close to the surface. The bottle can be placed straight, some use a slight tilt of 35-40 degrees.
Setting up and checking the system operation
After manufacturing, the drip irrigation system needs to be configured and tested. To do this, do the following:
- The physiological norm of water consumption by cucumber vines at a normal density of planted plants before flowering begins is 5 liters. After fruit formation begins, it increases to 10-12 l/m². Based on these numbers and the area of the ridge, the number and volume of bottles for irrigation are selected;
- The system is designed to supply water to the roots for a long time. Before starting work, fill the container with water and see how long it takes for it to flow out. If the water leaves the container too quickly, the number of holes is reduced; if it is too slow, the existing ones are expanded or new ones are added.
Making drip irrigation for cucumber beds with your own hands requires a little effort and time. The resulting design will saturate the cucumber vine with water, which will lead to consistently high yields.
DIY drip irrigation from plastic bottles for cucumbers with photos and videos
Cucumbers are a moisture-loving crop that must be periodically watered and fed when grown in open ground. If you water too infrequently, it can affect the growth of bushes and yield. The fruits themselves may also suffer, becoming tasteless and bitter.
Not all vegetable growers have the opportunity to constantly be in the countryside to constantly water the cucumbers. In this case, drip irrigation of cucumbers is created in a greenhouse or vegetable garden, which will ensure a constant supply of moisture to the plants. For such purposes, watering is created with your own hands from plastic bottles.
Is it possible to make a design with your own hands?
People who are planning to water their cucumbers using the drip method are wondering whether it is possible to independently make a structure for supplying water. Making your own system for moistening the soil is quite simple. To do this, it is enough to make a simple plumbing system that will ensure the flow of liquid to the root system of planted seedlings.
See also
Instructions for use of the drug Peat hydrohumate for cucumbers
Read
Advantages and disadvantages
The watering system using plastic bottles is quite simple. To ensure the supply of moisture to the cucumbers, it is necessary to dig a bottle with small holes for water seepage near each bush. This type of bottle watering has a number of advantages, which include:
- Low cost. This system is practically free, since to create it you only need plastic containers, which you can find on the street yourself or purchase at a low price.
- Ease of creation. To set up irrigation with plastic bottles, a person does not need any special skills, so anyone can do this job.
- Simplified care for cucumbers growing in the garden or in greenhouse conditions. To water in a greenhouse through plastic bottles, a person does not have to spend much time at his or her summer cottage. Using this scheme, a person will be able to go about his business and not worry about the plants.
- Protecting cucumbers from burns. Automatic watering of bushes using a drip method protects the leaves on the bushes from burns, since water will flow directly to the root.
- Autonomy. Most popular systems require a plumbing system. In this case, you only need bottles filled with water.
- Fluid temperature. The water used to water the cucumbers has the same temperature as the air in the greenhouse. This has a positive effect on plant growth.
- Easy dismantling and repair. There are times when some element in the system breaks down and has to be completely replaced. To do this, it will be enough to dig up the broken bottle and install a new one in its place.
Despite all its advantages, this irrigation system also has some disadvantages:
- Difficulty in organizing irrigation over large areas. Therefore, if it is necessary to ensure the supply of moisture to large areas, it is recommended to use any other irrigation methods.
- Frequent problems. Often, the holes in the bottles begin to become clogged with soil, and because of this, the flow of moisture into the soil slows down.
- Inadequate watering. Such a system is quite primitive and because of this, it cannot completely replace irrigation in open ground. The gardener will sometimes have to irrigate the bushes himself using a watering can. To ensure proper watering, it is recommended to use special tapes connected to the water supply.
See also: Growing cucumbers in DIY vertical beds Read
Features of the system application
Cucumbers are grown in open and closed ground using different technologies. Each of them uses its own drip irrigation techniques.
Using the system in a greenhouse
One of the main conditions for obtaining a bountiful harvest of cucumbers in a greenhouse is light soil penetrated by many channels. Watering with a hose or watering can compacts the soil, depleting the soil of oxygen. Drip irrigation solves the problem of maintaining soil looseness.
In closed ground, plants are planted in beds very tightly, so it is preferable to use hanging structures. Increased air temperature in the greenhouse promotes rapid evaporation of moisture; the number and volume of watering containers should be increased.
Materials used
Before starting drip irrigation after fertilizing, you need to decide what materials and tools will be needed to set up the system:
- roulette;
- shovel for digging containers into the ground;
- an awl or nails to create holes;
- bottles;
- a lighter that will be used to heat a needle or nail.
Particular attention should be paid to the choice of bottles, since they are the main material of the irrigation system. First you need to decide on the volume of containers. In this case, the choice directly depends on the area in which the cucumbers will be grown. If the temperature remains very high throughout the day, then for watering you will need large containers that could hold a sufficient amount of water. It must be remembered that the temperature in greenhouses is higher than outside and therefore the plants will need more water.
It is not recommended to use small volume containers, as this will require you to add liquid to it too often. Therefore, you should abandon half-liter bottles. The best option would be to use two-liter containers, which will last for a week and a half.
However, if the summer is too hot, you will have to use five-liter eggplants so that the bushes have enough moisture. You should think about the possibility of using such a large container in advance, as it takes up a lot of space.
You should also pay attention to choosing the right fabric. It is needed to protect the bottle openings from contamination. To do this, the fabric will have to be wrapped around the outside of the bottle so that soil cannot get inside. It is recommended to choose a fabric that is not very dense so that water can pass through it freely.
To pierce the lids, it is recommended to use needles to make holes about one millimeter in diameter. If they are too large, the water will be quickly used up.
Design elements
Today, ready-made drip irrigation systems can be purchased in stores. They are selected according to the total length of the distribution branches, the type of drip lines, the distance between them and other parameters, which will be discussed in detail below. But many gardeners are interested in how to arrange drip irrigation in a greenhouse with their own hands, and whether it is possible to use improvised materials available on the farm.
Could be so. But in order to make a decision, it is better to first study the design in detail.
Sources of water and equipment for its supply
Water can be supplied to a drip irrigation system from a centralized water supply system, a natural reservoir, a well or a borehole. But the most common option is a large container installed on an elevated surface. The water in it is first settled and warmed, and then fed into the pipes by gravity.
Serving from a barrel is the most convenient solution Source yandex.ru
In all cases, except for watering directly from a centralized water supply system, it is necessary to install a pump that pumps water into the pipes at a given pressure. Or feeding it into a distribution container. The type and parameters of the pump depend on the type and depth of the source.
Since any water, even purified tap water, contains impurities in the form of fine sand, silt, particles of rust and undissolved salts, before watering the greenhouse, you need to take care of installing a filter. Without it, the system will quickly become clogged with debris and require cleaning. The main elements – the droppers – are especially affected.
The mesh filter is the most popular, inexpensive and easy to use Source yandex.ru
Pipelines
To distribute water throughout the entire bed or greenhouse, you need a main supply line and branches extending from it along each row of plants. The main pipeline is connected to a water source and equipped with a shut-off device. Most often this is a ball valve, but in an automated system connected to a pressure line or well pump, a solenoid valve is used.
The main line is made of plastic or metal pipes; watering hoses are less commonly used:
- Metal pipes are strong and durable, but their use in a drip irrigation system is not recommended due to their lack of resistance to corrosion. Rust microparticles quickly clog the drip holes.
- Watering hoses are subject to mechanical damage and are not durable.
- It is best to choose the option of making irrigation in a greenhouse with your own hands from PVC or HDPE pipes. These materials are distinguished by their reasonable price and sufficient mechanical strength, they do not corrode, and deposits do not form on their smooth internal walls.
Main line made of polypropylene pipe Source decorateme.com
See also: Catalog of country house projects
In ready-made systems, the role of distribution pipelines is played by drip tubes or drip tapes - flat thin-walled hoses with built-in drips. They come in two main types: emitter and slot:
- The emitter tape has a labyrinth inside with flat droppers located at a certain distance from each other. It can be compensated, which always ensures a constant flow of water from each drip, and uncompensated - its water flow through the drippers differs depending on the distance from the main line and the slope of the area. This type of tape is not cheap, but it does not clog easily and can be used for several seasons.
- The internal labyrinth of the slotted tape is equipped with droppers in the form of long slotted holes. They get clogged easily, so before you water the greenhouse with your own hands using this type of tape, you need to take care of a high-quality filter. But it costs much less than the emitter one, which, however, is offset by the short service life of 1 season in the open ground or a maximum of 2 seasons in a greenhouse.
Fragment of an emitter tape Source isanshop.ru
Drip tapes also differ from each other in such parameters as the total length, the distance between the droppers and their consumption characteristics, and wall thickness.
Note! Most belts are rated at around 1 bar. Therefore, they are used in gravity systems or a pressure reducer is used when connecting to a pressure water supply.
Drip tubes made of low-density polyethylene have thicker walls, so they can withstand high pressure and can work in pressure systems. They are also convenient because they are often produced without holes - they are made independently at the optimal distance for each crop. And external droppers are inserted into the holes or connected to the pipe using thin short hoses.
Drip tube with outlet for 4 droppers Source ekotec.com.ua
In ready-made kits you can find everything to assemble the system, including tubes of different diameters, droppers, adapters, bends for different numbers of outlets, and even pegs for fixing the tubes at the desired level. But all these elements can be purchased separately or replaced. For example, a very relevant question is how to make drip irrigation with your own hands in a greenhouse from a PVC pipe, since it is cheaper than its polyethylene counterparts, as are fittings for assembly.
Special droppers can be replaced with medical ones. They are good because each has a flow-regulating device in the form of a wheel that pinches the supply tube. But the tubes of medical droppers are transparent, which leads to rapid blooming of the water in them and, as a result, their clogging and the need for rinsing.
Homemade system of PVC pipes and medical droppers Source ro.aviarydecor.com
If you choose between drip tapes and tubes, then each type has its own advantages and disadvantages. The pipe system is more durable, it allows you to regulate the water flow and supply it individually to each plant. What is important when growing cucumbers, tomatoes, peppers and other “piece” crops. But it is more expensive than tape and more difficult to assemble.
Tapes are convenient to use when growing root crops, herbs, and strawberries. They are relatively inexpensive, easy to install and clean.
Automation
If the owners do not have the opportunity to constantly be on the site and monitor the condition of the plants, you can think about how to make automatic watering in the greenhouse with your own hands. This can be easily done by equipping the system with a timer. Depending on the functionality, such devices can not only turn on and off the water supply at a given time, but also individually control several lines, monitor the pressure in the network and the operation of pumping equipment, and serve as a water consumption meter.
Arrangement methods
There are four main methods by which you can create a bottle irrigation system. Therefore, before starting work, you should familiarize yourself with each of them.
Digging into the ground
The most common way to arrange irrigation in open ground is to bury containers in the ground with the bottom down. To do this, a small hole with a depth of at least 10 cm is made near each bush, into which the container will be placed. Then, using a tape measure, remove 3-5 cm from the beginning of the bottom of the bottle and make a mark. After this, holes in several rows are created in the marked area using a heated needle. About 10 holes need to be made.
See also Description of the cucumber variety Sheer perfection, its characteristics and care Read
The prepared bottle is carefully wrapped in cloth and placed in the ground upside down. Then it is buried and filled with water. Often, debris and soil fall into the water from above. To solve this problem, you should cover the neck with nylon or cloth.
Digging upside down
This method differs from the previous one in that the container will be placed in the ground upside down. Therefore, holes will have to be made in the lid or neck. To organize watering using this method, holes for containers are made near each bush. At the same time, you need to make them a little less than last time. Their depth should be equal to the size of the container neck.
Having finished creating the holes, you can begin preparing the containers. Using a well-heated nail, you need to make 5-10 holes on the lid or neck. If the soil is not very dense, then their number can be reduced.
After this, measure five centimeters from the bottom of the container and cut off the bottom of the container using scissors or a knife. Some gardeners do not cut it off completely and leave it to protect it from debris and quickly evaporate moisture. Then the neck is wrapped with cloth and it is placed in the ground.
Hanging
Some people do not want to expose the root system of cucumbers and therefore they refuse to dig containers near the bushes. It is in such situations that it is recommended to use this method. To organize watering using this method, you must first make holes in the bottom of the container. Several holes are also made to pass the wire through which the container will be attached.
After this, a structure is mounted above the bush to secure the container. Its height should not be too high. It is necessary that the distance from the bottle to the ground is about 40 cm.
Application of attachments
This method is the most expensive, since you will have to purchase special attachments for the bottles. Using them, you don’t have to waste your time digging containers into the ground. It will be enough just to attach the nozzle to the neck and deepen it into the ground.
Method number 2 - Stick it in the ground with the neck down
The second method differs in that the bottle is inserted into the hole the other way around, bottom up. Accordingly, the holes are made either in the neck or in the lid. It looks like this.
Step 1. Use a shovel to prepare a hole near the plant in the greenhouse. The diameter remains the same as in the first method, but the depth of the hole is much smaller - the height of the neck of the container.
First you need to dig a hole
Step 2. Several small holes are made in the neck or lid itself using a hot nail. Their number depends on how dense the soil is and how well it absorbs moisture - the better, the fewer holes there should be, and vice versa.
Heat the nail Burn holes with the nail Cut off the bottom
Step 3. Measure 4-6 cm from the bottom and cut off the bottom of the bottle using a stationery knife or regular scissors. If you do not want debris to get into the container from above or moisture to evaporate from it too quickly, the bottom should not be completely cut off, and then bent to the side, like the lid of a tin can.
Step 4. The part of the container where the holes are located is wrapped with cloth. If desired, the fabric can be placed inside the bottle itself.
You need to put a mesh cloth inside the bottle so that it does not become clogged with debris.
Step 5. The neck of the bottle is buried in the hole. If desired, the container can be buried at an angle of 45 degrees towards the root system.
Compared to the first method, digging a hole for a similar design of an irrigation system is a little easier, but in this case the water is not delivered to the entire root system of the plant, but only to the lower part. The choice of the more preferable option is up to you.
System Description
Drip irrigation is the organization of timely watering of plants using storage containers and water. A simple, effective way to supply moisture directly to each sprout . Water easily passes through the top layer of soil, filling the roots with life-giving moisture.
Experienced gardeners know firsthand that a good harvest depends on the quantity and quality of timely irrigation. Cucumbers require warm water in large volumes. Drip irrigation will be an excellent help throughout the entire vegetable ripening season.
Overwatering threatens the development of fungal diseases. The drip system is an alternative solution. Specialty stores sell a variety of prefabricated irrigation systems. They take time to install. Not everyone likes the pricing policy.
Installing drip irrigation yourself using plastic bottles is a solution that does not require financial costs . Using available materials, it is easy to make such a system for anyone.
Automated irrigation system
Of course, using bottles is not as convenient as automated watering. In this case, a special device is used - an automatic water supply timer. It can be ordered online. They may be available in specialty gardening stores.
This method is good because once installed,
- you can adjust the frequency of watering, duration, days of the week;
- use for a long time, even without putting it away for the winter;
- it is easy to assemble, even a woman can handle it;
- Water can be supplied from a water supply or from a barrel.
For more details on how to use automated drip irrigation, watch this video.
Advantages and disadvantages of a bottle watering system
All the pros and cons collected by gardeners will help you make sure of the need for such an installation on your site.
First, about the advantages of the bottle system:
- noticeable water savings (more watering cans or hoses are used);
- autonomous operation of the system (you can safely leave the garden bed unattended for several days);
- versatility: the possibility of application does not depend on the type of soil, the method of growing vegetables (greenhouse, vegetable garden);
- availability of material;
- ease of installation and maintenance;
- targeted targeted moisture ingress;
- absence of hardened earthen crust around the plant;
- reducing the need to loosen the soil around the bush;
- slow evaporation of moisture (only on hot days will you have to monitor the condition of the plants: do they need additional watering);
- saving money;
- facilitating human labor;
- the top layer of soil is not washed away;
- the roots receive warm liquid (they have time to warm up under the rays of the sun);
- simplification of application of fertilizing (only to seedlings).
Drip irrigation saves the amount of liquid and allows it to flow directly to the roots
Weeds rarely germinate in such an area.
Now let's talk about the disadvantages:
- frequent clogging of holes ;
- the impossibility of using such a system on a large plot: a lot of containers will be required, the garden does not look aesthetically pleasing;
- limited fluid volume;
- difficult to use on heavy soils (bottles often become unusable when they become clogged);
- on hot days, plants receive little moisture from such a supply.
For cucumbers and tomatoes, drip watering using bottles will not replace full watering : depending on the weather, the sprouts will require additional moisture.
Advantages of using drip irrigation in the country
The main advantages of drip irrigation are the receipt of the required amount of moisture by the root system, as well as minimal physical effort and material costs. This type of irrigation is of interest to many summer residents and gardeners, since the drip irrigation system can be left unattended.
Watering beds using plastic bottles has a great advantage - it is almost completely self-sufficient. Thus, a person does not need to stand with a hose or carry heavy buckets one after another to water the plants.
Automatic drip irrigation has many advantages. For its effectiveness to be high, you need to choose the right drip tape.
Unfortunately, a ready-made drip irrigation system connected to a centralized water supply is quite expensive. Therefore, summer residents and gardeners have come up with a good alternative - using old used plastic bottles. Of course, this option is not completely autonomous, since from time to time you will need to add water to the container.
But, nevertheless, such watering minimizes human resources
, so you can pay more attention to other things or spend time relaxing. Drip irrigation using plastic bottles has the following advantages:
- No need to purchase material. Plastic bottles are something that can be found in almost every home one way or another;
Ease of execution. By following simple instructions, you can do everything yourself, even if you have no experience in creating such systems;
Saving. This type of watering allows you to significantly save time and effort that is spent on traditional types of watering;
Easy to use. All you need to do is go around the garden and fill the containers with water;
Rationality of watering. Water immediately flows under the top layer of soil, nourishing the root system of plants. Also, water will not spill over a large area and evaporate due to high temperatures in the summer. Thus, homemade watering favors the full development and subsequent strengthening of the plant’s root system;
No waterlogging. When watering with a hose, a so-called “swamp” often forms in the holes. Drip irrigation helps avoid this;
Reduces weed growth. This system also allows you not to wet the excess surface. Thus, favorable conditions are not created for the growth of all kinds of weeds, and this, in turn, makes it easier to care for the land.
This method of irrigation will be especially useful for those summer residents who, due to circumstances, can only come to their dacha once a week. In this case, they will only need to fill the container before leaving. This volume of water will be enough so that the plants do not need moisture while the owner is away.
Did you know? Drip irrigation from plastic bottles can work on the principle of solar distillation, which is good for hot summers. To do this, place half a 1.5-liter container of water on the pre-mulched soil near the plant, and cover it with a five-liter eggplant without a bottom. When heated, the moisture will turn into steam, which will settle in the form of drops on the walls and then roll down to the soil. Thus, the stronger the heat, the better the soil will be moistened.
Description of drip irrigation of cucumbers and tomatoes
Such a life support system for vegetables is entirely justified. With its help it is easier to achieve a good harvest of cucumbers or tomatoes. There are many ways to install such a structure. Let's look at some of them.
Lid up
A universal option. Common among summer residents. Suitable for greenhouse and open area.
Bottle system with cap up
- Measure 3 cm from the bottom. Using an awl and a gypsy needle (whatever you can find in the house), pierce holes lengthwise to the place where the narrowing begins . The number of holes depends on the type of soil and container volume. On average - 10.
- Make a hole near the bush so that the dishes fit up to the neck (the conical tapering part should protrude above the ground).
- Wrap the bottle in cloth, place it in the hole, fill it with water, and close it with its original cap.
Lid down
Cut off the bottom completely. Screw the lid all the way, pierce it in a circle. Bury the dishes near the stem without damaging the roots . Wrap with gauze to protect from debris.
Root watering
Choose small volume flasks - 1.5 liters . Pierce the lid with a hot needle. Place nylon fabric between the lid and neck and screw tightly. If this system is planned in advance, first dig the bottle halfway into the ground with the cut bottom up. Pour in the seeds and fill the container.
Special nozzles for root watering
The seedlings are planted - no problem. The flask can be placed at a slight angle by pushing the neck closer to the roots. Cut the bottom accordingly as well, maintaining a certain angle (more liquid can fit in).
A more expensive option is to screw in special attachments (sold in garden centers). It is convenient to stick them near the root. The downside is that a strong wind can overturn such a structure.
Another method of root hydration requires cocktail straws and juice. Place the container between two stems. The required length to the root is measured from it. One end of the tube goes inside the container. A plug is placed on the other. A tube is pierced from the bottom of the seedlings so that the liquid flows to the desired place.
Suspension
For a small bed of cucumbers, a hanging option is suitable. Make a frame of timber and wire along the row. Pierce the bottles with a through hole on both sides. Thread the twine. Screw to the wire above the seedlings. Pierce the bottom.
Adjust the uniform supply of moisture . Make sure that drops do not fall on the leaves. Otherwise, a burn is guaranteed.
Diagram of a suspended irrigation system
Temperature compliance
To obtain a large amount of harvest, in addition to moistening the soil, you need to observe the temperature regime when growing cucumbers in a polycarbonate greenhouse.
It affects the growth of fruits and their taste characteristics. If the regime is not followed, diseases progress, and the crop is quickly affected and may even die. Comfortable temperature conditions for cucumbers should be as follows: The temperature should not change sharply; a sharp difference of several degrees is not acceptable at any time of the day. To make it easier to control the temperature in the greenhouse, install a thermometer. The readings are assessed daily. If the seedlings were just planted outside, and frost suddenly began at night, you can raise the temperature in several ways:
If the greenhouse, on the contrary, gets too hot during the day and the temperature in it exceeds 20 degrees, it is reduced by ventilating through vents and doors.
The cucumber root system stops absorbing moisture if the temperature drops to 10 degrees.
How to organize a system of plastic bottles in a country house or greenhouse
The experience of summer residents shows that a liter bottle feeds cucumbers and tomatoes for 5 days , a three-liter bottle for 10 days , and a 6-liter bottle for 15 days .
Provided that there is accurate knowledge of the predominant type of soil. From it the calculated number of holes is calculated and the size of the container is selected. All that remains is to choose the appropriate option for installing drip irrigation. Prepare tools, materials, dishes. Take the time, install and enjoy the work done.
There are no boundaries for perfection. Having set aside a day to install such a structure, you can actually come up with your own version and you won’t have to water the plantings with your hands. The garden will thank you for your efforts with a generous harvest.
Source: profermu.com
Watering rules
Cucumbers need to be watered correctly, taking into account the characteristics of the vegetable. The root system of plants is located close to the soil surface, in the upper layer of the earth. If you water the plants abundantly, the moisture does not stay in the top layer for a long time and quickly goes down. The surface dries out quickly, and the roots lack moisture. To prevent this from happening, the following conditions must be observed:
If there is a lack of moisture in the soil, the taste of greens will become unpleasantly bitter, it will be impossible to eat them, which means the crop can be thrown away. If the soil is over-watered, this will have a detrimental effect on the development of the root system and the health of the plants. The culture is quickly affected by a fungal infection, rots and dies.
Before watering the plantings, you need to assess the condition of the soil. If it is dry to a depth of more than 5 cm, you need to water the plants.
Ways to place plastic bottles
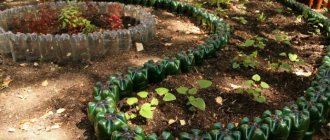
It is easy to evaluate the advantages of an irrigation structure assembled from plastic bottles: just remember the availability of the source material. Let's add to them a number of advantages:
- installation of a system from bottles does not require practically any financial costs, the main thing is to stock up on the required amount of plastic containers;
- you can build a structure without any creative skills;
- self-watering, made by yourself, is suitable for use both in open ground and in greenhouses, conservatories and hotbeds;
- perfect for irrigating green hedges, flower beds, shrubs, beds;
- saving time and effort: bottles are easily and quickly filled with water;
- dosed moisture goes directly to the roots of the plants;
- the flow of water is carried out evenly, without washing away the roots with a stream of water;
- when used in a greenhouse, drip irrigation does not over-moisten the soil surface, preventing the appearance of weeds, and soil compaction does not occur;
- soil covered with mulch does not require additional loosening;
- the moisture concentration in the greenhouse is minimal, which reduces the risk of dampness and the spread of diseases;
- in the absence of a central water supply on the site, this irrigation system provides significant savings in water resources;
- water poured into bottles warms up quickly, which is important for some garden crops - for example, cucumbers;
- easy to install, all design parts can be easily replaced with new ones;
- When using meters for tap water, flow rates change slightly.
Scheme of the future system
Drip irrigation, made from plastic containers, is a water supply network of several branches. With its help, liquid is supplied to the root system of plants. The bottle design has a simple design. First, fill the barrel with tap water. The liquid then flows through tubes into bottles. Through holes made in the walls of the container, moisture penetrates to the roots of the plants.
Some vegetable growers are improving the proposed scheme and making it automatic. For this purpose, the system is equipped with special rain sensors. They analyze the condition of the soil and determine the need to supply water to the bushes. Automation makes it possible to determine the optimal dose of liquid for plants.
A few shortcomings do not change the picture
The obvious advantages of irrigating plants using plastic bottles outweigh its disadvantages, but, unfortunately, they exist. You should know that:
- organizing such a system over a large area with open ground is impractical and time-consuming;
- drip irrigation is optimal as a temporary measure to maintain soil moisture; it cannot serve as an alternative to full irrigation;
- plastic bottles are not suitable for watering on heavy clay soils (their irrigation holes quickly become clogged).
Watering options from plastic bottles
Description and technology of irrigation
Today there are a huge number of ways to water a garden. The quality of the harvest harvested from the garden at the end of the season directly depends on the correct choice and efficiency of the irrigation device. But creating a full-fledged irrigation system is quite difficult, since not always one method will fully satisfy the needs of all plants planted in the garden.
Today, many gardeners choose a drip irrigation system. This method is suitable for watering both unpretentious plants and very capricious crops in terms of water regime. Separately, it is worth noting that to create a full-fledged drip irrigation device you will have to spend significant funds on the purchase of fittings, a special tap and other pieces of equipment. At the same time, many craftsmen advise using ordinary plastic bottles to solve the watering problem more economically.
You can create a high-quality irrigation system from plastic bottles and at the same time save significant money by avoiding the purchase of expensive elements and equipment. Most of the system here can be replaced using plastic bottles. It's also worth noting that by using this DIY approach, you'll not only save money, but you'll also be able to create a system to water your entire property rather than just a section of it. Moreover, even when you leave your dacha or garden for a couple of days, no one will steal your drip irrigation device. Bottles are a low-value “good.”
This system consists of drip hoses or tapes and individual drippers. With the help of the latter, it is possible to control the amount of water consumed. Each dropper can pass a specific volume of water per unit of time. Most often, droppers are divided by volume into 2.4 and 8 liters of water per hour of operation.
With such a simple organization of watering, any gardener can independently replace its elements with plastic bottles. Experts recommend using a type of irrigation device in which the droppers are directly built into the main plastic pipe. This way you will create a linear irrigation system.
The entire operation of the drip irrigation device, created from plastic bottles, is based on a dosed water regime of plant nutrition, in which water consumption is reduced during irrigation.
It should be noted that such a drip system has the following advantages:
- does not change the composition of the soil;
- prevents water starvation of plants in the garden;
- water is supplied constantly or, if necessary, in small quantities for each plant;
- watering is carried out with heated water, which is heated as it passes through the pipes;
- moistening the soil to a depth of one meter;
- the system can operate in any conditions - in greenhouses, open ground, etc.;
- the possibility of using the device for drip fertilization of plantings with liquid types of fertilizing;
- a convenient system for watering both plantings and fruit bushes and trees.
The created device can have a manual type of water supply to the plantings (for private gardens) or an automated system using controllers (for large sown areas).
And to create such a design, plastic bottles are perfect. But if everyone understands the principle of operation of such a device, then not every gardener will be able to make a full-fledged and perfectly working drip irrigation system with his own hands from plastic bottles.
Today, there are several ways - simple and complex - to create drip irrigation from plastic bottles. We will present below the simplest, most accessible methods for collecting irrigation devices, which can be easily implemented with your own hands in any garden plot.
Some practical recommendations
The practical experience of those who have assembled similar structures more than once will be useful to beginning DIYers. Various plastic bottles are suitable for organizing micro-irrigation, but there are some secrets in their use. Here are some useful tips:
- If the design is designed for caring for cucumber beds, it is better to take 2-liter containers; in some cases, 5-liter bottles are also suitable.
- The diameter of the punctures should be as small as possible (1-1.5mm) so that the water does not drain away too quickly.
- You can protect bottles from soil getting into them by wrapping them in burlap or old stockings.
- The amount of containers required is calculated based on the number of plants. The ideal ratio is 1 bottle per 1 plant bush.
- The amount of watering depends on weather conditions, soil type, and frequency of visiting the site. For bushes in open ground during the growing season, 3-4 liters of water per week is enough. When flowers and ovaries appear, the plant requires 6 liters of water. If the weather is hot, for normal irrigation you need 12 liters of water for 3 days. The moisture consumption in the greenhouse must be increased due to its intense evaporation.
The degree of watering can be adjusted as needed.
- The ideal period for installing bottles in the soil is the moment of planting seeds.
- The container with water should be placed at a distance of 15cm from the plant. The depth of the bottle is 10-15cm. The container can be placed either vertically or slightly tilted by 30-40 degrees.
Homemade automatic watering is actively used and is a great help for many summer residents. The bottles are used for irrigating tomatoes, eggplants, berry bushes, and flower beds. The simple design does not require special financial investments, is easy to assemble, does not deteriorate for a long time, and withstands weather conditions well. In addition, drip irrigation protects the plant root from excessive dampness and drought. The following video has been carefully selected and will certainly help you understand what is presented.
Source: fermerx.ru
How to properly water cucumbers in a greenhouse - advice from experienced gardeners
To grow tasty cucumbers in a greenhouse, the gardener must monitor the regularity of watering and the ratio of soil moisture to air. Watering cucumbers in a greenhouse should be moderate - no more than five liters of water per 1 m² of seedlings once a week. After the first ovaries of plants appear, the amount of moisture consumed by plants increases: increase the volume of water to 12 m², and the frequency of watering to two or even three times every seven days. Be sure to pay attention to the appearance of the leaves. At the first yellowish spots or complete yellowing of the leaves, check the plants for pests and fungi. With excessive and frequent watering, cucumber leaves also turn yellow, root rot appears, and the fruits themselves grow watery and tasteless.
What drip irrigation systems can you buy in the store?
Brief overview, price
There is a sufficient and varied selection of irrigation systems on sale.
The drip tape of the Autopoliv-75 system is made of hollow pipes. The total length is 75 m. Droppers are built into the pipes every 30 cm. Designed for 150 m of beds. Price 1200 rub.
Drip irrigation system for manual watering of 60 plants “AquaDusya”, price from 2400 rubles to 3800 rubles. depending on the configuration. Connects to the barrel. The barrel and tap are not included. Pencil type droppers.
The Optima drip irrigation set produced by the manufacturer is designed to process 116 plants, the hose length is 35 m, water is taken from the water supply, the price is 880 rubles.
The drip irrigation system “Cap-Ley” dispenser operates in automatic mode, designed for an irrigation area of at least 18 sq.m. Spot watering of 36 plants is carried out along one line. Price 2530 rub.
Gravity drip system
Drip irrigation of cucumbers in open ground will be carried out using it, or in a greenhouse - it doesn’t matter, it is suitable for both cases.
Choose a suitable container. Its volume should be enough for the number of beds that you have. The base for it can be assembled with your own hands from boards. If there are several beds, then it will be enough to install the barrel at a height of 1.5-2 meters. By the way, try to immediately find a barrel that has a tap on it, then you won’t have to install it yourself. It must be installed from below, but at a distance of about 7-10 cm from the lower base, so that debris accumulating at the bottom does not enter the system. Each bed should have one drip tape or one hose with small holes. You can make them yourself, but it would be a good idea to purchase a model with already built-in droppers. This makes it easier to calculate the distance between each cucumber bush so that the watering tape supplies moisture directly to the root system.