Tomato is one of the most beloved and popular vegetables in our country. Nowadays, imported tomatoes can be bought at any time of the year, but, you see, these “foreigners” do not have that same tomato smell and taste, reminiscent more of fodder beet than a tomato. And what is summer without ruddy, juicy, ripe, bright red, yellow, brown beauties? But in order to reap a good harvest in the summer, you will have to work hard.
One of the stages of preliminary work should be preparing the soil for planting tomatoes .
Soil value
When growing tomatoes, you need to take into account that the roots of this crop are highly branched and have a superficial location. From the top soil layer, plants take the maximum amount of moisture and minerals necessary for full development.
Taking this into account, soil is selected for planting tomatoes:
- moisture-absorbing and water-permeable;
- soft and crumbly;
- rich in nutrients;
- heat-intensive and heat-permeable.
If the substrate does not meet the above characteristics, then you should not count on high yields.
You can tell if tomatoes like the soil by their appearance:
- If the soil is poor in nitrogen, the stems look frail and thin. The leaf blades do not reach normal size and have a pale green color.
- With phosphorus deficiency, tomatoes grow slowly. The leaves take on a burgundy, almost purple color.
- If there is a lack of potassium in the soil, the edges of the leaf blades have a brownish color.
- With calcium deficiency, tomatoes do not grow, the upper parts of the shoots darken and rot. Few fruits are produced.
Ways to improve the soil
Often the soil on which tomatoes will be grown is not suitable for this. However, this is not a reason to remove the fertile layer and replace it with imported soil. It is enough to know 3 ways to improve the soil, which are available to every summer resident:
- Sowing green manure. This method helps to structure the soil, fill it with nitrogen and organic matter. Plants are sown throughout the warm season and mowed before flowering. The straw is left as mulch, under which beneficial microflora and worms develop. The method is implemented on clay, peat and sandy soil.
- The addition of organic matter (humus, compost) makes the soil lighter, more air- and water-permeable. In the first year, add 1 bucket of additives per square meter in spring and autumn. In subsequent years, with each digging, ½ bucket/1 sq. m. is added. This method is ideal for clay and peaty soil. To improve sandy areas, the application rate will have to be tripled.
- Regular digging and loosening helps saturate the soil with air and prevents its compaction, so the method is more suitable for clay and peaty soils. The method helps to get rid of weeds and evenly distribute loosening and nutritional components in the fertile layer. Sandy soil is loosened less often, and dug up only at the beginning and end of the summer season.
The listed methods of changing the soil for the better have a long-term effect, especially if they are used for at least 3 years in a row.
Important! The process of soil improvement lasts several years. A single application will not change the structure of the fertile layer, but will only increase its nutritional value for a short time.
Requirements for soil composition and acidity
Optimal soil for tomatoes:
- loose;
- rich in organic matter;
- drainable;
- free from harmful insects;
- easily transmits heat;
- rich in essential minerals;
- with a temperature of 18-20°C;
- with an acidity of 5.5-6.8 pH (ideal value 6-6.5).
Tomatoes grown in open ground are capricious. In order for them to grow well, the garden soil must meet the following indicators:
- porosity – 70-75%;
- air capacity – 20-25%;
- moisture capacity – minimum 45%;
- density – 0.5 g/cm2.
The most important parameter is moisture capacity. Tomato roots are strong, developed, highly branched, most of them are located in the 50-centimeter surface layer of soil. Therefore, the bushes need regular and abundant moisture.
If there is a lack of moisture, tomatoes bloom poorly, produce few ovaries, and the fruits do not grow to normal size. Therefore, soil for tomatoes should absorb and pass water well.
You cannot be sure of the quality and safety of garden soil in a greenhouse. There is a high probability that after the removal of previous crops, pests and infection remained in the soil.
Planting green manure
There is one more important question. What are these weeds we have here? It was we who sowed winter crops before winter - oats and vetch. The fact is that the soil structure has improved. This year, literally a week ago, they dug it all up. There is no need to be afraid of this. Some gardeners are afraid and do not plant green manure either in the fall or in the spring. If you have time to plant in the spring, no problem. In a month or a month and a half, they will sprout and improve the soil with both structure and nutrition.
For example, vetch is a legume that is often planted to nourish the soil. Look at the roots here. There are some white tubers on the roots, like knobs. This is nothing more than nitrogen. These are nitrogen-fixing tubers. And, it is clear that now we will not need nitrogen before fruiting. And maybe even more if last year’s food is enough. Because we contributed a lot. We always say that if you add nutrients once, you don’t have to add them another time. You can simply use crop rotation to select crops that require less nutrition. And this vermicompost will still work. In the third year, plant another crop that consumes very little.
We planted tomatoes last year and we are planting tomatoes this year. There is nothing else left for us. There is little space, nowhere to roam. Therefore, we will contribute food. First we must disinfect the soil. We do this both in the fall and early spring. We treated the soil with pharmaiod. So, I hope we are free of diseases, pests, etc.
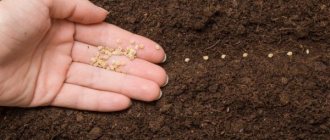
How to prepare substrate for tomatoes at home
To make high-quality and safe soil for tomato seedlings, several components are mixed. Substances are taken in the correct proportion.
A good soil mixture for tomatoes:
- Combine turf, peat and sand in equal proportions.
- Stir thoroughly.
- Add a nutrient solution containing 25 g of superphosphate, 10 g of urea, 30 g of potassium sulfate per 10-liter bucket of water.
Another good substrate option:
- Combine turf, peat, and humus in equal proportions.
- Add 45 g of superphosphate and 0.5 liters of ash to a large bucket of the prepared mixture.
If the soil on the site is relatively fresh, then you don’t have to take new soil instead in the next growing season. Sometimes disinfection and nitrogen saturation are enough. For the latter purpose, after harvesting before the winter cold, green manure herbs are grown in the area intended for tomatoes.
Preparing the soil for the new season begins in the fall after all the fruits have been removed. Plant residues are disposed of so that they do not become a source of infection and pests that remain in the soil until next year.
In the spring, before sowing seeds or planting tomato seedlings, the soil needs to be warmed up. For this purpose, after the snow melts, it is watered generously with hot water. Another insulating treatment is possible - adding organic matter. The best option is horse manure. As it decomposes, it quickly heats the soil to a temperature optimal for young tomatoes. You can plant the crop in a few days.
Preparing soil for tomato seedlings
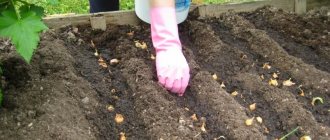
You should prepare the soil in which the seedlings will grow in the fall.
1. To do this, you need to prepare a mixture consisting of soil, to which compost and humus are added in a ratio of 1:1:1. The soil mixture is enriched with fertilizers: superphosphate (3 tbsp), potassium sulfate (1 tbsp), ash (2 cups).
An alternative soil preparation option for those who prefer organic farming: garden soil or good forest soil is mixed with one part humus and one part fine sand. After the mixture is sifted through a sieve, a glass of ash and one hundred grams of eggshells are added to it (it can be successfully replaced with crushed chalk).
Please note a fundamentally important point: ash is added to the soil mixture in the fall; it will be neutralized until spring. But if you add it immediately before planting the seedlings, the roots will get burned.
If you have not taken care of preparing the soil in advance, do not add ash, water the seedlings with an extract from it (1 cup is infused in 10 liters of water for 24 hours, stirring occasionally. The extract must be filtered through several layers of gauze).
2. In order to kill pests and disinfect the resulting soil mixture, it is recommended to steam it in a water bath under a lid for an hour or two. Then let it cool.
3. Store the prepared soil in boxes or plastic bags outside. In the cold, harmful bacteria that threaten seedlings die.
Which soil mixture is better to buy?
It is quite difficult to understand how correctly a store-bought product is made, whether it is suitable for tomatoes, and whether the storage conditions in the warehouse were observed. Therefore, it will not hurt to treat the purchased substrate for the prevention of fungal diseases with the drug “Fitolavin”. Take 2 ml per 1 liter of water.
When buying soil, you need to pay attention to the composition. Many store-bought seedling substrates are peat-based and require deacidification before they can be used for growing tomatoes.
Pros of purchased soil mixture:
- complete readiness for use;
- saturation with an optimal set of mineral elements;
- optimal moisture capacity;
- Convenient packaging in bags of different sizes.
Disadvantages of a store-bought product:
- approximate indication of nutrient concentrations;
- inaccurate acidity level;
- using peat dust instead of peat in poor-quality soil.
Processing the greenhouse before planting tomatoes
You should prepare for planting tomatoes in advance. As soon as the temperature allows, it is recommended to treat the greenhouse:
- Remove plant debris: dry leaves, tops. Clean the walls and ceiling from adhering plant parts.
- Wash all surfaces with soda ash solution. Be especially careful to clean all crevices with a brush: there may be hibernating insects there.
- Spray all surfaces with antifungal agents. This will destroy any remaining spores.
- It is especially important to clean the roof of the structure: dirt has accumulated on it over the year, which will reduce the illumination of the planted plants.
When cleaning the greenhouse, you should step on the soil as little as possible: put down boards and plywood panels.
Compliance with crop rotations
Plants of the same family (nightshades), placed one after another in a greenhouse, draw the same nutrients from the soil. And their pests are also the same. They parasitize on bushes, and then burrow into the soil and successfully winter there. Sometimes a greenhouse owner thinks: the annual application of mineral and organic complexes will quickly restore soil fertility in the greenhouse.
But if crop rotation is not observed, the farmer receives soil with an excess of some nutrients and a deficiency of others.
When planting tomatoes after peppers or eggplants, the yield is significantly reduced. And tomatoes begin to get sick much more often. Productivity decreases, and with it the profitability of the enterprise. Good precursors for tomatoes: marigolds, calendula, phacelia, lettuce, radishes, white mustard, oats, rye. These plants improve the soil health and destroy pests (wireworms). And cut and embedded in the soil will enrich it with nitrogen.
How to improve purchased soil
The substrate sold in stores is not always suitable for sowing seeds and growing tomato seedlings.
The first thing you need to check is whether the composition contains peat. If present, deoxidation is required. For this purpose, ash is added to the soil. A glass of wood powder is enough for a 10-liter bucket of soil mixture.
If the substrate is based on peat, then you need to add turf and humus to it in equal proportions. If the looseness is low, then river sand is added. If store-bought soil doesn’t contain perlite or vermiculite, it won’t hurt to add one of these components.
Store mixes
To grow tomato seedlings, you can use ready-made substrates sold in specialized gardening stores. Such soil mixtures have a balanced composition, specially designed for tomato seedlings.
Popular store-bought soil mixtures:
- Terra Vita “Living Earth” is a nutrient substrate based on high-moor peat, sand and vermicompost. High-moor peat improves oxygen access to the root system of seedlings and retains moisture in the soil for a long time. It has a universal purpose and is suitable for growing seedlings of many vegetable crops. Additionally, the substrate is enriched with perlite, growth stimulants, and mineral elements. Has neutral acidity.
- The miracle bed “Tomato and Pepper” is a nutrient substrate based on high-moor and low-lying peat. Loose and breathable soil is designed specifically for growing tomato and bell pepper seedlings. The soil mixture is homogeneous and breathable.
- A microgreenhouse is a universal substrate intended for growing vegetable and flower crops. Thanks to its carefully balanced composition, this substrate improves the germination of tomato seeds and provides them with complete nutrition.
- Malyshok is a soil mixture intended for growing tomatoes and other nightshade crops. The substrate is additionally enriched with mineral elements, dolomite flour.
- Agricola is a soil mixture with a balanced composition, ideally suited to the needs of tomato seedlings. Contains increased concentrations of nitrogen, phosphorus and potassium. In this case, the acidity of the substrate does not exceed 5 units.
- BIUD soil is a soil based on high-moor and low-lying peat, river sand, phlogopite, bone meal, vermiculite and dolomite flour. Additionally, the composition is enriched with special manure compost “Biud”.
- Humimax is a ready-made soil containing disinfected river sand, lowland peat, and beneficial humic acids. It stimulates the growth and development of seedlings and is also considered an effective adaptogen.
- Our flora is a nutritious substrate containing peat, river sand and humic acid salts. Additionally, the soil mixture includes a mineral complex of nitrogen, potassium, phosphorus, magnesium and calcium.
It is better for beginning vegetable growers to choose ready-made store-bought substrates. They have a balanced composition and contain all the mineral trace elements necessary for tomato seedlings for rapid growth.
For growing tomato seedlings, a substrate marked “Universal” is more suitable . It is advisable to choose a soil mixture that includes two types of peat, river sand or vermiculite, as well as mineral elements. In this case, the amount of potassium, nitrogen and phosphorus should not exceed 350-400 mg per 1 liter.
Store-bought soil, like home-prepared soil, requires disinfection. To do this, pour the soil into a bucket, pour boiling water over it and leave for 35-40 minutes, covering with thick plastic wrap or a lid. After this, pour the soil onto the film and leave to dry completely.
preparing a bed for cucumbers
Alexei
Whatever you put as organic matter under the cucumbers will work. If you doubt the quality of this organic matter, pour it with Baikal M 1, preparing the solution according to the instructions. This will help you get rid of pests and diseases. In addition, this product perfectly increases the speed and degree of decomposition of organic matter to the level of elements absorbed by the plant.
White Song of Corn
yes, and the hay is even higher, warm fluffy, if there are still good varieties of cucumbers, what will you do with it?
Nikolay Tsuprunov
There should be a special box or humus heap on the site for tops and collected weeds. Prepared compost should be added to the beds. Fresh tops carry a large number of pests and diseases for which you have a wonderful winter.
Hot beds for cucumbers - warming up the harvest
Preparing a bed for cucumbers
The root system of cucumbers is close to the surface, so they are very sensitive to cold. In order to fully grow and bear fruit, they need warmth, which is often interrupted in the spring. You can set up the “heating” of your site in several simple ways.
- Warm ridges. Dig a ditch 30 cm deep and 60 cm wide. Place fresh, hot manure slightly above the edge of the excavation, which serves not only as an effective fertilizer, but also as a good biofuel. Make a small depression in it, fill it with turf mixture and cover it with a layer of earth up to 15 cm. If the soil is heavy, you should add a bucket or two of sand. Vegetables are sown or planted closer to the center. The gap between plants in one row is about 15 cm, the distance between rows is 20 cm. Steam beds for cucumbers are arranged both on the surface of the ground and above it, using a wooden or slate fence. We install a box 1 m wide and 2 m long. We form a fertile substrate in it from the following layers:
- sand;
- wood or rag waste;
- organic waste;
- leaves, straw;
- liquid manure;
- soil and compost.
Some gardeners recommend pouring boiling water over the soil for cucumbers a few days before sowing and covering it with a dark film, securing it with pipes or bricks. Seeds can be lowered immediately after watering, while still in hot soil.
It is better to add the “vitamin cocktail” a week in advance so that the manure settles and cools a little. As fertilizer, you can use organic matter not only of animal, but also of plant origin: hay, straw, leaves, grass, even food waste. To speed up decay, the mixture is irrigated with a strong solution of potassium permanganate.
- Ridges on grass. A lot of mowed grass will be required for laying. First, a trench is dug with a garden fork. Then all the herbs you collected are thrown in there. During breaks between work, prepare a “broth” from potato peelings and moldy bread crusts (1 bucket for 1 cartload of grass). Pour boiling liquid over the trench and fill it with previously removed soil. Thanks to the starch contained in the peelings, the decomposition process will proceed much faster. The scalded grass will immediately begin to generate heat, and to prevent it from evaporating in vain, cover the “dugout” with film. By planting the seeds in a heated substrate, the greens will grow by leaps and bounds. The languishing grass will provide them with plenty of moisture and nutrients.
- Steam ridges. When arranging ridges, furrows are made with a slope to the south, rolling soil on both sides of each of them. The organic mass is placed in a 20 by 30 cm hole and covered with a layer of soil. The distance between the trenches is up to 80 cm, the plants in a row are about 15 cm. “Heated” ridges can be made for surface or deep laying. In the second option, furrows 25-40 cm deep are dug with a shovel or cut with a plow. Organic matter is placed in them, and on the way back they are covered with earth. The slopes are compacted using a shovel or a board with handles. To improve the microclimate inside a cucumber plantation, protective curtains are often created - crops of tall garden plants (peas, tomatoes, potatoes, beets).
Site selection and planting
A suitable place for cucumbers can be determined by the following indicators:
- good lighting;
- protection from the wind,
- “fed” fertile layer.
Accordingly, the soil for cucumbers should be moist, loose and well fertilized.
This culture is very sensitive to predecessors. They prefer to have a place “heated” for them by vegetables such as beets, carrots, cabbage, legumes or green crops. But she can’t stay in the pumpkin habitat zone for two years in a row. They leave behind pathogens characteristic of this family, so a new batch of greenies can easily pick up something.
Depending on the composition of the substrate, it is recommended to grow cucumbers either on a flat surface or on beds or ridges. The first option is more suitable for the southern regions of Russia, which are characterized by sandy, well-warmed plantations. But in the central and northern regions, it is best to start arranging cucumber “dugouts”.
Taking advantage of the fact that gherkins are a vine, you can greatly improve the nutrition of the stem, thereby increasing plant productivity. For new roots to appear, it is enough to press down the whip in several places and secure it with a pile of damp soil.
Feeding and care during the formation of cucumbers
If you don’t know what to feed the cucumbers after sowing, choose humus and rotted manure - you won’t go wrong. If you add fresh organic matter, the fruits will grow, form voids, and lose their taste, so they resort to it mainly in the fall. The rate of application of these substances is regulated depending on the composition of the soil: for heavy soils - 4 kg, for light soils - 3 kg.
To obtain stronger shoots, use mineral fertilizers for cucumbers: nitrogen, potassium (20-25 g per 1 m2), granulated superphosphate (40 g per 1 m2).
You can find out what kind of feeding is required in a given period by external signs: pale leaves - lack of nitrogen, vigorous growth, weak flowering - phosphorus and potassium. Mineral “doping” is alternated with organic doping, which is also used as mullein or chicken droppings. Fertilizing is carried out in moist soil, additionally watering the leaves with water to avoid burns.
The first pumpkin shoots usually appear 5-8 days after sowing. These delicate plants are protected from frost and cold snaps with burlap, grass, and spruce branches, which are placed on top of the frame. Rows that are too dense need to be thinned out. After each watering, it is advisable to loosen.
Yield results are also affected by how often you plant cucumbers. Unnecessary side shoots that take away useful substances from the main sprout, mercilessly remove when they reach a length of 7 cm. When 8-10 leaves are formed on the plant, leave two greens and leaves on each extra shoot, and three more than 11. The grown lash is wrapped several times around a rope and left until new ovaries appear, after which the growing tip is removed. To make the procedure painless, you need to pinch off the stepsons almost right at the stem, slightly pulling the leaf to the side.
Perhaps these methods of laying beds will seem too labor-intensive to you, but do not rush to conclusions. By spending just a couple of days, you will create an ideal nutrient medium that will simplify subsequent care and also greatly increase productivity. Agree, it's tempting.
Materials: manure, compost, humus, grass, leaves, straw, food, wood or rag waste, mullein, sand, chalk, granulated superphosphate, nitrogen and potassium fertilizers, potassium permanganate.
Tools: pitchfork, shovel with step-ladder handle, ripper, hoe, screen for sifting compost and debris, film, burlap, bricks and pipes, markers for marking planting locations, water containers, hoses and watering cans.
grounde.ru
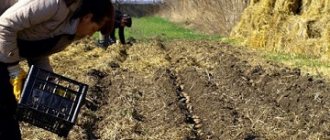
How to make beds for tomatoes with your own hands
Making your own beds is quite easy. If necessary, you can start arranging a high or warm bed for tomatoes in the spring. No difficulties should arise if, in the process of carrying out the work, you follow a step-by-step algorithm, as well as the advice and recommendations of experienced gardeners.
It is important to understand that in order to obtain a high yield, it is important not only to choose the right planting material and carry out the planting process. An equally important point is preparing the soil and place for planting tomatoes. The ease of caring for the plants and the amount of sunlight penetrating each crop depend on how well the site is landscaped. It is worth thinking in advance about how watering will be organized - this will save you from many problems in the future.
How to make raised beds for tomatoes
It is important to correctly determine the optimal height of the beds for tomatoes. In high beds it is quite easy and convenient to carry out the process of cultivating tomatoes. In order to make the sides, you will need to use the following materials:
- asbestos-cement slate sheets;
- building brick;
- boards.
Just as in warm options, in this case it will be necessary to use organic matter, due to which the seedlings will be heated in the spring. You can do planting work several weeks earlier than gardeners usually do. During the process of decay of organic matter, the process of heat release begins. If, during the growth of the crop, you water the tomatoes frequently and abundantly, then the process of decay of organic matter becomes much more intense.
Raised beds consist of several layers. The sequence of layers should be as follows:
- wood – you can use bush branches after sanitary pruning or crown formation;
- hay, weeds, fruit and vegetable peelings;
- compost, manure, chicken droppings;
- wood ash;
- nutritious soil.
Many experienced gardeners note that it is not necessary to use a fence. In this case, you can simply form mounds, on the surface of which tomatoes are subsequently planted.
How to make warm beds for tomatoes
Making a warm bed with your own hands in the spring for tomatoes is not as difficult as it might initially seem. Considering that tomatoes love warmth, then warm beds are the best option. Organic residues that are located deep in the ground gradually begin to rot, resulting in the heating of the tomatoes. In addition, it is recommended to take into account the fact that warm beds are made only once, after which they can be used for 8 years.
The step-by-step algorithm of actions is as follows:
- First of all, they dig a trench, the width of which is 1 m, and the depth varies from 50 to 60 cm. You can make any length - as far as the land plot allows.
- After cutting, the remains of trees and shrubs are placed at the bottom of the resulting trench.
- A layer of organic matter is placed on top of the wood, which consists of vegetable and fruit scraps, weeds, leaves, and vegetable tops.
- Then manure is poured in, the layer of which must be about 6 cm, but no less. The manure is sprinkled with a small amount of wood ash.
- The final stage is the arrangement of the top layer, which consists of last year's rotted compost.
After the warm trench for tomatoes is prepared, cover it with a top layer of soil and then cover it with black plastic film. It is worth taking into account the fact that the organic layer should be between 30 and 35 cm, while the soil layer should be approximately 20 cm.
Attention! Harvesting from warm trenches takes place several weeks earlier.
Application of mineral fertilizers in autumn for planting tomatoes
Plants can absorb all useful substances from the soil only in the form of an aqueous solution. Therefore, many people prefer to use liquid complex fertilizers: they penetrate to the roots more quickly and, naturally, are absorbed faster by plants.
What else needs to be taken into account: mineral fertilizers applied in the fall should have a minimum nitrogen content; on the packaging of such compositions it is usually written: “autumn” or “for autumn use.” These mineral mixtures contain almost no nitrogen, but contain phosphorus, potassium, calcium - microelements necessary for the ripening of shoots, strengthening plant immunity, and increasing resistance to low temperatures. Information on the rate of fertilizer application can also be found on the packaging. You should not exceed it: it is better to underfeed than to overfeed.
Disinfection: saving the future harvest
The main enemy of greenhouse tomatoes is late blight, which we all know. Moreover, there is evidence that since 1985, new species of the damaging fungus have appeared, which is why the danger of late blight has increased several times. Reproducing by spores, this mushroom hides in the ground and tolerates even severe frosts. Moreover, without having “food”, it still retains its high vitality.
Therefore, if last season you struggled with late blight or another similar fungal disease, then disinfect the soil with a solution of lime and copper sulfate heated to 70°C:
- Step 1. Take 3 g of copper sulfate and 50 g of quicklime per 1 liter of water.
- Step 2. Spray the solution evenly over 1 square meter of bed area.
- Step 3. Immediately on the second day, add dolomite flour or wood ash to the bed, 100-200 g per square meter of bed.
But using a sulfur bomb to treat greenhouse beds for future tomatoes is useless and irrational. As you know, this vegetable is most attacked by late blight, and sulfuric acid is almost useless against this scourge. Therefore, the best disinfection of such soil is copper preparations and treatment with Baikal. This product will not only destroy pests, but also add beneficial microorganisms to it, which in turn will increase soil fertility. Just remember that any increase in soil fertility also increases the amount of pathogens in it.
What are tomatoes happy to grow on?
Tomatoes are fruiting plants of the nightshade family. Their name comes from the Italian pommod Xoro - “golden apple”. And the Dutch were the first to develop the agricultural technology of this vegetable in their greenhouses, boasting that they had discovered the fourth state of water. The first is gaseous, the second is liquid, the third is ice, and the fourth is a Dutch tomato. And this “handsome man” has considerable requirements for the conditions in which it is grown and on what.
Here, for example, is the most successful design of greenhouse beds for growing this crop:
Now let’s look at what kind of greenhouse soil is needed specifically for tomatoes:
- Free from weed seeds.
- Cleared of pest larvae and possible pathogens.
- It retains moisture well, but does not turn into a swamp.
- It has optimal acidity pH - within 6.5-7.
- Contains all the necessary components for growing tomatoes.
- Be generous with minerals that are available in easily digestible form.
- In a certain part it consists of sand, which is necessary for the formation of the skeletal part of the plant.
- Rich in vermicompost, which provides all the nutrients for tomatoes in the most accessible form.
- Supplemented with loosening elements that maintain air-water balance (perlite, vermiculite or ash).
Now let’s take a closer look at how all this can be achieved and what you need to do.
Green manure: feeding the beds with nitrogen
If you are not a fan of mineral fertilizers in greenhouse soil, and you also don’t want to add manure or chicken before planting tomatoes (at least for fear of later becoming infected with helminths), then consider the option of green manure. This green fertilizer is planted in early spring, long before you bring in the first seedlings.
Green manure quickly forms green mass and is often grown in a greenhouse only to be used as an organic fertilizer with valuable nitrogen. As a result, only 3 kg of green mass will replace 1-1.5 kg of manure! These are beans, peas, seradella, mustard, lentils, soybeans, rapeseed, phacelia, rapeseed and broad beans.
You can sow green manure before tomatoes at the end of March, or in extreme cases - in the fall, after harvesting. Two weeks before planting the tomatoes, trim the grown green manure with a flat cutter and plant it to a depth of 2-3 cm. Do not remove any roots that remain - this is an excellent food for beneficial bacteria and worms.
Note that fresh and young plants are richest in nitrogen, and they decompose faster in the soil. Just don’t overdo it with the quantity, otherwise the green mass will not decompose, but will turn sour. But more mature green manure plants decompose more slowly, but enrich the soil with organic matter.