I was about to call the article “How to draw vegetables” and out of curiosity I looked on the Internet: what other vegetables could (and should) be drawn. This is where a discovery awaited me - cucumber and tomato are formally... yes! - fruits.
So, here are the conventions: it is agreed that those edible fruits that contain seeds are fruits. And those that are edible, but are not intended for plant propagation, are vegetables. This is the modern classification. Although I called cucumbers and tomatoes vegetables for years (and they didn’t mind).
But, having found out who is who in reality, now we will stick to the truth: how to draw fruits - a cucumber and a tomato?
Let's start in order.
Realistic example
The proposed sequence will teach you how to draw a cucumber with a pencil. The detailed visual explanation will be clear to artists of all skill levels.
It is most convenient to start a pencil drawing by preparing a sketch. For a cucumber, this can be an elongated rectangle with beveled corners and a marked stalk.
Then the corners of the sketch are rounded to form an oblong oval, slightly curved inward. In the resulting picture you can already guess the cucumber.
Next, excess auxiliary lines are removed and characteristic pimples are added, as shown below.
Finally, surface structure and shadow are conveyed by shading to give volume to the image. The drawing is ready.
Master class on drawing a sketch of a tomato
Every artist, even setting himself the task of painting a picture with oil paints, pastels or watercolors, first makes a sketch in pencil. Only then does he begin to design the painting in color.
This master class shows how to draw a tomato with a pencil step by step for beginners.
- It is not necessary to start sketching with a general outline. In this master class, the expert recommends applying the strokes of the lower part of the stalk to the sheet first.
- Then you should add volume to this part.
- Since it is impossible to draw a tomato without drawing the outline of the fruit itself, the next stage is drawing it. Usually it is an oval or a circle.
Step by step example of drawing a cucumber
In order to learn how to depict a vegetable along with a stem, leaves and flower, we suggest using the tips below. This method explains in detail how to draw a cucumber step by step and taking into account all the necessary details that make the final result resemble a real vegetable in the garden.
Stage 1
The future image is marked with auxiliary lines resembling the sides of a rectangle.
Stage 2
The main outline of the figure is drawn using them.
Stage 3
In the foreground there is a schematic representation of a cucumber flower and its tendrils. In the background is the visible part of the leaves.
Stage 4
It’s time to start detailing the image: voluminous pimples are drawn on the surface of the vegetable, and veins are drawn on the leaves and flower. The edge of the cucumber is slightly darkened.
Stage 5
The resulting drawing is shaded. You can also color it or shade the strokes and leave it black and white.
cucumber leaf
The leaf is the most complex element of the plant. But to understand how to draw a cucumber leaf, just follow the recommended sequence, and the result will be excellent.
First, the main veins are depicted, showing its five-pointed shape. Then, using thinner lines, small veins are added between them.
After this, arcs connecting them are drawn along the vertices of the rays. From the main ones, even smaller veins are added. The sheet is ready.
Now it can be added to any cucumber design. For example, it might look like this:
Jar
In order to understand how to draw a jar of cucumbers, it is enough to be able to draw the vegetable itself. A glass jar can be drawn quite easily in any desired shape. For example, like this:
You can also depict a more complex version, with a lid. The prepared transparent container should be filled with cucumbers drawn using any of the proposed methods. And the finished image is filled with color.
Leave a comment 6,950
Drawing vegetables step by step with children is useful because with these simple objects you can teach children to analyze the shape of an object and decide how to convey it on paper. Many vegetables are close to the shape of a ball. By transferring them to a plane, you will draw a circle. But this circle-ball is not always obvious to children. For example, you need to find it in a bow. And also find out what needs to be added to get exactly the onion. As with any step-by-step drawing with children, try to avoid mindless copying when drawing vegetables. All vegetables in the pictures are painted. But pencils are also suitable for working with children. Vegetables are great objects for practicing pencil skills! Tell the children that they need to paint over the ball, taking into account and as if repeating its shape (that is, with rounded lines). Do not press too hard on the pencil. Hand movements should be light. And, of course, you should not go beyond the outline of the drawing. But, still, it is better for preschoolers to work with gouache paints!
Tomato – step-by-step drawing of vegetables with children
Drawing a tomato is very easy! Its almost spherical shape and uniform color are easily conveyed on paper. So that we end up with not a red circle, but a tomato, let’s add white highlights and green leaves. Pay attention to the children that the leaves look like a star.
Scheme of step-by-step drawing of a tomato with children.
Radishes and turnips - step-by-step drawing of vegetables with children
Radishes are also a simple-shaped vegetable. The only difficulty can be its coloring - a pink radish, gradually turning into a white tail. If you paint the entire root vegetable with lilac, violet, you will get beets. You can draw a turnip in a similar way. But it is, rather, not a sphere, but an ellipsoid. So it needs to be depicted on paper as an oval. And paint it yellow accordingly.
Scheme of step-by-step drawing of radishes with children.
Scheme of step-by-step drawing of turnips with children.
Onions - step-by-step drawing of vegetables with children
Another “round” vegetable. But here it is no longer as obvious as with a tomato. The picture shows a bow with green arrows. From the point of view of the culinary qualities of onions, this is not great. But it’s very elegant.
Scheme of step-by-step drawing of onions with children.
Cabbage - step-by-step drawing of vegetables with children
Although children have no doubt that a head of cabbage is a ball, it is a rather difficult object for them to draw. It's all about the leafy clothes. Like a riddle, there are a hundred clothes - all without fasteners. Therefore, we suggest making the cabbage drawing less realistic, more decorative.
Let's draw a tomato step by step
From life. And paints.
The pencil drawing of a tomato is nothing complicated - a circle. If there is anything interesting, it is the tail - a short petiole with five long, curved, pointed sepals.
And now, in a wave of inspiration, we will try to draw a portrait of Senor Tomato as similar as possible.
This time the colors had to be applied in many layers - the shades on the sides were very diverse: red and orange and ocher and scarlet and purple.
Blik! Comrades, don’t forget the glare! In the watercolor technique there is no white paint - so you need to provide a place where the highlight will not accidentally be painted over in the general color of the blush. Also analyze shadows and reflexes (highlights on the sides) carefully. For me, the shadow is not just dark burgundy, but even crimson and even with a certain hint of cold purple. So that. As a child, studying at art school, I didn’t want to see this, but now I’ve become an adult and the shades and nuances have become interesting to me. Alas, I got punished for inattention precisely then – in childhood. Eh-ma, everything has its time.
Sometimes a novice artist needs to know how to draw a tomato. This article will help him. Here we discuss a variety of ways to draw a tomato: with a simple pencil, in color, as a whole and in section. Some master classes will help artists who are taking their first steps in this field to depict a tomato. Others are designed for more sophisticated craftsmen.
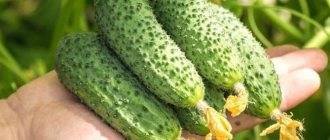
Let's depict
Today we'll talk about how to draw a cucumber. It has a simple shape and one color, so it will be easy for the baby to remember this vegetable and no longer confuse it with others. In the same way, you can gradually introduce him to other vegetables, fruits, and berries. It would be nice to create a card index from your own drawings, and then play with your child.
For example, ask him to show a tomato (he must get the right picture). Or you will offer him an image of, say, a watermelon, and let him name it. Over time, you can even ask your child to show how to draw a cucumber with a pencil, how to draw a melon, a carrot. In general, there are a lot of options for development. So, let's begin.
How to draw a cucumber step by step?
First, mark the approximate beginning and end of the vegetable. Let these be two points, one slightly lower, the other higher. Connect them with a straight line. Then draw an arc from below, one end of which will rest against the first point, and the other end against the second. Draw a curve on top, also connecting both starting points. The result is a silhouette that already resembles a future cucumber in shape. Now use an eraser to erase the extra dots and lines and give the final shape to the contours of the vegetable. Next, you need to understand how to draw a cucumber so that it looks like a real one. To do this, draw a flower on the left side of the cucumber, at its tip.
And on the opposite side, draw a tail in the form of two short parallel lines located at a short distance from each other. At the base of the cucumber, connect them with a small arc. Add a tendril extending from the tail, depicting it in the form of two twisted lines located almost close to each other. Then draw stripes along the entire cucumber with light strokes, and draw characteristic pimples on them. Ready!
Now you know from your own experience how to draw a cucumber. But the picture would be incomplete without rough, slightly prickly cucumber leaves. Let's try to draw a leaf.
With eyes
A cucumber (drawing for children with eyes) can be a cartoon character. The finished vegetable turns out very funny. You can color the finished drawing with paints.
Pencils, paper and supplies
Tools that will be required in the process:
- pencil;
- eraser;
- thick paper;
- green gouache;
- yellow paint;
- a glass of water;
- black and white gouache;
- brushes
You can also use watercolors or colored pencils.
Step-by-step execution process
You should use this template as a guide.
Step by step process:
- First you need to draw a thick, elongated oval - the base of the cucumber.
- Approximately 1/3 of the total figure must be separated by an arcuate line. Using smooth lines, you need to connect the arc and the base of the cucumber to make the drawing more accurate.
- Use an eraser to remove the excess line.
- A small “barrel” needs to be marked on the top. From it you need to draw torn figures that look like tongues of flame.
- Visually it is necessary to mark the middle of the resulting cucumber. A little lower you need to draw a steep arc, the convex side of which will look down.
It must be connected to an even steeper arc located below. Using a faint line you need to slightly shade the upper part of the resulting element.
- Above the previously outlined visual line you need to draw 2 circles. Inside you need to draw 2 more smaller circles, located closer to one of the sides. Immediately you need to lightly shade them.
- It is necessary to draw small arcs over the entire surface of the cucumber, which will indicate voluminous pimples.
- Just below the mouth you need to draw sticks raised up, 4 short lines should come out of each.
- From the base of the vegetable you need to draw the legs. They can be straight or bent, as on the template. You also need to draw “shoes” - oblong ovals.
- When the frame of the drawing is ready, you can start coloring. It is necessary to prepare water, paints and brushes in advance.
- First you need to dilute the gouache to a creamy consistency. Use green paint to fill the inside of the cucumber, not including the eyes and mouth.
Kawaii drawing of a cucumber with eyes
- While the paint is drying, you need to mix a little green and black paint in the palette to make the color more active. You need to work with gouache with clean tools.
- When the paint dries, you need to paint the upper part of the mouth, stretching the color downwards.
- The arms and legs of the cucumber also need to be painted in a dark green shade.
- Green paint must be mixed in small quantities with white paint to paint the lower part of the mouth.
- While the paint dries, use a clean brush to paint the top element yellow.
- Using a thin brush you need to draw the pupils.
- The boots can be painted in any color of your choice.
- The final step will be to paint the highlights in the eyes with white, as well as highlighting the lower part of the mouth with a lighter green shade.
If desired, you can draw the shadow with black paint diluted in water.
Final stage
First, mark the size of the sheet with two intersecting perpendicular lines. Then draw more carefully the main line and from it the rays diverging to the sides. Draw out the contours of the sheet - it looks slightly like a triangle with carved sides. Remove extra lines. Carefully draw the veins with light strokes. Draw the base of the leaf - the “stick” on which it rests. All! From now on, it won’t be difficult for you to show your child how to draw a cucumber.
The rapid development of humanity leads to the fact that people begin to be interested in very mysterious things, for example, why the sky is blue, why you can’t hold light in your hands, and where they even came from. The smartest minds are looking for answers to these questions, but with the discovery of the concept of DNA, it was discovered that everything around has DNA in exactly the same way as a person, which subtly hints at the possibility of the origin of everything from a person, or a person from everything. The closest DNA relative to humans is the cucumber. I was shocked too, so I have to show you how to draw a cucumber. Cucumber is a variety of cactus without sharp needles, the most cultivated type of vegetable, respectable to humans and personifies everything that is solid, durable and necessary. For better perception it is painted in a delicate green color. The special property of the cucumber is that it consists of a little more water than a person, which means it is a little more human. It was first discovered by the Chinese in the wildest uncultivated environment, where it still grows.
Like any other form of life on this planet, it came out of the sea, where its ancestors are still found - sea cucumbers, very rare and nimble algae. An ordinary cucumber quickly learns the essence of existence and being, which makes it yellow and fat, because it understands the futility of its life.
Not all properties of cucumber have been discovered yet, but here are some thoughts:
- By combining cucumber, milk and gastric juice into one, you can find the meaning of life. At least for a few hours;
- It can be used as a weapon, proven by Chuck Norris;
- You can make a salad out of it if you add mayonnaise;
- It was because of the high value of the cucumber as a snack that alcoholic drinks were invented;
Try drawing green using these instructions:
Master class: how to draw a cross-section of a tomato with a simple pencil
Perhaps this is the most difficult stage in depicting tomato fruits.
- Start drawing with an image of an oval. Only it will imitate the cut itself, so it is located slightly above the plane on which half of the fruit will lie. And the oval itself should be very elongated and slightly inclined towards the surface.
- A semicircle is attached to the bottom of the oval - this is the lower part of the tomato.
- The oval shows the grooves in which the seeds are located.
- The lower part of the tomato is shaded more intensely than the cut itself. The rule for shading the ball should be observed: it is darker at the edges than towards the middle.
- The grooves have the most intense shading. Along the cut, you can make lines closer to the contour of the oval.
History of the origin of the pattern
Paisley, Indian cucumber, or, to be more precise, buta - the pattern is very ancient. It probably first appeared in the Sassanid Empire, an ancient state located in the territory of modern Iraq and Iran from 224 to 651 AD. Thanks to trade relations, fabrics with this pattern spread throughout Central Asia and even reached India and Africa. “Cucumbers” came to Europe from India in the 17th century thanks to British colonists. The demand for exotic Indian fabric turned out to be so high that enterprising Europeans began to weave fabrics with “cucumbers” themselves. The small Scottish town of Paisley completely devoted all its resources to the production of Indian-style fabric and, thanks to this, has remained for centuries - but as the name of the pattern itself.
There is no consensus on what paisley actually is. According to one version, this is a floral motif combined with the silhouette of a cypress tree - a symbol of life in Zoroastrianism. Another possible origin is stylized flames, also symbolizing life. It may also originate from the cashew nut, which was a symbol of fertility. In India, it is widely believed that “cucumbers” represent the seeds of the mango tree. In any case, no matter what theory you take, we are talking about life and fertility. Some even manage to see sperm in paisley - but, given the antiquity of the pattern, this version is extremely doubtful.
The appearance of paisley in Europe and the USA
The first popular paisley product in Europe was cashmere shawls made from. They were extremely expensive, and only wealthy aristocrats could afford them. At the beginning of the 19th century, Scottish craftsmen learned to weave paisleys on jacquard looms - and paisley shawls became a more mass-produced product. True, they were no longer cashmere, but made of sheep’s wool or silk, and there were significantly fewer colors than authentic Indian goods.
A little later, paisleys begin to be printed on cotton, and the pattern ceases to be a luxury, and by the 1870s, paisleys are not exactly going out of fashion, but rather moving into the realm of the ordinary.
IN THE 1970S, PAISLEY SUDDENLY BECAME AN ATTRIBUTE OF THE HIPPIE MOVEMENT – MAINLY THANKS TO THE BEATLES, WHO BROUGHT AN INDIAN FLOW FROM THEIR FAMOUS JOURNEY
This situation would continue until the seventies of the 20th century, when paisley suddenly became an integral attribute of the hippie movement. This happened mainly thanks to The Beatles, who brought Indian flavor from their trip to Rishikesh to the guru Maharishi.
Suddenly, cucumbers are appearing everywhere: on John Lennon's Rolls-Royce, on shirts with huge collars, on bell-bottom trousers, on the linings of jackets and on the jackets themselves, women's dresses and baby carriages.
The time of the psychedelic revolution is passing, but “cucumbers” remain a symbol of the rebellious spirit. Gradually, street gangs are adopting paisley into their visual vocabulary - multi-colored bandanas with “paisley” are becoming a way to distinguish their own from strangers. In the LGBT community, at the same time, colored bandanas tied to the right or left of a belt help gays not only identify their own kind in the crowd, but also immediately declare their sexual preferences. “Paisley” and bandanas are becoming such interconnected concepts that even now the paisley pattern is often called bandana print.
The 1980s, 1990s and early 2000s were spent in slight oblivion, periodically appearing in the clothes of some rock musicians. The exception is the Italian brand Etro, which has been consistently producing clothes with “paisley” patterns since 1984 and continues to this day, as well as classic English ties and scarves. Ancient madder printed silk ties are often adorned with a paisley print and are a classic 20th century staple.
“Paisley” and bandanas are becoming such interconnected concepts that even now the paisley pattern is often called Bandana print.
Paisley today
Now paisley is experiencing a new heyday. Back in the mid-2000s, streetwear brand The Hundreds released a black jacket with a hood and white paisley, which is now considered a collector's item. But the coolest guys painted each “cucumber” by hand.
This year, Vans released sneakers with a paisley pattern, Undefeated - a cap, Opening Ceremony together with Adidas - a whole collection of clothes and shoes, Herschel - backpacks, and Fred Perry, together with the famous manufacturer of ties Drake's - a series of polos and shirts. Given the appearance of paisley on the runways during this year's fashion shows, we can assume that a new wave of paisley craze awaits us in the summer. After all, not everyone wears camouflage.
Drawing vegetables is quite a fun and interesting activity.
But it can also turn into disappointment when you put a certain vegetable in front of you and decide to depict it on a piece of paper.
After all, ordinary and simple objects behind their simple form and appearance can hide something more.
It is these little things that can help you draw not just a circle or an oval, but beautiful and voluminous tomatoes, cucumbers and onions.
"Tomato and cucumber." Summary of a drawing lesson in the middle group
Muslimova Guzaliya
"Tomato and cucumber." Summary of a drawing lesson in the middle group
Age group : Middle group
Lesson topic : “ Tomato and cucumber ”
Type of drawing : subject.
Task type: on assignment.
Type of lesson : by appointment
Lesson form : traditional
Fine: teach children to draw tomatoes and cucumbers in oval and round shapes. Reinforce knowledge about geometric shapes.
Technical: Strengthen the skills of drawing with gouache . Strengthen the ability to cleanly rinse the brush before using a different color of gouache
Educational: To develop children's interest in drawing .
Compositional: Exercise the ability to draw large .
Preliminary work: Exercise Artem in the ability to examine works and tell stories using questions.
Materials and equipment:
White A4 paper, gouache, brush, oilcloth, rags for drying the brush, fake ( tomato and cucumber )
Methods and techniques: conversation, artistic expression, children's drawings on the topic, partial display, analysis of children's work.