Which carrot variety should you choose?
Inexperienced gardeners choose carrots based on price, beauty of packaging, name, advice from a neighbor, reviews from vegetable growers, and other dubious criteria. In fact, carrot varieties must be selected according to agrotechnical characteristics.
All varieties of carrots are divided into categories. When choosing a suitable variety, take into account the following criteria:
- Selection. There are domestic and foreign varieties. The first ones are cheaper and are zoned in specific Russian regions. Foreign varieties have serious commercial and agrotechnical advantages, but their adaptation to the local climate must be taken into account.
- Terms of ripening. There are three categories of carrots: Early. For quick harvest. Ripens in June-July. Not for winter storage.
- Mid-season. They ripen in the fall. This is the sweetest and juiciest carrot. Well kept.
- Late. For long-term winter storage. They are distinguished by large root crops and are not inferior in sweetness to mid-season varieties.
The sweetest varieties of carrots are Orange Buddy, Children's Joy, Karotan, Emperor, Nastena, Krasna Maiden, and Beloved.
Among carrots there are also varieties of unusual color and shape:
- Carrots with white, yellow, red and purple roots are Belgien White, Yellow Stone, Queen of Autumn and Dragon, respectively.
- With small and round root vegetables - Parisian carotel and Round baby.
- Without core - Longe Rote and Karotinka.
Types and varieties
Contrary to what most people think about carrots, they are not only red-orange in color and not always cone-shaped. Carrots acquired an orange color only in the 17th century; before that, in the Roman Empire, for example, white carrots grew, purple in Ancient Egypt, and even black in some Western European countries. Early paintings by Dutch artists depict purple and yellow root vegetables.
The very first orange carrot was very pale, since it contained 3-4 times less carotene than modern varieties of carrots. More recently, in 2002, breeders revived the purple carrot variety, and it has already gone on sale. Purple pigments anthocyanidins, which, in addition to purple varieties of carrots, contain plants such as purple basil, beets and red cabbage, improve brain and cardiovascular function by clearing the blood of cholesterol and fats. Breeders are also working on the shape and size of root crops, which today are represented by varieties of conical, almost round, pointed, spindle-shaped or with a rounded end.
A huge number of carrot varieties are divided into varieties, among which the main ones are:
- Parisian Carotel is a very early, tender, sweet and round carrot, like a radish, with a diameter of up to 4 cm. It produces good yields even on poorly cultivated or clay soil;
- Amsterdam - cylindrical root vegetables with a diameter of 2-2.5 cm, a length of 15-17 cm, with a rounded end, juicy, sweet, tender, with a small core. The only drawback is their fragility - if carelessly harvested, the root vegetables easily break. This is a variety series of early carrots not intended for storage;
- Nantes - cylindrical root vegetables with a diameter of 3-4 cm, up to 22 cm long, with a rounded tip, with sweet and juicy pulp. Suitable for both eating in the summer and for storage;
- Berlicum-Nantes - also a cylindrical root crop, but with a sharp tip, and also larger in size than Nantes. The keeping quality of this carrot is excellent, but it is not as tasty as the carrots of the varieties described above;
- Emperor is a conical root vegetable up to 25 cm long with a sharp tip. The varieties of this series vary greatly in taste (they can be either very sweet or not very sweet), in the degree of keeping quality and in the fragility of root crops, some of which break if handled carelessly;
- Flakke - the root crops of the varieties in this series are the most powerful and long, reaching 30 cm. The weight of one root crop can be 500 g or more. The growing season for carrots of this variety series is very long, it is well stored, but, unfortunately, does not have the same high taste qualities that are characteristic of carrots of the Nantes and Amsterdam variety series.
Carrot varieties for open ground are also divided depending on the purpose of cultivation.
If you are a lover of exotics, then you will like these varieties:
- F1 Purple Elixir - root vegetables with a deep purple surface with a purple tint, but inside they are the usual orange color for carrots. The length of the root vegetable is about 20 cm. Carrots of this variety are used for pickling and preparing salads;
- Russian Size - the exoticism of this variety (varietal type of the Emperor series) lies precisely in its size. Carrots in light soils reach 30 cm in length and sometimes weigh about a kilogram. Despite the fact that these sizes are more suitable for fodder carrots, the pulp of the root vegetables of this variety is sweet and juicy, the core is small, and the color is bright orange;
- Polar Cranberry is a variety of the Parisian Carotel type, reminiscent of the well-known berry with its almost round shape of root crops and containing a high amount of dry matter and sugars. Very convenient for canning and storage;
- Minicore is an early variety of the Amsterdam series, which is a juicy miniature cylindrical root crop 13-15 cm long with a delicate taste. Carrots of this variety are very convenient for whole-fruit canning.
For those gardeners who are more interested not in appearance, but in the taste of the product and the amount of nutrients it contains, the following varieties are more suitable:
- Healthmaster is a new Flakke variety that contains at least a third more beta-carotene than any other variety. The surface of the root crop of this variety is smooth, crimson-red, the core is even more saturated in color, the average length is about 22 cm;
- Sugar Gourmand is a hybrid of the Emperor variety, up to 25 cm long, dark orange in color with a small core and smooth surface;
- Praline is a variety of the Nantes series with a high content of carotene, almost without a core, red-orange color, about 20 cm long. The taste of this carrot is beyond praise - very sweet, tender and juicy;
- Losinoostrovskaya 13 is a mid-season variety 15-18 cm long, characterized by good keeping quality.
If you are a pragmatic person and you don’t have time to do gardening experiments, we offer you varieties that are disease-resistant, productive and well-stored in winter:
- Samson is a mid-season, high-yielding variety of the Nantskaya variety with bright orange cylindrical root crops with juicy, sweet, crispy pulp;
- Mo is a late-ripening and high-yielding variety of the Emperor variety series with conical juicy bright orange root crops up to 20 cm long, perfectly stored in winter;
- Flakke is a mid-season spindle-shaped variety with barely noticeable eyes, capable of producing high yields even in heavy soils. Root crops reach a length of 30 cm;
- Forto is a mid-early variety of the Nantes series with smooth, cylindrical fruits of excellent taste, 18-20 cm long. It produces consistently high yields and is perfectly stored.
According to the timing of ripening, carrots are divided into early, or early ripening, which takes 85-100 days to fully ripen, mid-ripening, ripening within 105-120 days, and late ripening, which takes about 125 days to reach full maturity. Of the early carrot varieties, the varieties Alenka, Belgien White, Dragon, Zabava, Bangor, Kinby, Kolorit, Laguna and Touchon have proven themselves well; from the mid-season varieties - Vitaminnaya, Altair, Viking, Callisto, Canada, Leander, Olympian and Chantenay Royale; from the late - Queen of Autumn, Vita Longa, Yellowstone, Selecta, Perfection, Totem, Thinga, Olympus, Skarla.
Conditions for growing carrots in open ground
Carrots cannot be called a whimsical and demanding crop. But there are a number of conditions, without which it is impossible to obtain the desired harvest. Carrots will grow under almost any circumstances, but whether they will be large, tasty, shelf-stable, and filled with vitamins depends on the growing conditions.
Site requirements
Carrots are grown on flat areas without slope. Landing site requirements:
- Illumination. Choose a well-lit area. With a lack of sun, carrots grow poorly - the tops are stunted, and the root vegetables are tonic. The sun should fall on the site throughout the day. With shading, even temporary, yields decrease and the taste of root crops deteriorates.
- The soil. Preference is given to loose neutral or slightly acidic soils (pH 6–7). Acidic and alkaline soils are strictly contraindicated. The crop grows best on loamy soils with a high sand content, or on sandy loam soils. In dense loams, carrots grow small and rot during storage. When growing varieties with long roots, deep plowing is necessary. The soil should be well aerated and moisture-absorbing. With high humidity and lack of oxygen, carrots grow tasteless and the risk of fungal diseases increases.
- Predecessors. Carrots grow well after tomatoes, cucumbers, cabbage, onions, garlic, potatoes, and grain crops. You cannot plant carrots immediately after dill, parsnips, caraway seeds, fennel, parsley, carrots and all umbelliferous plants.
- Neighbours. The yield of carrots increases if peas, radishes, and tomatoes grow nearby.
Carrots are planted on the site no earlier than after 3-4 years. If you replant a crop in one place:
- Productivity is falling.
- Product quality is deteriorating.
- The incidence is growing. Root crops and above-ground parts are damaged by pests and diseases - Alternaria, carrot fly, aphids, nematodes and others.
The following areas are absolutely not suitable for carrots:
- with a strong slope;
- overgrown with weeds;
- on which unfavorable predecessors grew - especially tobacco and sunflower.
Preparing the soil for planting carrots
Site preparation begins in the fall. Over the winter, all fertilizers and additives will be absorbed and give maximum effect. The ideal soil for carrots is air- and moisture-permeable, loose and fertile, without rhizomes and stones.
Features of preparing soil for carrots:
- The soil is dug up in the fall, removing everything unnecessary from it - stones, rhizomes, solid debris.
- Digging depth is 1.5 shovels. Large digging horizons allow root crops to grow deeper. Also, deep digging makes it easier to harvest carrots - they are easier to pull out.
- If the soil is heavy loamy, add peat or sand for autumn digging - 1 kg per 1 sq. m. m.
- Manure or humus is added to excessively sandy soils.
- Humus is added to low-fertility soils in the fall - 6-8 kg per 1 sq. m. m. But you can add organic matter in the spring - before sowing.
- Chalk or lime is added to acidified soil in the fall - 1 cup per 1 square meter. m.
- In spring, you don’t have to dig up the soil - just loosen it and level it.
In loose soils, carrots grow straight and beautiful, in dense soils they grow crooked and deformed.
The amount of fertilizer applied to the soil depends on its type. So, for example, in clay soils, in addition to peat and sawdust, which loosen their structure, per 1 sq. m are contributed per season:
- coarse sand – 0.5 buckets;
- humus or compost – 5 kg;
- wood ash – 300 g;
- lime – 500 g (for acidic soils);
- mineral fertilizers – 2 tbsp. l.
Each type of soil has its own fertilizer recipe. Before applying fertilizers, it is necessary to determine the density and acidity of the soil. Gardeners have a lot of methods for determining these indicators - from folk signs to litmus tests.
Preparing soil and beds
Before you start preparing beds for carrots, you need to know the main features of its agricultural technology, in particular:
- carrots must grow in the sun: even in partial shade, their yield is significantly reduced;
- the best predecessors for carrots are cucumbers, potatoes, cabbage, garlic, and the ideal predecessor and neighbor in the garden is onions;
- You should not plant carrots after parsley, dill, celery, or after the carrots themselves;
- To get an early harvest, you can sow carrots at the earliest possible time, or even before winter, but for winter storage you need to choose late varieties, and sow their seeds only after it gets warmer: no earlier than the end of April.
When choosing soil, you should know that carrots prefer light sandy loam or loam. It can even grow on sand, but on clay soils the roots will be small and ugly. If the soil is heavy, it is amended long before sowing, adding a large amount of river sand, peat and well-rotted compost. The area should be level, free of weeds, dug twice: in the fall and immediately before sowing.
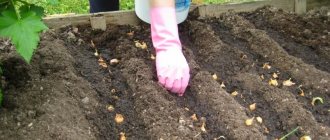
By alternating carrot and onion beds, they effectively fight onion and carrot flies
When digging in autumn, fertilizers are added to the soil, but in no case fresh manure. The manure will produce root vegetables with many tops, which bear little resemblance to classic carrots; they will be inconvenient to use, and they will be poorly stored. In the fall, add old humus (a bucket per 1 m2) and a liter jar of wood ash. But it’s even better if humus is applied a year before carrots: under cucumbers, potatoes or cabbage. Directly under the carrots, it will be enough to add ash and, possibly, a little complex mineral fertilizer (for example, 20–30 g of azophosphate per 1 m2). In the case of acidic soils, add a handful of chalk, slaked lime or dolomite flour.
Classic autumn digging of the earth is digging without breaking lumps, so that in winter the soil freezes better, pests and weed seeds die, and snow moisture is better retained in the spring. This technique is not very suitable for a carrot bed: it needs very loose, sifted soil. Of course, the final processing will be carried out in the spring, but if very early sowing is planned, then it is worth chopping the soil structure in the fall.
The addition of peat, sawdust or spruce needles, as well as sifted sand helps loosen the soil.
In the spring, as soon as the soil allows work, it should be spilled with a solution of copper sulfate (1 tablespoon per bucket of water), then dug up a second time and walked over with any cultivator. After this, ridges are formed. In arid regions they are not raised, but where it rains frequently, ridges are made 20–25 cm high. The width depends on the height of the gardener: carrots will have to be weeded often, and sometimes thinned out, so in order to be able to do this comfortably, you should not cook rows wider than 1.0–1.2 m.
Timing for planting carrots in open ground with seeds
The timing of sowing depends on the variety, climate and the purposes for which carrots are planted. The packaging usually contains information about the duration of ripening - this is what they use when calculating the sowing time.
When to sow carrots before winter?
To get an early carrot harvest - several weeks earlier than the earliest carrots ripen, they are sown before winter. For this purpose, only early varieties are used. The best time for sowing is mid or late autumn. Pre-winter sowing is practiced mainly in regions with warm winters. If the winters are harsh, then even a thick layer of covering material will not help - the seeds will freeze.
Autumn sowing is carried out taking into account the characteristics of the local climate. We need to plan in such a way that after sowing there can be no further warming. If the seeds manage to hatch and sprout before winter, they will be destroyed by frost, and there will be no seedlings in the spring. It is recommended to move sowing further away - towards the very end of autumn.
For autumn sowing, only winter-hardy and zoned varieties are suitable - for example, “Moscow winter” carrots.
In autumn, seeds are sown when the soil temperature is below +5 °C. Sowing depth is 2 cm. The top of the plantings is mulched with humus - a layer of 3-4 cm. If there is insufficient snow cover, the plantings are covered with spruce branches - a layer of up to 0.5 m.
Planting carrots in spring in open ground: timing
In central Russia, carrots are sown no earlier than the end of April - by this time the probability of night frosts becomes minimal.
The timing of sowing depends on the timing of ripening:
- early varieties are sown on April 20-25;
- mid-season varieties are sown before May 5;
- late – from April 15 to June 1.
In the south of Russia, the dates are completely different; here, early carrots can be sown starting in mid-March, and in mid-June, carrots can be sown for the second harvest. In July, only early varieties and hybrids are sown. Sowing must be done no later than July 20. In spring, seeds are sown as early as possible - as soon as the soil warms up to +8°C, during this period there is a good supply of moisture in the soil.
Dates according to the lunar calendar
Lunar phases are associated with the movement of juices in plants. On a waxing moon, the juices move upward, on a waning moon, downward, to the roots. Therefore, it is recommended to plant root vegetables, including carrots, on the waning moon.
Carrots planted closer to the full moon grow long; by the new moon they grow strong, thick, but shorter. Table 1 shows favorable and unfavorable days for planting carrots according to the Lunar calendar for 2022.
Table 1
| Month | March | April | May | June | July | August | September | October | november |
| favorable days | 10-12, 15-17, 23-25, 27-30 | 2-9, 11-15, 24-27, 29-30 | 1-4, 12-14, 21-23 | 9-11, 18-20 | 25-31 | — | 17-19, 26, 27, 30 | 4-7, 15-17, 19-21, 23-25, 27 | 1-3 |
| unfavorable days | 5, 6, 21 | 5, 19 | 5, 19 | 3, 4, 17 | 2, 3, 17 | 1, 5, 16, 30, 31 | 14, 15, 28, 29 | 14, 28 | 12, 13, 26, 27 |
Regionality
The dates for planting carrots are adjusted for each region. We have to take into account climatic features - when the soil warms up and when recurrent frosts stop. Table 2 shows the features and timing of planting carrots in different regions.
table 2
| Region | Climate Features | When to sow carrots? | What varieties are suitable? |
| Central Russia | Unstable spring. The snow melts in March or April. Frosts are possible after the snow melts. | The best sowing time is the last ten days of April. The landmark is the flowering of aspen and birch trees. Sowing for the second harvest - June, autumn sowing - late October or early November. | Early, middle and late. |
| Ural | Snow melts in mid or late April. There may be frosts in spring. Cool weather and rain may persist into the summer. | Planted in early May. In summer - in June, in autumn - in October. | Early, middle and late. |
| Siberia | Short summer. | Sowing after significant warming - usually in May. | Mid-season varieties are most suitable. |
| Southern regions | Short winter. There is no stable snow cover. The snow melts already in February. | In the spring, sow as early as possible, in March - while the soil is moist. Summer planting is in May. Before winter, carrots are sown at the end of November. | Early, middle and late. |
Cleaning and storage
Harvesting carrots is carried out in several stages. First, you start pulling it up in the summer for food, and the root vegetables remaining in the ground receive more nutrition and gain mass more intensively. Then the early varieties of carrots are harvested, which ripen in July. In August, it is the turn to harvest mid-season carrots, and late varieties, intended for long-term storage, are dug up from mid to late September.
When to dig up carrots? Choose a warm and dry day for this and get started. From light soil, root crops are pulled out by the tops, and from dense soil, carrots have to be dug out with a shovel.
- Rocky juniper: planting and care, description of varieties
After carrots are removed from the ground, they are sorted, setting aside damaged roots for processing. For carrots suitable for storage, the leaves are cut off right down to the head, the roots are placed under a shed to dry for several days and then stored.
We devoted a section to methods of storing carrots in a special article, which describes in detail how to store carrots, beets and other vegetables in the winter. It is best to store carrots in a basement or cellar in wooden or plastic boxes, sprinkling the root crops with sand so that they do not come into contact with each other. You can use moss instead of sand. You can sprinkle the carrots with crushed chalk and onion peels - chalk and onion peels counteract the development of putrefactive processes.
There is another way to store carrots - glazing with clay. The clay must be diluted with water until it becomes thick with sour cream, then each root vegetable is dipped into this mash, placed on a wire rack to dry, and then carefully lowered into the cellar. If you store clay-coated carrots at a temperature of about 0 ºC in a dry cellar, they will remain juicy and fresh until spring.
Preparing carrot seeds for planting
Carrot seeds can “sit” in the soil for up to three weeks before sprouting. They contain essential oils that prevent swelling and delay germination. To speed up germination, it is recommended to treat the seeds before planting.
Carrot seeds retain high germination rate - 50-70% for 3-4 years.
Treatment of carrot seeds before planting
If purchased seeds are used - granulated or glazed, they do not need to be processed. They have already undergone pre-sowing treatment, are covered with a special nutrient layer, and cannot be soaked - otherwise the shell will dissolve. Such seeds are sown dry.
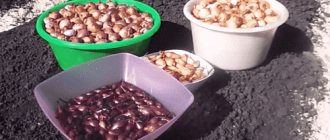
If the seeds are bought from hand or collected from your own, they will have to be prepared:
- Sorting. The seeds are placed in a saline solution for 5 minutes. Specimens that float to the surface are discarded - they are not viable.
- Heat treatment. The seeds are soaked in hot (50-60°C) water. After 20 minutes, they are transferred to cold water for 2-3 minutes.
- Processing in a stimulator. Seeds that have passed testing are kept in a cloth soaked in a growth stimulant - Zircon or Epin. Exposure time – 24 hours.
- Drying. After soaking, the seeds are dried until they flow and are immediately sown.
We invite you to watch a video in which an experienced gardener will share the secrets of preparing carrot seeds for sowing:
Do I need to germinate carrot seeds?
To speed up germination, some gardeners do this:
- Spread the seeds on a damp cloth. Maintained at temperatures from +20 to +24°C.
- In 5-6 days the seeds will swell. This is enough - the seeds should not germinate. If sprouts appear, they will be damaged during planting and there will be no seedlings.
- Before planting, the seeds are dried until they flow and are sown immediately.
The old fashioned way:
- The seeds are poured into a linen bag.
- They are buried in early spring to a depth of 20-25 cm. The soil during this period should be moist, not heated.
- Keep the seeds in the soil for two weeks. During this time, they swell and acquire increased immunity.
- Before sowing, a bag of seeds is taken out of the ground. The seed material is laid out on paper or cloth to dry. When they are dry, you can start sowing.
Planting methods
Whenever carrot seeds are sown, it will not be possible to do without thinning completely. Yes, this is not bad: there will be fresh vitamin “bundles” of products. But it is possible and necessary to try to reduce the number of labor-intensive operations to pull out excess shoots, and at the same time save on seeds. Our people have come up with many ways to do this.
Nowadays there are various devices such as sowing machines on sale. They are convenient to use, the rows are even, the distance between the seeds is whatever is required, and the sowing depth is the same. The work is simple and convenient, but the cost is stopping us, and gardeners are coming up with other, more economical techniques.
Recent Entries
Lilac perennials that are beautiful, compact and do not crowd out other plants Why when buying seedlings you should not take the sellers’ word for it and how to determine the age of the plant using 3 signs Tomato seedlings have turned purple or whitish: why the color has changed and how to save the plants
Is it worth buying coated carrot seeds?
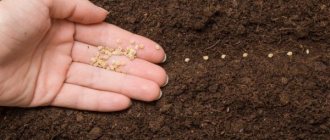
Like the seeds of most vegetables and flowers, carrot seeds are increasingly sold in granules. This means that they are factory-coated with a specially created shell, which disintegrates under natural soil moisture conditions. Since the size of the granules is at least 2–3 mm, it is relatively easy to sow them individually, at the required distance. This completely eliminates the need for subsequent thinning. The recommended sowing depth is 3 cm.
The pelleted seeds are quite large, and if desired, they can be placed one at a time
Does it make sense to buy such seeds? If there are no problems with money, of course: this is very convenient, you just need to be able to water the bed both immediately after sowing and subsequently, until the emergence of seedlings. Otherwise, the destruction of the shell at the most crucial moment may be slowed down, and the sprouted seeds, unable to germinate through it, will die. Carrots sprout from such seeds almost like from ordinary seeds, 15–20 days after sowing.
Tape planting
One of the most effective and economical methods is sowing carrots on tape. Sometimes they use adhesive tape of the required size, but long ago our housewives came up with the idea of sowing seeds on toilet paper. Having prepared such a tape in advance, on long winter evenings, in the spring it is laid in a groove about 3 cm deep, watered abundantly and covered with soil.
Gluing seeds onto paper is a painstaking but reliable task.
Usually, seeds are glued onto the tape at a distance of 2.0–2.5 cm. To do this, cut a piece of paper: its length is chosen equal to the length of the intended bed. Boil a regular starch paste, adding a little boric acid to it (a pinch per 1 liter of solution). Having laid out the paper on the table, apply paste from a dropper at the desired points and carefully place the seeds in these drops. After drying, carefully roll the paper and store until spring.
A modification of the method is sowing seeds in napkins. Everything is exactly the same, but they take napkins of a convenient size and apply drops of paste in several rows, with a distance between rows of 15–20 cm. You can also use a different pattern, 5x5 cm, whichever is more convenient for you.
Of course, when using this method, you need to be sure that the germination of the seeds will be close to 100%, so that your work is not in vain, and there are no “bald spots” in the garden bed. You need to use only reliable seeds.
Video: planting a ribbon with carrot seeds in a bed
Sowing with sand
Sowing carrot seeds, like any other small seeds, has long been done with sand. Everything is very simple: the seeds are “diluted” with any convenient amount of fine sand. For example, for a dessert spoon of seeds (about the amount they put in a package now) take about 1 liter of sand (each gardener has his own proportions). It is important that the sand is clean and dry, because the most important thing is to mix the ingredients well so that the seeds are evenly distributed over the sand.
Then there are options. Some fans sow this mixture dry, others lightly moisten it and scatter the “mush” along the furrows. In my opinion, sowing dry mixture is much more convenient and natural. You can simply read on the package of seeds over what area of the garden bed you need to scatter the prepared mixture.
Carrot seeds are almost invisible in the sand, and sowing turns into scattering of sand into a furrow
Planting with paste
The paste is made from potato (can be corn) starch or wheat flour, making it liquid. For example, at 1 tbsp. take a spoonful of flour and 1 liter of cold water, bring to a boil while stirring and cool to 30–35 oC.
Pour the seeds into the warm paste while stirring in a thin stream (you can pack seeds for 1 liter of paste), mix well, transfer to a small watering can without a strainer or into a kettle and pour the mixture into the prepared wet grooves with a pre-calculated flow rate.
As in sand, the seeds in the paste must be distributed evenly
Sowing carrot seeds in a bag
Sowing “in a bag” is a combined technique that combines the natural swelling of seeds and diluting the mass with paste or sand. In a bag made of natural fabric or gauze, the seeds are buried in the ground in early spring to a depth of about 15 cm, making a mark nearby. Within 10–15 days in moist soil, the seeds swell and begin to hatch. During this time, dig up the bag and pour the seeds into a bowl.
In a bowl, the seeds are mixed with sand and the mixture is sown in a well-watered furrow: the sprouted seeds definitely need moisture, they will sprout very soon, no later than in a week. Instead of sand, you can take starch: there is a modification of the method with dry starch, and there is also with liquid starch; in the latter case, the seeds are not actually sown, but “poured” into the garden bed.
Video: preparing seeds for sowing in a bag
Syringe as a device for sowing carrots
The simplest manual “planters” for carrot seeds are available for sale. They are plastic vessels with a dosing device located at the bottom. When you press the piston, the seeds are gradually squeezed out of the vessel.
In fact, a purchased planter resembles a regular syringe
Since the device costs about 100–150 rubles, gardeners for this purpose usually use a used medical syringe, which works no worse. It is important that the diameter of the outlet corresponds to the size of the seeds: the syringe capacity is 10–20 ml.
Sowing carrots using egg trays
When using cardboard or plastic trays for eggs, the arrangement of the holes in the garden bed becomes uniform, which gardeners often use when sowing various vegetables. The lattice is lightly pressed into the loosened soil, where it leaves behind holes of the required depth. The seeds are sown in these holes. Most often, this method is used when sowing radishes, but the technique is also good for carrots. Many gardeners sow 2 seeds in each hole, and then still pull out the extra shoots.
Most often, the tray is used simply as a marking tool.
A modification of the method is the option when there are many unnecessary trays at disposal. Then a small hole is made in each cell (for easy root germination), and then on any convenient table, soil is poured into all cells and seeds are sown in them. After this, the trays are laid out on the bed and left until harvest.
Sowing carrots in the ground
The beds are watered with hot water before sowing. It is advisable to dissolve Fitosporin in it. Then the soil is covered with a film so that it retains moisture and warms up.
Distance between seeds
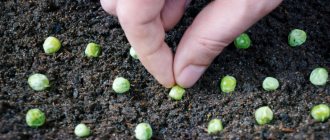
Carrot seeds are buried 2-3 cm, having previously made shallow grooves - 2-3 cm deep. You can’t sow deeper - the germination period is already long and will be pushed back even further. And if you sow less deeply, you may lose seedlings altogether. The recommended interval between adjacent seeds is from 1 to 3 cm, the optimal distance is 2 cm.
The furrows in which the seeds are sown are watered and then sprinkled with:
- wood ash is a potash fertilizer;
- tobacco dust - it saves from pests.
Carrot seeds are very small, so sowing them is a painstaking and slow process. If you sow hastily and generously, you will subsequently have to pull up the carrots - the seed material will be wasted. In addition, when thinning overly thickened plantings, thin shoots can be damaged.
Scheme for planting carrots in open ground
The scheme depends on the scale of planting:
- When industrially grown, carrots are planted in double rows, with 15-20 cm between them. Between adjacent ridges - 40-50 cm.
- On a small scale, the width of the bed is 1.3-1.5 m. The rows are made perpendicular to the long side of the bed. Due to the small width of the bed, the rows are convenient to weed, water and thin out from any side. The distance between the rows is 15-20 cm. Sides are made along the edge of the beds so that water does not flow down when watering.
Do I need to water carrots after planting?
The sown seeds are covered with fertile soil and compacted with hands to ensure good contact with the soil. Watering crops depends on the weather:
- Carrots are planted early, while the soil is still moist, and if it is damp and cool outside, there is no need to water the plantings.
- In warm, sunny weather, it is recommended to lightly water the crops. But this must be done carefully and moderately - so as not to provoke the formation of a crust. It is advisable to mulch the crops after watering, then a crust will definitely not form, and the seedlings will easily break through to the surface.
To preserve moisture and accelerate the emergence of seedlings, the crops are covered with film or spunbond. The latter is preferable - it may be too hot under the film and the seedlings will burn. As soon as the shoots appear, the covering material is removed.
Light watering - sprinkling, repeated daily until shoots appear. When the carrots sprout, the rows are loosened and watering is halved. Until the rows are covered by tops, they are regularly loosened to prevent them from becoming overgrown with weeds.
How long does it take for carrot seeds to sprout?
Under favorable conditions - if the weather is warm and the seeds were planted soaked, seedlings will appear in about a week. At temperatures below +12 °C, the germination time doubles - the first shoots will appear no earlier than in two weeks.
What are the mistakes and how to avoid them?
Due to agricultural practices that must be followed, growth may slow down and yields may deteriorate. So do not use fertilizers such as liquid mullein or manure for carrot beds. Because of this, root crops can rot.
What is also undesirable when planting carrots:
| Errors | Consequences | How to avoid |
| Failure to comply with the timing of moistening and soaking seeds | Rotting, fungal infection | Follow the instructions strictly |
| High concentration of minerals when soaking | Shock for the embryos Problems with germination | Follow the dilution dosage |
| Deep landing | Germination delay | Optimal depth 1.5-2 cm |
| Soil waterlogging | Death of seeds due to oxygen deficiency | Moderate moisture during sowing and subsequently 2-3 times a week |
| Soil drying out | Drying of seedlings | Compliance with irrigation frequency |
Planting seeds so you don't have to thin out later is quite simple. Effective methods help to avoid the labor-intensive breaking through of seedlings. The shoots are strong and strong, the root crops grow juicy and large.
Caring for carrots in open ground
In order for large and beautiful carrots to grow, rich in vitamins and other useful substances, they must be looked after throughout the entire growing season - watered, loosened, fed, and thinned out if necessary.
Thinning
In order for root crops to grow large, you need to provide them with space to grow. If you do not thin out the plantings in time, the carrots will grow thin, and some plants will not form root crops at all.
Thinning time:
- The first time the plantings are thinned out as soon as the sprouts have two true leaves. They mercilessly pull out all the excess carrots. There should be 2-3 cm between neighboring plants.
- The second and last time the carrots are thinned out is a month later - by this time the tops should grow to about 10 cm in height. By the second thinning, the plants are quite large, it is easier to pull them out by hand, without any equipment. Now the distance between neighboring plants should be 5-7 cm. If the variety has cylindrical root crops, then the intervals are smaller, if conical - more.
How to thin carrots:
- Manually. They dig up unnecessary shoots carefully - the movement should be directed perpendicular to the surface. It is important not to damage the plants that are left to grow.
- Scissors. Using a tool, they pull out weak, short and thin plants. Instead of scissors, you can use garden tweezers - they are suitable for both the first and second thinning. To make it easier for plants to be removed from the soil, the soil should be moistened before thinning. The method requires patience - each plant must be grabbed with tweezers and carefully pulled out.
In addition to thinning, you have to weed the seedlings. Seeds take a long time to germinate, but weeds grow quickly, and when young plants appear, they are mixed with weeds. The seedlings are so small that you can only remove the weeds by hand - you can’t work with a hoe here.
The torn-out excess is not left on the beds - the carrot fly immediately flies to its smell. All torn plants must be collected and taken to compost. They cannot be replanted - torn carrots do not take root well, and even if they grow in a new place, they produce branching root crops. After uprooting, the soil is compacted so that insects do not lay eggs in the stirred up soil.
They thin out the carrots during the day, and in the evening the carrot fly actively flies to the smell of the torn carrots.
Watering carrots
Watering affects not only the size of root crops, but also their taste, juiciness and sweetness. Carrots are watered throughout the growing season. The soil is moistened to a depth corresponding to the expected length of the root crop - about 30 cm. If there is not enough moisture, the root crops will be sluggish and the taste will be bitter.
Irrigation features:
- Moisturizing is especially important at the initial stage of the growing season - while the plant has a weak root system. As it grows, the frequency of watering decreases. After watering, the rows are loosened, simultaneously pulling out weeds.
- Watering frequency: every 3-4 days.
- Watering rate is 30-40 liters per 1 sq. m. For medium-sized root crops, 10-20 liters per 1 square meter is enough. m.
- At the end of the growing season, 10 liters per 1 square meter is enough. m. Watering frequency – once every 1.5-2 weeks.
- Watering is stopped 2 weeks before harvesting.
If changes in humidity occur, from soil drying out to excess moisture, root crops crack and their shelf life deteriorates. Improper watering - violation of norms and frequency, leads to deformation of carrots - it grows crooked, with a large number of small and thin roots along the entire length of the root crop.
Top dressing
During cultivation, carrots should be fed two to three times. The development and immunity of plants, the commercial quality and keeping quality of root crops depend on the timely application of fertilizers and the correctness of their composition. The periods and composition of fertilizing are in Table 3.
Table 3
| Feeding period | Compound |
| The phase of formation of 2-3 true leaves. First thinning. | It is advisable to apply fertilizers in liquid form. For a bucket of water take 30 g of superphosphate, the same amount of potassium salt and 25 g of nitrate. The volume is designed for 10 sq. m beds. The second option is diluted bird droppings (1:15). |
| 3 weeks after the first feeding | Same as the first feeding. The goal is to increase root crops. |
| 3 weeks after the second feeding | Nitrogen is excluded from the composition. For 10 liters – 40 g of superphosphate, 25 g of potassium salt. |
If carrots are stunted in growth, it is recommended to water them with complex mixtures - for example, Crystallon - 1 tbsp is diluted in a bucket of water. l of the drug. You can also feed carrots with Kemira, Nitrophoska, Mortar. Next time, the dose of the drug is increased by 1.5-2 times.
To get large and good carrots, after July 15 they are not fed with nitrogen fertilizers.
Feeding rules:
- Before applying fertilizer, the beds are watered.
- The last fertilizing is carried out a month before harvesting. This reduces the nitrate content in root vegetables, adds sweetness and juiciness to them, and improves keeping quality.
Initial care after planting
At the initial stages there are features of growing carrots:
- Regular loosening of beds or mulching between rows with straw.
- Adding soil around root crops.
- The use of potassium-phosphorus mixtures for feeding during the growth stage.
- Water at least 2-3 times a week as the soil dries out.
- Timely weeding.
- Pest control.
Combining plantings with garlic, tomatoes, and cucumbers has a positive effect.
Harvesting carrots
In central Russia, carrots are usually chosen after October 10. When carrot leaves turn yellow, it’s time to harvest. It is recommended to carry out cleaning on the waning moon.
Cleaning and storage procedures:
- The extracted root vegetables are cleaned from the soil. They cannot be washed or wiped with rags - the thin skin can be damaged.
- The root crop is dried in the sun. If the weather is rainy, then the carrots are moved to a well-ventilated area. The tops of dried root vegetables are cut off.
- The greenish tops are cut off - they contain solanine; carrots become bitter during storage. The sections are disinfected with a solution of potassium permanganate. After waiting a few days so that the cut area becomes crusty, the root vegetables are transferred to the basement for storage. There is such a storage option - cutting off the tops of root crops. If you cut off the top bud, the carrots do not germinate, they remain fresh.
- Store carrots at a temperature of +1°C and at a humidity of 90–95%.
- Carrots should not be stored in an airtight container. If carrots are placed in plastic bags, holes are made in them.
- Before storing, root vegetables are dipped in a clay mash, dried and stored.
- Another storage option is to put carrots in boxes, layering them with moss. The boxes are covered with tarpaulin.
If you approach the issue of sowing correctly, there is nothing difficult in growing carrots. Thanks to the original ideas of gardeners, you can skip the thinning stage and significantly simplify the agricultural technology of this root crop.
1
0
Copy link
Diseases and pests of carrots
Carrots are good because they are practically not susceptible to diseases. They develop extremely rarely in this root crop. This is mainly phimosis or alternaria. At the same time, treating the beds with a 1% Bordeaux mixture will reduce the risk of these diseases to almost zero.
The main enemy of the root crop is the carrot fly. The best protection against this pest is proper care of the beds. Necessary:
- prevent the bed from becoming overgrown with weeds;
- thin out plants on time;
- Observe moderation when watering, avoiding excessive moisture.
To repel carrot flies, carrots are planted together with onions.
How to effectively fight carrot flies, read our article: Carrot flies: photos and descriptions of how to fight them
If the fly has already appeared, and this can be understood by the twisted and shriveled leaves, it is worth using products such as Actellik, Intavir and others.
What kind of soil does he like?
Carrots love the sun, this must be taken into account. It is sown in open beds, not shaded by bushes. The soil should be loose. It grows best in loamy soil, but peaty soil is also suitable. If the soil is heavy, it needs to be prepared by diluting it with sand and peat. Usually, half a bucket of loosening ingredients is used per square meter of land. You can’t add manure; carrots don’t like it. The soil acidity level should be 6-7.
Humus should be added to the soil; ash and bone meal are also needed. Superphosphate and potassium sulfate are suitable fertilizers, but if fertilizers are applied, ash and bone meal are not needed. As a mineral fertilizer, you can use urea (10 g per sq. m).
Preparing seeds
Seeds are exposed to adverse factors. These include weather conditions, diseases and pests.
To achieve rapid germination and further growth, you need to carry out special pre-sowing treatment of planting material. The composition contains a large amount of essential oils, which can delay the emergence of seedlings.
When planning preparation, you need to remember that some types of seeds do not tolerate any treatment. Hybrid varieties that have been granulated or treated with insecticides or fungicides should not be subjected to these procedures.
Each procedure has its own goals and technology features. There are several main methods:
Soaking is necessary to shorten the germination period of the seed. Soak it about a day before planting. To do this, use warm water. The seeds should be placed in a gauze bag and placed in water. Every 5-7 hours the material must be washed, making sure that it does not dry out or ferment;
Germination. The procedure helps speed up the formation of root crops. To germinate, the seeds need to be soaked, then spread on damp material and covered with film. Maintain a sufficient level of humidity at all times. When the seedlings begin to appear, they are dried a little and immediately planted in warm soil;
Biostimulation enriches and enhances the effect of soaking. You need to add special nutrients to the water. This treatment will improve seedlings and reduce the susceptibility of seeds to diseases and other unfavorable factors;
Disinfection or dressing protects seeds from the action of pathogens that concentrate on the surface of the seed. The procedure consists of immersing them for several minutes in a solution of potassium permanganate, hydrogen peroxide or boric acid;
Hardening is necessary to increase resistance to cold. After soaking for a week, the seed material is kept in the refrigerator. Periodically take it out and warm it up at room temperature;
Bubbling is used to activate seedlings after sowing. This is the treatment of planting material with oxygen. The seeds are placed in a glass container and treated with oxygen using an aquarium compressor for several hours. Then, after drying them, they are sown in the ground. Bubbling helps speed up the emergence of seedlings (picking occurs within 6-8 hours);
Pelleting helps improve nutrition. Makes the process easier. Carrot seeds are quite small. Therefore, they are enlarged using a special filler and adhesive mixture. Cover with a mixture prepared according to a special recipe until they are covered with a dense layer of this mass and take the form of a dragee. Sprinkled with ash, they are sown in the ground.
Some preparation methods can be combined. Others are used separately. Any of the methods helps future sprouts quickly adapt to new conditions and protects them from unfavorable factors.
Pest Control
Carrots have a lot of pests, including carrot psyllids, slugs, and carrot flies. But since the seedlings are grown at home and the plant arrives in the garden already older and stronger, the carrot fly does not have time to harm it much.
And if you also spray the planted plants in time with infusion of onion and garlic, sprinkle pepper, mustard, and wood ash between the rows, then the carrot fly will fly away altogether.
But if pests do attack your crop and it is not possible to fight them with preventive measures, only special preparations will help - insecticides that are sold in stores (Aktara, Inta-Vir, Fitoverm). They need to be diluted and processed according to the instructions.
Deadlines by Regions of Russia
In the southern part of the country, stable warmth sets in much earlier than in the central zone or other regions. Therefore, you can start sowing from the end of March - early April, after the snow has finally melted.
In the Moscow region and the rest of the Central Zone, the soil warms up much later. The optimal period for sowing seeds will be the end of April - the first days of May. In the Leningrad region, carrots are planted at approximately the same time, taking into account weather conditions.
In the Urals, the best period is from late April to May. This depends on the geographical location and weather conditions in a particular year. The optimal period is when a stable minimum temperature is established at a level of 5 degrees Celsius.
Siberia is not an easy region to grow many crops. The orange root vegetable, due to its relative unpretentiousness, grows well in Siberian climatic conditions. But you can plant seeds in the ground when the ground has warmed up well. This should be done no earlier than May.
How to prepare the soil for a carrot bed?
Before planting seeds in open soil, it is necessary to prepare it. It is worth taking care of the place intended for spring sowing in the fall. The soil should be thoroughly dug up, all existing roots and weeds should be eliminated. It is also important to fertilize the soil. After such preparatory work in the spring, the place must be loosened again and the seeds must be planted. Summer residents should remember that the soil should be light and loose. In such conditions, the culture will grow well and will not become deformed.
If the soil is dense enough, it can be mixed with sand, compost, manure or peat. It is important to take into account the acidity level of the soil. An excess of acids can negatively affect the taste of carrots. The optimal indicator is 6-7. To obtain the required acidity level, you need to add special products: dolomite flour, wood ash, chalk.
Thinning, loosening, hilling
To obtain even and large root crops, it is imperative to adhere to the rules of hilling and thinning. Initially, you need to timely loosen the bed with carrots in order to saturate it with the required amount of oxygen. You need to resort to loosening the soil after watering or rain. Actions must be extremely careful, since the weakened roots at this moment are close to the surface, therefore, they are easy to catch and damage. Thinning should also be done carefully. It should be started after the leaves of the tops have become stronger. If thinning is not done correctly, the root crops that are in the ground will be injured and the carrots will grow “horned”.
Such a procedure must be carried out guided by the following rules:
- Thin only when the soil is thoroughly moistened.
- Remove excess root vegetables carefully by pulling them up or rocking them.
- It is better to thin out in several stages: for the first time, it is enough to leave the distance between the carrots no more than 3 cm, after two weeks the procedure is repeated. In this case, the distance will be 4-5 cm.
As for hilling, the root crop must be covered with soil to prevent the appearance of a green surface on the root crop. If you neglect this rule, the substance solanine will appear in vegetables. When storing the crop in winter, it will give the carrots a bitter taste.