Potato varieties for seed propagation
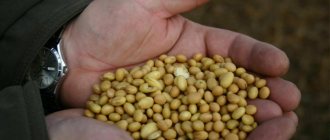
After flowering, all potato bushes are covered with berries, from which the seeds are collected.
Certain varieties produce a larger number of fruits, and their seeds have increased germination:
- Farmer. Potatoes with thin light skin, the flesh does not disintegrate during cooking. The harvest is harvested 65 days after planting. Each bush bears fruit with 10–15 potatoes weighing about 100 g. Resistant to viral diseases.
Farmer - Assol. Oval tubers with smooth light skin. The pulp is dense, light yellow. New potatoes are dug up in mid-July, and the entire crop is harvested in August. The variety is resistant to diseases and sudden temperature changes. The weight of each tuber is from 100 g and above. More than 3 kg of crop is harvested from the bush.
- Empress. Small bushes with large elongated tubers. The pulp is yellowish, the taste is high. The weight of vegetables is from 60 to 140 g; 3.3 kg of potatoes are usually harvested from a bush. The first harvest is dug in July, harvesting is completed at the end of August. The plant is resistant to fungal diseases and is practically not affected by nematodes.
- Triumph. Small oval tubers. It is characterized by increased productivity: each bush bears fruit of at least 30 potatoes. The creamy flesh is good - great for soups and baking. The culture has increased immunity to viral and fungal diseases.
- Ilona. Full ripening occurs in August. New potatoes begin to be dug up in July. The tubers are large, elongated, beige in color. The pulp is crumbly white. High yield, resistance to diseases and pests, good germination in various climatic conditions.
- Velina. Oval tubers of medium size, pale yellow color, dense foliage. Potatoes sprout quickly and are harvested in August. Vegetables are suitable for preparing various dishes. Each bush produces 500–700 g of tubers. There is immunity to fungi and viruses.
- Revenge. Large oval-shaped tubers weighing 120 g. One bush produces up to 3 kg of yield. Smooth yellow peel, creamy flesh that does not darken during heat treatment. Resistant not only to common diseases, but also to pests.
- Lada. Produces round tubers that keep well all winter. The peel is reddish, the pulp is starchy light yellow. One tuber weighs up to 150 g. The variety has increased resistance to common diseases.
- Beauty. Mid-season high-yielding variety. Large red tubers weigh up to 300 g each. The yellow flesh does not crumble when cooked. The plant is resistant to fungal diseases and temperature changes.
Beauty - Virgo. Large elongated tubers weighing up to 200 g, light red peel. The pulp is yellow, boiled. There is immunity to infections and pests.
Benefits of seed planting
Growing a crop from seeds has a number of advantages over classical propagation by tubers:
- there are no diseases that occur in tubers;
- buying seeds is cheaper than buying potatoes for planting;
- the yield is 10–20% higher than that obtained from tubers;
- The shelf life of planting material is more than 5 years, it does not require much space;
- grown potatoes are more resistant to late blight and other diseases.
Potatoes grown from seeds are small in size in the first year, but are used for planting the following season.
Benefits of seed planting
Each method of planting potatoes in the garden - tubers or seeds - has its pros and cons. Having chosen the seed method, you need to work with the seedlings, select the right soil and conditions for its cultivation, and transplant the seedlings to the site. While planting tubers takes on average only 1-2 days, there must be suitable facilities for storing them during the winter.
The main advantages of seed planting potatoes are:
- absence of diseases, unlike tubers, which add new diseases with each sowing season;
- high indicators of taste, quality, yield, while tuber indicators are constantly deteriorating (culture degeneration);
- compactness, ease of storage of seed material.
Having become fascinated by the process of growing potatoes from seeds, gardeners have the opportunity to develop their ideal variety with high fruiting rates that take root well in the existing soil.
Another advantage of this method is its cost-effectiveness. Collecting potato seeds on your own will significantly save your budget, especially in comparison with purchasing tubers for planting. You can, of course, purchase seeds at the market or in seed stores, but then there is a risk of purchasing low-quality material with poor germination.
When to collect seeds
To obtain a large number of healthy seeds, berries are collected from the strongest bushes that have not been sick throughout the season.
Reference! To prevent loss of berries, the top of the bush is wrapped with vegetable netting. This will prevent falling and make collection easier.
The seeds are found in the berries left after the potato blooms. To prevent the fruits from falling off, they are harvested unripe in mid-July. For early ripening varieties, the harvest time begins in June. Their color at this time should be light green.
Harvesting time and storage of potato seeds
The exact timing of harvesting berries with potato seeds depends on the specific variety of the crop. Early-ripening varieties ripen earlier, so fruits can form on them as early as June, and on late-ripening plants, berries appear closer to mid-July.
The general rule is that berries from potatoes should be picked immediately after the bush begins to turn yellow and dry out. After the seeds are separated from the pulp of the berries, they are prepared for storage.
Important! Properly prepared potato seeds can be stored for up to 6–10 years, but the highest germination rate is typical for planting material that is no more than 2 years old.
To do this, perform the following actions:
- the seed material is washed under running clean water to remove any remaining fruit pulp;
- wet planting material is laid out in a thin layer on thick paper and placed in a warm room to dry;
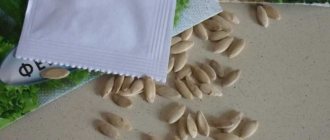
- dried seeds are packaged in paper envelopes, indicating on the packaging the name of the variety and the date of harvesting.
How to collect potato seeds from bulbs
The collected berries are carefully laid out in one layer or hung in a gauze bag in a bright and warm place. Leave for several weeks until fully ripe and softened.
Further actions:
- Ripe berries are turned into porridge by crushing them. Add a small amount of water to the mixture. Leave in a warm place for 2-3 days for fermentation (bubbles and a sharp characteristic smell should appear).
- The fermented pulp is poured with a large amount of water. Seeds that are suitable for planting will sink to the bottom. All defective material will rise to the surface.
- Remove empty seeds from the surface.
- To separate the seed material from the water, filter the entire mass through cheesecloth or a fine sieve.
Planting material is also extracted in a simpler way: the fruits, cut in half, are ground on a sheet of paper and allowed to dry. After the pulp evaporates, only the seeds remain on the leaf. The disadvantage of this method is the lack of fermentation, which destroys the dense seed coat, which prevents the rapid germination of plants.
Obtaining mini tubers
A simple option for obtaining new planting material is a sprouted large tuber. I will tell you how to properly update potatoes by obtaining mini-tubers.
Instructions:
- I chose and saved from the fall the largest potato of the species that interested me.
- I treated it with a weak solution of manganese to prevent rot spores from appearing.
- In mid-summer I put it in a bucket of wet shavings.
- I placed it on the floor in the closet.
- All summer I moistened the shavings with a spray bottle.
- Within a few months in a favorable environment, the tuber took root with small nodules.
- At the end of autumn, I removed the mini-tubers that had formed on the roots of the potatoes.
- I dried them in the sun until they turned green, this way they are preserved better.
- I put it in a paper bag and put it in a cool place until spring.
- Next year I will plant seedlings.
Have you learned how to grow seedlings from large potatoes? Look at another way: growing potatoes at home from seeds, perhaps this is the one you will like more.
Storage and preparation for planting
Packaged seeds are stored in dry rooms at a temperature of +12...+18°C.
Advice! Store the material in a place inaccessible to rodents, as they will use some of the seeds for food and spoil some.
Before planting, it is better to prepare the seeds to awaken and harden them:
- To awaken, they are filled with warm water and left for 48 hours in a warm room.
- Remove from water and dry naturally to a powdery state.
- To harden, wrap it in a damp cloth and leave it for 14 days. The fabric is regularly moistened, kept indoors during the day, and put in the refrigerator at night.
The appearance of sprouts is a sign that it is time to plant the seeds in the ground.
Growing from the top of tubers
Friends, it turns out that it is not necessary to take the entire tuber for planting; you can use only a part.
Since September, I have been storing several delicious potatoes to get a new look in my garden. Look at the nuances of planting the tops of potatoes.
Instructions:
- I cut off ¼ of the top of the tuber with sprouted eyes.
- I sprinkled the cut with charcoal to disinfect it.
- I placed the scraps in a cup with sawdust so that the eyes were on top.
- She covered it with sawdust, which she watered with warm water before laying the seed material.
- Covered the container with film and placed it in a warm place.
- You don't have to cover it and monitor the humidity.
- After 21 days, the eyes sprouted shoots and roots.
- The sprouted tops are ready to be moved to the garden bed.
Have you prepared for the harvest in advance? Then look at how to store potatoes in an apartment so that not a single tuber goes bad.
Watch a video about the mistakes of growing potatoes from seeds.
Growing from sprouts
Dear gardeners, growing seedlings from sprouts is a method of propagating and renewing potatoes that is suitable for beginners. The main condition is to prepare suitable potato tubers in advance. If you are interested in the method, read the story about the preparation.
Instructions:
- I take a long pot 25 cm high and fill it with wet peat halfway with sand.
- I place the selected potatoes in the soil so that half of the tuber with buds remains outside.
- I cover the pot with plastic and place it on a sunny windowsill.
- When the bores rise 5 cm, I carefully tear them off the tuber.
- I move the sprouts into a new container for rooting.
- When they take root, about a week and a half later, I send them to the garden bed.
- In the fall, I collect small potatoes and leave the larger ones for the next planting.
Author's note
Natalia Papanova
Blog author
To grow from sprouts, I take mid-early potatoes, they germinate and take root faster.
Watch the video instructions on propagating potatoes from sprouts.
Potato sprouts for propagation and renewal
Various vegetative methods
Depending on the amount of seed, you can choose several methods of growing potatoes.
Tubers
The easiest way is to plant vegetables with whole tubers. To do this, it is enough to dig up the soil in advance and properly prepare the material: move it to a lighted room in advance and get sprouts to appear (spray the potatoes with water and turn them over periodically).
Tubers
Cuttings
This procedure is carried out in the middle of the season, after the potatoes have faded. Once you have chosen a healthy and strong bush, cut off small sections of the stems. After treating the cuttings with fungicides, bury them horizontally to a depth of 1 cm. The resulting tubers can be used for planting.
Carry out in the middle of the season
Eyes, peel and division of tubers
Potatoes can be propagated by eyes, which are cut out separately, with the peel or with parts of the tuber. Having chosen a large fruit, select the seed and then place it in moist, fertile soil 1.5-2 months before the planting season. The sprouted eyes must be periodically sprinkled with soil until the seedlings reach a height of 8-10 cm. After this, the potatoes can be planted in the garden.
Peel. Photo used from pxhere.com
Layerings
Using this method, several plants can be obtained from one mother tuber. Having chosen large, healthy potatoes, keep them in a bright place for some time, and then plant them in moist, high-quality soil. After some time, the root crop will begin to sprout. When the seedlings grow, they can be separated from the tuber and planted separately. Sprinkle the mother part with soil again; soon a new sprout will appear in this place.
How to store collected seed
Once the potato seeds have been collected, they begin to place them in storage until the planting season. It is believed that properly prepared seed material can be stored for 6-10 years without losing its germination characteristics.
To preserve the seeds, separate small envelopes of thick paper or bags of fabric (burlap) are prepared. To know what variety of potatoes was harvested and when packaging took place, all this data is written directly on the envelopes or a separate piece of paper that is attached to the container.
The storage conditions for seed grains are as follows:
- dry air;
- cool temperature (12-16 degrees Celsius);
- absence of frequent, strong fluctuations in humidity;
- safety from insects and rodents.
If seeds were purchased from breeders or in stores, they should be stored in similar conditions until they are planted in the ground to obtain seedlings (approximately the month of April). It is advisable to plant them in the season following the purchase, since the shelf life of their quality is much lower than that of those collected independently.
Vegetation or seeds?
Naturally, propagating potatoes vegetatively is easier, more familiar and faster than using seeds. However, both of these methods are quite widespread. Propagation by tubers, cuttings, layering, peel, and parts allows you to preserve all the varietal qualities of the crop, but often the seed material is affected by infection and is not suitable for further use. In addition, tubers take up a lot of extra space. Collected and dried seeds can be stored in matchboxes. But to plant and germinate them you will have to put in some effort.
Growing from eyes
An ancient way to obtain new bushes and renewal is to grow from buds. Eyes are small pieces of potato with a kidney. When there is little planting material, I use this option. When I receive new plants, I recommend looking at them in the description.
Instructions:
- If I like the taste of the potatoes, I take a few to update my planting material.
- In the spring I separate a bud with potato pulp 2-3 cm thick.
- I place it in a container with soil to a depth of 3-4 cm.
- I cover it with film for a greenhouse effect.
- When the buds sprout, I remove the covering material.
- I put it in the sun and at the end of September I dig up the formed nodules.
- I dry it in the sun and put it in fabric bags for storage.
- I put the bags in the pantry at a temperature of no more than 15 degrees and a humidity of 60-70%.
- In the spring I plant seedlings.
Have you tried growing potatoes from eyes?
Not really
Further care for potatoes
Caring for seedlings planted in open ground includes the following activities:
- protection of seedlings from frost - for this purpose the plantation is covered with lutrasil, spunbond or other non-woven covering material;
- moderate watering as the top layer of soil dries out;
- mulching with a 5-8 centimeter layer of straw and peat;
- pest and disease control (spraying with insecticides and fungicides).
When mulching between rows, potato seedlings are not hilled up.
Growing from cuttings
Dear readers, potato cuttings also occur. Experienced gardeners say that when the bushes begin to bloom, it’s time for cuttings. It is necessary to use a healthy bush free from stains and pests. The process, in my opinion, is interesting, I advise you to read the landing sequence.
Instructions:
- Immediately after the potato bush blooms, I cut off a thicker branch at the root.
- I divide it into 4-5 cuttings with sharp pruning shears so that the leaf remains in the middle of the cutting.
- I remove half the leaf, the remaining part feeds the cutting.
- The optimal thickness of the cuttings is slightly thicker than a pencil, length 5 cm.
- I immerse the slices in a solution of Fitosporin (1 ml + 200 ml of water) for 3 hours.
- I pour a nutritious earthen mixture into the pot (humus + peat + sand in equal parts), spill it with the remains of Fitosporin.
- I place the disinfected cuttings in the soil with a slight slope.
- I put sawdust on top.
- Only the leaf remains on the surface; it’s okay if it’s lightly sprinkled.
- I cover it with film so that the moisture does not evaporate.
- I place it in the shade; the sun is harmful to the seedlings.
- After 10-15 days, I remove the film and water it every other day.
- After a month, I dig up the nodules and store them in fabric bags until next year.
- If the weather permits, I leave the seedlings in the container longer; the larger the mini-nodules, the better they will overwinter.
Friends, I recently wrote an article about storing potatoes on the balcony in winter, I invite you to read it to expand your knowledge.
If you cut part of a bush into cuttings, you will get new plants
Growing from seeds
Dear friends, if you like the look and quality of potatoes, you can collect seeds from the plant in the fall and plant them
. Potato seeds are formed after flowering in the form of small green tomatoes, see how best to collect them.
- I pick the bulbs and ripen them at home on the window.
- When the tomatoes become completely soft, I take out the seeds.
- I wash them and dry them on newspaper.
- I store it in paper bags indicating the date of collection.
I start planting at the end of spring so that the seedlings can be taken out into the open air, otherwise they will stretch out and the quality will decrease. A detailed description of the method will be useful for beginner gardeners.
Instructions:
- I pour soil (sand + peat + humus, 1 part each) into a long, low container (20x50).
- I place 1 seed on the surface of the ground at a distance of 2 cm from each other.
- I sprinkle 0.5 cm thick sand on top.
- I moisten it with a spray bottle and cover the container with glass.
- I leave it in a warm place, and when the first sprout appears, I take it out onto the balcony.
- I place it so that the direct rays of the sun do not fall, and I remove the glass.
- I water it daily.
- Until autumn, small nodules ripen in a pot.
- I dry them and put them in a paper bag until next year.
Author's note
Natalia Papanova
Blog author
Collect the seeds of the potatoes you like from healthy and young plants. If you don’t have a summer house, you can order them via mail or the Internet.
Ripening potato seeds
Have you planted seeds for seedlings? I advise you to replenish your knowledge and learn how to freeze potatoes for the winter, share useful information with your friends.
Features of planting potatoes
Planting potatoes with tubers has not lost popularity for many years. The usual method is implemented by the overwhelming majority of farmers. However, recently the desire to obtain large yields with minimal effort has come to the fore, and so there has been increased attention to alternative methods.
Seed propagation of potatoes can be done by seedlings and without seedlings.
Seedless growing method
Planting seeds in open ground is more relevant for southern regions with a stable weather situation. Open, sunny areas are allocated for light-loving crops. The shady side will not allow full-fledged bushes and large tubers to form. If we talk about soil preparation, then this issue must be approached in the fall. After harvesting, the soil is cleared of weeds and dug up onto the bayonet of a shovel.
Related article: Fusarium and powdery mildew of potatoes: symptoms and control methods
Acidified soil should be neutralized. This requires a glass of lime, a glass of dolomite flour or about three glasses of ash. All this is calculated per square meter of area. After cultivating the land, green manure is sown. Peas, mustard, rye and barley are best suited. After a month and a half, the soil is dug up again. You can use humus, compost or mineral fertilizer with nitrophoska.
To obtain rapid germination, potato seeds are heated in a humid chamber at a temperature of 40 degrees. Additional treatment with microelements is welcome. The seeds are dried at room temperature and planted in the soil. You can pre-germinate them. To do this, they are scattered on a wet napkin, covered with a damp cloth and placed in a warm place. A window sill above a warm radiator is ideal. In about a week, the seeds will be ready for sowing.
Sowing seeds in open ground
An important point is the soil temperature. It should be at least 14 degrees in a ten-centimeter layer. Typically, this temperature regime is established already in the first half of May. Before planting, the bed should be loosened. The hole should be made about 4 centimeters deep at a distance of up to 40 centimeters. 3 seeds are placed in each hole. Then a centimeter of fine mulch is laid.
Planting in furrows is not prohibited. Four-centimeter lines are cut and filled with water. After the moisture disappears, seeds are placed in the furrows. The first shoots appear on the 10th day. In the phase of two true leaves, during the period of closure of the above-ground mass, thinning is carried out. The soil is thoroughly moistened.
It should be noted that the sprouts need constant watering and loosening. They grow very slowly and can suffer from weeds. Only after 30-40 days do bushes form. Further actions are no different from those carried out with the usual tuber planting. Harvest occurs in September-October. First year potatoes are stored for later use as seed.
Seedling method
The soil with this method must be fertile and breathable. For two parts of garden soil, take four parts of peat and one part of sand or six parts of turf soil. The composition must be thoroughly mixed and disinfected. To do this, for every 10 kilograms of soil, add 10 grams of nitrophoska, as well as phytosporin or trichodermin. The proportions are given for 10 liters of water. Biological products will destroy pathogenic microflora and support the formation of beneficial ones. The resulting soil mixture is used for planting.
Seed preparation
The seeds are placed in the refrigerator overnight and then transferred to a warm room for several days. This is how they are hardened. Before sowing, you should pay attention to root formation stimulants. Solutions of root or epin are perfect for pre-planting treatment. By the way, germination is carried out in the same way as with the seedless method. After a week, the seeds can be planted. Cups, cassettes, pots or low boxes are perfect. There must be holes in the bottom of the container to drain excess liquid. It should be remembered that seedlings are susceptible to root diseases due to waterlogging.
Sowing and caring for seedlings
When planting seeds in boxes, make furrows of one and a half centimeters every ten centimeters. The seeds are placed in recesses every 5 centimeters, mulched with dry sand or soil mixture and slightly moistened. The soil is watered through a spray bottle until sprouts appear.
The containers are placed on shelves in a heated greenhouse. If we are talking about home cultivation, boxes or glasses are covered with film or plastic to ensure an optimal microclimate. Periodic loosening is necessary.
On about the tenth day, the first shoots should appear. After two true sheets appear, picking is carried out. Potatoes in pots do not pick. Containers with seedlings must be rotated to achieve uniform illumination.
Two weeks before planting in open ground, the bushes must be hardened off. To do this, the boxes are periodically taken out to the balcony or other cool place. The hardening time gradually increases.
Planting seedlings in open ground
Potato seedlings are planted at the end of May at the age of 40-50 days. The holes in the beds should be about 10 centimeters deep. If potatoes are intended for seeds, then they should be planted after 30 centimeters. If you plan to immediately eat potatoes, the space between the bushes should be about half a meter. It is not forbidden to plant 2 seedlings in one hole. If desired, you can add humus or ash.
