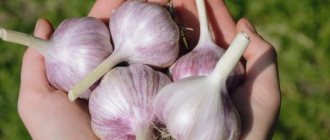
Why do I grow garlic outdoors?
Garlic is one of the mandatory plantings on my site. I, like many gardeners, choose this vegetable for its combination of beneficial properties:
- A tasty tart spice that stimulates the appetite and improves digestion.
- A universal product: garlic is added to salads, sauces, meat dishes, soups, side dishes, marinades, canned food and pickles.
- Garlic strengthens the immune system.
The “King of Spices” is easy to grow in the garden. The plant is unpretentious - suitable for sowing in open beds, requires minimal preparation and simple care.
Useful properties of garlic
Content
Garlic has a rich chemical composition, including many valuable vitamins and minerals. The sulfur compounds contained in it are responsible for most of the healing properties. The cloves are consumed fresh to strengthen the immune system, lower blood pressure and cholesterol levels. Based on them, capsules are made that are taken for acute respiratory viral infections, acute respiratory infections, diseases of the cardiovascular system, and dysbacteriosis. A tincture based on the plant is used to treat diseases of the upper respiratory tract and externally for dermatitis and pyoderma.
When to plant garlic in open ground in spring
There are two ways to grow garlic - winter and spring. The first is sowing the crop before winter, in late autumn. The second is spring planting.
When to plant summer garlic in open ground
Winter garlic is planted from the 2nd half of September to mid-October. It is necessary that the plant has time to form a root system before the onset of frost and goes 10 cm deep into the soil. But at the same time, it does not begin to grow with the arrival of winter.
By region
The timing of spring planting varies among Russian regions:
- North-West, Siberia, Ural: end of April beginning of May.
- Middle zone: second to third ten days of April.
- Southern regions: early April.
Garlic is planted as soon as the soil warms up to 5-6 C. It is a cold-resistant plant that develops comfortably under such conditions. Garlic is able to form a root system only in moist soil, whose temperature is in the range of 4-10 C. With warming, the development of the root system stops - the crop begins to actively grow tops and heads.
According to the lunar calendar
Let me present the favorable dates for sowing spring garlic according to the lunar calendar for 2022:
- April: 1-4, 8-13, 15-19, 23-27, 29-30.
- May: 1-3, 7-11,13-17.
Now - lucky numbers according to lunar cycles for planting winter garlic in 2022:
- September: 1-5, 7-12, 16-21, 23-26, 30.
- October: 1-4, 6-12, 16-20, 22-26, 30-31.
It is believed that plants sown on these dates grow stronger, healthier, and more resistant to adverse conditions.
Care
Mulched garlic.
Watering
Garlic does not tolerate excess moisture well, however, it requires constant moderate watering.
This is especially important during the growing season - from the beginning of spring until the appearance of the first teeth. Watering rates depend on the density of the soil. Water should penetrate the soil to a depth of about 30 cm. The time between waterings is one week.
Watering
The first watering is carried out at the end of April - beginning of May and is usually combined with the next feeding. A month before harvest, watering is stopped. The harvest of winter garlic occurs at the beginning of August, and for spring garlic - from the third ten days of August.
Feeding
In addition to fertilizing before planting, garlic needs to be fed 2-3 times during the season. It responds very well to fertilizing, especially phosphorus and potassium fertilizers.
Autumn fertilization
The winter variety is fed for the first time as soon as the snow melts. The composition of the fertilizer is as follows:
- Ammonium nitrate – 6 g
- superphosphate – 10 g
- potassium sulfate – 5 g
All standards are indicated for an area of 1 sq. m.
The second and subsequent feedings are carried out at intervals of 1 month. In June, feeding stops.
Fertilizing spring garlic is done in a similar way, but with a time shift due to planting dates . The first feeding occurs at the beginning of May, the second at the beginning of June, the third at the beginning of July.
Additional care
Garlic practically does not require any additional care, since thanks to the substances included in its composition and its size, it is able to compete perfectly with almost any weed.
Adding humus
You can also loosen the soil after each watering, but there is no urgent need for this.
The only thing a plant needs for good yield is the timely removal of flower stalks as they appear.
However, you should not get too carried away with the process and remove flower stalks from all plants. Usually, 1-2 plants are left on each row, which are allowed to bloom and form bulbs . This is necessary to obtain part of the planting material from the flowers in order to avoid the degeneration of garlic.
Harvesting
When cultivating garlic, it is important not to miss the deadline for its harvest, since overripe bulbs begin to disintegrate into cloves, which immediately tend to begin germination.
Therefore, as soon as the garlic shows the first signs of ripening, it must be harvested.
These signs include:
- the appearance of a dense membrane at the heads
- clear visualization of teeth
- color change of lower leaves from green to yellow
Harvesting
About a week before digging up the garlic, it is recommended to rake away some soil from it and expose the top of the bulb - this will slightly speed up its ripening.
Baring bulbs before harvest
Review of garlic varieties for planting in open ground
All varieties of garlic can be divided into three categories:
- Spring non-shooting.
- Winter bolting and non-shooting.
Winter varieties are chosen because of their large yield, rapid ripening, and the formation of large heads and cloves. But their significant drawback is short-term storage. Garlic is suitable for fresh consumption, for preparing first and second courses, pickling and canning.
Popular winter varieties:
- Anniversary Gribovsky. Mid-early, high-yielding, disease-resistant. Shooting variety. Garlic is very spicy. These are large heads with 10-12 cloves in a matte purple skin.
- Boguslavsky. Cold-resistant variety. The heads are small (up to 40-50 g), with 5-6 cloves in a purple shell.
- Petrovsky. Richly productive and shooting. It has excellent keeping quality, disease resistance, and tart taste.
- Losevsky. Mid-season, high-yielding bolting variety. The mass of the heads is up to 80 g, the number of cloves is no more than 5-6. The pulp is dense and sharp. Garlic can be stored for up to six months.
- Gulliver. Arrowhead, mid-season. The head is covered with dark gray “scales”, the flesh is dense and sharp. Weight – 90-120 g, number of cloves – 3-5. The maximum storage period is 8 months.
Other winter varieties that deserve your attention:
- Flight;
- Sail;
- Komsomolets;
- Gribovsky;
- Prometheus;
- Saved;
- Anniversary;
- Sofievsky;
- Lyubasha;
- Kharkov purple;
- Say goodbye;
- Saki;
- Leader.
Spring varieties are distinguished by the possibility of longer storage. However, you need to create optimal conditions (temperature, humidity, ventilation). The growing season for these varieties is shorter - about 3 months.
The most popular spring varieties:
- Ukrainian white. The head is large - about 20 cloves.
- Gafurisky. Early ripening, productive, prolific (up to 20 cloves) variety. The pulp has a very pungent taste.
- Elenovsky. Medium-hot garlic, suitable for long-term storage.
- Degtyarsky. Mid-season variety. The number of lobes in the head is 16-18, the taste is semi-sharp.
- Ershovsky. Mid-early garlic with small heads (up to 35 g). Multiple fruits - up to 15-25 small cloves. The taste is pleasant, semi-sharp. The product is stored for up to 7-8 months.
Pay attention to varieties from foreign breeders:
- Silver. High-yielding, disease-resistant variety. The head has 15-20 teeth.
- Red Duke. Frost-resistant garlic. There are 8 large lobes in the head.
- Elephant. A giant variety - the weight of one head can reach 1-2 kg. The diameter of the fruit is about 15 cm. One head has up to 20 teeth.
You can easily get your own seed, leaving a few arrows for the development of bulbs.
Recommendations for planting
Holes or grooves are dug in the area at a distance of 10 cm from each other. 25 cm are left between the rows. The recommended depth of the planting hole is 9 cm. A small handful of tobacco dust is placed at the bottom, which will protect the plants from pests. The cloves are placed bottom down, without pressing into the soil. They are sprinkled with fertile soil on top.
The method of planting whole garlic heads with 4-5 large cloves allows you to save space on your plot. They are buried 15 cm into the holes, sprinkled on top with nutritious soil containing humus or vermicompost. Planting holes are located at a distance of 25 cm.
Regardless of the planting method, the beds are watered with warm water or a Fitosporin-M solution, which will prevent the development of fungal diseases. Then the area is mulched with fallen leaves, peat or humus. The optimal height of the mulch layer is 10 cm.
♥Interesting information: photo gallery on the website “How to grow raspberries in the countryside in open ground”
Preparation of planting material
The richness of the harvest always depends on quality and proper preparation. Therefore, 2-3 weeks before sowing, I carry out the following procedures:
- Stratification. I put the cloves and onions in the refrigerator.
- Sorting. I reject deformed, damaged, soft, twisted, or with suspicious inclusions. I remove the seed material that is left without shell or scales.
- Disinfection. I usually use an ash solution: 400 g of ash per 2 liters of water. I boil the suspension for 30 minutes, cool to room temperature. Then I soak the onions in it for 2 hours. An alternative is a 1% solution of potassium permanganate, a suspension of low concentration copper sulfate. The seed is kept in such liquids for 12 hours.
- Germination. An optional procedure - I use it to improve germination. I wet a napkin, a piece of cloth in water, and wrap the cloves in the cloth. I place the envelope in a plastic bag, tie it tightly, and store it at room temperature for 2-3 days.
After such simple procedures, the material is completely ready for sowing.
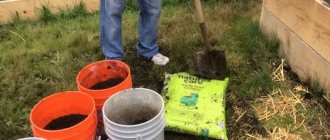
preparation of garlic planting material
Diseases of winter garlic
Rotten
The most dangerous for the crop are bacteriosis and penicillium bottom rot , which infect garlic during storage and enter the soil with planting material. In diseased plants, the tops of the leaves first turn yellow, and then the entire leaf dies.
To protect the crop from rotting during storage, harvesting should be done when the garlic heads are fully ripe. When trimming stems, you should leave a long neck (up to 10 cm). The dug up and trimmed garlic must be dried in air or in a dryer. Properly dried onions rustle when poured.
Store garlic at a temperature of 1-3°C and air humidity not higher than 75%. By following the described technology, you can always get a good harvest of garlic with a long shelf life.
Rust
Another terrible disease for garlic, rust , manifests itself in the form of individual specks the color of rusty iron, which after some time completely cover the entire plant.
At the first signs of disease, it is necessary to treat the garlic planting with fungicides: 0.4% Oksikhom solution, 0.2% Ridomil solution, 0.3% Ordan solution or 0.3% Bravo solution. Moreover, the procedure must be repeated 2-3 times with a break of 1-2 weeks.
The listed preparations for treatment can be alternated. The packaging always indicates the name of the drug, concentration, list of diseases and application rate, so always carefully study the recommendations for the use of drugs.
How to prepare for planting garlic
To ensure that your plantings delight you with a rich harvest, I advise you to properly prepare the area for sowing garlic.
Soil preparation
Garlic prefers fertile, neutral soil. It grows well on a loamy substrate and loves moderately moist soils. Lowlands and wetlands where melt water accumulates are not suitable.
The soil is prepared in the fall for both winter and spring crops:
- For 1 m2 – 1 bucket of humus, 20 g of potassium salt, 30 g of superphosphate. Fertilizer is mixed with garden soil.
- The area is being dug up.
The bed for winter garlic is leveled after 2 weeks. Under spring crops, they are raked in the spring.
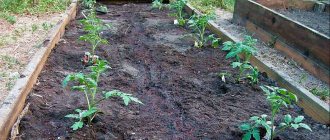
Crop rotation
The best predecessors for garlic beds:
- cabbage;
- legumes;
- pumpkin;
- green manure;
- zucchini.
Unwanted Precursors:
- the root vegetable itself;
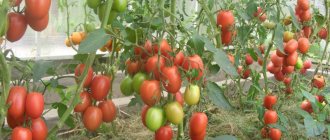
- tomatoes;
- cucumbers;
- carrot;
- onion.
Neighborhood with a garlic bed is beneficial for plants:
- gooseberry;
- strawberry;
- raspberries;
- currant;
- potato;
- tulips;
- gladioli;
- roses.
Garlic repels pests from these plantings - caterpillars, slugs and even moles.
Selecting a location, preparing the soil and beds
The aromatic vegetable prefers light soils (pH not lower than 6), loves a sunny place and moderate watering. It has a stingy root system, so the crop is planted in fertile soil. Loams and sandstones are best suited.
Garlic grows quickly in a well-lit, sunny location with little shade during the day. If it is impossible to provide such conditions, then when planting, maintain a distance of 18-20 cm between the segments so that the grown leaves and arrows do not create additional shading.
Soil preparation begins approximately 2 weeks before planting the cloves. The soil is dug up to a depth of 25 cm, all plant remains are removed and left to shrink.
If you plant garlic in a freshly dug bed, it will go deeper into the loose soil than it should. A heavy layer of soil will not allow the required amount of oxygen to pass through, which will greatly complicate rooting and can lead to the death of garlic, especially in winters with little snow.
Before forming the bed, the soil is fertilized. For 1 sq.m. use 5 kg of humus and 1-2 tbsp. spoons of mineral fertilizer. Any phosphate fertilizer or special complex fertilizer for onions and garlic is suitable. In addition to the phosphate, you can sprinkle ash on the bed - 0.5-1 liters per 1 sq.m of bed. The prepared compost is thoroughly mixed with the soil and a high ridge is formed.
If the soil is acidic, lime materials are added. It’s just better to do this a year before planting.
Do not add fresh manure to the soil! Organic matter contains a lot of ammonia and stimulates leaf growth; nitrates accumulate in the cloves. The fruits are susceptible to fungal diseases, become loose, ripen and are poorly stored.
How to plant garlic in open ground
I will present several ways to plant winter and spring garlic. They differ in the type of seed you will use.
Planting bulbs with cloves (lateral buds)
This method is suitable for winter planting. First divide the head into individual cloves. The sowing pattern is simple:
- Form ridges 1-2 m wide.
- Make even furrows at a distance of 15-20 cm.
- Deepen the cloves by 5-7 cm. Use specimens weighing at least 4 g for sowing.
- Cover the furrows with garden soil. On top is a centimeter layer of fertile humus.
The side buds must take root before the onset of cold weather - do not hesitate to plant them. A little trick: if there is not enough sun, place the teeth in the groove with their ribs facing south. This way the sprouts will be turned towards the sun, which will increase their yield and simplify care.
How to plant with aerial bulbs (bulbs)
Aerial bulbs are collected from the peduncle of the plant - the most developed arrows are left for its formation. As soon as the shoot straightens, the bulbs are ripe. They are sorted and dried for a month. Before planting, soak for 12 hours in an ash solution.
Sowing with bulblets is carried out in the fall in order to obtain single-toothed bulbs (sets) the following year. Already when planting the latter, full-fledged edible garlic is obtained. The sets are harvested when the plant begins to wilt and turn yellow. It is important not to miss the right moment to prevent the bulbs from self-burying.
The scheme for sowing aerial bulbs is simple:
- Planting depth – 3 cm.
- The distance between bulbs in a line is 2 cm, between rows is 10 cm.
Be sure to prepare the bed for winter - mulch with sawdust, chopped bark, last year's compost or peat. The layer thickness is at least 2 cm. This mulch will reliably protect the garlic bed from the cold. If severe frosts occur, additional protection with roofing felt or film is needed. Winter garlic survives cold temperatures down to -20 C well.
To retain snow on the beds in the spring, brushwood is used. When warm days arrive, all protective layers are removed to prevent the plantings from overheating. The mulch is carefully removed with a rake so as not to damage the first shoots. To allow oxygen to reach the roots, the soil is loosened with a hand hoe.
Planting with single-pronged bulbs (sets)
You can start sowing spring (spring) garlic when the soil has warmed up to 5-6 C. Follow the simple algorithm:
- Make even grooves at intervals of 20-25 cm.
- The depth of the furrow is 7-9 cm.
- Place the onion bottom down. The distance between neighbors is 6-8 cm.
- The depth interval is equal to twice the height of the set. On average, 6-7 cm.
- If the substrate is sufficiently moistened with melt water, watering is not required. Water treatments are only needed for dry soil.
- Although garlic is not afraid of spring frosts, mulch it with wood chips, sawdust, straw or compost.
Sowing winter garlic using this method follows a simple scheme:
- Make the grooves deeper - 15-20 cm.
- Pour coarse sand mixed with ash into the bottom of the recesses in a layer of 1.5-3 cm.
- The bulbs are placed bottom down, deepened by about 5 cm. If you plant garlic in sandy, sandy loam soil, the distance can be increased to 12 cm.
- Place large onions at a distance of 12-15 cm, smaller ones - 8-10 cm.
- Winter garlic does not require watering after planting.
Don't forget to mulch the bed. If there is a threat of sudden frost, cover the plantings with “non-fabric”, thick polyethylene. In warm autumn conditions, the first shoots may appear before the onset of winter. There is no need to be afraid of this - if the plant has developed a strong root system, it will be able to survive the cold months.
Harvest
It is important to know when to remove winter garlic from the garden for storage. Over-ripening causes it to quickly deteriorate. The collection takes place in the summer. The timing depends on weather conditions and the growing region. If June turns out to be cold and damp, then the procedure is postponed for 5-10 days. In the south they harvest at the beginning, in Central Russia - in the middle, and in Siberia - at the end of July.
The signs of maturation are:
- straightening arrows;
- drying of the outer film;
- yellowing of the lower leaves;
- easy separation of teeth.
2 days before the expected date, the area is weeded, the soil is loosened, and yellowed leaves are cut off. Harvest on a dry and sunny day in the early morning or after sunset. The heads are dug up using a shovel or fork, carefully removed from the soil, and the adhering soil is removed from the root system. The dug up garlic is laid out in rows along the beds to dry it. Damaged garlic is eaten because it cannot be stored for a long time, and rotten and moldy ones are disposed of.
Caring for garlic after planting in open ground
I have already said that garlic requires very simple care. Take care to remove the arrows in a timely manner (if the variety is arrowing). The plant wastes energy on the development of shoots to the detriment of the formation of the head.
The arrows are sharply cut off or cut off with a knife or scissors. You should not pull them up - this can tear out the plant and damage the root system. I remove the arrows as soon as they reach 12-15 cm. I break them off closer to the leaf rosette. I do not recommend removing shoots that are too small - they will grow again, taking away the vitality of the plant.
The key to a good harvest is timely weeding and loosening. I am not lazy to do these procedures after every heavy rain or watering.
How to water garlic in open ground
I water it as the soil dries out. The plant loves infrequent but abundant water treatments - up to 10-12 liters per 1 m2. On rainy days, I reduce both the number of waterings and water consumption. In August I will reduce water procedures to nothing. In order for the garlic to be tasty and tart and to be stored longer, watering must be avoided during this period.
Top dressing
Garlic plantings require both mineral and natural fertilizers. Any last year's manure is suitable for plants - pig, cow, horse, rabbit or sheep. Potassium and phosphorus supplements are also important. For winter plantings, the following schedule is recommended:
- Early spring. The following is added to the frozen substrate: 100 g of superphosphate, 60 g of ammonium nitrate, 50-60 g of potassium sulfate. This is the approximate consumption per 10 m2 of ridge.
- A month later. The same substances are added in similar proportions.
- Reaching the volume of the walnut head. Repeat the procedure.
feeding for garlic when grown in open ground
Now I’ll tell you about feeding spring garlic:
- The appearance of the first shoots. Mullein solution: one part dry mass to 50 parts water. You can replace it with an herbal infusion, a low concentration solution of bird droppings, or a mineral nitrogen agent.
- After 2 weeks. Use any complex mineral preparation for culture.
- End of June beginning of July. Phosphorus-potassium fertilizers.
I recommend fertilizing only after abundant watering. Do not use fresh manure - it provokes the development of infections and reduces the storage period of the crop.
Growing spring garlic
Spring garlic differs from winter garlic in the size and number of cloves. It is smaller and less convenient when preparing dishes. Its advantage is a longer shelf life, which allows you to use garlic throughout the cold season.
Landing dates
Spring garlic is planted after the frosts have stopped, towards the end of April, starting in the second decade.
Co-cultivation
In addition to following the rules of crop rotation, it is equally important to choose good neighbors in the garden. Neighboring plants will help resist infectious diseases and protect against pests.
All types of salads, as well as spicy crops, will be good neighbors of garlic. They can be planted in one bed alternating rows.
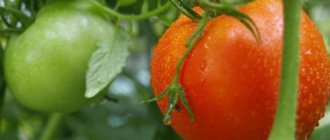
Garlic has a beneficial effect on the growth of nightshades - it repels the Colorado potato beetle and minimizes the harm of late blight. Garlic planted next to strawberry or wild strawberry bushes increases their productivity and saves them from aphids and ants.
Garlic should not be planted next to cabbage, peas and legumes. This will slow down their development and minimize yield.
Caring for spring garlic
Caring for spring garlic involves timely feeding, regular watering, weeding and loosening the soil.
Mulching a bed of garlic allows you to reduce watering and protects the soil from drying out in the heat.
Watering and fertilizing garlic
The most active growth of the green mass of garlic begins in May and lasts until mid-July. During this period, it is necessary to water the garlic beds 3 – 4 times a month. In case of heavy rains and high soil moisture, watering should not be done, since excess moisture leads to the development of fungal and bacterial diseases of the bulbs and yellowing of the leaves. In the second half of summer, watering should be significantly reduced or stopped completely.
Fertilizing should be carried out 2 times during the growing season. The first fertilizing is carried out immediately after the appearance of green shoots. To prepare the solution, add 2 cups of wood ash to 10 - 12 liters of water. You can also feed the plants with any nitrogen fertilizers. The second feeding is carried out at the beginning of the formation of the bulbs. For the second feeding, humus or any mineral fertilizers are used.
What difficulties may arise when growing garlic in open ground?
A difficulty that can be encountered when growing garlic is susceptibility to diseases and pests. I will tell you about the main diseases and enemies, methods of combating them.
Pest Control
Many uninvited guests are not averse to eating garlic:
- stem nematode;
- mole cricket;
- scoop;
- tobacco thrips;
- flies – sprout, onion flies;
- caterpillars – cabbage, winter;
- onion moth;
- onion secretive proboscis.
Pests can be controlled with effective folk remedies. The most popular is shag infusion:
- For 2 liters of heated water - 250 g of tobacco, 1 tbsp. spoon of red pepper.
- Infuse the composition for 3 days.
- Strain the concentrate, dilute with 10 liters of water.
- Add 30 g of laundry soap shavings, stir until smooth.
- Use a spray composition.
If there is an infestation of pests, turn to effective insecticides - “Neoron”, “Aktellik”, “Calypso”, “Dimethoate”. Use products as directed and observe waiting periods to ensure a safe harvest. Take care of your own safety - a respirator, safety glasses, closed clothing and shoes.
Disease Prevention
Garlic suffers from almost the same diseases as onions:
- rust;
- powdery downy mildew;
- mosaic;
- rot: white, cervical, gray;
- jaundice;
- helminthosporiosis;
- Fusarium
At first, an infusion of yarrow and calendula will help garlic:
- For 1 liter of hot water – 500 g of chopped green mass.
- Infuse the composition for 7 days.
- Dilute 1 liter of concentrate with 10 liters of plain water.
- Use spray liquid. It is also useful for cultivating the soil before sowing.
In case of severe damage, treatment with fungicides is required. But I do not recommend allowing this stage - garlic absorbs from the substrate not only minerals, but also the poisons with which you treated it. This makes the crop unsafe to eat.
Therefore, I recommend avoiding the problem – turning to simple prevention. It comes down to following the rules of crop rotation and crop care:
- Do not return garlic to its original place earlier than after 4-5 years.
- Disinfects cloves, bulbs, bulbs before planting.
- Warm up the seed before sowing: keep it at a temperature of 40-43 C for 10 hours.
- Before storing, treat the storage: disinfect with a solution of bleach (300 g per 10 liters of water).
Now you know about popular varieties and methods of sowing garlic. Do not forget that before planting it is necessary to prepare both the bed and the seed itself. And as the plant grows, water, weed, loosen, remove shoots, apply fertilizers, and prevent pests and diseases.
Diseases and pests, control methods
The most common fungal diseases that affect crops are:
Downy mildew, or perosporosis - the disease can be identified by the yellowed and dried tops of the leaves.
Favorable weather conditions for development are rainy weather and high humidity.
The disease spores spread quickly with the wind.
To prevent downy mildew, seed material is kept in a solution of potassium permanganate for half an hour. For treatment, garlic is treated with 1% boron liquid.
Rust - yellow specks appear on the affected leaves.
As the disease spreads, they increase in size.
Over time, the leaves die off.
Fitosporin-M is used to treat rust.
Bacteriosis - it can only be detected during crop storage.
The heads become yellow with ulcers.
The causes of the disease lie in improper drying of the heads or high humidity in the room.
In addition to diseases, plantings can be damaged by insect pests, including:
- onion fly - it lays eggs near plants, and the hatching larvae eat the head of garlic from the inside. Garlic stops developing and the head rots;
- onion moth - with the onset of warm weather, the moth lays eggs on the beds and at the base of the leaves. The emerging caterpillars eat the leaves. You can find out about pests by looking at the stripes that appear on the plant;
- garlic nematode - the most dangerous pest is threadworms. The leaves begin to curl and yellow-brown spots can be seen on them.
To prevent the appearance of onion flies, the beds are watered with salt. 250 g of salt are dissolved in 10 liters of water.
Water three times: when the leaves grow 5-8 cm in height, and then every 2-3 weeks. In addition, it is important to observe crop rotation and sprinkle tobacco dust on the beds.
You get rid of onion moths in the same way as you get rid of flies. For prevention, it is necessary to remove old tops and cultivate the soil in the fall.
Removing self-sowing plants, removing weeds, and purchasing high-quality seeds will help prevent garlic nematode.
Remember that weeds are the most common causes of a wide variety of insects.
General description of the crop, types and varieties
All varieties are usually divided into two main subspecies:
- winter crops - planted in autumn;
- spring - intended for planting in spring.
There is a secondary division into two groups:
- shooting type - instead of seed material, they form small bulbs with one clove;
- non-shooting - these include species grown in the spring months.
Large garlic
When understanding the question of how to grow large garlic, you should immediately understand that large heads come from winter varieties. Their peculiarity is the short-term storage of the collected fruits - in the last cold month the crop begins to deteriorate. Summer varieties have a shelf life of 2 years.
Important! Preference is given to varieties depending on needs: for sale or self-consumption.