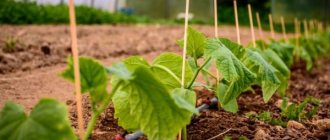
Tomatoes are heat-loving plants that produce tasty and juicy fruits. But to enjoy them in the fall, you will have to spend a lot of effort. Tomatoes are capricious plants and will not grow just anywhere. Therefore, the process of growing them must be treated very carefully.
You will have to take special care of the soil, and not only for seedlings - the soil that is in the greenhouse where tomatoes will grow in the summer also needs special preparation.
Preparing soil in a greenhouse for tomatoes in the fall
Here you will learn:
What kind of soil do tomatoes need?
Before you learn how to properly prepare the soil for planting seedlings, you should also become familiar with what the soil for tomatoes should be like. What is the ideal land for tomatoes?
She must be:
- loose;
- rich in organic matter;
- well drained;
- free from various pests;
- easy to heat up;
- rich in minerals (calcium, magnesium, potassium, phosphorus);
- its optimal temperature is 18-20 degrees;
- with pH = 6.0-6.5, but can also be from 5.5 to 6.8.
Tomatoes are quite capricious, so the soil in the greenhouse must meet a number of requirements
Table. Basic characteristics of soil for tomatoes.
| Property | Meaning |
| Porosity | 65-75% |
| Moisture capacity | Min 45-50% |
| Air capacity | 20-25% |
| Density | 0.4-0.6 g/cm2 |
The most important soil parameters for tomatoes are water permeability and looseness. These plants have a strong, branched root, sometimes going into the soil to a depth of 1 m. Its main part is located in the first 50 cm of the soil. The plant needs a lot of moisture. Lack of water will negatively affect the condition of flowers, ovaries, the size of fruits, and may even lead to the death of the plant. Therefore, the soil must hold and pass moisture well.
On a note! The higher the size of the bush the variety, the less it feels the lack of moisture. But short tomatoes do not tolerate drought very well.
However, overwatering can have a bad effect on the tomato - it can rot and die.
Layout of the tomato root system. A - in a richly irrigated area, the roots are placed more shallowly. The bulk of the roots are located closer to the soil surface. B - in a poorly irrigated area, the roots go steeply into the soil. The bulk of the roots are located deep
Precursor plants for tomato are not of great importance. But it will still be good if you decide to grow tomatoes where cucumbers or cabbage or other cruciferous plants previously grew. The hero of our article does not like the soil where nightshades, for example, eggplants and potatoes, were fruited and grown before him. Tomatoes grow well where legumes and onions were previously grown. You can also grow radishes and lettuce in front of tomatoes.
The best predecessors for tomatoes
On a note! Tomato is an excellent predecessor for almost any vegetable; it leaves behind very clean and high-quality soil without weeds.
In general, the tomato is not picky about the soil, but the better conditions are created for its growth, the greater the harvest it will produce. So you should not neglect either autumn or pre-planting soil preparation.
Soil for planting tomatoes in a greenhouse
Organic fertilizers
The most popular crops in the country are potatoes, tomatoes, and cucumbers. How to fertilize the soil to compensate for the lack of nutrients for the future harvest? The needs of each culture must be taken into account.
For example, potatoes and tomatoes love complex fertilizer containing a large amount of nitrogen. But since nitrogen in mineral form does not last long in the soil, green manure will be the best for these plants.
The second option is simpler in terms of labor costs and benefits for the soil. Although few gardeners know that microorganisms living in different layers are of great importance for the quality of the soil. Moving them from their place is fraught with death.
When digging, an exchange of layers and microorganisms occurs that do not survive in the new conditions. Because of this, organic matter is processed less efficiently. To replenish the number of soil bacteria, EO preparations are used, which accelerates the decomposition of plant residues.
Cucumbers and tomatoes love potassium, so potassium fertilizers must be applied before digging in the fall. If you do not replenish the amount of potassium, the harvest in this bed will be small.
All plants need phosphorus, especially potatoes. Phosphorus supplements create favorable conditions for the growth of the root system. The root is responsible for the absorption of all other substances - nitrogen and potassium.
If you overuse nitrogen fertilizers, but if there is a lack of phosphorus, the plant will be weak and will not be able to grow green mass. This will affect flowering and fruiting - it will be scanty. When there is a lack of nutrients, vegetable crops drop their flower stalks.
Soil preparation depending on the soil
The approximate ideal composition of soil for tomatoes is peat, sand, compost at 60%, 20% and 20%, respectively. It is in this case that the soil will have the best performance. However, peat is difficult to find in some regions of the country, so it is often replaced with sand. But this is not the best option, since the moisture capacity of such soil is worse, and it will also have to be watered more often.
The quality and composition of soil in general is highly dependent on the region, area, even the location of the site on a smaller scale. And therefore, before working on preparing the soil, you need to determine what kind of soil you have. To do this, carefully examine and feel the soil, paying attention to its physical characteristics.
Types of soils
Take some soil in your hand, slightly moisten it into a thick paste and roll it into a sausage about 3mm in diameter. After that, try twisting it into a ring and see what happens.
- If you can make the ring easily, it means you have heavy clay soil.
- If the ring cracks, but you still get a sausage, you have loam, medium-heavy soil.
- If you can’t make a sausage, not just a ring, then you have sandy loam or light soil.
How to determine soil type
Each type of soil has its own advantages and disadvantages. For example, sandy loam holds water very poorly, but it is easier to get wet during watering. But along with water, useful substances also flow deep into the earth, so such soils need to be fertilized more. Also, an undoubted advantage of sandy loam is its rapid warming up, so seedlings can be planted in such soil earlier. Clay or peaty soils, on the contrary, are much colder.
It is also important to know the pH value of the soil in order to determine what fertilizers need to be added to the soil. This indicator can be determined using a special test, which is sold in any gardening store.
Soil acidity test
How to determine soil acidity
Acidity level scale (pH)
On a note! The amount of organic matter in the soil is approximately 10%, and the remaining 90% are mineral components.
By the way, the stages of preparing the soil for planting tomatoes will depend on the type of soil. Experts advise that clay soils must be prepared in the fall, but loam or sand can be prepared for planting at the very beginning of spring.
Basic procedures that need to be carried out when preparing the soil for tomatoes (depending on the specific needs of the soil)
Liming . It is produced both in autumn and spring - the substance is introduced into the soil to a depth of about 30 cm. Lime will help lower the pH level and also enrich the soil with calcium and magnesium. But this substance can also be different. Remember that slaked lime reacts much faster, which means pH fluctuations will be more noticeable - in some cases this can be harmful. But the calcium-dolomite mixture contains extremely little magnesium.
Liming the soil with wood ash
Adding organic matter . The soil must be fertilized with compost, humus and allowed to stand for some time. A little later it is dug up to improve soil aeration. As the name implies, organic matter will enrich the soil with organic nutrients.
Compost
Compost bin layout
Sifting the finished compost
Attention! If you use rotted tops of garden plants as compost, then make sure that there are no old dead tomato plants in it - they can be carriers of soil diseases that destroy the crop.
Mulching . The soil at the planting site can be covered with mulch or cloth. This will ensure good moisture retention.
Mulching is covering the soil with a continuous layer of mulch, through which moisture does not evaporate and competing weeds cannot break through. It is better to mulch with “natural” materials: peat, humus, sawdust, pine needles, straw, grass clippings, leaves, tree bark, etc.
Mulching with inorganic materials
Application of soil amendments . You can add bone meal or other mineral supplements to the soil - this is a good source of phosphorus and calcium. Add at least two weeks before planting, so you can do it in the fall.
Bone meal (bone meal) is a product of processing animal bones, used as phosphorus fertilizer (contains 29-34% P2O5)
Pre-sowing soil preparation
Bone meal prices
bone flour
Soil preparation instructions
Why is it worth preparing the soil for planting in the fall? This procedure is due to several factors.
So, soil preparation:
- helps reduce the risk of crop disease;
- will provide a high yield;
- will destroy pests - both microorganisms and the larvae of various parasites;
- will improve the quality of the soil and nourish it with useful substances.
How does the autumn stage of preparing the soil for spring planting of tomatoes proceed? The algorithm of actions is as follows.
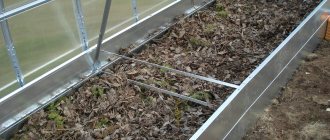
Step 1. First of all, you just need to clean up the greenhouse. To do this, remove all plant remains from it - both weeds and cultivated ones. If you leave them until spring, various parasites and pests can easily overwinter on them. Also, old plants will simply interfere with further work in the greenhouse.
Cleaning the greenhouse
Step 2. One of the cleaning stages is a thorough washing of all parts of the greenhouse: glass, frame, etc. If the plants have been doing well throughout the summer season, then simply hose off the entire greenhouse with water. If they were affected by any disease, then make a solution of bleach and wash the greenhouse with it. Prepare the solution as follows: dilute 400 g of the substance in a bucket of water. You can also use a solution of laundry soap: grate 200 g of soap and dissolve in a bucket of hot water. We will touch on more serious pest and fungus control a little later.
Washing all greenhouse elements
Step 3. Where the paint has peeled off, touch up the frame of the greenhouse and renew it.
Step 4: Tackle the soil. Dig the soil thoroughly.
Dig the soil thoroughly
Step 5: Get ready to fertilize the soil. For this you will need compost or humus, you can also buy peat. Apply organic matter to the soil as follows - about 5-12 kg of fertilizer per 1 m2.
Attention! It is better not to use fresh manure - it can harm the soil. It also contains many dangerous microorganisms.
Organic fertilizers for greenhouses
Peat prices
peat
Step 6. Treat the soil with biological preparations (“Siyanie-1”, “Baikal EM-1”) at the rate of 3-5 liters per 1 m2. This way you will destroy pathogenic bacteria and fungi.
Microbiological fertilizer "Baikal EM-1"
Beware of fakes!
Prices for "Baikal EM-1"
baikal em 1
Step 7. Depending on the type of soil, you can add mineral fertilizers in the fall - phosphorus, nitrogen and potassium. Place them 5-7 cm deep into the soil and loosen them with a fork, at the same time removing any remaining weeds, if any.
Table of feeding mixtures for tomatoes
On a note! If time permits, you can use green manure plants instead of organic fertilizers: mustard, peas, lupine, beans.
Video - Preparing the greenhouse for winter
How to get rid of diseases?
What to do if all summer you have been suffering with sick and dying tomatoes? Most likely, they were affected by some pathogenic microorganisms or fungus. This means that all measures should be taken to ensure that history does not repeat itself next year.
Step 1. Similar to the standard procedure for preparing the soil and greenhouse, remove all dead plants along with the roots in the fall.
Step 2. Remove the top layer of soil - approximately 10-20 cm - and replace it with fresh one. It is advisable not to take replacement soil from your garden.
Replacing topsoil in a greenhouse
On a note! The removed layer can be thoroughly steamed or calcined - this will destroy all pests and parasites. But if the greenhouse is large, this procedure will be extremely difficult to carry out.
Step 3. Remove all ropes and garters, especially those made of natural fabrics, as well as wooden sticks - pathogens can settle on them.
Step 4. Sow the soil with white mustard - the substances that this plant secretes are destructive to most pathogens of fungal diseases. You can also spray the soil thoroughly with fungicides.
White mustard
On a note! Many people advise using smoke bombs with sulfur to destroy pathogenic organisms. The method is somewhat extreme, but fail-safe.
Step 5. Don't forget to thoroughly treat the walls of the greenhouse and its frame with soap or lime, as in the previous guide.
Greenhouse room treatment
Step 6. After completing all work, leave the greenhouse open for the winter so that the soil freezes well.
The greenhouse must be left open
On a note! If the tomatoes were very sick throughout the summer, then it is best not to plant them there again even after treating the greenhouse and soil in the fall. Plant other plants in this place, and move the tomatoes to another place for a couple of years.
How to fertilize and feed the soil in the fall in a greenhouse
Let's start with organic matter; organic fertilizers include humus, compost, wood ash, manure and bird droppings.
Humus is manure that has been rotted down to the state of soil. It usually takes two seasons for manure to reach a state where it is indistinguishable from normal soil. Weed seeds are not preserved in humus, and pests and diseases do not survive there. Consequently, humus can be safely added to the soil of the greenhouse and greenhouse in the autumn.
- About 2-3 kg per square meter is added to the greenhouse for digging.
- In the greenhouse 3-4 kg per square meter for digging.
Humus for the greenhouse.
The fertilizer is evenly scattered over the surface of the soil and embedded in the soil to a depth of 12-15 cm. This can be done at any time of day convenient for you in the autumn season.
Compost is organic matter that has decomposed into soil. A variety of organic residues, composted over a couple of seasons, are excellent feeding that any greenhouse will be happy with. Compost is a less active fertilizer than humus and can be used in higher concentrations.
- Usually 4-5 kg of compost per square meter is added to the greenhouse in the autumn.
- 5-6 kg of compost in the greenhouse.
Compost for the greenhouse.
Wood ash is a rich source of microelements and, most importantly, potassium. Wood ash contains up to 5% potassium available for plants. Among other things, wood ash can deoxidize the soil; it acts very gently, usually leveling the pH of the soil. Wood ash is added in the autumn (in the greenhouse and in the greenhouse in the same concentrations) approximately 250-300 g per square meter, embedded in loose and fairly well-moistened soil.
Wood ash.
Manure is usually applied in small quantities in the fall. This is an active fertilizer that requires overheating in the soil. It is advisable to apply manure no later than mid-October so that it has time to transform into a form accessible to plants. Application rate:
- 1-2 kg per greenhouse.
- 1.5-2.5 kg in a greenhouse, for digging up soil.
Manure for greenhouses and greenhouses.
Bird droppings are usually applied in even smaller quantities than manure. That's enough:
- 500-700 g per square meter of greenhouse.
- 600-800 g per square meter panic for digging the soil.
Bird droppings
Mineral fertilizers ; in the autumn, only phosphorus and potassium fertilizers are usually used. Of the phosphorus minerals, superphosphate is most widely used, and of potassium minerals, potassium sulfate.
If cucumbers, tomatoes and similar vegetables that produce a large yield and have significant above-ground mass were grown in a greenhouse, then the doses should be large. A tablespoon of superphosphate and potassium sulfate per square meter of soil for digging.
If green crops were grown in a greenhouse or greenhouse, then you can get by with a dose of a couple of teaspoons per square meter of greenhouse soil for digging.
Dolomite flour is used as an additional element to deoxidize the soil, and river sand is usually used for loosening.
Dolomite flour for fertilizing a greenhouse in the fall.
If the soil in a greenhouse or hotbed has high acidity, then in the autumn, during digging, it is necessary to add 500-600 g of dolomite flour per square meter in order to reduce the acidity of the soil and make it normal.
On dense, clayey soils or soils that are tired and compressed, it is necessary to add a baking powder. Usually this is river sand, which you need in a standard bucket per square meter of soil for digging.
Mineral fertilizers in autumn
It is not advisable to use only minerals, since the amount of humus decreases with each season. As a result, the soil loses its looseness and cracks. Vegetables will lose their flavor over time. It is not for nothing that in the West the prices for organic vegetable products are much higher than for vegetables grown using purely mineral mixtures.
Minerals are divided into quickly soluble and long-lasting. For example, phosphate rock, which is used to fertilize beds in the fall or spring, dissolves in the soil for 3–4 years. To produce superphosphates, faster phosphorus fertilizers, phosphorites are further enriched.
Potassium sulfate or chloride is used. Here you need to look carefully at autumn fertilizers - what to fertilize with in the fall, what crops potassium is intended for - not all plants respond well to chlorine mineral additives, although chlorine in the ash composition is well tolerated.
How to fertilize the soil in a greenhouse and greenhouse
Usually the process of applying fertilizers itself is not difficult. The first step is to prepare the soil of the greenhouse and greenhouse:
- Free it from any plant debris. It is necessary that the soil surface is absolutely clean.
- The second, important stage after harvesting is the first digging of the soil. When we dig up the soil, we free it from parts of the roots of both cultivated plants that were grown in a greenhouse or greenhouse, and from the roots of weeds. It is better to dig up the site in warm and dry weather.
Digging the soil in a greenhouse.
- The next stage is the actual spreading of fertilizers. In the autumn, any type of fertilizer can be applied to both dry and moist soil. There is no fundamental difference here, but it is much easier to work with dry soil.
- Spread as evenly as possible - spread in an even layer over the surface of the soil of the entire greenhouse or greenhouse. In the case of various organic fertilizers, this is often not difficult to do.
As for mineral fertilizers, there may be a certain problem - they are not always enough to cover the entire surface. In this case, the soil in a greenhouse or greenhouse can be divided into squares. An equal dose of one or another mineral fertilizer should be added to each square.
- When the fertilizers are distributed, the stage of digging the soil begins. You need to use uniform movements, trying to dig to an equal depth, and embed them into the soil by turning the layer with a shovel.
Ultimately, fertilizers should be embedded in the soil to a depth of 12-15 cm. This is the optimal depth for the final processes of decomposition of the initial elements of the fertilizer to substances available for consumption by plants.
Horse manure - pros and cons
Horse manure is one of the most useful organic fertilizers, which can be applied to garden beds and flower beds with equal success. However, not all summer residents know exactly what benefits horse manure can bring to their summer cottage, but there really are a lot of benefits from it! So why can this simple and completely free fertilizer be useful to a modern summer resident?
advantages
horse waste includes an impressive amount of organic matter and is a fairly effective concentrate of phosphates, nitrogen compounds and such useful minerals as calcium and potassium. and thanks to such a rich composition, horse manure can not only significantly increase the nutritional value and fertility of the soil, but also activate the growth of a wide variety of crops! with the help of this substance it will not be difficult to significantly increase the yield of various garden and vegetable crops. In addition, horse manure helps make plants much more resilient, both in relation to environmental conditions and in relation to various infections and pests. and if you mix horse manure with sawdust, it will bring even more benefits!
Horse manure is lighter than cow manure; accordingly, it decomposes and rots much faster. And, what’s especially nice, it is absolutely not susceptible to infection by all kinds of pathogenic microorganisms! This horse waste product is also endowed with the ability to retain heat for as long as six to eight weeks, cooling very slowly and gradually. Horse humus also perfectly loosens soils, saturates them with carbon dioxide, is a valuable supplier of a wide variety of nutritional compounds, ensures proper circulation of air and water, and actively counteracts soil acidification.
flaws
Horse manure also has certain disadvantages: firstly, it is not available to every summer resident, secondly, horse manure has a too pungent and very unpleasant odor, and thirdly, many do not like the need to accurately dose and dilute this fertilizer. opponents of using horse manure believe that it would be much more convenient to purchase high-quality mineral fertilizers in the store and periodically pamper growing crops with them.
What type of manure is best?
Horse manure can come in a variety of forms: it can be fresh, semi-rotted or rotted, and also in the form of humus, liquid solution or granules. At the same time, fresh horse manure is considered the best and healthiest option. However, at the same time, it is important to take into account that such manure is endowed with the ability to heat up quite strongly, which in turn can easily destroy vegetation; accordingly, it is necessary to use fresh horse manure with some caution. It is best to resort to its help in the fall, when the garden beds have already been dug up - during the winter, all the substances contained in such manure will have time to completely decompose, and in this case there will be no need to talk about any harm to the plants at all. Moreover, with the onset of spring, plants will be able to receive all the elements necessary for their full growth in an easily accessible form! And in the spring, fresh horse manure is often used as biofuel in greenhouses - it warms up beds with zucchini and early cucumbers especially well! It is quite acceptable to “mix” horse manure with a wide variety of other organic waste. With peat, it generally creates an ideal tandem! Horse manure has proven itself no worse when combined with well-chopped straw; in addition, it goes well with fallen leaves, sawdust or grass. And many summer residents are very willing to dilute fresh horse manure with water, obtaining a useful and effective liquid fertilizer!