Having collected a generous harvest of spicy vegetables in the fall, every zealous owner worries about its safety. How to store garlic so that it lasts until the next harvest without losing its taste and consumer qualities is the most important question that worries every vegetable grower.
When keeping a house in winter, heads that are in unfavorable conditions can either dry out or rot. Teeth sometimes even sprout, confusing the season. They can be damaged by pests or diseases. If stored improperly, garlic withers, losing the lion's share of nutrients and vitamins.
How to properly tie garlic into braids for storage, weaving methods and patterns
Weaving braids and bunches of garlic is popular among gardeners. Beginner summer residents have a question about how to properly tie garlic for storage in braids. This method has several options for making combinations. It is easy to use and decorates the kitchen interior.
When to harvest to braid it?
Harvesting is carried out at the end of the growing season of winter or spring garlic. It is dug up and the roots are cleared from the ground. All plants are sent for drying. They are laid out or hung by the tops, grouped in small bunches. The plants are left to dry for 3–4 days. And to preserve the integrity of the tops for 7 - 10 days.
All bunches are removed and the roots are trimmed. The tops are cut so that 30 cm remains. They should not be damaged or broken.
Advantages and disadvantages of this storage method
The method of storing garlic in braids has its pros and cons. There are the same number of pros and cons, but despite this, the method is popular. The advantages include:
- Garlic heads do not rot with this storage method, as they are constantly exposed to air.
- Braids do not take up much space and save it. They can be hung on a nail in the kitchen.
- Convenient location in the kitchen allows you to use a head of garlic at any time.
- The substances that garlic releases indoors prevent colds.
- Braids made from onions or garlic decorate the kitchen and fit perfectly into the interior, especially in country houses.
However, this method has its disadvantages:
- Gradually, the vegetables dry out and the husks fall off, which requires frequent cleaning from the floor and shelves.
- Not everyone likes the smell emitted.
- In damp areas there is a risk of rotting.
- With constant exposure to sunlight, the heads begin to germinate.
- If at least one bulb rots, then the rot affects the rest and midges breed.
The shelf life of the crop depends on the variety and storage option. When using braids, there are certain patterns:
- The spring variety can be stored for 5–6 months at average humidity and a temperature of 15–17°C.
- The winter species will persist for 3–4 months in a cool room with a temperature of 5–6 °C, but easily tolerates high humidity.
- Damage to the tines during transportation or harvesting reduces shelf life.
Important! During harvesting and during weaving, it is necessary to sort the heads. Damaged ones are processed and eaten first.
Common weaving mistakes
Making braids from vegetables is a fairly easy process, however, some mistakes impair their quality and appearance. These include:
- The composition of the heads is too sparse. When the braid dries out, the bulbs begin to fall out.
- Weaving in too dry tops. You will end up with a broken braid.
- Using a short rope ruins the look of the combination.
Important! Before you start composing a combination, it is recommended to practice on a simple rope
Conditions for preserving garlic braids
For long-term preservation of garlic braids, certain conditions must be observed:
- The combinations are hung away from the window.
- Ventilate the room periodically.
- The braids are checked for damaged heads and removed.
- The scythe should be hung, not lying, this increases the safety of the fruit.
Alternative options
Several alternative options are used to store vegetables:
- The tops are tied into bundles of 5–7 pieces.
- Vegetables are collected in old stockings; there is no need to waste time making braids.
- In boxes in a cool room.
- On the bottom shelf of the refrigerator.
- In fabric bags.
How to knit a garlic braid: video
It is important to preserve garlic for the winter. To learn how to braid a garlic braid, you can look up information on the Internet and study several master classes. A properly braided braid will always be at hand and will preserve every head.
A properly braided braid will always be at hand and will preserve every head.
Methods for weaving garlic braids
Why you should store onions in braids
In the fall, after harvesting onions, every gardener thinks about how and where to store them for a long time, so that in winter and spring they can consume a tasty and healthy product. Vegetables can be stored in several ways:
- in wooden or plastic boxes;
- in wicker baskets;
- in bags made of thick fabric;
- in cardboard boxes;
- in grids;
- in a suspended state, braided.
Onions are striking in their variety of types - Indian, shallot, set, decorative, leek, batun, chives, onion, slime, exhibition, jusai, red, multi-tiered, perennial - and each of them can benefit the human body.
Common weaving mistakes
Making braids from vegetables is a fairly easy process, however, some mistakes impair their quality and appearance. These include:
- The composition of the heads is too sparse. When the braid dries out, the bulbs begin to fall out.
- Weaving in too dry tops. You will end up with a broken braid.
- Using a short rope ruins the look of the combination.
Important! Before you start composing a combination, it is recommended to practice on a simple rope.
The best ways to tie garlic in braids
There are several options for how to weave a garlic braid so that it is beautiful and neat. The easiest way is to use proven schemes. Since the tops of this plant are not very strong, twine is used to strengthen the ligament. It will need 1.5 m.
First way:
- Fold the twine in half and tie it around the large head at the beginning of the tops so that together with the stem of the plant there are 3 free ends.
- Place the second fruit on the left piece of twine and throw this end to the center.
- Attach the third fruit to the right end and place it with it in the center.
- Then continue weaving, adding new fruits each time and removing the tops from the first vegetables from time to time.
- At the end of weaving, tie the braid with loose pieces of twine and cut off the remaining tops.
- Connect both ends of the braid into a ring and hang the wreath on the hook.
In the second weaving method, the fruits are tied in twos. To make a garlic braid in this case, it is more convenient to use a 1.5 m long rope. Step by step action diagram:
- Tie 2 vegetables together in a knot in the center of the rope. The resulting free ends should be identical.
- Take 2 more heads and place them on top of the first ones so that all the fruits are visible when viewed from above. Tie them by the stems at the base.
- Continue adding garlic 2 pieces at a time, making 4 or 5 layers.
- In the last step, tie a tight knot in the center of the braid and make a loop to hang later.
- Cut off the remaining tops.
The third way to weave garlic braids is only suitable for heads of the same size with stems 15 cm long
It is important that the vegetable tops are sufficiently elastic, otherwise they will break during weaving. To avoid this, it is recommended to use under-dried plants.
For this method, twine or rope is used as reinforcement.
Weaving order:
- Make a knot halfway along the length of the twine and insert the stems of the first garlic head into it. Tie them tightly at the base.
- Weave the tops into the remaining loose ends in a zigzag.
- Insert the second fruit next to the first and tie a tight knot around its stem at the base.
- Weave the remaining piece of tops again in a zigzag pattern into the remaining free pieces of rope.
- Continue weaving until the desired length is reached.
- Finish the braid by tying a knot with rope.
- Make a loop and hang the garlic on a storage hook.
In the latter option, it is important to ensure a strong contraction of the tops, but at the same time it is necessary to ensure that the stems do not tear and the braid remains intact. Garlic woven in this way is stored well in a cool room.
If the heads begin to deteriorate, it is easy to notice and remove them from the general bunch.
Optimal timing
Winter varieties of garlic planted in the fall are planted on the 10th-20th of July, 3-5 days before harvest. Spring garlic ripens by August. The exact time can be determined by the garlic leaves and arrows (if you did not tear them off). The leaves turn yellow at the tips and become coarser, the arrows straighten, gradually unwinding the spiral, the bulbs on them crack. The upper shoots begin to gradually bend towards the ground.
To be even more sure of the accuracy of the timing, 3 weeks before the expected ripening, begin to selectively dig up individual bulbs. In ripe heads, the scales should easily come away from the cloves. They themselves must be dense.
The main thing is not to overexpose the garlic bulbs in the ground. In this case, they will lose some of the nutrients and will be stored worse.
Before tying, all arrows must be cut obliquely, otherwise they may cause rotting in the future. Leave a 3 cm stem from the top leaf. Do not pull out the arrow under any circumstances, especially with force. This way you are likely to damage the bulb itself. Use clean scissors. Lubricate the cut area with lime or wood ash. If there are a large number of arrows, they can be added to a vegetable salad or pickled for the winter.
Preparation for storage until the new harvest
Garlic that is planned to be left for the winter must be especially carefully prepared. One of the main rules is the importance of timely harvesting .
If you miss the right moment, the heads will begin to fall apart into slices. The winter variety is harvested in late July in warm and dry weather.
After harvesting, winter garlic must be thoroughly dried. The roots of the plants are cut off. The tops are not cut off immediately.
If the crop will be stored in braids, then you need to leave 0.4 m, for bunches 0.2 m is suitable , in all other cases it will be enough to leave 20 mm. The harvested vegetable crop must be sorted, removing damaged heads.
The length of storage of the crop largely depends on the correct preparation of the winter variety.
How to weave braids from onions. Storing onions in the apartment
Now it's time to put the onions away for storage. You can store onions in boxes, stockings, bags. Let's try to weave braids from onions. They will become a stylish decoration for your kitchen and will help preserve your hard-earned harvest.
5 reasons to store onions in braids
What are the advantages of storing onions in braids:
- no need to spend money on storage containers
- onions are best stored in a hanging state
- easier to control when signs of spoilage appear
- takes up less storage space
- it’s simply beautiful, if you use your imagination, onion braids can be used to decorate your kitchen
Bow braids
Beautiful braids from onions
Garlic wreath
How to braid a bow
To store onions in braids, you must first prepare them:
- select beautiful bulbs of the same size
- clean from dirt, remove the layer of husk
- we trim the roots; the roots of the onion can be burned, thereby preventing its germination
- The key to a beautiful bow braid is the tops. It should be elastic, never wet (it will rot), but not too dry. This condition occurs in the tops 3-4 days after the onion is dug up.
Method 1
How to braid a bow
The base is also useful for weaving braids from onions. For the base, take a cord, ribbon, rope.
We have everything ready, let's start weaving a braid from a bow.
- We take a strong onion, with long and strong tops. Fold the rope in half and tie it around the base of the bulb.
- we got three ends for weaving - tops and two ropes at the edges
- We begin to weave a braid, alternately adding bulbs, now on the right, now on the left.
- Braid the bulbs in the braid tightly; to do this, braid the bulb as close to the head as possible.
- if the bow braid hangs in a visible place, it needs to be decorated. Use dry herbs and flowers (lavender, dried flowers) as decorations.
We tie the onion with a rope We begin to weave the onion into the braid We continue to weave the braid from the onion
Method 2
We take the prepared bow base (rope, cord) and begin to weave. The weaving technique is reminiscent of weaving a wreath of flowers.
- choose a beautiful onion, tie it with a string at the base
- use the second onion to braid the rope
- we continue to weave a braid from onions, gradually adding onions
Video “How to braid a bow for storage”
Method 3
We twist the prepared, dried onions in pairs and secure them to the base.
Video “How to braid a bow for storage”
Method 4
If you don't know how to braid hair, don't despair. Simply tie onions and garlic in bunches and hang. This is also a good way to store onions and garlic.
How to store onions in braids
Optimal conditions for storing onions
- temperature from +18°С to +22°С
- humidity within 65-70%
Inspect the onion from time to time and remove damaged ones immediately.
In the old days, it was not for nothing that onions were kept in braids as a talisman. Onions produce phytoncides that have bactericidal properties. In winter, with flu epidemics, extra protection will not hurt.
As you can see, there are many ways to weave braids from onions and garlic, choose the one that is most convenient for you.
And when to plant winter garlic, find out from the article: When to plant garlic in the fall according to the lunar calendar in 2016
How to braid a bow video
Storage conditions
It is possible to preserve garlic for a long time if a number of conditions are met:
- Humidity. Acceptable range: 50-80%, and it is advisable to comply with it. If the humidity levels are even slightly exceeded and dampness appears, the cloves quickly become moldy and rot. If the place is too dry, the garlic will dry out.
- Temperature. According to the observations of experienced summer residents, it is best to store the harvested vegetables at a temperature from +2ºC to +5ºC. Winter garlic does not tolerate high temperatures (above +10ºC), summer garlic is preserved well at temperatures up to +15ºC...+20ºC, but not higher. It is advisable to avoid temperature changes, as this will cause the vegetable to lose its piquant taste and pungency.
- Lighting. The harvest is placed for storage in a semi-dark place so that direct sunlight does not fall on the bags, boxes, baskets, and braids.
Garlic is unpretentious; if optimal conditions are created, it can be stored until next summer.
How to store garlic in braids
At the end of July, it is time to remove winter garlic from the beds and prepare it for storage. A sign of garlic maturity is traditionally considered to be yellowing of the leaves and stem. Moreover, it is not at all necessary to wait until the entire above-ground part is completely dry. You can harvest garlic if the leaves have partially yellowed, but many of them still remain green. This will make it possible to braid the garlic for later storage.
There are several ways to store garlic for long-term storage for the winter. But we will tell you exactly how to braid garlic for storage. Garlic has been stored this way for a long time, as it is quite convenient.
So, we clean the collected garlic from dirt and cut off the roots.
After this, we take three heads and place them in the manner shown in the photo. One is straight from below and the head is away from us, the other two are on top of it crosswise. This is the very beginning. It can be seen that three strands have formed from the stems, which we will weave like a regular girl’s braid.
Next we place the next plant on top. We lay it evenly, like the bottom one. We combine the stem with the lower strand.
After this, we begin to weave the braid directly. We braid the strand that goes to the right in the opposite direction over the strand going towards us. At the same time, add new garlic to it.
Then we bend the lower strand going to the left in the opposite direction over the previous strand, and again attach a new stem to it.
Further actions should be clear, since they will be repeated by analogy with the previous ones. Each new bend of the stems should be accompanied by the weaving of a new garlic stalk. They bent a strand, weaving it with two others, and then laid a new stem on top of it. We bent another strand again and again put new garlic on top. And so on until we create a braid of the size we need.
They should not be made very large. Reasonable sufficiency must be observed.
Once the garlic braid is finished, tie the ends of the stems with twine to prevent them from unraveling. You can also tie a braid with twine near the heads of garlic so that they are closer to each other.
We hope that we showed you how to tie garlic into a braid for later storage without being too confusing, and that you understood everything.
First, let the garlic dry thoroughly by hanging these braids in well-ventilated and dry areas. Afterwards, they can be hung directly in the kitchen, or in a cellar or other room suitable for storing crops. When you need garlic, just cut it off and that's it. In this case, start from the bottom of the braid.
Write your comments or ask questions below. Good luck to you and great harvests!
Storage space
The choice of location is determined by the capabilities of the summer resident and living conditions. The most suitable places for owners of private houses are:
- cellars;
- basement;
- storerooms;
- lumber room.
The heads are hung in braids, buns, placed in nylon stockings, in baskets, boxes, boxes. The premises are prepared in advance for planting the harvest:
- ventilate;
- dried;
- treated with special compounds for disinfection;
- check the ventilation.
Various vegetables are usually stored in the cellar for the winter, and garlic is stored away from potatoes, beets, carrots, and cabbage.
City dwellers store garlic in the kitchen (braids, boxes, in jars or bags), in the refrigerator (in bags, jars), on insulated loggias and balconies (in boxes, boxes).
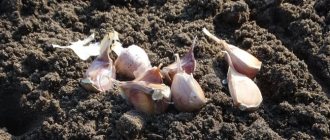
Preparing the bulbs
In order for the bulbs in braids to be stored for as long as possible, they need to be properly not only woven, but also collected and prepared. What is included in these activities:
Harvesting is best done in the morning, after the sun appears. You cannot pull out the tubers - they are damaged from the inside
How to remove from the ground: dig up the soil with a shovel, carefully pull the onion. Shake the remaining soil off the root vegetables, but do not hit the heads together. Otherwise, the bulbs will begin to rot. Place the tubers in the garden or indoors to dry
The first option is preferable, since the onions must be dried in the sun. Place woven material under the vegetables that allows air to pass through - they will remain clean and “breathe” from all sides. Why exactly under the sun? The answer is simple - the heat emitted by the rays promotes disinfection and rapid natural drying. Do not cut off the feathers immediately, as the tails will be needed for braiding. Their length should be at least 15-20 cm. Root vegetables should not be left outside at night - it is better to bring them indoors or cover them with film. This is necessary to prevent morning dew from saturating them with moisture. Before braiding, the bulbs are freed from the husks, which are easily removed, but do not allow the scales to be completely removed. Be sure to wipe each vegetable with a soft, dry cloth. Calibrate the bulbs (select whole, undamaged fruits that are fully ripened). For braids, select turnips of the same size. Do not allow the tops to dry out - they should be elastic.
When to harvest garlic in 2022
Harvest when signs of crop ripening become apparent. The degree of maturity of garlic can be determined by the following characteristics:
- the upper leaves begin to turn yellow and droop downwards;
- the lower leaves dry out;
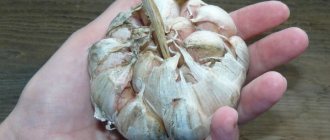
- the heads become dense and covered with two or three membranes;
- the teeth come off easily.
To check, dig out 2-3 heads: if the garlic is soft and loose, then it is not yet ripe, and if the scales are cracked, the head breaks into cloves, and young roots appear on the bottom, then you are already late for harvesting. Typically, winter garlic is harvested at the end of July, and spring garlic at the end of August.
As for the recommendations of the lunar calendar for gardeners, in July of this year the favorable days for digging up garlic are the time period from the 5th to the 7th, and then the 15th, 15th, 19th, 20th, 23rd, 24th of the month. In August of the year, it is good to dig up garlic from the 1st to the 3rd, and then on the 11th, 12th, 15th, 16th, 29th and 30th.
Harvesting garlic
Winter garlic (those planted in the fall) ripens in late July - early August, and spring garlic (planted in the spring) - towards the end of August.
It is best to dig up garlic with a pitchfork on a dry and sunny day. The heads, cleared of soil, along with the stems are laid out on the bed to dry. It takes five days to dry the garlic. If five dry and sunny days in a row is not your local weather, then you can dry garlic under a canopy, in a gazebo, on a terrace, even in a greenhouse. The main thing is not to forget to ventilate the room well.
After drying the garlic, use scissors or pruning shears to trim the roots so that about 3 millimeters remain, then cut off the stem, leaving up to 10 centimeters.
How to braid hair correctly
Of all the sorted bulbs, you must first choose the one whose feather looks the strongest. This is where the weaving process begins.
At the base of the onion neck, the twine must be tied so that the result is 3 “tails” - feathers and two ends of the twine, which should be the same in length (see photo).
After the beginning has been made, they begin to weave in the bulbs evenly on both the right and left, grabbing them by the neck with twine.
Weaving can be continued until the free ends of the twine are about 15 cm. After this, you need to secure them by wrapping them around the braid and making a loop by which the creation will be suspended. Usually it is 1.5-2 m long. However, it will be easier for beginners to start weaving short small braids.
There is another option for braiding. Here you also need to decide on the lower initial bulb from which the creation process will begin, and tie twine around it in the same way as the first method.
The remaining bulbs are braided in pairs with each other by the feathers. And then these couples are alternately woven into a common braid on the right and left.
After every two woven pairs, you need to secure the section with a knot. You can see more about how to weave a bow in the video below:
When to remove garlic from the garden
They begin to dig up garlic when the lower leaves dry out and the upper leaves turn yellow. The head of ripe garlic should be dense, the cloves should be easily separated from each other, and the film covering them should be easily removed.
At the same time, if you dig up garlic at the wrong time, the following troubles can happen: Unripe garlic will be soft and loose,
Overripe garlic begins to re-grow. When harvesting and drying overripe garlic, the common scales are destroyed, and the cloves are easily separated from the bottom. As a result, such garlic is not suitable for long-term storage.
Garlic that is covered with at least three outer scales has a high shelf life. The ripening of garlic determines its keeping quality, so before digging up the entire bed of winter garlic, check how ripe it is.
To make sure the garlic is ripe, dig up a couple of heads of garlic to test. To do this, rake off the soil from 2-3 heads and inspect the condition of the scales. If the scales are strong, the garlic is ready for harvesting. When harvesting, first cut off the arrows, then dig up the plant with a garden fork and pull it out, then shake off the soil from the roots and place it on newspaper to dry. Then the garlic is dried for a week or two in a warm, ventilated room. After complete drying, the heads are cleared of stems and roots, while a stump 1-2 cm long is left from the above-ground part, and the roots are trimmed so as not to damage the bottom. It is imperative to trim the bottom of the garlic from excess roots so that the bulb is well dried and stored well in the winter.
Product shelf life
The storage period of the winter species is greatly influenced by the conditions that must be maintained throughout the entire period. Winter garlic does not store well, so it must be used first. Its shelf life is on average no more than 3-4 months.
Particular attention should be paid to the following factors:
- protection from light penetration;
- humidity ranging from 50 to 80%;
- good air circulation;
- air temperature from +2 to +4ºС.
Storage conditions for spring and winter species differ.
How to properly tie garlic into braids for storage, weaving methods and patterns
Weaving braids and bunches of garlic is popular among gardeners. Beginner summer residents have a question about how to properly tie garlic for storage in braids. This method has several options for making combinations. It is easy to use and decorates the kitchen interior.
- 1 When to harvest to braid it?
- 2 Advantages and disadvantages of this storage method
- 3 Duration of storage of garlic in braids
- 4 Weaving methods 4.1 Weaving with twine
- 4.2 Double weave with rope
- 4.3 Weaving with a tourniquet
- 4.4 Along with the bow
When to harvest to braid it?
Harvesting is carried out at the end of the growing season of winter or spring garlic. It is dug up and the roots are cleared from the ground. All plants are sent for drying. They are laid out or hung by the tops, grouped in small bunches. The plants are left to dry for 3–4 days. And to preserve the integrity of the tops for 7 - 10 days.
All bunches are removed and the roots are trimmed. The tops are cut so that 30 cm remains. They should not be damaged or broken.
Advantages and disadvantages of this storage method
The method of storing garlic in braids has its pros and cons. There are the same number of pros and cons, but despite this, the method is popular. The advantages include:
- Garlic heads do not rot with this storage method, as they are constantly exposed to air.
- Braids do not take up much space and save it. They can be hung on a nail in the kitchen.
- Convenient location in the kitchen allows you to use a head of garlic at any time.
- The substances that garlic releases indoors prevent colds.
- Braids made from onions or garlic decorate the kitchen and fit perfectly into the interior, especially in country houses.
However, this method has its disadvantages:
- Gradually, the vegetables dry out and the husks fall off, which requires frequent cleaning from the floor and shelves.
- Not everyone likes the smell emitted.
- In damp areas there is a risk of rotting.
- With constant exposure to sunlight, the heads begin to germinate.
- If at least one bulb rots, then the rot affects the rest and midges breed.
Duration of storage of garlic in braids
The shelf life of the crop depends on the variety and storage option. When using braids, there are certain patterns:
- The spring variety can be stored for 5–6 months at average humidity and a temperature of 15–17°C.
- The winter species will persist for 3–4 months in a cool room with a temperature of 5–6 °C, but easily tolerates high humidity.
- Damage to the tines during transportation or harvesting reduces shelf life.
Important! During harvesting and during weaving, it is necessary to sort the heads. Damaged ones are processed and eaten first.
Weaving methods
This method of storing garlic has been practiced for many decades. During this time, they came up with several options for weaving braids from garlic. Knitting braids is easy and does not require special skills. For this they use twine, rope, tourniquet, and combine it with a bow.
Weaving with twine
To weave a combination with twine, choose bulbs of the same size. This way the braid turns out more beautiful and will not break in places where small bulbs are located. The braid is braided according to the following algorithm:
- Take twine 150 cm long and fold it in half.
- Place the onion at the bend and tie it with twine.
- This makes 3 ends, 2 from twine and 1 stalk of garlic.
- Next, apply the second onion and others.
- Weaving is done according to a standard pattern.
- At the end, the ends of the twine are tied into a knot and a ring is made from which the braid can be hung.
Double weave with rope
This pattern got its name from the fact that before weaving begins, all the bulbs are tied in pairs. This speeds up the process and compacts the braid. The manipulation is carried out according to the following instructions:
Other options
In addition to storing the vegetable fresh, winter garlic can be preserved or dried. In the case where there is both a spring and a winter variety, it is better to leave the first one fresh and process the second one.
Drying
It is better to dry winter garlic cut into thin slices. This will reduce the drying time, since the slices themselves of this species are usually large.
Several methods can be used for drying:
- air drying;
- using an electric dryer;
- oven use.
An electric dryer helps dry the fastest; the slowest process takes place under natural conditions. The disadvantage of using technology is the cost of using resources (electricity, gas).
A well-dried vegetable can be ground . In this form, the workpiece will not take up much space, and it is much more convenient to use. It is best to grind the garlic not all at once, but as needed. In this case, the seasoning will be more flavorful.
An option for creating a dried preparation is in the video:
Conservation
There are many recipes for preserving garlic. Among them are methods of harvesting together with other vegetables or separate pickling.
How to pickle and marinate garlic - on video:
How to tie a braid from onions or garlic. Master classes
Weaving braids and bunches of garlic is popular among gardeners. Beginner summer residents have a question about how to properly tie garlic for storage in braids. This method has several options for making combinations. It is easy to use and decorates the kitchen interior.
Harvesting is carried out at the end of the growing season of winter or spring garlic. It is dug up and the roots are cleared from the ground. All plants are sent for drying. They are laid out or hung by the tops, grouped in small bunches. The plants are left to dry for 3–4 days. And to preserve the integrity of the tops for 7 - 10 days.
All bunches are removed and the roots are trimmed. The tops are cut so that 30 cm remains. They should not be damaged or broken.
The method of storing garlic in braids has its pros and cons. There are the same number of pros and cons, but despite this, the method is popular. The advantages include:
- Garlic heads do not rot with this storage method, as they are constantly exposed to air.
- Braids do not take up much space and save it. They can be hung on a nail in the kitchen.
- Convenient location in the kitchen allows you to use a head of garlic at any time.
- The substances that garlic releases indoors prevent colds.
- Braids made from onions or garlic decorate the kitchen and fit perfectly into the interior, especially in country houses.
However, this method has its disadvantages:
- Gradually, the vegetables dry out and the husks fall off, which requires frequent cleaning from the floor and shelves.
- Not everyone likes the smell emitted.
- In damp areas there is a risk of rotting.
- With constant exposure to sunlight, the heads begin to germinate.
- If at least one bulb rots, then the rot affects the rest and midges breed.
It is important to preserve garlic for the winter. To learn how to braid a garlic braid, you can look up information on the Internet and study several master classes. A properly braided braid will always be at hand and will preserve every head.
A properly braided braid will always be at hand and will preserve every head.
There are several ways to store this product:
- in paraffin;
- in salt;
- in nylon stockings;
- in boxes made of cardboard or wood;
- in birch bark baskets;
- in glass jars.
To store in paraffin, each head is dipped in melted warm paraffin, allowed to cool and stored in a cool place.
Nylon stockings or old tights are tightly stuffed with heads and hung on a nail or hook so that such a bag does not touch the floor.
The product is stored well in cardboard or wooden boxes if the room is cool, there is no dampness and the lighting is dim.
Storage in banks has a significant drawback. The product must be periodically inspected and rotten specimens removed. Housewives often divide the heads into cloves and dry them for use in seasonings. But the most popular and practical way is a garlic braid. You can knit oblique garlic for both home and industrial storage.
Before knitting garlic, after digging it up, it is necessary to carry out several preparatory measures.
It is important to dig it out carefully so that all the heads remain intact and there are no cuts from the shovel. After drying and sorting the crop, it will be easy to weave, while tubers that are not damaged during digging are selected
After drying and sorting the crop, it will be easy to weave, while tubers that are not damaged during digging are selected
After drying and sorting the crop, it will be easy to weave, and tubers that are not damaged during digging are selected.
Third way
We choose vegetables of the same size with stems 15 centimeters long. They should not be too dry - it will be difficult to braid into a rope:
We take a tourniquet or twine and tie a knot in the middle. We insert the tops there and tie them at the base. The two ends remain free. We weave the stem into two ropes in a zigzag. The next fruit is also inserted and a knot is tied to secure it. This is how a braid of the required length is woven
It is important to weave the tops and tighten them tightly, but avoid breaking the stem. 1
Storing onions and garlic, folk methods from the Supergardener website
1. Storing onions and garlic, folk methods from the Supergardener website
3. How to weave braids from onions, video master class from Sergey Kasatkin.
4. How to braid a bow, video master class from Marcus Fisher.
5. How to tie a braid from a bow, video master class from davidmcc33's channel.
6. DIY bow braid, video master class from LearnHow2.
7. How to weave garlic braids, video master class from Gardenerd.
What to do if the fruits spoil
Sometimes difficulties arise that can baffle even an experienced gardener. There is no need to rush to throw away the harvest; the situation can still be corrected:
- If the garlic heads dry quickly, it is likely that the air entering the room is too dry, or there is no air exchange at all. Due to this, the moisture evaporates quickly, and the slices wrinkle, break easily, and lose their original marketability and weight. The problem can be solved by normalizing air exchange, ventilating the room, or choosing another method: storing in oil, jars, paraffin;
- The appearance of mold or rot is possible only when the room is stuffy and humid. Those cloves that have already become infected are removed from healthy ones. They need to be cut back to a healthy place and processed. Normalize air circulation and temperature conditions;
- Around winter, some heads germinate if the room is hot. This cannot be allowed, so ventilate the room so that the temperature in it does not rise. It will not be possible to completely get rid of sprouting; the sprouts in the segments still develop, so you need to speed up the processing;
- if yellowness appears on the cloves, this indicates that the vegetable has become infected with fungal spores. Sick garlic plants are isolated from healthy ones and the remaining harvest is systematically checked.
If the conditions are met and vegetables are properly prepared for storage, it is unlikely that any problems will arise. However, they periodically inspect the entire crop and remove infected heads in time so that they do not have time to spoil healthy ones. In this case, the vegetables are guaranteed to be preserved until late spring.
And next year, prepare garlic arrows for future use - they are incredibly delicious.
Methods for braiding garlic for storage
Braiding garlic is the most optimal way to store the crop. The main advantage of this method is constant air circulation, which prevents the heads from rotting. There are several ways to braid garlic for storage, which will be discussed below.
How to braid?
Weaving is recommended to be done immediately after the heads have dried. To do this, leave 30 cm of the stem.
From the moment of harvesting to mating, at least a week should pass. If you exceed this period, the tops will break. In this case, weaving will not work.
1 way
To tie a braid for the winter using this method, you will need twine 1.5 m long. For braiding, choose large heads with a long and strong tail.
Then proceed like this:
- the twine is folded in half;
- the head of garlic is tied at the base so that there are 2 ends of the twine and one end of the base of the garlic;
- Place the head with the stem down at one end and braid it, alternately placing the garlic on one side or the other;
- After the braid is completely woven, the garlic is wrapped with twine at the base, and the remaining ends are cut off.
Method 2
To weave a braid, you can also use a rope 1.5 meters long. Before starting the manipulation, garlic is tied together in 2 pieces.
The further algorithm will be like this:
- the rope is folded in half;
- choose the largest one head of garlic and tie it at the base so that you get 2 ends of twine and one end of a garlic stalk;
- apply two pairs of garlic on both sides of the head, stems down, and braid;
- After 5 layers, a knot is tied in the middle of the braid, the stems are cut, and the ends of the rope are tied to the base to form a loop.
3 way
To knit garlic this way, you need a tourniquet. In this case, the length of the plant stems should be between 30 and 15 cm.
They work like this:
- the ends of the tourniquet are connected and tied to each other;
- a stem is inserted into the knot and tightened, after which it is woven into the two ends of the cord;
- the head is inserted into the weave and a knot is formed at the base - such manipulations are performed along the entire length of the rope.
other methods
There is another way to knit garlic into a braid. To do this, take a rope and form a ring out of it.
After this, the loop is hung on the hook, and the following steps are performed:
- the stems of the two heads are tied and fixed at the beginning of the loop;
- another pair of heads is attached crosswise;
- the stem of one head is wrapped around both ends of the rope and the head is placed at the top of the pair;
- such manipulations are performed alternately along the entire length of the loop;
- leave the tip of the ring, about 7 cm long, for easy storage;
- excess stems are cut off for aesthetics.