Is corn grown by seedlings?
It is customary to sow maize grains directly into open ground. But there is an alternative option - growing corn from seedlings. This method of cultivation is less known, but more preferable, as it has the following advantages:
- seed consumption is reduced;
- the time until the first harvest is obtained is reduced;
- harm from insects that destroy grains before germination in the soil is minimized;
- the risk of plant death from frost or excessive rain is reduced.
Improper watering
Soil moisture is critical for corn seed germination. If the seeds are planted in spilled soil, then there is no need for additional watering until the first shoots appear. Simply ventilate the container by removing the lid for a while every day (15-20 minutes).
The soil should not be too wet. This will lead to rotting of the seeds and, as a result, the absence of sprouts. But don’t let it dry out either. The grains will not sprout due to lack of moisture.
When to plant seeds for seedlings
Sowing of grains is carried out 25-30 days before planting shoots on the site. This time is needed so that the plant has time to form to the phase of 3-4 leaves - the optimal size for transportation to open ground.
Depending on the region
It is worth taking into account not only the growth rate of the crop, but also the agroclimatic features of the area. In different regions, the timing of sowing seeds will differ:
- In the southern regions, favorable weather conditions allow harvesting from the beds earlier, so seeds can be planted in the last days of March.
- In central Russia (including the Moscow region), the optimal time for germination of grains will be the end of April - mid-May. Due to unstable weather conditions, it is better to be a little late with sowing than to rush.
- In Siberia, the Urals and other northern regions, corn grains are also sown no later than mid-May, since it is necessary to focus on the length of daylight hours.
For growing corn in the Urals and other northern regions, quickly ripening early varieties are best suited.
Moon calendar
In order for the maize grains to sprout well, it is favorable to start planting work at home when the moon is waxing. Then the seedlings will be strong and healthy. The days of the New Moon and Full Moon are considered the least suitable for growing corn seedlings. It is generally accepted that at this time plants stop growing and may die.
Corn care
To ensure optimal plant development, weeds must be regularly removed, especially at the beginning, or avoided by mulching to prevent them from overgrowing and competing with the corn for nutrients and light.
Weed problems usually only arise when the corn is just emerging. A layer of mulch with straw or mowed grass can resist weeds, which also protects the soil from drying out.
Corn is relatively drought tolerant, but constant water shortages lead to lower yields. Therefore, you should moisten the soil, especially during dry periods, but avoid waterlogging.
It makes sense to add compost to the soil a few weeks before planting. If necessary, subsequent fertilization should be done with organic nitrogen. Horn flour and nettle infusion in a ratio of 1:10 are considered the best fertilizers.
Corn can evaporate 2 liters of water per day. Mulching retains moisture and heat. Just before and during flowering, plants need the most water and heat. 3 weeks before flowering and 3 weeks after, corn absorbs about half of the water it needs for the entire growing season.
Lack of water during these 6 weeks results in reduced yield. It is optimal to water it with sun-heated rainwater: this stimulates plant growth and pollen production.
Preparing for sowing
If we are talking about using your own seed, preparations should begin in the fall. To do this, during harvest, well-ripened ears are selected from healthy plants. Then the heads of cabbage are dried in the sun and stored in a dry, ventilated room. 3-4 days before planting corn grains for seedlings, they are taken out again, laid out on the windowsill and subjected to air-thermal heating at room temperature.
Calibration
Next comes a careful inspection of the seeds. This step is relevant even if seeds in store packets are used to germinate maize seedlings. Large grains without dents or spots are considered suitable for planting. It is advisable to choose the same color and size. Seeds that raise doubts should be discarded immediately.
If you plan to grow corn seedlings in large quantities, you can use another method instead of visual inspection. Soaking in salted water will help identify non-viable seeds. After a quarter of an hour, they will float to the surface, and the germinating grains will sink to the bottom.
Etching
After the initial selection, the grains are wrapped in a piece of gauze and placed in a weak solution of potassium permanganate for 20-30 minutes (a fungicide is also suitable). The seeds need such a “bath” so that the future plant remains healthy during the growing season. After the allotted period, the seed must be thoroughly rinsed with clean water.
Germination
This step is not strictly necessary. But since corn grains have a hard shell, before planting seedlings, it is recommended to soak them for germination using one of the following methods:
- Place sawdust in a container and moisten it generously with water from a spray bottle. Seeds are placed on top at a distance of 2-3 cm from each other. Then the container is loosely covered with a lid and left on the windowsill for 2 days.
- Add 2 tbsp to 1 liter of warm water. l. wood ash and leave for 2 days. Then the seed is placed in the resulting solution for 12 hours.
The appearance of small sprouts will indicate that the material is ready for planting.
Soil selection and preparation
For growing corn seedlings, a universal soil mixture for vegetables is suitable, which can be purchased at a specialty store. You can also make a suitable soil yourself. To do this, you will need to mix 3 parts of peat with neutral acidity, 1 part humus and 1 part sand. To improve seedlings, wood ash is added to the resulting substance in a ratio of 1:10.
In order to avoid the risk of infection by viruses and parasites, soil prepared with your own hands must be disinfected. To do this, the soil is calcined in the oven for 20 minutes at a temperature of 70-90 degrees, or you can hold the soil for 2 hours over a steam bath, stirring it from time to time. After thermal exposure, the soil must be shed with a solution of Fitosporin.
It is better to disinfect the soil in advance to give the soil a chance to rest and infuse. Complete restoration of beneficial microflora will occur in 4 weeks. It is better to postpone planting corn seeds for this period. But if waiting is an unaffordable luxury, then sowing work is carried out immediately after watering with the biofungicide Fitosporin.
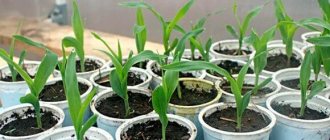
Containers suitable for planting grains
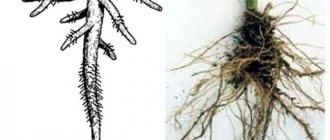
The root system of corn shoots is quite delicate and fragile, so individual containers are used for growing seedlings. These can be plastic cups, recycled containers, garden cassettes, peat tablets, etc. The main requirements for the container are a diameter of 12-14 cm, a height of 8-10 cm and the presence of drainage holes. Excess moisture will negatively affect the development of the cereal sprout, so if there are no holes at the bottom of the planting container, they should be made.
In addition, corn grains for seedlings can be sown in a “snail” - a special garden cloth made of waterproof material, twisted into a spiral. The width of the strip is 15 cm. Such a container will significantly save space and avoid the need to pick plants.
Planting containers need to be pre-treated against potential fungal infections. This procedure is especially important if the container has already been used last year. To disinfect planting containers, place them in a 9:1 solution of water and household bleach for at least 10 minutes. Then rinse thoroughly with running water. Mineral deposits are removed with a wire brush or scraped off with a knife.
It would be a good idea to carefully inspect the rims, as salts often accumulate in this place. If they are not cleaned, the seedling stems will suffer from dehydration, which will negatively affect the quality of the plant.
Large boxes for planting corn seedlings are used only as a last resort, because in a single space the likelihood of intertwining the root system of young plants increases. Such shoots will most likely die during picking or transplanting into open ground.
Determining the optimal timing of corn sowing
Considering that for young plants with a weakly branched root system, a sufficient amount of moisture in the upper layers of the soil is especially important, and the soil is moistened to the maximum in the spring (regardless of precipitation), sowing should be carried out as early as possible.
Calculation of sowing dates based on average daily temperature
Corn hybrids that are offered for sale are quite neutral to the light regime of the day. But the cobs are still better formed during early sowing, when the average daily soil temperature at a depth of 5 cm reaches +10 degrees. It is important that the sum of temperatures over 10 days is not less than 100. This can be considered favorable conditions for seedlings, which appear on about the 10th day. If this amount is below 10, then not only will seedlings appear later, but some of the already swollen seeds may rot and then germination will suffer.
In any case, it is necessary to take into account weather statistics for the last 5 - 10 years in order to consider frosts to be very likely or unlikely after the soil warms up to +10 degrees. In accordance with this, acceptable risks are determined and the possibility of sowing immediately after fixing certain temperature indicators or the need to wait several days.
By the way, one of the characteristic indicators of sufficient soil warming (up to +10) is the flowering of cherries.
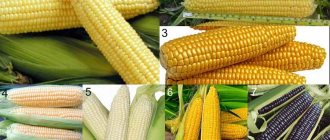
Fig.1 Corn hybrid SI ALADIUM
The importance of strict adherence to sowing dates
In Germany, for example, corn sowing usually begins in mid-April, in Belarus - after April 20th. It is important that every day of delay in sowing after the optimal period supposedly reduces the yield by 1% (hence, in a week - by 7%, in 2 weeks - by 14%, in 3 weeks - by 21%!). At the same time, the share of cobs in the mass of plants decreases by 0.4% per 1 day of the lost growing season.
Step-by-step instructions for planting corn kernels
The process of growing young shoots of maize seeds is quite simple. To give the crop a good start and get strong seedlings, it is recommended to adhere to the following sequence in sowing work:
- A drainage layer 1-1.5 cm thick is placed at the bottom of the container. These can be either specialized materials, for example: sterilized expanded clay, perlite, etc., or improvised means: pebbles, charcoal, fine broken ceramic tiles, brick chips.
- The seed container is filled with soil mixture. There should be a gap of 1.5 - 2 cm between the edge of the container and the ground.
- For each seed, make a hole 3.5–4 cm deep.
- Corn grain, dry or already sprouted in advance, is placed in the hole and covered with earth.
- The soil is carefully leveled and moistened from a sprayer with warm water +33-35°C.
- Sowing containers are covered with transparent plastic film, a lid or glass to create a greenhouse effect and maintain a microclimate.
- Containers with seedlings are placed in a well-lit, warm place - the range from + 23 to +25 ° C is considered optimal for seed germination. Containers with seedlings can be placed on shelves in the greenhouse, on window sills, or on other elevated surfaces. But you shouldn’t leave it on the ground: it may happen that the roots grow into the drainage holes and are injured during replanting.
As a rule, there is no need for additional watering until the first shoots appear. But regular ventilation will be useful. To do this, it is enough to open the containers for 15-20 minutes every day.
Lack of seed preparation
For grains that have not been pre-treated, the chance of sprouting is reduced. The plant will have to spend time and effort to adapt to the soil and climatic conditions, instead of taking root and sprouting. Also, you should not count on good germination if you do not select the most valuable seed material.
How to prepare:
- Cleaning. Scatter the beans on a clean cloth or sheet of paper and remove any damaged specimens. Remove debris.
- Calibration. Select the best seeds by distributing the entire mass into fractions with certain geometric seed sizes. As a rule, large, uniformly shaped grains are the best. If possible, sow only these.
- Disinfection. Immerse the seeds in a bright pink infusion of potassium permanganate for disinfection.
To do this, thoroughly stir 1 g of the drug in 100 ml of water. You can treat with fungicides. Alpha-Protravitel is perfect (recommended dose of working solution 10 l/t). - Hardening. This is an additional (optional) way to strengthen the seed. Keep the seeds at a temperature of + 35 ° for 5 days (heat hardening). Or do cold hardening. Keep the corn in the refrigerator for 5 days, wrapped in damp material.
- Soak. The grains of the crop are covered with a hard shell. To avoid prolonged germination, it is recommended to soak them before planting. Immerse the seeds completely in water for a day. You can add 2 tbsp to 1 liter of warm water. l. wood ash. After infusing the solution for 2 days, place the seeds in it for 12 hours.
Conditions for growing corn seedlings
Corn seedlings need proper care. And one of the important criteria for the development of young plants is maintaining the desired indoor climate. In order for the seedlings to grow strong and healthy, the temperature regime will have to be adjusted several times:
- From the moment of planting until the appearance of the first shoots - from +23 to +25°C;
- The next 3-5 days – from +16 to +18°C during the daytime and from +13 to +15 °C after sunset;
- After the above period and until the seedlings are transplanted into open ground - from +21 to 24°C during the day and from +16 to +18°C at night.
Watering
Watering should be moderate and not too frequent. Both excessive drying out of the soil and excess water are equally harmful to corn seedlings.
Corn shoots need to be irrigated correctly. Droplets of water should not fall on the green mass, only on the roots of the crop. Therefore, using a spray bottle is not recommended. A syringe or syringe is perfect for these purposes.
Lighting
Young corn shoots need good lighting. If there is not enough of it, the plants will turn yellow, stretch out, and quickly wither.
The length of daylight hours for seedlings should be 10-12 hours. For these purposes, it is recommended to use special lighting.
Top dressing
7 days after planting the seeds, it is recommended to apply water-soluble fertilizer to the soil. Any composition containing up to 30% nitrogen is suitable: “Teraflex”, “Kemira Hydro”, “Master” and others. If for some reason the seedlings stop growing, you can additionally feed the soil with phosphorus.
Hardening
Before planting in open ground, grown plants need hardening - gradual acclimation of the crop to the ambient temperature. To do this, the seedlings are taken outside or onto the balcony, gradually increasing the period of stay in the open air from 3 to 8-10 hours. The procedure begins a week before transplantation to a permanent place.
How to germinate corn at home before planting in the ground
How to germinate corn before planting? In this case, the following recommendations must be followed:
- Before germinating corn seeds, they must be carefully inspected and damaged ones removed. Otherwise, after sowing, the crop may be susceptible to diseases.
- Pour water over the seeds so that the liquid completely covers the material. Leave for 10 hours.
- Drain the water and place the planting material in the refrigerator for several hours; this procedure is carried out to harden the culture.
- Prepare 3 pieces of fabric. Soak them in water and spread the seeds on cloths. Cover the top with a wet cloth. Spread the seeds again in a thin layer and cover with a layer of cloth.
Planting seedlings in open ground
Corn seedlings are transplanted to a permanent place after 30 days from the date of sowing the seeds. In this case, it is better to wait until the soil on the site warms up to +14°C and the threat of night frosts has passed.
Corn loves warmth and sun, so you should choose an appropriate place for it. It is also necessary to choose the right neighbors for her on the site.
In order for young corn shoots to take root in the designated bed, the soil should be moistened before planting. It is not recommended to plant seedlings in dry soil!
It is recommended to plant on a cloudy day or at sunset using the transshipment method. Step-by-step instruction:
- Water the seedlings 2-3 hours before planting.
- Mark future rows on the garden bed. Between them you need to maintain a distance of 50-60 cm.
- Next, dig holes at intervals of 30 cm. Their size should slightly exceed the size of an earthen ball of seedlings.
- Remove young plants from temporary containers and place in prepared holes. It is advisable to deepen the seedlings, then the plant will grow additional roots and take root faster.
- Carefully fill the holes with earth and compact them in a circle with your hands.
- Provide abundant moisture to the bed.
Figuring out when to plant grains and how to grow corn seedlings is not at all difficult. In addition, this process will not require special efforts or financial investments from the gardener. But the result will definitely please you! After all, cobs grown on your own plot are not only tastier, but also healthier than store-bought counterparts.
Germination stage skipped
All steps of corn planting are important for a good harvest. But the germination stage is considered vital. Its absence can lead to prolonged germination. And in case of unfavorable weather conditions, the seeds may not germinate at all.
Apply the following methods:
- Place the sawdust in the germination container and mist it generously with water from a spray bottle. Place the grains on the sawdust, keeping a distance of 2–3 cm between them. Loosely cover the container with a lid to create a greenhouse effect and keep it on the windowsill for 2 days. The optimal temperature for germination is considered to be + 23… + 25°C. Soon small sprouts will appear (the grains will hatch). This means the seeds are ready for planting.
- Corn is often sprouted using a new method called “snail”. Cover the top with plastic tape (can be cut from a bag) with a strip of toilet paper. Moisten the structure with water from a spray bottle. Place the grains along the upper edge of the tape at a distance of several centimeters from each other. Next, roll the tape into a “snail” roll. Place the resulting roll in water. The paper will become saturated with liquid. This way the grains will always be hydrated and will germinate quickly.
Use growth stimulants. A popular remedy is Epin:
- Dilute one or two drops of the drug in 100 ml of water.
- Use the solution to irrigate seed on sawdust or to soak the snail.
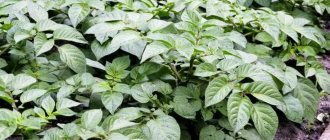
Care after landing
Rapid growth of the crop is observed right up to the moment of flowering. The growth of green mass per day can be up to 12 cm. Then the plants devote all their strength to forming cobs. Caring for corn is simple and consists of the following activities:
- Watering. Although corn is a drought-tolerant plant, it requires deep watering at certain points in its life. With enough moisture, the kernels on the cob will be full, juicy and sweet. The first time the bed with crops is moistened abundantly, when 9 leaves are formed on the plants. The corn is then well watered during flowering. The third watering is necessary during the period when the grains are filled. After this, the soil should be moistened only if its top layer becomes excessively dry. You can install drip irrigation on the corn bed.
- Loosening. It should be done after every watering or rain. This procedure must be done especially carefully while the sprouts have not yet appeared above the surface. It is recommended to loosen the soil to a depth of no more than 4 cm. This procedure promotes the growth of additional roots and provides access to oxygen to the roots. Loosening is especially important at the beginning of the season.
- Hilling. This technique helps tall plants withstand gusts of wind, and also helps retain moisture in the ground. We can say that hilling partially replaces loosening. In addition, in hilled beds it is more difficult for weeds to break through, which means there is no need for weeding.
- Fertilizer application. The first feeding is carried out in the phase of appearance of 6 leaves. You can use both organic and chemical fertilizers. From organic matter you can take humus and compost. Ammonium nitrate solution or complex fertilizer will deliver minerals to the soil. A concentrated solution of Lingohumate is well suited for corn. It is used by diluting two tablespoons of the product in 10 liters of water. Apply 1 liter of the resulting fertilizer to each plant. At the moment the panicles appear, a second feeding consisting of mineral fertilizers is applied. The third time the plantings are fertilized during the formation of the cobs, using, for example, an Agricola-Vegeta solution.
Experienced summer residents have their own secrets of growing corn, which they are ready to share with other gardeners:
- Before planting, the corn bed should be dug to a depth of 30 cm, since this crop loves loose soil. Carrying out this procedure again after 2 weeks will eliminate the appearance of a large number of weeds.
- Acidic soil must be neutralized with lime, adding 3 kg of the substance per square meter of land. This will significantly improve yields.
- To obtain an early harvest, special early varieties and hybrids are best suited. Their plants are not tall and form cobs up to 30 cm in size.
- No matter how attractive the picture on the seed packaging may seem, you should choose zoned varieties intended for cultivation in a specific area.
- If you plant corn along the perimeter of the plot in a narrow strip, it will act as a hedge.
- In the second half of summer, side shoots - stepsons - form on the plants. They should be ruthlessly removed, only then can you count on a high-quality harvest. The grown shoots are broken off or cut off.
- If the flowering period occurs in damp, cool weather, pollination may not be complete and the process can be helped artificially. You should cut off the male flowers (sultanas) and shake off the pollen from them above the cobs.
Although corn was considered a southern crop, it is now successfully grown in the middle zone and even colder regions. The main thing is to use the right variety and follow the rules.
0 0 votes
Article rating
Ripening time and harvest
Depending on the variety of corn, full ripening of corn cobs is 70-150 days. By the time of maturity, the grains become swollen and bright yellow. If you press down on the grain with your fingernail, a white liquid should come out.
In the Moscow region, early ripening varieties that are resistant to disease and cold are grown; the harvest is harvested in August-September. In the northern regions, you need to collect the cobs before frost - in August, early September. In the south of the country, late varieties are harvested before October, while early hybrids already ripen in July.
Store the cobs in a dry place with good ventilation. Hang the corn in nets until completely dry. When the grains are dry, they are separated from the cobs and sent for processing or livestock feed. Dry grains are stored in an airtight container under a lid in a dry, dark place all winter. When exposed to moisture, the seeds become moldy and become unfit for consumption.
Fertilizing plants
When the corn seedlings have 5 leaves, they should be fed with superphosphates, potassium salt and ammonium nitrate. These fertilizers are applied to the soil in the form of solutions. Dosage recommendations are usually indicated in the instructions for the drugs.
The second feeding is carried out during the flowering period of corn, and the third when the cobs begin to form.
The composition of the soil directly affects the plant’s need for a particular fertilizer. The condition of the leaves can tell you what kind of fertilizer the corn is lacking. For example, with nitrogen starvation, the leaves will turn yellow and dry out. A lack of phosphorus will manifest itself as reddening of the leaves, and a deficiency of potassium will result in slower growth and damage in the form of burns.
Pests and diseases of corn
Corn diseases
Unfortunately, there are quite a lot of pests and diseases that affect corn. Most often, corn suffers from fusarium cob and seedling blight, helminthosporium blight, stem and pythium root rot, red cob rot, rust, dusty and blister smut.
Fusarium cob blight is widespread in agriculture, and during periods of high humidity and prolonged rains, epidemics of the disease occur. Signs of fusarium disease appear at the stage of milky ripeness of the cobs - a pinkish coating forms on them, heavily affected grains darken, lose their shine, become loose and destroyed, and those that remain intact cannot be used as seed, as they may be infected. In order to avoid disease, it is necessary to treat the seeds before sowing.
Fusarium seedling blight is also a fairly common disease, in which the affected seeds become covered with a white or pink coating, and the sprout that emerges from the grain turns brown and dies. But even if it continues to develop, it lags behind other plants, it has weakened roots, a fragile stem, and drying leaves. At best, such a plant simply will not produce a harvest. The disease cannot be cured, but it is possible to prevent the disease: the grains should be treated with fungicidal preparations before sowing, the seeds should be sown on time and in a well-warmed area by the sun.
Helminthosporiosis affects the leaf blades and ears of corn, forming brown and gray spindle-shaped spots on them, surrounded by a dark border. You can sometimes see a sooty coating in the center of the spots. The spots grow, merge into a shapeless focus, causing the leaves to die, a gray coating forms on the affected cobs, the seeds wrinkle, become covered with dark mycelium and rot after a while. Pathogens can survive on seeds and plant residues of corn. To protect the crop from disease, it is necessary to observe crop rotation, grow infection-resistant hybrids, treat the seeds before sowing and the soil on the site with fungicides, and after harvesting, it is necessary to remove weeds and corn plant debris from the site.
Stem rot can spread very quickly during prolonged rainfall, but in regions with a dry climate it is almost never found. The onset of the disease is characterized by the appearance of dark spots on the lower part of the stem or on the internodes, and with the development of the disease, softening, rotting and death of the stem occurs, while its core becomes pink in color, and the affected tissues are covered with many small perithecia with a diameter of no more than one millimeter. You can prevent the appearance of stem rot using the same preventive measures that have already been described.
Corn rust is caused by a pathogen that is especially active in the second half of summer and continues its destructive activity until the end of the growing season: light yellow spots appear on the underside of the leaves, which gradually darken, then pustules with maturing spores no larger than a millimeter in size form on them. The leaf tissue under the pustules dries out, tears, and the spores fly away and infect healthy tissues and plants. Rust must be combated with preventive measures and by treating crops with fungicide solutions.
Loose smut is an infectious disease of all grain crops, most often affecting corn in the southern regions. The infection covers the inflorescences and ears of the plant, and the causative agent of the disease can accumulate in the soil for years without manifesting itself, but as soon as favorable conditions arise, it can cause a widespread epidemic that can destroy up to 40% of the crop. Diseased inflorescences become a loose mass, the cobs turn into a black lump. If the plant was affected at an early stage of development, it is stunted in growth, becomes too bushy and ugly compared to healthy specimens. Sometimes the disease is not so obvious, but negatively affects the growing season. To prevent infection, grow smut-resistant hybrids and strictly observe crop rotation - compliance with these preventive measures will prevent the accumulation of pathogenic microorganisms in the soil.
Bladder smut is caused by a basid fungus and manifests itself as numerous blistered formations on the cobs and leaves of corn. When the panicles are damaged, rough swellings in the form of sacs appear on the flowers, but the largest galls are formed on the stems and cobs. During harvest, large galls fall off and remain in the soil, and the next year they again infect the plants. The disease progresses during dry weather and when planting is too dense. During a massive epidemic, the disease can destroy up to 50% of the crop. This can be prevented by growing disease-resistant hybrids and planting corn according to a scheme developed by professionals. Do not forget to treat the seeds before sowing with a fungicide solution and remove weeds and corn plant debris from the site after the end of the season.
Pythium root rot of corn most often occurs in areas with heavy soils and high humidity. The causative agent of the disease is activated during the germination of seedlings, affecting their root system - constrictions appear on the roots, root hairs do not form, as a result of which the roots rot and dry out, starting from the tips, and then the entire plant dies. If the disease is mild, you can observe a change in the color of the leaves and stunted growth of the plants. For intensive treatment and as a disease prevention, corn is treated with fungicidal preparations or phosphonates.
Red rot of the cob is dangerous because it not only reduces the yield of corn, but also infects people and animals, causing damage to their nerve cells. The disease is detected during the period of milky-waxy maturity: a white-red coating appears on the upper cobs, quickly spreading and affecting both the stem and the grains. As a result of the lesion, the grains are destroyed, and the wrapper becomes brown, dries out and tightly covers the diseased cob. Prolonged rains and low temperatures during grain ripening contribute to the spread of the disease. Damage can be prevented by observing crop rotation, growing disease-resistant hybrids, treating seeds before sowing, monitoring the amount of nitrogen fertilizer applied, deep digging and cleaning the area after harvesting from plant residues and weeds. The disease should be controlled with fungicidal drugs.
Corn pests
The most dangerous pests for corn are wireworms, false wireworms, cutworms, meadow and corn moths, and the oat fly.
For wireworms (larvae of click beetles) and false wireworms (larvae of darkling beetles), corn is the main victim, although they also happily devour potatoes, sunflowers, beets and other vegetable crops, gnawing holes in their underground organs. If the density of insects per m² of garden is 90 or more, the crops at best are reduced by a quarter, but there have been cases of complete destruction of crops. Pests are most active at low air temperatures during the rainy season or in irrigated fields. To prevent the reproduction and development of wireworms, it is necessary to plow the field every autumn, observe crop rotation, treat the grains with insecticides before sowing, and use pheromone traps against pests during the growing season.
- Watercress: growing in the garden and at home
Fall armyworms can also cause serious damage to corn. They are widespread and affect all terrestrial organs of the plant. The main danger is posed by winter, meadow and cotton bollworms, which reproduce from two to four generations of pests per season. The first and second generations mainly destroy corn leaves, while the third and fourth generations gnaw on the cobs, seriously damaging the generative organs, which leads to a decrease in the yield and quality of the grains. It is necessary to combat armyworms and their larvae primarily using agrotechnical methods - observing crop rotation, plowing the soil after harvesting, and timely destruction of weeds. To combat larvae, you can use pheromone traps.
The Swedish oat fly lives in a moderately humid climate - closer to the forest-steppe zone and in the area of irrigated fields. During the season, it reproduces 2-3 generations, which are equally dangerous for corn. You can protect a plant from flies by taking preventive measures: deep plowing or digging up the area in the fall, followed by soil compaction, timely sowing of seeds and planting seedlings, as well as regular weed control. If a fly does appear on your corn, you will have to resort to treating the plants with insecticides.
The meadow moth is more often found in the steppe, forest-steppe and taiga zones. Of the four generations of the moth, the greatest danger is posed by the first - rapidly reproducing caterpillars. It is interesting that the number of moths manifests itself in cycles - once every 10-12 years there is an invasion of pests in such quantities that can destroy up to 60%, and sometimes the entire crop. The caterpillars damage the leaves and stems of corn, sunflower, legumes and some grain crops, potatoes, beets and hemp. The appearance of pests can be prevented by the agrotechnical methods already described, and caterpillars and moths are destroyed with biological products.
Stem borer. The main victim of the stem borer is corn, although it also attacks hops, soybeans, peppers, sorghum and millet. This pest develops in three generations, laying eggs on leaves and stems that do not die even in severe frosts. Symptoms of the presence of the borer include yellowing of the leaves and their central veins. The veins break, the leaf bends and dies. The threshold of harmfulness of this insect is 6 pieces per m² of planting. With strict adherence to agricultural practices, corn is more or less protected from the stem borer, but if it does appear, it is necessary to treat the plants with insecticides.
Useful tips
For regions that are classified as zones of moderate humidity, it is recommended to apply nitrogen fertilizers using the spreading method - using fertilizers in granular form.
In arid conditions, agricultural management is possible only if planting is done “in the rain.” This is due to the fact that the lac crop will be able to absorb fertilizers only if they dissolve in the moisture contained in the soil and are available to the plant roots. Although the area for corn is being prepared in the fall, it is recommended to close it in the spring to replenish moisture reserves. After the snow cover melts, the dug up area is harrowed. Before direct field work, the area is weeded or weeds are destroyed with a soil herbicide. The latter is advisable to use for large cultivation areas (not 1-2 beds).
It is possible to grow strong plants and get a rich corn harvest even in regions with short and cool summers. The main thing is to correctly calculate the timing of sowing seeds for seedlings and comply with agrotechnical requirements for cultivating grain crops.
Sources:
https://ogorod365.com/posadka-kukuruzy-v-2020-godu-sroki-poseva-vyrashhivanie-i-uhod/ https://byton.ru/zernovye/posadka-kukuruzy-33014/ https://ogorod- bez-hlopot.ru/posadochnye-dni-dlya-kukuruzy-v-2020-godu-po-lune-i-regionam.html