Many people grow green onions on the windowsill. In addition to this, other greens are also suitable for winter cultivation. We will tell you how to grow other crops.
The main feature of these crops is that they can easily tolerate a lack of sunlight and grow very quickly: in just 2-3 weeks they can delight you with lush greenery. At the same time, watercress and mustard grow well from seeds even in winter, but parsley, celery and onions can be obtained more quickly through the forcing process. As for basil, it propagates well by cuttings.
Watercress on the windowsill
Varieties of watercress for growing on the window : Dansky, Dukat and Vest.
This is not only an unpretentious, fast-growing green, but also a very useful product for the human body, as it normalizes blood pressure and relieves insomnia.
Watercress grows well without soil. Place a layer of porous paper, cotton wool or hydrogel at the bottom of the growing container. Moisten the base thoroughly and sow the seeds.
Watercress should be sown thickly; in this case, the seedlings “support” each other during the growth process and form a green mass that is pleasing to the eye.
For the first few days, before germination, cover the container with the planted seeds with cling film and place in a warm, shaded place. When the seeds germinate, remove the film and place the container on the windowsill. Don't forget to turn, water and spray the crops: watercress loves moisture. After a few weeks, you can cut the first crop. The leaves are considered ready for cutting when they grow to 6-10 cm.
Rosemary
This plant will not only add piquancy to your dishes, but will also decorate your kitchen. It is grown in summer on a personal plot, and in winter it lives well in an apartment. It requires a wide container with fairly thick drainage.
Growing conditions
Rosemary places high demands on lighting and fresh air. In winter, it needs a southern exposure, and in summer it must be moved into open ground, taken out to a loggia or balcony, or at least placed outside a window so that the leaves can accumulate the required amount of essential oils.
Rosemary is propagated using cuttings and seeds.
Seeds
They have poor germination. They are kept wet for two days, then placed on the surface of the soil, covered with cellophane and sprayed with water daily from a spray bottle. If after a month the shoots have not appeared, then you need to sow other seeds. When the seedlings have at least 3 leaves, they are placed in larger containers.
Cuttings
But rosemary grown by cuttings turns out much better. For cultivation, a lignified shoot is used, which is kept in a vessel with water or wet sand until roots appear, and then transplanted into a pot with soil.
Sarepta leaf mustard on the windowsill
Varieties of leaf mustard for growing on the window : Vesnushka, Volnushka, Mustang.
Sarepta mustard leaf is grown in the same way as watercress. Keep in mind that this crop grows well at a temperature of 10-20°C, so place the container with seedlings on a glazed, insulated loggia. In an apartment, it is better to choose the coolest window sill for greenery.
A rosette of leaves grown 20-25 days after germination is suitable for consumption. Leaf mustard will enrich your diet with vitamins B1, B2, PP, ascorbic acid, carotene, calcium salts, magnesium, iron, phosphorus and other beneficial substances.
To speed up germination, seeds can be soaked for 12 hours in a solution of microelements and then dried until they flow. After sowing, place the container with the seeds in a warm, shaded place. When the seeds germinate, transfer the mustard to a cool, bright room. Leaf mustard is undemanding to the soil, just like watercress; its seeds can be sown on cotton wool, porous paper, in hydrogel, or in universal fertile soil.
Leaf mustard should be harvested either by pulling out the entire rosette of leaves from the ground, or by carefully cutting off individual leaves and maintaining the growing point.
If you want to receive fresh greens throughout the winter, then you should sow new batches of watercress and Sarepta mustard every 20-25 days.
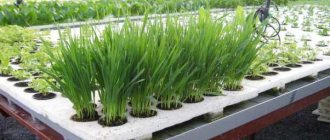
Grow greens hydroponically or in the ground?
First, let's determine the growing conditions. You can choose any convenient option, but from our own experience we will say that the most effective method of growing greens in closed ground conditions is hydroponics. With this method of cultivation, the greens (as well as many other plants) will be more lush and juicy, and will ripen much faster. In addition, problems such as “forgot to water” or “there are midges in the substrate” will not arise. Clean and tidy.
For medium-sized table greens (parsley, dill, lettuce, cilantro, spinach), you can choose a compact hydroponic setup. For example, CuttingBoard 27 or this one. But basil is a more voracious friend, so ideally it needs a larger installation, for example, like AeroFarm. 5 basil bushes a meter high and with leaves up to 10 cm in length will grow perfectly in it!
Expanded clay and mineral wool can be used as a substrate in which the sprouts will be held. A mineral wool cube is placed in the center of the hydroponic plant pot and sprinkled with expanded clay around it. On the same cube you can immediately germinate seeds. By the way, expanded clay is an environmentally friendly substrate, as it does not accumulate salts and after washing can be reused (even several times). You can read more about expanded clay here.
If you are not yet planning on getting a hydroponic setup and want to start growing in soil, you need to read the article about the basics of soil growing. In this article, the emphasis will be on hydroponics.
Forcing onions into feathers
Onion varieties for growing on the window : Chernigovsky, Rostovsky, Soyuz, Bessonovsky, Timiryazevsky, Spassky and other multi-germ varieties.
A bulb in a jar, a common plant on Soviet window sills, no longer often pleases the eye and stomach with its pungent taste.
To force onions to grow, choose dense, medium-sized bulbs. To make the feather germinate faster, cut off the top of the bulb. And if you find bulbs that have already “bloomed”, then there is no need to cut anything. A large onion will produce more greens, but will take up a lot of space. It is better to plant such specimens separately, lowering the bottom with germinating roots into a container of water.
If you plant onions in the soil, you can add a hydrogel soaked in a nutrient solution. It will prevent the soil from drying out, which often happens indoors.
For planting, you can use containers of any size. If they do not have holes for draining excess liquid, pour expanded clay onto the bottom, and then up to about half the volume - soil with or without hydrogel. After slightly compacting the mixture, plant the bulbs in it close to each other, without burying them in the soil. Water generously and expect a harvest.
Onion
Handsome onion
- In appearance, the leaves are similar to the feathers of ordinary onions.
- A feature of the variety is the inability to form the head - the bulb itself, so entrepreneurs grow onion bulbs by sowing seeds.
- Productivity depends on the growing temperature (+15 °C) and a certain humidity (80%).
- From 1 m2 you can collect up to 3.5 kg of greens.
Parsley and celery on the windowsill in winter
Varieties of parsley for growing on the window : Astra, Beads, Gloria, Emerald lace, Common leaf, Russian feast, Morning freshness.
Celery varieties for growing on the window : Vigor, Zakhar, Kartuli, Nezhny, Samurai.
In winter, growing parsley and celery from seeds is not easy. But if you still have the roots of these plants in your bins since the fall, the greens can be obtained by forcing them. Select small, not overdried roots and immerse them in water for several hours. Then plant in a pot with soil up to the shoulders so that the soil does not fall on the growing point of the greenery.
Place containers with roots first in a shaded place. After the first leaves appear, the pots should be moved to the brightest windowsill, because... Parsley and celery are very demanding of light. Water the plantings no more than twice a week.
You need to cut off the grown greenery carefully, leaving a three-centimeter petiole on the root crop. Fresh greenery grows back in about a month.
Root parsley
In general, growing parsley from seeds takes a long time and you need to start early. To speed up this process, you can use rhizomes to grow parsley. This is much easier to do in winter.
You can dig up parsley root from your garden or even buy it at a grocery store. It must have a healthy appearance, no damage or signs of wilting, and the apical bud must be intact.
Landing
It should be placed in a container filled with moist soil. Excessively long roots are planted obliquely. The first greens will hatch within a few days after planting, and after another two weeks the leaves can be used for food. The root will give you greens for six months.
Growing basil on a windowsill in winter
Basil varieties for growing on the window : Clove, Yerevan, Dwarf, Lemon, Marquis, Violet.
Cuttings are one of the easiest ways to get basil greens in winter. The main difficulty is to find a growing specimen in order to cut cuttings from it; in this case, you can even try to root branches bought in a store.
Place cuttings 10-15 cm long in water until roots appear, changing the water every two days. Basil cuttings should be planted in separate pots filled with universal soil. Basil loves light, loose, nutritious soil, so pay special attention to organizing drainage. In addition, basil is very light-loving. Find the lightest window sill for it and, if possible, on cloudy days, supplement the crops with special LED or fluorescent lamps.
- Lighting for seedlings at home
Do seedlings grown on a windowsill need additional lighting? What are phytolamps, how to choose them and use them correctly?
Caring for rooted shoots is the same as for adult plants: regularly water them with warm (30°C) water, periodically loosen the soil and fertilize. The harvest of basil greens can be obtained within a month after planting the cuttings in the ground.
What you need for a mini-garden
- Containers. It is best to use plastic (wooden ones can leak) or wide clay pots. Each type of greenery needs its own home (many plants do not combine with each other).
- Priming. Suitable soil is a mixture of garden soil, sawdust, peat and clean sand in equal proportions. You can buy ready-made soil for seedlings. Before pouring it into containers, place a thin layer of small pebbles, pieces of broken brick or crushed foam on their bottom. This is drainage (it is necessary to drain excess water when watering, otherwise the greenery on the windowsill may rot).
Lamps (fluorescent, white spectrum). It is necessary to illuminate a small garden in the winter months so that the daylight hours are 13-15 hours.
- You can purchase special timers and set the backlight time in advance, which is very convenient.
- Polyethylene film. It is necessary to create a greenhouse effect so that seeds germinate better.
But the most important thing that is needed is your desire to always have fresh greens on the windowsill in winter, a good mood in autumn, a constant supply of vitamins in spring and the beauty of tender seedlings in summer.
For information about the features of growing greens on a windowsill, see the table below.
Growing chard on a windowsill in winter
Chard varieties for growing on the window : Scarlet, White Salver, Emerald, Beauty.
Swiss chard, also known as chard, can be not only a pleasant addition to the diet, but also an interior decoration, because its petioles and leaves are distinguished by different and very rich colors.
Sow the chard in a mixture of humus, garden soil and coarse sand (1:1:0.5), to a depth of 4 cm. Place the boxes on a sunny windowsill and try to maintain the room temperature at 17-20°C. After the emergence of seedlings, the chard is thinned out for the first time, and when 4-5 leaves are formed - a second time, leaving 15-20 cm between shoots. The removed specimens can be eaten. 1.5-2 months after the emergence of chard shoots, they begin to carefully cut off the side leaves. Water it and spray it with warm water every 3 days so that the soil does not dry out, and once every 2-3 weeks it is fed with complex mineral fertilizer, for example, Kemira Universal, diluting it according to the instructions.
Slime Bow
Wide leaves of onion.
- The feathers of the slime onion are quite wide and very juicy, with a pleasant garlic aroma.
- The species is perennial, so it can be cultivated all year round.
- Slime onion does not have a rest period. From 1 m2 you can get 4.5 kg of greens.
- High-yielding species. Recommended for growing for industrial purposes.
What is witloof and how to grow it on a windowsill
Varieties of witloof for growing on the window : Danish, Cone, Rocket, Extrella, Express.
Lettuce chicory has baffled more than one gardener, because growing it has its own trick. This crop develops from seeds in two stages, so it makes no sense to immediately sow them on the window.
Witloof seeds are sown in open ground no earlier than mid-May, thinned out after germination and fed with any mineral complex with a high proportion of nitrogen. Caring for plants is simple - they need to be loosened and watered as the soil dries out. At the end of September, the resulting root crops along with the leaves are dug up and dried. Then the foliage is cut off at a height of 2-3 cm, and the root crops are stored, peeled from the roots, in a box with sand, put away in a cool room.
Starting in November, root crops can be planted to force the heads of cabbage. Trim them in length, sprinkle the cuts with crushed coal and plant them in a deep (from 40 cm) box filled with a mixture of sand, earth and high-moor peat. Place the root vegetables in a box close to each other and water carefully so that the root collar does not get wet. Sprout them in a cool (no higher than 15°C) and completely dark place.
If the temperature is too high or exposed to light, the heads of cabbage will begin to taste bitter, and if watered inaccurately they can rot.
You can harvest as soon as the heads of cabbage break through the soil layer, that is, 2-3 weeks after planting.
Cucumbers, melon, peppers
Real extreme sports enthusiasts can try growing larger plants at home, such as cucumbers, tomatoes and even potatoes.
Evgeny Zhgulev, Greenpeace volunteer, web developer. Has been gardening for 20 years
Where to get seeds
Choose seeds that are suitable for home cultivation. For example, I took the seeds of “Kuzya the Brownie” cucumbers to grow on the windowsill. There are similar varieties for other crops. You can bypass the stage with seeds and immediately buy seedlings in hypermarkets or from familiar gardeners.
How to plant
As a substrate, standard soil from the store or garden soil with the addition of baking powder (vermiculite or perlite) is suitable. For each crop, you can vary the composition depending on recommendations from the network (you can compare advice from several resources and select the most common ones).
The pot must be deep enough for the full development of the root system, otherwise the plant will not be sufficiently nourished during the fruiting period. In addition, good drainage is necessary. Some crops like cucumbers require a structure to support or shape the stem. I use four corner sticks and guide the stem in a spiral around them. Thus, the stem develops over a long period of time and does not rest against the ceiling. The structure can be attached either to the container with the substrate itself, or the stem can be tied to a support from above, but then moving the pot will be more difficult.
Cucumbers in Zhenya's apartment. Photo © Evgeny Zhgulev
It is useful if there is a rotating platform under the pot. Then the plant will be easy to turn, this is especially important with spinning stems.
Six months ago, I built a vermicomposter and stocked it with gold digger worms. In winter, they produced vermicompost, which I then used as a substrate for planting a homemade cucumber variety, Domovenok Kuzya.
Worms live in the roots of cucumbers.
Moreover, I decided to combine a composter and a container with a substrate for the plant. Worms do not touch healthy plant roots, so they coexist perfectly. The cucumber produces a harvest, and the worms loosen the soil and create humus, which, when watered, goes down to the roots.
How to care
Determine the location where the plant will grow best depending on the direction the windows face. During the growing season (development of the main part of the plant: stems, leaves), the amount of light can be average. During fruiting, the plant needs maximum light all day. But the light does not have to be direct - you can use a diffuser in the form of a greenhouse film or analogues.
During the flowering and fruiting period, the plant can be fed with organic fertilizers. To avoid overdoing it, read the tips for each crop in more detail.
After what time can you eat?
Cucumbers “Kuzya Brownie”. Photo © Evgeny Zhgulev
After one and a half to two months in the summer, the first fruits ripen from the seeds. The best time for planting is from early May to June. Then the plant will have time to go through the vegetative stage and begin to bear fruit while there is still plenty of sunlight.
The best option is to plant two plants overlapping. For example, in mid-late April the first, and then a month and a half later the second. And then, by the end of the fruiting of the first, the second will begin to ripen.
Harvest fruits as soon as they are ripe. Although tomatoes, for example, are often picked unripe and left in the sun.
volunteers organic waste ecohabits
Chives on the window during the cold season
Varieties of chives for growing on the window : Bohemia, Velta, Honey plant, Moscow early ripening, Khibinsky, Chemal.
Chives, like regular onions, are incredibly easy to grow, especially if you have somewhere to get a piece of a developed bush. But onions will grow from seeds, although it will take more time.
Choose a deep and voluminous pot, fill it with light and loose soil, and sow chives seeds on the surface. Spray them with water, sprinkle with a centimeter layer of substrate and spray generously again. Cover the pot with film, ventilate every day, but remove it completely only after germination. Every two weeks, fertilize the chives with a complex mineral fertilizer for greens, and when the bushes develop, start cutting the crop. This is a perennial, fast-growing crop, so chives can grow on a window for quite a long time.
To keep the greens tender, remove flower buds in a timely manner.
When can you cut greens?
The ripening period of a given variety is usually indicated on the seed packaging. But these dates are approximate. Sometimes the plant does not have enough light and grows more slowly, and sometimes, when the growing conditions are so good, the greens can ripen a little faster. It's always better to go by what you see. It makes no sense to keep greens longer than the specified ripening period, as this risks switching to flowering. And then eating greens will no longer be tasty or healthy, because all his energy will be spent on the formation of inflorescences and future seeds. Parsley will become tough, and many salads will become completely bitter. So cut the greens while they are in the prime of youth and bring you their vitamins.
Well, the whole growing journey is behind us. All that remains is to wash it, put it beautifully on a plate and enjoy the taste. You see? When you grow something yourself, it somehow tastes better. Enjoy your meal! If anything, feel free to ask our online consultant about growing any crop. He will be happy to tell you how to do better. Wishing you great harvests, friends!
How to grow arugula on a windowsill
Arugula varieties for growing on the window : Koltivata, Solitaire, Poker, Rococo, Rocket, Euphoria.
The pleasant nutty taste of arugula adds to the popularity of this crop, and the ease and speed of cultivation makes it an indispensable inhabitant of your windowsill.
Take a pot 10-15 cm deep and large in size, fill it with light purchased soil or a mixture of sand, peat and garden soil (1:1:1). Moisten the soil mixture and scatter the seeds over its surface, then spray them again with a spray bottle and cover with a thin layer of soil. Place the box on a north-facing window sill, as arugula may “burn” in direct sunlight. Every 10 days, apply complex mineral fertilizer to the soil; for the first two weeks, do not water the seedlings, but spray them. You can cut arugula 4 weeks after sowing, but it is better to let it grow.
As you can see, organizing a vegetable garden on a windowsill in winter and growing fragrant fresh herbs in it is not at all difficult. The main thing is to choose the right crops and follow our instructions.
Preparing to grow greens at home
For a small home plantation, early determinate species should be selected, since they are less demanding on living conditions and have a short growing season. Regardless of the chosen crop, there are general rules for preparing for planting.
Watercress can be eaten 2 weeks after sowing
Selection of capacity
To grow greens on a windowsill, you need to create comfortable conditions for them. Beds for a home garden can be arranged in ordinary flower pots, plastic containers, wooden boxes and even in eggshells. The main thing is that there are holes at the bottom of the container through which excess water will drain onto the tray. Before planting, the pots should be disinfected with a 0.2% manganese solution.
Containers for greens must have drainage holes and a tray
The author of these lines grows greens in decorative clay vessels, which often have no holes. To avoid stagnation, I place expanded clay at the bottom of the container, and on top I pour a layer of earth mixed with hydrogel swollen in water in a ratio of 5:1. The gel acts as a kind of water reservoir. All excess moisture is absorbed into it and then absorbed by plants as needed.
A layer of expanded clay should be placed at the bottom of the pot, which will help avoid stagnation of water in the soil.
In an apartment in a small area, it is advisable to use a multi-level arrangement of pots. In the window opening, you can attach several shelves at a distance of 50 cm from each other to provide the plants with the necessary amount of light. You can also place the pots on racks or hang them above regular planter boxes.
By multi-level arrangement of containers with herbs, space is saved
Soil for greenery
For the full growth and development of home greens, a nutrient medium is required. The substrate must be light, water- and breathable. The soil mixture can be prepared from turf soil, peat, sand, coconut fiber and perlite in a ratio of 3:2:2:2:1 or from equal parts of soil, humus and sand. To deoxidize the soil, it is necessary to add ash (200 g/5 l). The prepared soil should be disinfected with a solution of Maxim (2 ml/1 l), Fitosporin (6 drops/5 l) to destroy pathogens of fungal diseases.
The soil for greenery should be loose and fertile
If the necessary ingredients are not available, the substrate can be purchased at garden pavilions. Suitable soil mixture for seedlings or universal use. It is filled with all the necessary components and does not require pre-sowing treatment.
Video: a landless way to grow herbs
Preparation of planting material
Depending on the crop, different growing methods are used:
- sowing seeds;
- forcing from roots or bulbs;
- cuttings
Parsley is a traditional herb
Parsley is perhaps the most popular in our area due to its spicy aroma and ease of growing. A little greenery in a soup or salad, and we get a completely different flavor.
Why is it good to grow parsley on a windowsill:
- Parsley contains essential amino acids. This means that such amino acids only come from food. It is rich in vitamin C and beta-carotene, as well as large amounts of iron and potassium, fluoride, phosphorus and calcium. To improve immunity, hemoglobin levels, bone and teeth health and overall physical health, parsley is simply irreplaceable.
- Few people know that parsley helps whiten tooth enamel.
- Unlike salads, which fade over time, parsley pleases us for a long period, up to a year. The main thing is not to cut it before it ripens, then it will constantly replenish the greens on your table.
It is known that parsley seeds contain many essential oils, which protect them from diseases, but also make germination difficult. Put them in a bag (several layers of gauze or nylon) and place them in a container with warm water. Every 5-6 hours the water needs to be changed, removing the bag at the same time so that the seeds can “breathe”.
After several changes of water, the seeds are ready for planting. Parsley seeds do not germinate as quickly as lettuce, you need to wait. Otherwise, parsley is undemanding, but try to provide it with a well-lit place. Cut it off no earlier than it reaches 10–12 cm.