Planting potatoes in holes has always been considered the most acceptable and traditional method for many farmers. Recently, another method has become widespread - planting potatoes in ridges . There are many reasons for this. A more detailed examination of the process allows us to understand all its advantages, which ensured its widespread use and popularity. The video of planting potatoes in ridges at the end of the article demonstrates the process in detail.
This method has many advantages. Potatoes can be planted using this method much earlier, since there is no need to wait for the soil to completely warm up. The reason for this is to use only the top layer, which has time to warm up sufficiently. The ridges warm up very well under the sun, this guarantees a rich harvest.
The essence of the method
If you need to plant tubers in small beds, many gardeners use the “shovel” planting method. This means that when planting potatoes in open ground, they are planted almost to the depth of a spade bayonet.
This planting method is often used on light and loose soils, where groundwater lies quite deep. After planting potatoes in this way, many gardeners create small earthen mounds around the stems of the plant, because the bulk of the productive stems are located deep in the ground, and there is no need to rake a lot of earth onto the plant.
Mulching potatoes - my experience
So, when the mustard flowered, I mowed it. By this time, the potatoes had already been weeded and hilled once. I decided to lay the cut mustard as mulch on the rows of potatoes.
I read many reviews from gardeners that mulch retains moisture and prevents the soil from heating up from the sun - in general, it is beneficial.
Without any thoughts about the potato experiment, I covered with mustard mulch exactly those rows of potatoes that were planted in the holes. It was purely an accident that I covered the potatoes planted in the holes with mulch. It’s just that these rows of potatoes were closer to the mustard crops. It turns out that it is quite difficult to carry cut mustard and place it around potato bushes. There was not enough cut mustard for all the potatoes.
I only spoiled the potatoes with this mustard. No, the dried mulch actually held moisture well. That's a plus.
But in recent years, a sea of snails has multiplied in our country. This didn't happen before. So, by covering the soil around the potato bushes, I created excellent conditions for snails. During the day they hid from the sun in mowed dry mustard, and at night they crawled out to feast on potato leaves.
On the bushes covered with straw, all the leaves of the potatoes had small holes. I think it really hurt the potatoes. Not only was it planted in the holes and not the furrow, but the snails also gave it a good beating. And on potatoes without straw there were practically no snails.
And I experienced another inconvenience when digging up potatoes from under the mulch. But this is my personal opinion, my experience. The fact is that I laid the cut mustard stalks whole and did not chop them. When it came time to dig, the shovel had to cut these dry stems plus the heavy black soil. That is, this is additional effort. You can’t rake our land with your hands, choosing crops from holes, as shown in videos from other regions. Dried mustard grass stood on end after digging up potatoes. For some reason, after my garden was plowed in late autumn, these shreds of hay and straw almost all remained on top. Although I hoped that the plowed mulch would have time to partially rot in the ground, that is, it would provide additional nutrition for the next harvest. I'll see what happens to her by spring - maybe I'm worrying in vain...
Choosing a landing site
Before choosing this planting method, you need to make sure that the site is suitable for growing this vegetable crop:
- Character of the soil . Chernozem soils are excellent because they will supply the plant with all the nutrients it needs. In addition, such soils have good water and air permeability. Potatoes can also be planted on clay and sandy soils. To improve the quality of clay soil, it is worth supplementing it with sand or peat, but sandy soil can be improved with peat.
- Soil reaction . If a buttercup or plantain grows from weeds in a garden bed, then the soil is acidic, and if there is a birch or sow thistle, it is neutral. Acidic soil needs to be turned into neutral, and for this it is enough to add chalk, ash or lime at a ratio of 1-2 kg per 1 sq. m. m. plot.
- Previous cultures . Potatoes should be planted in an area where crops such as sunflowers, beets, corn, cucumbers or pumpkins previously grew. If potatoes were previously growing on the site, then they do not need to be planted in this place for another 4-5 years. If this rule is violated, the potatoes will be susceptible to disease and may also be affected by wireworms.
In general, the area should be small, since this planting method is classified as labor-intensive. It is desirable that it is well illuminated by sunlight and is accessible for watering. In addition, it is recommended to choose a place near which groundwater does not accumulate, and there are no other reasons for stagnation.
Planting potatoes in bags
This method of growing potatoes is loved by summer residents for its mobility: if necessary, bags of seedlings can simply be moved to a more suitable place. In addition, the method is very economical - it is possible to harvest almost twice as much harvest from a unit area.
The bags chosen are small, made of dense but breathable fabric (like those used for flour or sugar). They turn off the edges and fill them with fertile, slightly moistened soil with a layer of about 20 cm, then place several sprouted potatoes there and cover them with the same layer of soil. That's all! The bag is placed in a sunny place, preferably near a wall or fence, or slightly buried. In the future, you only need to water the plants as needed, and when they grow up, turn away the edges of the bag and add soil.
For bag growing to be successful, it is important to choose the right potato variety. Basically, early varieties with large tubers are used for this purpose.
Some gardeners modify the method - they select bags from dense polyethylene, fill them with soil to the top, and place the tubers in diamond-shaped slits on the sides of the bag.
Pros:
- tubers are not afraid of pests and late blight and do not rot;
- There is no need to hill up or weed the potatoes.
Minuses:
- a lot of humus (compost) is required;
- constant monitoring of soil moisture is required.
How to prepare the soil?
To plant potatoes, you first need to prepare the ground, which can be done in two ways. In any case, preparations begin in the fall, since the potatoes are planted in the spring.
Continuous application of fertilizer
Gardeners scatter manure, bird droppings or compost over the garden bed, and then dig up the soil and loosen it with a rake. It is recommended to remove any weed roots found in the area.
To prepare excellent fertilizer for potatoes, you can use this method:
- Remove all unnecessary mass from the garden in the form of various plant residues, weeds, roots and other plant components.
- Place all this in a compost heap or pit - a specially designated place where the collected compost will rot.
- Over time, it will become an excellent fertilizer.
There is another way to get organic fertilizer - to plant green manure crops on the plot in the fall, and in the spring, mow everything and manually bury it in the ground. Soon the crops will begin to rot, fertilizing the soil, so after 2 weeks you can plant the potatoes using a shovel.
If you are unable to prepare organic compost, you can use mineral fertilizers that are sold in stores.
Applying fertilizer in rows
If you need to dig up the soil and apply fertilizer at the same time, you can use this method:
- Just dig up the area with a bayonet shovel, removing all the weed roots so that they do not germinate further, otherwise in the summer you will need to spend a lot of time weeding.
- Apply fertilizer to the dug row, distributing everything evenly with a shovel so that there are no gaps.
- When digging the next row, cover the first one with soil so that the fertilizer remains in the bed, and not on the surface, and nourishes the potatoes during their growth and germination.
- In the spring, when digging the area, mix everything well again.
To ensure active growth of potatoes, you can use a mixture of fertilizers, for the preparation of which you mix 5 kg of manure and no more than 30 g of potassium phosphate.
How to care after planting
After planting, the area is systematically watered abundantly. Weeds are removed in a timely manner, and the soil is loosened in order to eliminate excess moisture and prevent rotting of the tubers. Weeds contribute to thickening of the soil, which causes various diseases.
Note! During periods of prolonged rains, it is better to avoid moistening the soil. As practice can show, waterlogging often causes tubers to rot.
Hilling and fertilizing are carried out every 4 weeks. With the onset of flowering, the bushes need more frequent application of fertilizers. Before you start applying the drug to the soil, you should water it abundantly, which will avoid burns to the root system by chemical agents.
Watering potatoes between rows
If you follow the recommendations of agronomists, growing vegetables will be quite simple.
Preparation of planting material
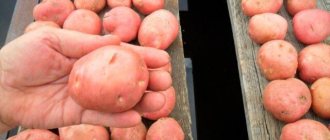
Potato yield depends entirely on which tubers are planted in the spring. So, you should purchase good varieties of plants, and then start processing the tubers, which is done in three stages:
- In autumn . Sort through the planting material, removing tubers that are small or damaged. Then pour the potatoes in one layer and keep them in the light for 2-3 weeks, but not in direct sunlight. Soon the tubers will turn green and be disease resistant. It must be remembered that planting one hundred square meters will require from 500 to 700 tubers.
- In the spring . 1 month before planting, inspect the tubers and remove those that show signs of rotting or disease. Move good potatoes to a cool, damp place where the sun's rays penetrate. If the room humidity is low, the tubers should be sprayed moderately with water. They can be kept outside if the air temperature is not lower than 10 degrees.
- Just before landing . Potatoes can be kept in a solution of potassium permanganate or boric acid for 20 minutes, which will make them more resistant to pests. To stimulate plant growth, tubers can be sprayed with biostimulants.
Popular methods of pre-sowing processing of potatoes can be found in the table:
| Processing method | Benefit | Features of the technology |
| Gibberellin or Heteroauxin | Increases yield by 65 kg per hundred square meters. | A few days before planting, spray the tubers with a solution of the drug in a ratio of 7 mg per 1 liter of water. |
| Ferric chloride | Protects the crop from scab, which reduces the marketability of potatoes and shortens their shelf life. | Spray the potatoes with a weak solution of ferric chloride 2-3 days before planting. |
| Succinic acid | Helps nutrients remain in root vegetables, which improves their biochemical composition and taste. | A few hours before planting, treat the tubers with a 1% solution of succinic acid. |
| Wood ash | Increases the level of starchiness and nourishes the plant. | Treat the tubers before planting by dusting them with ash at a ratio of 1 kg of ash per 50 kg of potatoes. |
| Microelements | Nourishes potatoes with useful elements. | A few hours before planting, sprinkle the tubers with a solution of macroelements containing boron, manganese, copper in a ratio of 0.5 tsp. half a bucket of water solution. |
Before planting, large tubers can be cut, but in any case they should have strong and not too long sprouts that will not break off during planting.
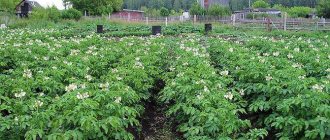
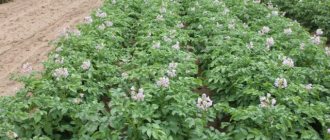
Forming the ridges correctly
To obtain a rich harvest of tubers, it is necessary to form a ridge of a certain shape. Its cross section should be an isosceles trapezoid with a height of 15-17 cm, bases of 75 cm at the bottom and 25 cm at the top.
This configuration is given either manually (with a hoe, hoe), or with special devices and mechanisms.
The use of technology somewhat changes the sequence of operations when planting tubers. When using a hiller, planting potatoes extends over 3 days.
- Before cutting the ridges, the garden bed is loosened and harrowed.
- The ridges are cut with row spacing of 70-80 cm and a height of 12-15 cm on light soils, 20 cm on clay soils.
- The ridges warm up for 2-3 days.
- The sprouted tubers are manually placed in the furrows.
- Cover the planted potatoes with soil and form ridges.
It is more convenient and faster to plant potatoes in ridges using a mini-tractor with a mounted potato planter. This is a universal unit that performs the following operations in 1 pass:
- cuts combs;
- lays the tubers;
- covers them with soil.
Some models also apply fertilizer at the same time. The height of the ridges is easily adjustable: just change the angle of attachment of the cutting discs.
Walk-behind tractors with replaceable attachments are used not only when planting potatoes, but also for cultivating row spacing: the cultivator does more than just loosen the soil - it is an effective replacement for weeding.
Time and methods of planting
As a rule, potatoes are planted in the ground in mid-April. Depending on whether it is early or late spring, planting time may shift to the beginning or end of the month. In this case, you need to be guided by the air temperature at night - it should be more than 10 degrees.
Potatoes can be planted in three ways:
- Square-nested . The bed is “divided” into squares, in the center of each of which a hole (nest) is made for a potato bush. The distance between the holes is from 50 to 70 cm.
- Chess . The holes are arranged like a honeycomb, that is, each next row must be started with a shift of half the distance between the bushes.
- Two-line (according to Mittlider) . Two rows (lines) are dug, and close to each other. Holes are made in each row at a distance of about 30 cm. Between every two lines you can create a gap of up to 1 m for passage. The holes of two joint rows must be placed in a checkerboard pattern, as in the previous diagram.
Square-nest method of planting potatoes
Chess method of planting potatoes
Two-line method of planting potatoes according to Mittlider
The bed should be located from south to north in order to achieve maximum illumination of the potatoes, because this way they will warm up and develop faster.
Regardless of the chosen scheme, potatoes should be planted under a shovel according to the following instructions:
- Drive pegs into the ground and stretch a rope or cord between them to dig even rows.
- It is advisable that at least two people do the planting: one should dig a hole, and the second should plant the potatoes. The optimal depth of the hole is 10-15 cm. Initially, you need to pour a handful of humus into it, and only then lay out the tuber with sprouts. Some gardeners resort to this trick - they throw in the seeds of bush beans along with the potatoes, since this can not only enrich the soil, but also increase the productivity of the plant. When working with potatoes, you need to be careful not to damage the sprouts.
- Use the earth dug for the holes of the next row to bury the holes of the previous one. If there is a third assistant, he can level the ground with a rake after planting, which will reduce moisture loss.
In general, it is worth maintaining at least 50 cm between rows, and from 20 to 30 cm between holes, in order to provide each plant with an optimal feeding area. Of course, the distance between rows and holes can be adjusted according to the potato variety and soil fertility.
If there are large tubers, deeper holes can be prepared for them, and the optimal distance between them is from 25 to 35 cm.
Cultural information
Potatoes begin to be prepared for planting in the first month of spring. They purchase new varieties in specialized stores or take tubers prepared last summer, with green on the skin. Planting material is removed from the basement a month in advance so that healthy light shoots form on it. All tubers are sorted out and only those that have no damage or foci of disease are left. Place 2-3 layers in boxes and leave in a bright and warm room. Already sprouted tubers are planted when the ground temperature rises to 7-8 °C and the air warms up to 14-15 °C. This way the crop in the garden develops faster.
Ridges for planting potatoes
For potatoes, choose an area where nightshades did not grow the previous year, but where carrots, beets, beans, peas or grains grew. Early potatoes are planted first, followed by mid-season and late varieties. Shoots must be protected from return frosts by hilling them as soon as the first shoots appear. Mandatory care - removing weeds, weeding, hilling, watering and protection from diseases and pests, guarantees a bountiful harvest at the end of the growing season. Depending on the variety, the tubers ripen in different periods - from 60 to 110 days.
Potato care
To reap a good harvest, you need to take proper care of the plant, from watering to fertilizing.
Watering
Water the plant during the growing season:
- When the first shoots appear. As a rule, this happens a week after planting. Before this, watering is not required, since the tubers have enough moisture contained in the soil.
- At the budding stage.
- After flowering.
Potatoes are watered quite rarely: once a week, and in dry times - 2 times. If sufficient rainfall occurs, watering can be canceled. It is completely interrupted 2 weeks before harvest.
Under no circumstances should the plant be allowed to overwater, as the soil should remain slightly moist and loose.
Loosening
10 days after planting the potatoes, the first loosening should be carried out, since it allows you to remove excess moisture and prevent rotting of the tubers. It is important to remove weeds along with their roots, as they thicken the soil, making it breathable and susceptible to infectious diseases. In addition, weeds prevent the full development of potatoes. Loosening should be done regularly.
Hilling
During the season, it is necessary to carry out 1-2 hillings, since this provides normal conditions for the formation of tubers - it helps to get rid of the earthen crust, saturates the soil with air, allowing the plant to “breathe”, and protects it from frost.
The first hilling is carried out after the potato tops have grown to a height of 10 cm, and the second - a week later, when the height of the tops is about 40 cm. For manual hilling, you need to use a hoe with a long handle, a hoe or a ripper. When hilling, you just need to lift the soil from the bottom up to the potato sprouts, gradually forming grooves.
Fertilizer
During the entire period of plant maturation, it is enough to apply 2 fertilizing according to the following scheme:
- For the first time - a month after planting.
- The second time, as soon as the potatoes bloom, the dose of fertilizer should be doubled.
Before applying fertilizer, you need to water the potatoes so that the root system is not burned by chemicals. Of course, it is worth using natural fertilizers, as they allow you to obtain environmentally friendly vegetable products. So, humus and wood ash are perfect for fertilizing. It must be remembered that an excessive amount of fertilizer can lead to excessive growth of the tops, which can damage the tubers.
To increase productivity, you can cover the row spaces in the garden bed with a layer of leaves or straw, since these wastes are not only excellent fertilizers, but also prevent moisture evaporation and weed germination.
Planting potatoes against a wall
In this case, do not prepare separate beds for potatoes in the middle of the garden, but pour a layer of compost directly against the southern wall of any building or fence on the site. Tubers are planted in compost according to the traditional pattern (about 30 cm from each other) and soil is periodically added as the shoots grow. As a result, a perfectly heated bed can reach a height of 80 cm, and the main concern for caring for the plants will be regular watering.
Pros:
- simplicity of organizing beds, due to the formation of additional shoots and stolons, the potato yield increases significantly.
Minuses:
- sloppiness in the appearance of the plantings.
Pros and cons of the method
Each method of planting potatoes has its own strengths and weaknesses, which are worth paying special attention to.
Pros:
- planting potatoes under a shovel allows you to get a good harvest with minimal resources;
- Potatoes grown using this method have high commercial quality;
- The harvested crop can be stored for 8 months.
Minuses:
- involves large amounts of energy because it is a labor-intensive method;
- It is difficult to provide potatoes with the right amount of nutrients, light, moisture and air.
Site selection and soil treatment
All potato varieties cultivated in Russia require a properly selected growing area to obtain a good harvest. It is this parameter that largely determines the size of the harvest (seed and regular), as well as its quality.
Potato cultivation takes place in an area that is well protected from northern winds. The protection should be a slope on the southwest, south and southeast sides. Sandy loam or sandy soils are best. The soil should be light and dark in color. In this case, the thermal conditions improve. In addition, the area should be well lit throughout the day.
Growing potatoes always begins with preparing the soil. Tillage begins in April (in the second half) and early May. This will make it possible to land early. All potato varieties require the creation of a loose, thick and moist layer of soil. This is the most important condition for growing, especially seed potatoes.
The area for potatoes must be dug up twice. In the fall, digging is carried out using a spade, after which fertilizer is applied. This allows you to minimize the risk of disease. To do this, it is also necessary to remove all plant debris from the site. If potatoes are grown in this area for the second year, then autumn digging is not carried out, but the area is simply cleared of plant residues.
In the spring, digging is done to accumulate moisture in it. For this purpose, the soil is slightly loosened with a rake. For light soils, digging to a depth of 14 cm is permissible, for heavy and medium soils - up to 20 cm. In the presence of heavy soils, the application of organic fertilizers is necessary. At this point, site preparation is considered complete.
Video: planting potatoes under a shovel
In the following video, the gardener will show how he plants potatoes in his garden bed:
Planting potatoes under a shovel is a method proven by many gardeners, which helps to get a good harvest if you follow all the above recommendations. At the same time, it is important to water the plant in a timely manner, weed away weeds and hill up. To increase potato yields, it is worth remembering about fertilizers.
0
0
Copy link
Planting potatoes in containers
This method of planting potatoes involves the preliminary arrangement of stationary container beds from scrap materials (slate, boards, bricks, timber, etc.). They are usually made about a meter wide and at least 30 cm high, and are also oriented from north to south.
The containers are filled with organic matter (plant residues at the very bottom, then a layer of compost, and soil on top) and potato tubers are planted in a checkerboard pattern. Two rows of plants fit in a 1 m wide bed; as a result, they all equally receive light, water and nutrients without competing for them, and develop well.
After harvesting, the bed can be planted with green manure and used again next year by adding filler.
Pros:
- neatness of container beds, the possibility of their use for several years;
- increased potato yield (2-3 times);
- no stagnation of water;
- no need for hilling.
Minuses:
- a lot of labor costs for the construction of container beds.
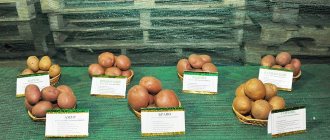
Preparing tubers for planting
The most crucial moment in growing potatoes (especially seed potatoes) is preparing the tubers. The quality and abundance of the harvest directly depends on this.
Preparing tubers requires sorting out the planting material. Here, defective tubers affected by diseases, with a dry or wet putrefactive structure should be selected. Also, small and unsightly tubers, as well as those that are too large, are not used for planting. It is these tubers that produce low-quality and low yields. Planting material must be carefully selected, leaving only beautiful, healthy and medium-sized tubers, which, with proper care, will allow you to obtain a high-quality and abundant harvest.