Turnip is one of the oldest cultivated plants of the cruciferous family. For those who are hearing about this “miracle vegetable” for the first time, we invite you to get to know it better and understand in detail how and when to plant turnips in 2022.
You can plant turnip seeds in open ground in spring, summer and autumn in almost all regions of Russia
Over the centuries-old history of cultivation, turnips have become a symbol of Russian cuisine, as they have always been among the staple foods. With the beginning of the “potato” era, this tasty and healthy vegetable was relegated to the background. Modern domestic gardeners rarely cultivate it in their garden beds, which is probably why many have not even seen or tried the “native” root crops. But in vain! Their juicy tops and sweetish pulp contain many useful substances, the harvest can be stored fresh all winter, and growing a “big, big” turnip, as in the famous fairy tale, is not at all difficult, in other words, “easier than a steamed turnip”!
Traditionally, table turnips are planted in the spring, in order to begin using young, juicy root crops for food by mid-summer, and in the summer, in June–July, to obtain an autumn harvest intended for all methods of processing and long-term (winter) storage. Experienced gardeners also practice winter sowing in mid-October - early November, which ensures rapid and friendly emergence of seedlings in early spring.
To obtain tasty, nutritious greens, “leafy” varieties of the crop are grown
The optimal planting time depends on the varietal characteristics of the plants and the climate of a particular region; you need to focus on the degree of soil heating, air temperature and weather forecast for the near future. If you wish, you can pay attention to the recommendations of the “lunar” sowing calendars in order to choose the most favorable days.
Sowing time
Turnips can be sown in the ground three times a year. The timing of sowing depends on specific climatic conditions and the purposes of growing the crop. Here are possible sowing options:
- In the spring . If you plan to grow turnips for food, it is best to sow the seeds between April 25 and May 10. The main thing is that the snow melts and the ground warms up a little. Young sprouts are not afraid of slight frosts, so you can harvest juicy root vegetables in the summer. The advantage of sowing seeds in the spring is that the plant can be protected from the main enemy of turnips - the cruciferous flea beetle. It appears already when the sprouts are gaining strength and are favored by the pest, which is unable to harm the mature plant. The flea disappears in the summer, and the gardener can harvest the crop without hindrance.
- In summer . If you plan to grow turnips not only for food, but also for winter storage, you can start sowing seeds from late June to mid-July. Turnips love temperatures within +12…20ºC, so they bear fruit well in moderately warm summers. If the weather conditions are favorable, seedlings will appear already on the 3-4th day of sowing the seeds.
- Before winter . Turnip is a cold-resistant crop - it can germinate at temperatures of +2...5ºC, withstanding short periods of frost. In this regard, to obtain an early harvest (2-3 weeks earlier than usual), you can resort to winter sowing, immersing the seeds in the ground in the fall - in October or early November (in warm weather). Turnip seeds endure the winter under a blanket of snow, undergo natural stratification in the soil and germinate in early spring.
Growing conditions
Like most root vegetables, turnips are cold-resistant. It produces excellent harvests in any region of Russia, including the north. Its seeds begin to germinate already at 2–3°, and for normal development it needs 15–18°. Seedlings can withstand frosts down to -1–2°, and adult plants - up to -4–8°.
However, a long-term decrease in temperature to 10° leads to the fact that turnips bloom in the first year and do not produce root crops. For this reason, in a cold summer, up to a third of the plants can go into arrows, and if sowed too early - almost 100%.
Turnips love light, loose soil, preferably loam or sandy loam. Optimal acidity is neutral, but a slightly elevated pH of 5.5–6 is also acceptable. The best predecessors for turnips are tomatoes, cucumbers, legumes and onions, but they cannot be planted after representatives of the cruciferous family.
A rich turnip harvest can only be obtained on well-moistened soil. If plants lack moisture, the roots will be underdeveloped, fibrous and bitter.
However, waterlogging is also harmful - in such conditions, turnips grow loose and watery. It cannot be grown in places where melt or rain water stagnates.
Turnip is a light-loving plant, so it needs to be grown in well-lit places.
Site selection and preparation
Turnips can be successfully grown in a plot, when choosing which you should take into account the following parameters:
- Illumination . Young plants respond well to mild weather, sunlight and a minimum of shading, so for turnips you should choose well-lit and warm places, reliably protected from winds and drafts. They can be located on flat or slightly lower areas so that the soil maintains an acceptable level of moisture for this moisture-loving crop.
- The soil . Juicy and large root crops can be grown on even, light soils. Turnips respond best to peat bogs, loams and sandy loam soils, but grow poorly in clay areas. The soil reaction must be low or neutral, otherwise the grown root crops will not be stored well. If necessary, soil acidity can be reduced by liming.
- Predecessors . Like all plants of the Cruciferous family, turnips do not grow well in areas where their relatives previously grew (they have common diseases and pests). These include:
- watercress;
- horseradish;
- any types of cabbage;
- radish;
- radish;
- mustard;
- swede.
daikon;
As for the best predecessors, these are:
- legumes;
- cucumbers;
- tomatoes;
- carrot;
- potato;
- pumpkin;
- zucchini;
- onion;
- strawberries
Turnips can be sown as a repeat crop in beds where early ripening vegetables were previously cultivated.
The area that meets all the requirements must be properly processed. Regardless of the sowing period, this should be done in the fall, adhering to the following order:
- Dig the soil deeply, adding two types of fertilizers:
- organic - 2-3 kg of organic matter (humus or compost, but not fresh manure) per 1 sq. m;
- mineral - 15-20 g of urea, 30-40 g of superphosphate and 15-20 g of potassium chloride per 1 sq. m.
- To alkalize during deep digging, add wood ash to the soil at the rate of 100-150 g per 1 square meter. m. Thanks to this, the earth will become looser. Some gardeners burn a fire in the area to fertilize the soil with wood ash, and then scatter the charred remains of the tree over it and dig up the soil. To neutralize the acidity of the soil, you can also use eggshells. It will need to be dried and crushed using a blender. The resulting powder should be sprinkled on the ground before digging at the rate of 40 shells per 1 square meter. m.
- Level the area with a rake and compact it.
Nitrogen fertilizers cannot be applied at the above rates, since their excess will provoke excessive growth of tops to the detriment of root crops, due to which they will deteriorate their taste and may acquire voids.
Variety selection
Turnip varieties are divided into early and late.
Early
The fruits have thin skin and are not suitable for winter storage.
These include:
- Geisha (resembling daikon in taste and shape);
- Golden Ball (the fruit has a sweetish juicy taste and has high yield);
- Purple turnip (raspberry-pink, with a white tip, weighing 100-150 grams) and others.
These varieties produce a harvest in a record 40-45 days and have high taste.
Late
Varieties such as:
- Comet (weighing 90-120 grams, well tolerated storage conditions in the cellar);
- Luna (round, yellow and incredibly juicy fruit);
- Petrovskaya turnip, the most common in Russia, due to its high germination rate and unpretentiousness.
These varieties ripen and are ready for harvest in 60-80 days, are cold-resistant and easily survive the winter period.
How to obtain and process seeds?
Turnips are vegetables with a two-year growing season. In the first year after sowing or planting seedlings, fruits with rosettes of leaf plates are formed on the site, and in the second year, the planted root crops produce arrows with flowers. Viable and germinating seeds ripen on them. If the variety is not a hybrid, they can be sown next season.
To get turnip seeds, it is better to take fruits grown for winter storage. These may be representatives of such varieties as:
- Gribovskaya;
- Petrovskaya-1;
- Orbit;
- Purple;
- Burnt sugar, etc.
Obtaining seeds from them occurs as follows:
- From root crops, select specimens with good varietal characteristics.
- Place the planting material in storage and dig it in the sand.
- In the fall, dig up the bed and add humus to place the queen cells on fertile soil.
- In the spring, dig up the area again and level it. Plant the queen cells in rows at a distance of 30-40 cm. In this case, the root crops do not need to be deepened, but rather pressed tightly with soil.
- Tie the peduncle to a vertical support.
- When the pod turns light yellow, start collecting the seeds. If you delay this procedure, they may scatter on the ground, suffering mechanical damage.
- Peel the seed material and dry it.
Collected or purchased seeds must be subjected to proper pre-sowing treatment, otherwise active seedlings will not be obtained. First of all, they should be immersed in a 5% solution of table salt (5 g per 100 ml of water at room temperature) and stirred to remove air from their surface. Those specimens that float must be removed, as they are hollow, damaged or deformed and will not produce strong shoots.
Specimens that have settled at the bottom must be disinfected, since 80% of turnip diseases are transmitted through seeds. This can be done in the following ways:
- Warming up . Throw the seeds into a fabric bag and place them in a thermos with hot (+40...+50°C) water for 5 minutes. Next, immediately cool them in cold water, immersing them in it for 2-3 minutes.
- Soaking . Treat the seeds in a 2% solution of potassium permanganate, for the preparation of which 2 g of powder is dissolved in 100 ml of water at room temperature. Soaking time – 20 minutes. After disinfection, rinse the seeds and soak them for swelling for several days in water, which needs to be changed twice a day.
For better germination, seeds should be soaked for a day in a biostimulator (Epin-extra, Zircon, Ecogel).
After calibration and disinfection, the seed needs to be slightly dried, mixed with sand and sown in the ground.
Description and main characteristics of the plant
Turnip is a herbaceous plant of the cruciferous family, genus cabbage. Western Asia is considered the homeland of this vegetable. It was there that turnips began to be grown about four thousand years ago and from there this plant spread throughout the world.
Turnip is a root crop, as its spherical white or yellow root is used for food. In the first year, the plant produces an edible root and a rosette of dissected, hard leaves. The arrow with seeds appears only in the second year of cultivation, so turnip is considered a biennial plant.
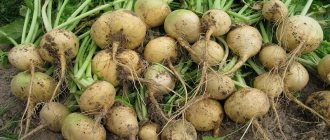
The weight of a ripe turnip, depending on the variety, can reach 500 g or more
Sowing seeds in open ground
If turnips are cultivated without seedlings, sowing seeds in open ground is carried out according to the following instructions:
- Loosen the soil and immediately roll it down a little.
- Prepare small furrows 1.5-2 cm deep in the garden bed. The distance between them is 10 cm, and the row spacing is 20-35 cm.
- Sow seeds at the rate of 0.2-0.3 g of quality seeds per 1 square meter. m or 2 pieces per 1 cm. If the seed is too small, it is advisable to sow it with ballast, having previously mixed it with sand. This is a painstaking procedure, but the planting will not be too thick, so when caring for the crop you will not need to thin out the bushes several times, which can damage the roots.
- Cover the crops with sand, and then with compost, humus, coconut substrate or loose soil. At the end, all that remains is to water the area with water or a solution of the EM preparation and cover it with non-woven material for faster germination.
The covering material can be removed after 2 days, and a day after that the first shoots will hatch.
If seeds are sowed before winter, then it is worth considering the following differences from spring and summer sowing:
- seeds can be planted to a depth of 3-4 cm;
- It is better to sprinkle them not with frozen and petrified earth, but with pre-prepared peat or sand;
- It is worth placing stakes along the edges of the bed so that in the spring you can quickly find a place to sow turnips.
When snow falls, it must be thrown onto the garden bed. Repeat this procedure 2-3 times a season.
Seedling cultivation method
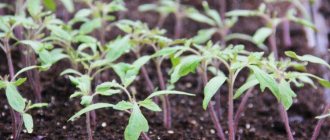
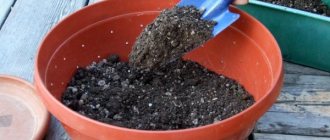
Seeds treated in the manner described above should be sown in wooden boxes or separate cups filled with substrate approximately 30-40 days before planting the seedlings in a permanent place. Another option for sowing is in peat tablets, pre-wetted so that the soil in them has time to swell. It is enough to place 2 seeds in each tablet.
It is better to grow seedlings in separate containers, as they do not tolerate picking well. Peat tablets are considered the best option - they can be planted in the ground along with seedlings without destroying the earthen ball and without injuring the delicate root system of the plant.
Regardless of the container in which the sowing was carried out, the seedlings need to be properly cared for, which consists of carrying out the following agrotechnical measures:
- Organization of an optimal microclimate . After sowing, cover the containers with film and place them on a south-facing windowsill so that they are well illuminated by sunlight. When the sprouts hatch, the film must be removed. The optimal air temperature for their active growth and development is in the range of +6…+12°C. Similar conditions can be arranged on a balcony or terrace, but the rays should not be allowed to directly hit the delicate shoots of the plant.
- Thinning . When the cotyledons of the seedlings open, thin out the seedlings - select the most developed sprouts, and carefully cut off the rest using sharp scissors at the very base (at ground level).
- Watering and loosening . Moisten the soil as necessary, avoiding drying out or waterlogging. Wet soil must be carefully loosened to provide the cuttings with the required amount of oxygen.
- Feeding . On the 4-5th day of opening the cotyledons, feed the seedlings with nitrophoska (1 tbsp per bucket of water). The solution consumption is 10-15 ml for each seedling.
- Hardening . Approximately 2 weeks before planting the seedlings in a permanent place, begin hardening procedures. At first, the containers with seedlings can be taken outside or onto an open balcony for an hour, but every day the duration of hardening must be increased so that by the 15th day the seedlings spend the whole day in the open air.
In mid-May, strong seedlings with 2-3 true leaves can be planted in a prepared place. The optimal distance between plants is 25-35 cm. After replanting, the soil around them should be carefully compacted and watered abundantly.
Planting care
In order to collect juicy and large root crops from the garden, you need to properly care for the plant - from watering to protection from all kinds of adversity.
Watering
Turnips love moisture, and if it is lacking, the roots acquire a bitter taste, become too compacted or crack, losing their marketable qualities. To prevent such consequences, you need to organize a competent watering regime in compliance with the following rules:
- prevent the soil from drying out by watering the plants 1-2 times a week at the rate of 5-5-6 liters of water per 1 square meter. m;
- during the period of emergence, in the phase of formation of true leaves and at the stage of maximum growth of root crops, provide the plants with the most abundant watering, increasing water consumption to 8-10 liters per 1 sq. m. m;
- moisten the soil in the morning or evening, watering young shoots from a watering can with a fine sieve to uniformly irrigate the entire area, and taller bushes from a hose with a regular diffuser;
- water the bushes only with warm water left in the sun;
- reduce watering to a minimum after the root crops gain the mass characteristic of a particular variety, otherwise they will crack (as a rule, this period occurs a week before harvesting the turnips).
Loosening, weeding and mulching
The plant is sensitive to a lack of oxygen, so the bed must be regularly loosened in moist soil. Before doing this, you need to evenly scatter wood ash over it in a layer of 0.5 cm to repel cruciferous flea beetles. Instead of ash, you can use ground pepper, mustard powder or tobacco dust.
Along with loosening, the area should be cleared of weeds, and then mulched with straw or hay. Thanks to the layer of mulch, the evaporation of moisture from the soil will slow down, which will relieve the gardener from the need to frequently loosen the area and remove the soil crust.
Thinning
If sprouting occurs too frequently, you should not delay this procedure, otherwise the root crops will not be able to gain the required mass and will turn out too small. Here is the optimal thinning scheme:
- At the stage of appearance of 2-3 true leaves . Leave at least 4-5 cm between the bushes, removing weak and diseased specimens.
- 2 weeks after the first thinning . Expand the distance between plants to 10-15 cm.
Top dressing
If the soil is well fertilized in the fall or spring, the crop does not need to be fed. However, in case of poor soil, it is still worth carrying out 1-2 fertilizing per season, adhering to the following sequence:
- A month after germination . For fertilizing, use complex mineral fertilizers. Among them, nitroammophoska is effective (dilute in the amount of a matchbox in a bucket of water, and treat 1 sq. m of bed with the resulting solution). It can be replaced with superphosphate, potassium chloride or potassium magnesium.
- Around midsummer . During this period, turnips respond best to potash fertilizers. If the root crops develop well, it is enough to sprinkle 250-300 g of wood ash (contains up to 5% potassium) on each square meter of land. If root crops are lagging behind in development, it is better to water the bed with a solution of potassium sulfate (10 g per bucket of water to treat 1 sq. m).
Experienced gardeners use organic matter to feed turnips - at the stage of formation of the first true leaves, they water with herbal fertilizer.
Protection from diseases and pests
Turnips can be affected by diseases that pose a danger to plants of the Cruciferous family. She is more susceptible to the following pathologies:
- Fomoza . The fungus infects the leaves, which first become covered with dark spots and then with “fluff.” With such signs, the tops should be sprayed with Bordeaux mixture.
- Kiel . Attacks the root system of the plant. Growths appear on the petioles and roots, which provoke the gradual withering of the plant. In the fight against clubroot, the garden bed should be watered with an infusion of horseradish leaves or roots (infuse the crushed raw materials in water for 4 hours).
If signs of damage appear too strongly, diseased plants should be removed from the garden bed and burned, and the remaining plants should be treated with fungicides (Topsin-M, Fundazol).
As for pests, the following can pose a danger to turnips:
- Flea beetles (cruciferous, earthen) . They destroy young shoots and can deprive the gardener of his harvest. To prevent their attacks, you can water the beds with a solution of Malathion (60 g per 10 liters of water) or sprinkle with a mixture of equal amounts of ash and tobacco dust. Another option is to spray the entrances with vinegar water (1 tbsp 70% vinegar per 10 liters of water).
- Cabbage _ Caterpillars pose a danger to turnips. To get rid of them, the seedlings need to be watered with water and vinegar (3 tablespoons per 10 liters of water).
- Cruciferous bug . It attacks the leaves, sucking the vital juices out of them. In the fight against bedbugs, the bed should be sprayed with a decoction of yarrow (pour 80 g of dried flowers into 10 liters of water, boil and strain, add 40 g of soap shavings).
- Cabbage moth . The plant can be affected by caterpillars that eat the leaves. To scare them away, turnips need to be pollinated with tobacco dust.
If insect pests have already attacked the plant, it is better to use chemicals against them, following the instructions on the package. The following products show good results:
- Malathion;
- Trichlorometaphos-3;
- Iskra-M;
- Rovikurt;
- Bankol;
- Fury.
In the early stages of infection, it is better to use biological preparations that can be used to treat plants even 5 days before harvesting root crops. Among them, the effective ones are:
- Entobacterin;
- Bicol;
- Aktofit;
- Nemabact.
Disease and pest control
All cruciferous crops have quite a lot of pests - cabbage flies, flea beetles, bugs, aphids, etc.
Cruciferous flea beetle
Turnips are also susceptible to fungal diseases - mucous and vascular bacteriosis, blackleg.
In order to protect your future harvest from diseases and pests, you need
- Maintain crop rotation.
- Pre-sowing seed treatment is mandatory.
- Thinning of seedlings
- Weed removal
- Destruction of turnip residues after harvesting.
Consequences of the cruciferous flea pest
A decoction of potato tops is used to control pests.
The tops are boiled for 30 minutes, filtered, diluted with water 1/3. Before processing, dissolve 40 grams of grated soap. Spray the seedlings using a sprayer.
How to grow black radish
Why don't turnips grow?
Fewer and fewer gardeners are growing turnips, noting that they grow poorly or do not bear fruit at all. There are two common reasons or mistakes in cultivating this crop that can deprive a gardener of a harvest. Let's consider them separately.
Unsuitable soil
Turnips are unable to grow on peat or soddy-podzolic soils, as they immediately become infected with clubroot. Even if the disease occurs after the root crops are formed, their taste immediately deteriorates - it becomes woody and tasteless.
Before you can grow tasty and beautiful root crops in such conditions, you will need to significantly cultivate the land. To make it fertile and neutral, you will need to add up to 1/2 a bucket of wood ash for each square meter of bed.
Cruciferous flea beetle
Whole colonies of pests attack young turnip seedlings, so one day a bed of crops can be found completely empty. To avoid such consequences, you can use three methods:
- Sow seeds as early as possible in spring. The fact is that the period of flea beetle activity occurs in late spring, and if you sow turnip seeds at this time, the sprouts that appear in a few days will certainly become victims of this pest. More strengthened plants of early sowing are better able to withstand flea beetle attacks.
- Sprinkle ash, tobacco or just road dust directly over the seedlings. The difficulty is that these procedures need to be carried out every day, so it is troublesome and not the most effective action.
- Cover turnips after sowing with covering material, which can be removed when weeding and thinning the plants. It is best to carry out this work during the day, when the fleas are resting.
In order for turnips to actively grow and bear fruit, it is enough to grow them on fertile neutral soil, use a large amount of ash and protect the planting from the cruciferous flea beetle with covering material.
Soil for planting turnips
For planting turnips in the spring, the site is prepared in the fall. Turnips grow well in neutral, light clay soils. Acidic soil is limed. For turnips, good predecessors are: beans, tomatoes, cucumbers, potatoes. A bad predecessor includes any type of cabbage, radish and radish. Since these plants have common pests and diseases.
The place for growing root crops is dug up. Apply organic fertilizers. Humus, compost. Under no circumstances should fresh manure be introduced. They contribute 2 - 3 kilograms per square meter.
Harvest and storage
Root vegetables must be collected on time, otherwise they will become coarse, deteriorate their taste and will not be suitable for long-term storage. The following rules will help you avoid miscalculating cleaning time:
- during the summer, turnips with a diameter of 7-10 cm are considered most suitable for harvesting, but earlier harvesting is possible when the turnip reaches a diameter of 4-5 cm;
- For winter storage, root vegetables should be collected at the end of September - beginning of October, that is, before frost arrives (low temperatures will make the fruits soft and tasteless).
You need to harvest on a sunny day without rain or frost, following these instructions:
- Pull root vegetables out of the soil without much effort, just with your hands. If any difficulties arise, you can slightly dig them up without damaging the skin, as this will provoke rotting processes and negatively affect their further storage.
- Carefully cut off the tops from the collected root crops, leaving only petioles 3-4 cm long. Woody roots must also be removed, otherwise they may absorb some of the useful elements.
- Using a dry cloth, clean the root crops from the soil and dry them for 5-7 days in an open place, sprinkled with hay or straw to a depth of 12-15 cm.
Dried root vegetables without signs of any damage can be used fresh for preparing vegetable salads, warm dishes and cough juice. Otherwise, they should be sent for storage in a dry and dark room, where the temperature is kept within +2...4°C or slightly lower. In this regard, the best option is a cellar or basement.
Turnips are perfectly stored in cardboard or wooden boxes, the bottom of which is sprinkled with dry sand or peat chips. In this case, the root vegetables must be laid out in such a way that they do not come into strong contact with each other. The layers between them can also be sprinkled with sand. In this form they can be stored without spoiling for several months.
If there are only a few turnips, you can wrap them in plastic or cling film and then store them in the refrigerator or on the balcony. In this form, root vegetables can last up to a month.
Turnips can be stored in the room for no more than 2-3 weeks. Over time, the pulp of root vegetables will become more bitter, which will be a sign of spoilage.
Video: how to grow turnips?
Turnip is an undeservedly forgotten root crop, says an experienced gardener, who will talk about the benefits of the crop and how to grow it for autumn-winter consumption:
With tall, heavily leafy stems above the ground and thick, fleshy roots, turnips can be easily grown in the garden through seedlings or direct sowing of seeds in the ground. The culture is unpretentious, so it is enough to carry out sowing work at the right time, and then organize basic care for the plant.
1
0
Copy link
Hello, dear readers!
We chose which varieties of turnips we would plant. We decided on which part of our garden it would be more comfortable for it to grow and learned about the best time to plant turnips.
Now it’s time for our Russian fairy-tale beauty to take her place in the garden.
Planting, growing and caring for turnips is not a difficult task.
A gardener needs to know only a few agrotechnical tricks.
Turnip is an unpretentious vegetable. Even if she did not find a separate corner in the garden, she can be planted with some green crop (dill, lettuce).
