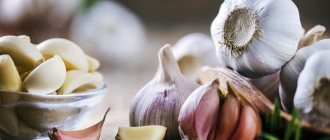
Garlic is an early vegetable crop that can be planted both in autumn and spring. Autumn plantings are called winter crops; they produce a large harvest of bulbs with large teeth. Spring plantings are called spring plantings, and their harvest is bulbs with smaller cloves.
Depending on what kind of garlic needs to be grown, different planting times and different plant varieties are used. What is different about planting winter garlic in spring? And how to get a full harvest from spring plantings?
Is it possible to plant garlic in the spring if you didn’t plant it in the fall?
Gardeners can answer this question like this: “When you were born, that’s when you came in handy.” Who was born? If it is spring garlic, then, according to all the rules of agricultural technology, it is planted in the ground in the spring; winter - this means it should get into the ground in the fall approximately 40 days before the onset of stable frosts. That is, our doubts concern only winter garlic that was not planted in beds in the fall.
Numerous spring experiences of planting winter garlic show that this “not a vegetable - not a cereal, but a flower, because it grows as a bulb”, planted outside the time period provided for by the technology for growing winter garlic, still produces a harvest. That is, answering the question about whether it is possible to plant garlic in the spring if you did not plant it in the fall, it is permissible to give an affirmative answer.
The benefits and harms of garlic
What is the difference between spring sowing and winter sowing?
The main advantage of planting garlic in the spring is that the planting material will be of higher quality. Cloves that have defects or diseases simply will not last until spring planting. This means that the future harvest will be healthier. In addition, there is no risk that winter plantings will die from autumn frosts.
The disadvantages of planting in the spring include:
- plants less resistant to spring colds and frosts;
- weeds appear earlier than seedlings, “clogging” them;
- later harvest ripening.
Is winter garlic planted in spring?
Of course, winter garlic is planted in the spring. When planting winter garlic in the spring, long-proven agrotechnical methods for growing spring garlic are used. As a result, from approximately 60% of the planting material, a single-toothed head grows, covered with very dense scales. The rest of the planting material produces both full-fledged ones, divided into 4-6 cloves, collected into small and not very large onion heads, and “degenerates” - heads divided into 2-3 segments.
For planting, beautiful, heavy cloves are selected that are not dried out or diseased, and are stored in an unusual way for a garlic variety. Small cloves from full heads are suitable for growing early garlic green feathers. After all, many people love boiled potatoes sprinkled with finely chopped green garlic. And how many culinary recipes exist where young green garlic is simply necessary!
Small cloves are planted in shallow grooves along the edge of the main beds. But cloves from defective heads can only be used for food. Planting garlic using the spring planting method in the spring is correct; planting winter varieties in the spring is also correct, but with reservations.
Diseases and pests
One of the main enemies of garlic is the onion fly, which loves to feast on this crop. To destroy it, it is recommended to powder the plant with tobacco dust or wood ash. Among chemical preparations, insecticides such as Karbofos and Fufanon are extremely rarely used. For preventive purposes, carrots are planted in rows next to garlic and onions.
Garlic crops can be affected by a nematode that lives in the soil. After the defeat, the above-ground part begins to turn yellow, and the head of garlic rots. Under a microscope glass you can see small twisted worms on the dug out head. The plant must be treated with Actellik.
Garlic cloves are often affected by bacterial rot. Black dots form on the slices, which subsequently emit an unpleasant odor. Almost the entire above-ground part turns yellow and dries out. Fungicides rarely help in such advanced situations. The plant dies.
Fusarium blight affects the bottom part of the head, causing the foliage and stem parts to turn yellow. The axillary part appears to be colored pinkish due to plaque, and the foliage is covered with brown stripes. The root system turns into dust. The bottom of the garlic is watery and soft. It is difficult to find an effective remedy for the treatment of this disease.
Currently reading:
- All the benefits of mulching the soil for high yields
- Choosing cucumbers for open ground according to your preferences
- Basic technologies for growing and caring for peas
- Confidentiality
Share the news on social networks
About the author: Victoria Semyonovna Nakhodkina
Leading researcher at the laboratory of vegetable and berry crops, Yakut Scientific Research Institute of Agriculture, Siberian Branch of the Russian Academy of Agricultural Sciences, Republic of Sakha (Yakutia).
Discussion: there is 1 comment
- unkyrona:
01/01/2021 at 07:51The choice of planting time and type of vegetable grown will depend on the purpose of cultivation. Experienced gardeners recommend planting both winter and spring plants in garden beds.
Answer
When to plant garlic in spring in open ground
The terms and conditions for planting in the spring are the same for both spring and winter garlic (not planted, as expected, in the autumn!) and not used in winter.
Planting time comes, in most cases, immediately after the soil is cleared of snow and it becomes possible to walk into the garden without drowning in the mud. A lump of earth, clenched in a fist, should not crumble, but water should not ooze from it. During daylight hours, the earth should warm up to at least +3+5 °C. There should no longer be frost at night.
Warming the soil to 8-10°C allows the root system to actively develop. When the soil temperature rises to 16°C, garlic is no longer planted, otherwise it will grow and store poorly.
When exactly in the spring, what does the time depend on?
Can winter garlic be planted in early spring? The time depends on the region in which the landing takes place. It is not the month that is important, but the temperature, since the plant needs warmth and moisture. Garlic can be planted already at an average temperature of +5 degrees. At this time, the root system will begin to develop. When warming reaches +15 degrees, garlic will begin to actively grow.
Planting times depending on the region:
- South – end of February – beginning of March.
- The middle zone is mid or late April.
- North - early May.
How to plant garlic in the spring so that it is large
When you think about how to properly plant garlic in the spring so that it grows large, you will inevitably come to the conclusion that you need to start with properly preparing the garlic for storage and creating reasonable storage conditions. Much will depend on the quality of soil preparation and the chosen location for planting the planting material. Planting teeth, heads, single teeth will need to be sorted and treated against diseases and pests, and, if necessary, subjected to vernalization.
Timely and sufficient watering, quantity and quality of fertilizing, soil care, weeding and loosening the soil in garlic beds will have a significant impact on the harvest. Even plants that lived in the garlic bed for future plantings last summer can affect the size of the garlic heads.
Preparation of planting material
For planting in the ground, only the outer cloves of winter garlic are used. Internal - not suitable for growing bulbs; they can be planted on a green feather. Therefore, before planting, the head of garlic is disassembled and the inner and outer cloves are separated.
Internal ones are set aside, external ones are inspected for the presence of rot and sorted by size. Sorting is necessary to separate the plantings - small tines will be planted in one row, large ones in another.
The prepared cloves are soaked in potassium permanganate and then in a stimulant. Soaking time in manganese solution is 5-15 minutes. The concentration of the solution is several crystals of manganese per 1 liter of water.
After this, the cloves are dried. The soaking time in the stimulator is 7-8 hours, after which the garlic is placed in the refrigerator for stratification. Such a complex preparation technology is necessary for the spring bulbs to catch up with the winter ones in terms of quantity and quality of the harvest and to form a full-fledged head of garlic with 10-20 cloves.
Note: garlic has relatively weak rooting, which is the reason for soaking it in a stimulant during spring planting.
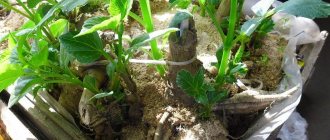
After soaking, the cloves are wrapped in damp cloth and left to germinate. The fabric should be damp. To do this, it is dipped into water, squeezed out and placed in a container (plate), cloves of garlic are placed on top and covered with another damp cloth.
A plate with teeth is placed inside the bag and placed in the refrigerator on the bottom shelf, so that the bag is slightly open. The teeth are kept there for 3-4 weeks, periodically removing and checking the moisture content of the fabric. After 3-4 weeks, roots up to 5 cm long form on each clove.
Storage conditions for winter garlic intended for spring planting
Winter garlic, compared to spring garlic, is stored much worse. Spring is intended for winter storage. It is protected from damage and drying out in winter by a dense, thin white cover of dry scales. And winter crops should freeze in the ground in winter, but not freeze. Therefore, to store it, you need to create conditions so that it still freezes without being planted in the ground, but does not freeze.
Some people hide garlic bulbs prepared for storage in linen bags and bury them half a meter into the ground before snow falls. Some people put garlic heads in three-liter jars, wrap the jars and also bury them, but not under the ground and snow, but right in the snow heaps. Some people store them in nets in a cold cellar or basement, others in boxes covered with old quilted jackets on the balcony. The storage temperature should not fall below 0°C+5°C.
But this is not always possible. Then the garlic, if there is not much of it, has to be stored in the refrigerator in the bottom drawer, and if there is a lot, then at room temperature, for example, in the pantry in braids. Storage areas should maintain humidity within 50-60% and be dark. High humidity causes fungal diseases and spoilage of garlic heads.
Preparing garlic for storage
In addition to observing light and heat and humidity storage conditions, it is necessary to protect the garlic heads from rot and pests.
Winter garlic that is not planted in the ground in the fall is initially stored either in a dry room at a temperature of 18-20°C, or in the fresh air for 5-7 days at a temperature of 20-25°C. This will give it a chance to dry out. Then you need to clean the heads from the outer dirty layer of husk, trim the roots and stems. It is better to do this with scissors or pruners. The length of the cut roots should be from 2-3 mm to 1 cm, the stems can be from 2 to 10 cm.
Craftsmen advise lightly burning the cut roots over the flame of a candle or gas burner. In this way, the bottom of the garlic is sealed, as it were, and becomes more resistant to rotting and spoilage. Some pluck out the roots, some do not touch the roots at all, but only clean them of dried dirt.
Garlic heads must be divided by size, examined and unsuitable ones selected. Heads with mechanical damage, signs of disease, rot or overripe are not suitable for long-term storage. Overripe garlic has bare cloves, not tightly pressed together, the head of garlic crumbles in the hands, the skin of the scales is cracked and easily separated from the juicy core.
If, when examining the dirty layer of garlic peel that has been cleared of dirt, blue stains are noticeable under the clean layer of scaly skin, then it needs to be removed - there may be pest larvae underneath. They must be destroyed.
Delicious pickled garlic. 8 cooking recipes
How to collect and save
Its keeping quality directly depends on the timeliness of harvesting. Garlic dug up too early quickly rots and is not as tasty. Late-harvested fruits are also poorly stored; the head crumbles into teeth. Taste qualities are also lost.
Collection time
How to recognize the degree of ripeness of garlic? There are several signs:
- the first sign of garlic ripeness is that the entire upper part of the plant or its lower leaves begin to dry out;
- It’s easy to determine the degree of maturity by digging up several onions: mature ones will have completely dry husks, purple-white in color. Garlic “wrapped” in three layers of husk stores best;
- the teeth of a ripe plant are elastic, separated from each other without difficulty, but they should not crumble;
- In non-shooting garlic, at the time of ripeness, the root collar easily separates from the teeth and becomes dry;
- To determine the ripeness of shooting garlic, a shoot is left on several plants. A ripe plant is characterized by unwinding of the arrow and full opening of the inflorescence itself.
Cleaning correctly
When harvesting, it is better to hurry literally 1-2 days before the garlic is completely ripe. This will make it easier to preserve its taste and beneficial properties.
Dig out the plant with a shovel, because the bulb is damaged during pulling out. Also, you should not clean it of dirt by knocking the plants against each other or with a shovel. Such fruits will also be damaged, and you can’t count on their long-term storage. Peel the soil by hand.
Afterwards, garlic, especially slightly unripe garlic, should be “finished” and dried. To do this, hang it, without separating it from the stem, in the shade. For example, under a canopy or in any room where there is good air circulation. This method allows you to improve the taste of the spice; all the beneficial substances from the tops go directly to the head. This onion contains more nutrients and better taste.
Saving the harvest
For storage, onions are selected that are strong, whole, and without signs of rot or damage. Even one slightly rotten garlic can nullify all the gardener’s efforts in winter.
The fruit should be stored away from light, in a dark and cool (from 2 to -2°C) room. A cellar, basement, dry insulated attic are suitable for this. There are many storage methods, for example:
- hanging in braids;
- in plywood boxes;
- in cardboard boxes;
- in fabric bags soaked in salt and dried;
- In oil;
- slices, dipped in paraffin.
Other methods are suitable for storage in apartments. One of them is placing garlic in jars, whole or disassembled into slices. There is no need to clean the husk. Storage containers are washed, well dried or sterilized, and then the bulbs are placed.
To sprinkle the fruits, use onion peels, ash, salt, flour, and expanded vermiculite. You can simply put it in sterile jars and roll it up. The longest and highest quality storage is freezing.
How to plant spring garlic in spring - planting stages
Before putting garlic in a hole or furrow, you need to decide on the planting site, then you need to prepare the soil, beds and planting material.
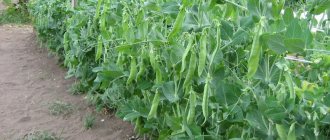
Selection of landing site. The landing site should be sunny, protected from the wind, preferably somewhere at an elevation. Garlic loves watering during the growing season, that is, during the period of growth and development, active formation of the bulb, but does not like waterlogging and waterlogged soils. Garlic is not picky about its predecessors in the garden - some manage to get good yields of garlic even after potatoes. But it has been noticed that the best harvests come from the beds where zucchini, cucumbers, pumpkins, early cabbage, peas, and beans grew last season.
Soil preparation . If the beds for garlic were not formed in the fall and the soil remained unfertilized, then all this will have to be done in the spring. The best soil for planting garlic is neutral, loamy, fertile. Peat and sandy soils are used.
Loamy soil is fertilized with compost and humus - a bucket per 1 sq.m. Add one tablespoon of potassium sulfate and superphosphate (per 1 sq.m.). It would be a good idea to check the soil for acidity and, if necessary, take measures to deoxidize it. Do a water seepage test - fill a half-meter-deep hole with water and remember how long it takes for the water to go underground. If this takes more than 12 hours, then add a bucket of sand and peat per 1 sq.m.
If the soil is sandy, then in addition to the fertilizers listed above, 2 buckets of clay soil and a bucket of peat are added per 1 sq.m. A bucket of loam and coarse river sand is also added to the peat soil. In early spring, in the snow, you can treat the soil with copper sulfate. 1 tbsp. a spoon is diluted in a 10-liter bucket of water and poured directly onto the melting snow at the rate of 1 liter per 1 sq.m.
Vernalization. If garlic is stored for a long time (3-4 months) at room temperatures, it will be necessary to vernalize the garlic heads before planting. To do this, you need to find a dark place where you can lower the temperature to +3, +5 ° C and keep the garlic there, depending on its size, for 10 - 30 days. Large heads require longer cooling times. A short exposure to low positive temperatures after room heat allows the garlic to begin to grow.
Preparing for planting spring garlic. Spring garlic is divided into cloves. Large heads and cloves from the outer rows are selected for preparation for planting. They are kept in cool water for 2 hours, then for half an hour in a weak solution of potassium permanganate (potassium permanganate), or in a solution of salt or ash at the rate of 6 tbsp. spoons per 10 liters of water. (You can water the beds with a solution of this salt before planting garlic.) Wrap in a damp cloth and store for 3-5 days in a cool, dark place, not allowing the cloth to dry out. As soon as the roots hatch, you can start planting. The length of the roots is no more than 1 cm.
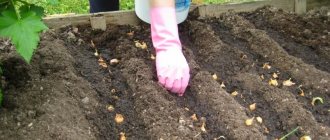
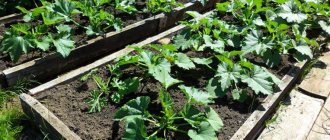
Planting garlic . Plant garlic in rows in furrows and holes. If the soil under the beds was dug up in the spring, then it must be slightly compacted so that the cloves do not fall to a great depth. Prepared, sprouted or not, the cloves are placed in the ground bottom down. It is not recommended to press them into the ground. Planting depth - 2.5 times the height of the planting clove. Usually this is 5-7 cm. There is no more than 2-3 cm of soil above the clove. This helps to increase productivity.
Large, medium and small cloves are planted in groups separately from each other. The distance between the cloves is at least 10 cm, between the rows 20-25 cm. There should be no more than three or four rows in one bed for the convenience of further loosening, processing and watering.
Is crop rotation important for garlic?
Let's figure out how to properly plant garlic cloves in the spring. In general, the cultivation technology for planting in winter and spring differs only in the time when field work begins. Otherwise the processes are identical.
Ideally, garlic should be planted after green manure or mustard plants. These crops will prepare the soil and saturate it as much as possible with nitrogen, potassium and phosphorus, necessary for the growth and development of garlic. Green manure is sown immediately after harvest, then dug up or plowed.
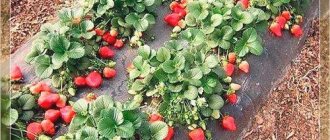
In addition to green manure, the optimal predecessors for planting spices will be zucchini, squash, cucumbers, and berry bushes. It is even allowed to plant garlic between the rows of strawberries.
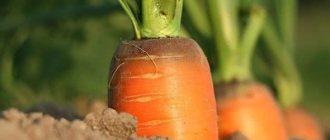
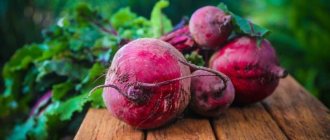
to plant the crop after carrots, beets or onions. Carrots deplete the soil, and onions not only “feed” on the same microelements as garlic, but can also infect the soil with diseases common to garlic, because they are from the same family.
Caring for garlic in open ground
During the first half of its development, garlic loves moist soil. Watering is carried out with settled tap water, not cold, but warmed up in the sun, water from a well or borehole. The tips of the garlic feathers begin to bend, which means the plant is complaining that it lacks moisture. Faded feathers indicate its overabundance. During prolonged rainy periods, drainage furrows between the rows will prevent the garlic from rotting.
After rains and the soil dries out, it is necessary to loosen the soil crust to allow free access of air to the developing garlic bulbs. By mulching the soil under the garlic, you can reduce the amount of watering and loosening the soil. The disadvantage of mulching is the possible settlement of ants and slugs in the mulch and further control of them.
Two weeks after the emergence of friendly shoots, the garlic is fertilized with nitrogen fertilizer. To do this, use either mineral nitrogen-containing fertilizers according to the instructions for use, or herbal infusions with the addition of bird droppings. Garlic planted on prepared soil requires only two such feedings with an interval of 2 weeks.
Planting dates and soil preparation
Garlic is cold-resistant; it begins to germinate as soon as the average daily temperature rises above zero. Spring garlic is planted when the soil warms up to 5 - 10 ºC. In the Moscow region, such conditions are created closer to mid-April. When to plant garlic in the Far East depends on spring temperatures; according to long-term observations, optimal conditions for garlic develop by the beginning of May. It is not recommended to delay planting, as it may not have time to ripen. If agricultural practices are followed, spring garlic is ready for harvesting in the central zone at the end of August - beginning of September.
Garlic forms a weak root system, so it needs good moisture and high fertility. The reaction of the soil solution should be close to neutral; on slightly acidic soils, ash is added. Two weeks before planting, add humus or compost.
If the area was dug up in the fall, then in the spring it is enough to harrow it with a rake with long teeth or use a flat cutter. You should not cover up the humus by digging it onto the bayonet of a shovel. Otherwise, the thin root system of garlic will not be able to take advantage of the nutrients.
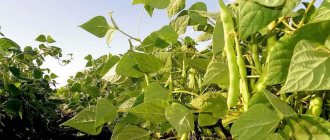
When planning a planting site, it is necessary to observe cultural rotation. Garlic can be returned to its original place or to an area occupied by other onions no earlier than after 4 years. Good predecessors will be melons, legumes and cabbage.
What garlic to sow in spring - the best varieties for planting
Before choosing garlic for planting, you always want to know what will grow from the purchased seed material. You always want to buy something better and more productive. Manufacturers, for a long time working to improve the commercial qualities of garlic, were able to offer gardeners plants that differ in the length of storage time, taste, number of cloves in the head, weight of the heads and individual cloves.
The planting form can be in the form of whole heads, individual cloves, single cloves and seeds from air baskets. Garlic heads grown from single cloves always have more cloves and are larger. The cloves obtained from such garlic retain their high yield up to 3-4 reproductions.
Winter garlic single clove “Lyubasha” is a garlic set grown from a seed bulb. Dry and frost resistant, shelf life up to 10 months. The weight of a mature garlic head is 80-150 grams, a head of 4-5 cloves.
Large winter garlic head “Zorro” has up to 7 cloves per bulb. It is loved for its persistent scent and medium pungency. A tooth can weigh 15-20 grams.
“Prometheus” (large bulbs of 5-7 cloves weighing up to 10 g) - withstands winter temperature fluctuations and is suitable for long-term storage. It is collected after 100 days of growing season.
“Elenovsky” spring garlic with a growing season of 4 months. Under normal conditions, it may not deteriorate for 2 years. Responds well to temperate climates. One of the largest fruits.
Late-ripening winter garlic in heads “Dobrynya”. During the ripening period, up to 14 cloves weighing 5-6 grams are divided into the bulb. Requires additional insulation during winter planting. Height after shooting up to 70 cm.
Features of the winter variety
Winter garlic differs from spring garlic in that it is planted in the fall (you can learn about the features and differences of the garlic planting procedure in winter and autumn here). Gardeners generally prefer this species for its taste and ability to take root. Winter garlic also has external differences: the cloves are quite large and are located around the stem. This species reproduces using bulbs on arrows or cloves.
Growing winter garlic is not difficult, but there are a number of peculiarities. The soil must be fertile, so it is better to choose loamy or sandy loam. The acidity of the soil should be neutral. Garlic can be planted either alone or next to other plants.