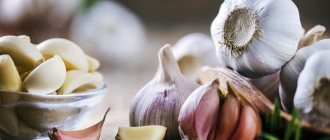
Hello friends. Autumn has come, and it would seem that it’s time to finish all the work with gardens and dachas. The harvest has been harvested, the preparations have been made, what else is needed? But it turns out that rest is not so close. After all, it is in the autumn season that many vegetables, flowers and other vegetation require special care. For example, in order to get a good harvest of garlic next year, you should prepare and plant it in the ground now. Otherwise, you won’t see this useful fruit in the summer.
Garlic protects the brain from aging, preserves good memory and vigor, and has a great effect on the functioning of the body’s immune and nervous systems.
Therefore, today I suggest you understand in detail when and how to properly plant garlic in open ground for the winter in the fall. We will also analyze planting dates according to the lunar calendar and care rules.
I think it’s no secret to anyone that there are two ways to grow garlic:
- winter (planted in autumn, before winter);
- spring (planted in early spring).
We will focus on the first method. Since growing winter garlic is not at all difficult, the main thing is to observe the planting dates.
If you plant garlic early in the fall, it will have time to germinate and therefore die in the winter. If, on the contrary, it is too late, then the plant will not have time to take root and overwinter safely.
Plus, don’t confuse winter and spring garlic. Their main difference is the landing time. Well, the following reminder will help you if you are just a beginner gardener).
Of course, the choice of planting dates will depend not only on the lunar calendar, but also on the region and weather conditions. Experienced gardeners believe that garlic should be planted in the fall three weeks before the first frost.
When and how to plant garlic before winter in autumn 2022
First, I suggest you take a look at the Lunar calendar and look at favorable dates.
So, if you are a resident of the northern regions of our country, then planting winter garlic should begin in September. At the same time, it is better if you do this on the waning Moon on the Days of the Root, that is, the Moon must pass through the fertile signs of the Zodiac.
In September these will be the following days: September 2, 10-13, 19.
Please note that landing during the full moon and new moon is not recommended.
But for the majority of Russian residents, garlic is planted before winter in October. The lunar calendar recommends the following favorable dates: October 6, 8, 9, 11, 12.
If November is warm, then it can be used for planting on the following days: November 5-7.
We take December into service only if climatic conditions allow it: December 11-14, 17.
But it is not recommended to sow garlic in 2022 on the following days:
- in September – 1, 6, 16, 20;
- in October – 5, 6, 16;
- in November – 4, 8, 9, 10, 18;
- in December – 1-3, 18, 29.
Also, do not forget to focus on the planned planting depth:
And since we have decided on the planting dates, we move on to the next point - how to plant this vegetable correctly.
After what crop should garlic be planted before winter?
I will immediately answer the question of many people: “After what can you plant garlic?”
It is advisable that tomatoes, legumes or cucumbers grow in the garden before the garlic. Zucchini, pumpkin or early cabbage are also good predecessors.
But where potatoes or onions grew, it is better not to plant garlic. Also, do not plant in an area where you applied manure this year. Otherwise, the plant will produce abundant tops and loose heads, and will be susceptible to fungal diseases.
Now let's talk about choosing a bed for growing this vegetable.
How to choose a place for a garden bed and prepare it for winter garlic
First, find the most fertile soil with normal or low acidity. Make a bed on the sunny side, and place it from north to south.
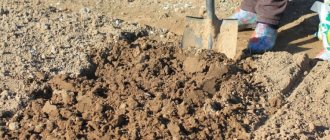
Secondly, prepare the soil in advance. Starting from the end of August-beginning of September it needs to be fertilized. So, for each square meter of area, add 10 kg of humus, 1 cup of chalk or 2 cups of ash, then add 2 tbsp. spoons of potassium sulfate and 1 tbsp. a spoonful of superphosphate. Distribute all this evenly over the soil, and then dig up the ground. In this case, the digging depth should be at least 20 cm.
Read also: Tomato Slavyanka characteristics and description of the variety
After fulfilling the above conditions, proceed to forming the bed .
It is desirable that the bed be up to 1 m wide and up to 25 cm high.
Then give time for the soil to shrink . That is, just leave the bed alone so that the soil settles after digging. By the way, if September is not very rainy, then for better shrinkage you can spill the prepared soil with water several times.
The next stage is tillage . This work is needed in order to prevent garlic diseases. Treat the ground with a 1% solution of copper sulfate at the rate of 1 tbsp. spoon per 10 liters of water. Using a watering can, pour the solution over the entire area of the bed, and then cover it with film.
But on the eve of planting garlic, you can scatter urea (10-20 grams per 1 sq. m) on the surface of the bed and water the soil with water.
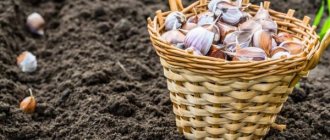
Preparing garlic for planting
Next, you need to directly prepare the spicy vegetable itself. Typically the following material is used for propagation:
- Cloves (garlic heads are divided into parts);
- Seeds (bulbs).
The easiest way to get a good harvest is from cloves. Therefore, let's look at the stages of preparing this planting material.
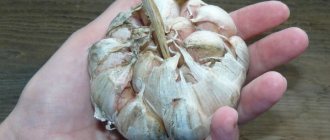
1. Disassemble the head into teeth.
First, inspect the garlic and separate the heads into individual cloves. Select the largest and healthiest ones from them.
If you take planting material from non-shooting varieties of garlic, use only the cloves of the outer tier.
2. Disinfect the cloves.
To do this, soak the cloves for a day in a 0.1% solution of potassium permanganate or a 1% solution of copper sulfate.
That's all, the garlic is ready for winter planting in open ground.
Planting winter garlic
Now it’s time to look at the technology for planting vegetables in the fall.
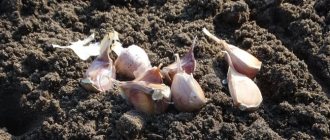
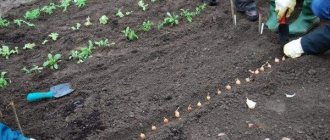
1. Make holes.
On the prepared bed, mark the location for planting the cloves. Take a stick and make holes in the soil at a distance of 10 cm from each other. The depth should be from 3 to 15 cm (here everything depends on the method and time of planting).
The distance between rows is 20-25 cm.
2. Bury the garlic cloves.
Just place the cloves in the holes. At the same time, there is no need to press them into the ground, because this will delay root formation.
3. Cultivate the land.
Spill the soil with a pink solution of potassium permanganate.
4. Fill the holes.
Cover the holes with rotted compost.
5. Mulch the garden bed.
For this procedure, use peat, pine needles or fallen leaves. The optimal layer of mulch is approximately 10 cm.
Please note that in warm regions there is no need to mulch winter garlic.
As a matter of fact, these are all the secrets of planting and caring for winter garlic! And by the way, don’t forget that every two years the vegetable’s place of residence needs to be changed.
If you want to use a second material for planting - seeds or bulbs, then watch the following video. I'm sure you will succeed.