Preparation of planting material
High-quality, healthy planting material is the key to an excellent harvest. Before planting, it is necessary to prepare the tubers. This includes the following activities:
- unloading potatoes from storage areas;
- rejection of rotten, damaged, disease-affected tubers;
- dividing them into factions;
- heating and germination of eyes for early varieties;
- treatment against fungal diseases with fungicides.
Planting material storage
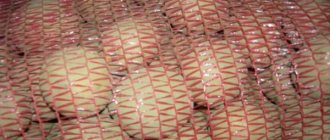
For planting, you need to use healthy tubers that meet the variety and requirements of class 1 and 2. It is not allowed to use frozen, rotten or irregularly shaped tubers.
Planting material begins to be prepared 2-3 weeks before planting in the ground. This allows you to improve the quality of tubers and increase productivity.
Potatoes are separated into fractions using sorting rollers. There are the following factions:
- 25-50 g - small,
- 50-80 g - medium,
- 80-120 g - large,
- more than 120 g - very large.
After sorting, the tubers are taken to closed areas, where they are laid out in a layer up to 20 cm thick and dried for 12 days at a temperature of 16-20 degrees Celsius. At this time, germination of the eyes occurs. At the same time, potatoes are treated against diseases. And to speed up germination, tubers are treated with various stimulants.
How to plant?
- Spread the sprouted tubers directly on the surface of the soil.
- Sprinkle with hay or dry leaves to protect the potatoes from possible frost.
- Cover the top with covering material to prevent the foliage from being blown away by the wind.
- When it finally gets warmer outside, remove the covering material.
- On top of the tubers and hay you need to put everything you prepare for compost.
- You will have to hill up the potatoes not with soil, but with weeds.
- Pour the slop between the rows.
- Make sure that the tubers are not exposed - place weeds on the empty areas.
Who is Galina Kizima?
She is an ordinary person, at one time she even received an education as a physics engineer. But she soon realized that this was not for her, and began to do what she loved. Having a small plot of land at her disposal, she realized how much the soil was depleting, so she decided to develop new ways of planting, caring for and growing plants.
The basic rules of her methods:
- Don't dig.
- Do not water.
- Do not remove weeds.
There is no need to disturb the soil excessively; plants already know what they need for growth and development. But you still have to work, the method is not so simple.
Galina has written many books for amateur gardeners. Her followers note the great benefits of the advice, while skeptics continue to adhere to other rules in growing. Those who want to learn something new and useful will find answers to many questions in her books.
Galina places great emphasis in her works on pensioners who, for health reasons, cannot spend much time on the site. She tries to reduce the labor intensity of the conventional process as much as possible.
Why is the Kizima method popular?
For Galina Kizima, everything is simple: you don’t need to work day and night in the garden, and then nature itself will thank you and give you an excellent harvest.
In her opinion, there have always been two types of gardeners: workaholic gardeners and lazy gardeners. Kizima invented a third subspecies of these same gardeners, one of which she considers herself to be - the rationally lazy one.
Galina Alexandrovna’s entire gardening concept is based on the fact that everything should be in moderation, including plant care. Nature itself knows better than any person what it needs. Therefore, Kizima deliberately refuses chemical and mineral fertilizers. For what? After all, the organic matter remaining from grass and compost is itself capable of feeding the earth with everything it needs. Every plant, be it a noble crop or a simple weed, knows how to grow correctly in order to provide its owner with tasty fruits.
The basis of her theory is based on three main rules: “Don’t dig!”, “Don’t weed!” and “Don’t water!” Agree, how much time will be left for relaxation and contemplation of nature without doing daily physical work in the garden! Most likely, these rules are what made Kizima so popular among those who are not particularly eager to sit in the garden fighting for the harvest if everything can grow on its own.
Interesting: G. Kizima identifies the desire to work a little and get a lot with the Emelya syndrome from the famous Russian fairy tale. All her life she has been accumulating the experience of those who are obsessed with this syndrome, including herself.
However, Kizima does not call for giving up on everything and waiting for the plants to produce a wonderful harvest. No, you will still have to work on the site. The pensioner only calls for minimizing labor-intensive work as much as possible.
Kizima does not mince words and personally convinces dissenters that her theory works. Her followers have already appreciated the joy of “doing nothing” and getting high yields on their plots. According to her admirers, the earth really does not need to be dug up. On the contrary, if you don’t touch it and don’t constantly pull weeds, the soil becomes more fertile and airy. Plants grow beautifully in such soil, and what fruits are produced!
Along with Kizima’s henchmen, there are many who do not accept the methods of the gardener with 55 years of experience. Firstly, many people do not believe that anything can grow without water and fertilizers. What can we say about the fact that potatoes do not need to be planted in the ground at all, but simply scattered over the beds. Secondly, they note the extreme unaestheticness of garden plots: just imagine an overgrown garden, in the middle of which potato beds grow and multiply.
While skeptics silently clear their gardens of grass, more and more gardeners are trying on Kizima’s bizarre methods on their acres, surprised that they can work less but get more.
Seed preparation
Before you start planting, potatoes need to be prepared. This procedure is performed 30-45 days before the planned planting. We select tubers the size of an average chicken egg for seeds. Rinse them with water and place in a deep container. Heat water to 45 degrees and pour over the tubers, covering completely. Leave until the water cools to room temperature. Make a solution of potassium permanganate and gradually pour it into the container with the tubers until a pink tint forms and let stand for 15 minutes. After this, the tubers are taken out, washed and dried. It can also be treated with another solution: dilute Fitosporin in water until transparent, pour the tubers with this solution for half an hour. Afterwards we simply dry it.
We carry out the gardening operation: we place the tubers in the light for 2-3 weeks. After planting, we send the seed material for germination and put it in a dark, warm place, again for 2-3 weeks. Tubers can be laid out in boxes, scattering cardboard boxes in one layer, the next 2 layers should be lined with newspaper.
Some useful tips
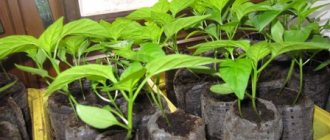
To grow tomato seedlings, it is better to use seeds of determinate varieties or hybrids. It is better to sow them at the end of March. Since it will take no more than a month and a half to obtain seedlings, this period is the optimal solution.
Important: Indeterminate varieties of tomatoes are not suitable for this method, since the formation of bunches occurs during the growth process. As a result, it branches into 2 or 3 sprouts
During transportation, tomato seedlings experience serious stress. This is especially true for changes in temperature and humidity levels. Therefore, they should first be treated with a small amount of “Healthy Garden” product. This will protect the growing tomato sprout from negative environmental factors, as well as protect it from stress that occurs as a result of their transportation.
Galina insists that seedlings are watered when necessary. First of all, the soil moisture level is determined. To do this, you need to insert your finger into the package. If it remains dry, then the tomatoes need urgent watering.
When growing tomatoes, fertilizing the plants is no less important. For the first time, fertilizers are applied one and a half weeks after picking. For this, it is recommended to use diluted mullein. To prepare the solution, you need to add 1 liter of organic fertilizer concentrate to a bucket of water. It is carefully introduced into the root zone. To do this, use a watering can that has a thin spout.
Destruction of tops
Be sure to remove the tops before harvesting. This is done in order to:
- facilitate the work of combines;
- accelerate the ripening of tubers;
- prevent tubers from becoming infected with diseases present on the bush.
Removing potato tops
Tops are removed in two ways: mechanical or chemical. It is mowed with special machines at a height of 10-20 cm, crushed and then used for silage along with the tops of other plants, such as corn and beets.
You should not leave tops on the field, as this can lead to disease infection of new plantings.
The chemical method is used if the tops are infected with late blight. It is sprayed with special preparations, which causes the bush to dry out. But even in this case, it must be cut off and removed from the field.
The destruction of tops is done before harvesting.
Advantages and disadvantages of the method
The classic method of growing tomatoes involves sowing seeds in a container with soil. Often pots, glasses and other products are used for this. But, according to the Kizima method, sowing of seed material is carried out in non-woven material. In this case we are talking about dense polyethylene film. With its help, a small volume of soil is formed, which is enough to grow high-quality seedlings.
Galina Alexandrovna’s method is also called “diaper” or “Moscow style”. This is due to the fact that the residents of this particular city were the first to use the technology. When it came to growing seedlings, many Muscovites faced such a problem as a lack of free space in the apartment. Kizima's method made it possible to easily resolve this issue.
Before planting tomato seeds, you need to carefully study the disadvantages and advantages of the technology.
As for the advantages, the author of the technology here draws attention to the following:
- You can place a record number of sprouts on one windowsill without hassle. This allows you to save space, which is often in short supply.
- Picking seedlings is quite easy and quick. To do this, you just need to unfold the “container” and take out the sprout. Subsequently, they are planted in the prepared container.
- You don't need a lot of land to grow seeds. So, for example, to plant one hundred sprouts you need no more than 5 kg of soil.
- This growing method helps protect tomatoes from diseases. This is especially true for blackleg. The chance of its occurrence is reduced to a minimum.
- Transparent containers make it easy to check which seeds have sprouted and which are just about to germinate.
The method from Galina Kizima has many advantages. But, unfortunately, there are several disadvantages here:
- Tomato seedlings do not have enough space for germination. Also, the dense arrangement of “pots” leads to a decrease in natural light. All this leads to the fact that the sprouts grow and develop relatively slowly. Therefore, in order to obtain material in time for planting in open ground at the beginning of the season, it is necessary to sow the seeds in advance.
- As a result of growing seeds in films, the plant has a strong and stable stem, which cannot be said about the root system. Therefore, when planting in unprotected soil, you should take care of strengthening it.
The “Moscow style” method is recommended for cold-resistant plants. This will greatly simplify growing tomato seedlings. Of course, if necessary, it can also be used in the case of heat-loving plants. But, here it is necessary to carry out the picking of the sprouts.
Planting potatoes in a new way - advice from G. Kizima
Before planting potatoes, the tubers must be prepared. This will take approximately 1-1.5 months.
Preparing tubers for planting will take 1-1.5 months
Preparation of planting material
The tubers must be washed, then placed in a basin, filled with hot water (+45°C) and kept in this water until it cools to room temperature. Separately, dilute potassium permanganate (potassium permanganate - potassium permanganate) and gradually add it to a bowl of potatoes, stirring until the water turns pink. Let stand for 15 minutes, remove, drain, rinse and dry the tubers. This is done in order to remove pathogens from the surface of the tubers.
Note: instead of potassium permanganate, you can use a solution of Fitosporin, for which you can dilute a small amount of the drug in water to obtain an almost transparent solution. Pour this mixture over the tubers for half an hour. Then, without rinsing them with water, dry them.
Place the tubers in the light to green for 15-20 days. This is done so that the plant poison solanine is formed in the subcutaneous layer. Neither rodents nor gnawing insects will touch such green potatoes. The easiest way is to keep dried tubers in glass jars on the windowsill, turning the jars from time to time. Or spread the potatoes in a single layer on newspapers on cabinets or window sills.
The easiest way is to keep the tubers in glass jars on the windowsill.
Then the tubers need to be germinated; to do this, they should be removed to a dark and warm place. It is convenient to place them in cardboard boxes in one layer, not too close to each other (to give freedom to the sprouts), then lay a layer of newspapers and lay out two more layers, interlayering them with newspapers, close the box and place it on a stool near the radiator. It is not advisable to place the box on the floor, since the temperature on the floor is much lower and the tubers will germinate unevenly. It will take about two to three weeks for sprouts 4-5 cm long to form.
You can start planting when bird cherry trees begin to bloom in your region, and even much earlier - as soon as the top layer of soil dries out.
Planting potatoes
As you know, tubers do not grow on potato roots, but on horizontal shoots growing on the lower part of the stems, called stolons. These shoots don't need soil, they need darkness. They will grow not only in compost, but even under empty hoods made of light-proof material. So don't worry about it. Mark the bed directly on the virgin soil, regardless of the fact that weeds have begun to grow there. Do not dig the ground under any circumstances!
Do not dig the ground under any circumstances!
Place the sprouted tubers directly on undug soil. It is more convenient to make two rows at a distance of 40-50 cm from each other, and lay the tubers in each row 25 cm from each other. You need to leave 20-25 cm from each row to the edge of the bed. Thus, the planting width will be 80-100 cm, you can take any length, but you need to know that for every meter of planting you will need 4 tubers in one row and 4 in the other.
In this material we wrote on the topic: “how to plant potatoes using the kizima method.”
- How to plant potatoes? – how to plant potatoes in the country
- Planting potatoes in ridges - how to do it? – how to plant potatoes in ridges
- How to grow potato seeds - complete technology - how to plant potatoes with seeds
- Planting and growing potatoes under straw, hay - how to plant potatoes under straw
- Favorable days in April 2022 for planting potatoes; Home, garden and vegetable garden - relevant and useful tips for summer residents and gardeners: planting, care, flowers, vegetables and fruits, mushrooms and berries - when to plant potatoes in April
- How to plant potatoes? – how to plant potatoes in spring
- How to plant potatoes correctly to get a good harvest? – how to plant potatoes correctly to get a good harvest
- Planting potatoes with a plow (under a walk-behind tractor and manually) - how to plant potatoes under a walk-behind tractor
- Potatoes: when to plant according to folk signs, how to plant without digging - when to plant potatoes according to folk signs
- When to plant potatoes according to the lunar calendar in 2022: good days - when to plant potatoes according to the lunar calendar
← March is the time to plant seeds of tomatoes, peppers, eggplants; Wow! Dacha and 100 tips to boot - when to plant pepper seedsGrowing melons in a greenhouse - how to plant melons in a greenhouse →
What other planting methods are there?
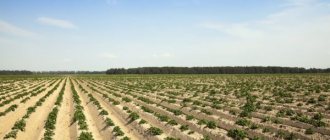
Planting potatoes in ridges
You can grow tuber crops in an original way not only using Galina Kizima’s technology. Various innovative methods have long been popular among summer residents. Some people try to plant potatoes in a ridge, while others are attracted to “pyramids” or “chessboards”. You can plant tubers in spacious holes, covered with layers of straw, or use old containers: barrels, buckets, bags.
0 0 votes
Article rating
Planting potatoes in double rows
Mitlider method for growing high potato yields
In summer cottages and garden plots, less and less space is allocated for garden beds, and more and more space is freed up for recreation (gazebos, mini-pools, barbecue facilities, etc.). Because of this, many summer residents and gardeners have to puzzle over how to grow tomatoes, cucumbers, zucchini, peppers, and even plant potatoes on the remaining acres.
Advantages of the method
With small plot areas, you want to achieve especially high yields. Therefore, the Mittleider method is becoming more and more popular - potatoes from 150 sq.m. this method yields a harvest of up to 700 kg, which is enough to provide a family of 4 with supplies for the entire winter.
The Mittleider method is suitable not only for open ground, but is also successfully used in greenhouses, greenhouses and even in boxes on a windowsill or balcony. Narrow beds, cleanliness, well-groomed and neat - these are the main differences of this common method. And most importantly, in the beds there is a continuous process of ripening vegetables: seedlings are growing in one bed, fruit buds are forming in the second, harvesting is taking place in the third, and in the fourth, plants are being harvested and the soil is being prepared for the next batch of seeds.
In the photo, growing potatoes according to Mittleider
Advantages of the Mitlider method:
- from one narrow bed you can harvest different vegetables several times over the summer;
- plants sprout amicably and ripen almost simultaneously;
- narrow beds provide a higher yield than conventional ones, and take up less space.
Narrow beds on one hundred square meters will take up only a third of the area, and the yield will be 10-15% more than on one hundred square meters sown in the usual way. Consequently, you will not only get 15% more vegetables, but you will also need to cultivate a third less land. A high yield is ensured by regular watering, balanced feeding and good lighting, which is provided by narrow rows with wide aisles.
Video about the Mittleider method
How to plant potatoes according to Mittleider
The area for planting potatoes should be level and well lit during the day. Carefully dig up the ground, freeing it from weeds and rhizomes, so that not a single root is hidden from your eyes. Now you can begin marking by driving pegs about 40 cm high into the four corners of the beds and stretching ropes between the pegs.
Standard narrow beds are 0.45 m wide and 9 m long, with wide passages of one meter remaining between the beds. If the area is too small, a passage of 0.6 m will be enough - do not do less, otherwise the potato bushes will create shade for each other, and it will be inconvenient to care for them. If there is a slope in the garden, it is recommended to make the beds in several levels so that they are horizontal. This will ensure more efficient watering and care of the plants and give the best results. If the slope is too steep, you should make ridge boxes 20 cm deep and fill them with artificially prepared soil mixture (sawdust, perlite, sphagnum moss, sand, pine bark - two or three of the listed components, without using soil).
The photo shows how to plant potatoes according to Mittleider
After marking, dig up the beds (do not touch the spaces between the rows), adding pre-sowing fertilizer to the soil at the same time, and make sides of soil 10 cm high. The edges will make it easier for you to water the beds, help save water and control weeds. There should be a flat surface at least 30 cm wide between the sides of the beds. Mark two rows of holes on the surface in a checkerboard pattern with a distance of about 30 cm between the holes in the row and a hole depth of 8-10 cm. Add 1 tbsp to each hole. vermicompost, place a potato on top and level the hole.
Success depends on proper care
Planting potatoes according to Mittleider involves careful care of the beds with fertilizing, watering and weed control. You will need to ensure that the soil under the potatoes does not dry out and that each plant receives the same amount of water and fertilizer. Fertilizing should be applied first as soon as the seedlings sprout, then when the sprouts grow to 15 cm, the last time before the potatoes budding. There is no need to hill up the bushes.
Video about growing potatoes using the Mitlider method
By choosing to grow potatoes using the Mitlider method, you will ensure a guaranteed harvest, because this is a win-win method that combines the best techniques of hydroponics (growing without soil) and vegetable growing on natural soil. Narrow beds provide plants with optimal access to the nutrients contained in the soil and allow for economical use of water. On any type of soil, when choosing any potato variety, you can achieve high yields with a minimum of financial costs.
orchardo.ru
Pros and cons of technology
The main disadvantage of the method is the unsightly nature of the beds. With this method of growing potatoes, the garden becomes like a trash can, especially since there are more progressive ways to grow potatoes in a small area, such as growing in containers or mounds. The second and main disadvantage is that Fitosporin or manganese are not able to completely protect potatoes from attack by pests and all kinds of diseases.
The phytospore in the compost mound will develop even faster under the influence of heat, especially after precipitation. In addition, the method is completely unsuitable for large areas, because it will not be possible to remove buds from 1 hectare of plantings. The method has several advantages:
- saving money on fertilizers and water;
- saving effort on digging and watering;
- ease of harvesting.
Growing potatoes using the Kizima method causes a lot of controversy. It involves removing inflorescences at the budding stage in order to redirect the plant’s energy to rhizome growth. Planting potatoes under hay has been used for a long time, and in some cases it gives good results, but it is not suitable for every site. At the same time, pests and late blight feel great under a cover of hay and compost, and it will never be possible to get rid of ailments in one fell swoop with the help of Fitosporin.
Unrotted compost at the time of decomposition makes the soil acidic, which negatively affects the quality of the crop: potatoes react poorly to increased acidity. Any plant needs care, watering and strict control over the condition of the tops. In a layer of compost left for the winter, the larvae of the Colorado potato beetle will feel great. This is another minus of the method.
Preparation of planting material
The tubers must be washed, then placed in a basin, filled with hot water (+45°C) and kept in this water until it cools to room temperature. Separately, dilute potassium permanganate (potassium permanganate - potassium permanganate) and gradually add it to a bowl of potatoes, stirring until the water turns pink. Let stand for 15 minutes, remove, drain, rinse and dry the tubers. This is done in order to remove pathogens from the surface of the tubers.
Note: instead of potassium permanganate, you can use a solution of Fitosporin, for which you can dilute a small amount of the drug in water to obtain an almost transparent solution. Pour this mixture over the tubers for half an hour. Then, without rinsing them with water, dry them.
Place the tubers in the light to green for 15-20 days. This is done so that the plant poison solanine is formed in the subcutaneous layer. Neither rodents nor gnawing insects will touch such green potatoes. The easiest way is to keep dried tubers in glass jars on the windowsill, turning the jars from time to time. Or spread the potatoes in a single layer on newspapers on cabinets or window sills.
The easiest way is to keep the tubers in glass jars on the windowsill. Photo by user Svetlana Davlieva
Then the tubers need to be germinated; to do this, they should be removed to a dark and warm place. It is convenient to place them in cardboard boxes in one layer, not too close to each other (to give freedom to the sprouts), then lay a layer of newspapers and lay out two more layers, interlayering them with newspapers, close the box and place it on a stool near the radiator. It is not advisable to place the box on the floor, since the temperature on the floor is much lower and the tubers will germinate unevenly. It will take about two to three weeks for sprouts 4-5 cm long to form.
Read also I wish you peace in your soul
You can start planting when bird cherry trees begin to bloom in your region, and even much earlier - as soon as the top layer of soil dries out.
When to plant?
You can plant potatoes as soon as the top layer of soil dries out. Galina Kizima herself recommends starting planting when the bird cherry blossoms.
These are different times for different regions:
- In early May, potatoes are planted in the Central region and Kaliningrad.
- The first ten days of May are suitable for planting potatoes in the Central Black Earth, Volga-Vyatka and Volga regions.
- In mid-May, potatoes are planted in the North-West region.
- In the second half of May, it is worth planting potatoes in the Ural and Far Eastern regions.
- The end of May or the beginning of June is ideal for planting potatoes in the Northern, West Siberian and East Siberian regions.
- In the North Caucasus region and Crimea, potatoes can be planted as early as early April.
Please note that weather conditions may affect timing. Heavy rains and cool weather are forcing gardeners to delay planting potatoes for a couple of weeks.
The main stages of planting potatoes according to Galina Kizima’s method
Planting potatoes according to Kizima’s method includes the following steps:
- Selection of seed material. For planting, it is recommended to use medium-sized tubers. Too large ones should be cut in half. The cut area must be treated with wood ash.
- Soaking pre-washed potatoes in a bowl of warm water.
- Adding a solution of potassium permanganate to a bowl of potatoes. This will subsequently protect the seed material from the effects of various pests.
- Washing seed material with running water. Potatoes laid out in 1 row must be kept in the sun for 15-20 days. Thanks to this procedure, solanine is produced under the skin of the tubers, which protects them from damage by various diseases and pests.
- Germination. In order for a large number of eyes to form on the tubers, you need to place them in layers in a box. Each row must be covered with paper. The recommended time for tubers to remain in the box is 3 weeks.
- Planting ready-made seed material. According to the method, the tubers are laid on a pre-prepared floor of compost or straw. The gaps between them must be at least 20 cm.
- Protection from spring frosts. An excellent material that protects potatoes from sudden temperature changes is spunbond. It must be laid on top of a layer of newspapers.
- Hilling. This procedure is carried out using weeds or compost. The tubers should not be allowed to sit on the surface, as they may begin to produce solanine under the influence of the sun.
- Harvesting. Different types of tuber crops have their own ripening periods. Harvest from early varieties can be harvested 50-60 days after planting. Late varieties need 80-90 days to ripen. An external sign that the tubers are ripe is the presence of wilted flowers on the bush.
This method of cultivation allows you to combine a good harvest and low labor costs. The illustration for the article is used under the standard license ofazende.com
Positive and negative sides
The proposed growing method causes controversy among summer residents and botanists. Skeptics say that the garden plot will become like a landfill if the beds are fertilized with old plant debris. Galina Alexandrovna's supporters do not agree. Her advice helps to grow a large potato harvest without the use of labor-intensive agricultural techniques. Other advantages and disadvantages.
| Advantages | Flaws |
| Harvesting is much easier | The vegetable garden takes on an unattractive appearance |
| No need to dig up the area | The technique is only suitable for small areas |
| Plants need less water | Low level of protection against pests and diseases |
| Summer residents need less fertilizer | — |
Another controversial point is that Galina Aleksandrovna recommends removing the buds at the stage of inflorescence formation. Manipulation increases the amount of resources that seedlings will direct to the development of the root system. Botanists object. Such actions in cool and humid summer conditions will weaken the potato’s immunity.
Is it necessary to pick off flowers from potatoes: why is this done? During their development, potatoes go through a flowering phase, after which berries and seeds are formed. Usually for...Harvest storage
Storing the harvested crop is an important point in the entire chain of growing potatoes in large quantities. For long-term storage and preservation of crops, vegetable storage facilities are used, in which all optimal conditions are created:
- Humidity so that the crop does not dry out and rot;
- Sorting allows you to separate healthy tubers from damaged ones;
- Creating conditions for the healing of vegetable damage received during harvesting;
- Temperature conditions so that the potatoes keep longer and do not germinate;
The two most common ways to store potatoes are:
- In bulk. The method is somewhat resource-saving - you can save on storage containers, but you need a good ventilation system.
- In containers. You can sort vegetables more flexibly according to various parameters, create a multi-tiered warehouse, and also make it easier to transport and monitor their safety. But it is an economically more expensive storage method.
- Storage in containers
- Bulk storage
Method of growing seedlings in diapers
Galina Kizima also developed a technique for growing seedlings that significantly saves space on window sills. The author's technology is based on the so-called. “diapers”, popularly called “Moscow rolls”. The technique was developed for growing tomato seedlings, but in the case of preparing sprouts of peppers, cabbage, cucumbers and flowers, it also shows good results.
Galina Kizima in her work “Vegetable garden without hassle” recommends growing seedlings of tomatoes and other crops in rolls made of non-woven material with a small volume of nutritious soil. This technique does not require traditional filling of containers with soil, which means it saves you money and space on illuminated window sills.
For “swaddling”, soil, seeds and non-woven material (geotextile, thick film or disposable baby diapers) are prepared, which is cut to size. Moist soil is spread on the diaper in a thin layer, seeds are placed in the upper third of the length, after which it is rolled up and placed vertically in a container.
But this method also has plenty of disadvantages. Sprouts develop worse in cramped conditions, the root system is much weaker than the stems. In addition, when picking, you will still have to plant the plants in separate pots, so the thesis about saving space becomes moot. It is advisable to use this technique for growing seedlings of cold-resistant crops, which can be planted directly into beds or a greenhouse.
For heat-loving crops, Galina Kizima suggests extending the “diaper period” by dipping the sprouts into individual rolls with soil, rolled up like shawarma. In a relatively spacious bag made of non-woven material, the seedlings will be comfortable, moist and warm, and the plants will be able to sufficiently develop their root system and above-ground parts by the time they are planted in the ground or greenhouse.
Potato care
The method requires preliminary preparation of planting material, which takes 1-1.5 months.
The seeds are suitable for strong, healthy potatoes, the size of a chicken egg. If the tubers are smaller, this can significantly reduce the yield; large specimens are cut in half lengthwise so that there is an equal number of sprouts on each part.
Disinfection
You can treat them with Fitosporin. A small portion of the product is diluted in water, the tubers are placed in the solution for half an hour, then they are dried. Planting material should not be washed off from Fitosporin.
Germination
After processing, the potatoes are laid out in the sun so that the tubers turn green when exposed to light. Can be placed in rows on a windowsill or placed in a glass jar. The tubers need to be rotated to ensure uniform release of chlorophyll.
It is necessary to ensure that the tubers are always covered with grass. You should not leave last year's potato tops in the garden. It contains a lot of solanine, a poison produced by nightshades, and the larvae of the Colorado potato beetle like to overwinter in the tops. The tops are collected and thrown away. The grass is not removed from the garden bed - it will be useful the next time you plant.
Of course, this method of growing is not suitable for everyone, but people who have been using the method for several years now report high yields, so it has a right to exist. After all, trying something new is very interesting and useful for your own experience.
After the threat of return frosts has disappeared, remove the spunbond and burlap. Periodically add weeded weeds, grass clippings and organic matter that you usually put in the compost heap onto the garden bed, trying not to completely block the potato seedlings. Be especially careful not to expose the tubers.
Leave signal plants with flowers as a marker. The very first summer harvest will be ready for harvest when the flowers begin to fade. In the evening, carefully remove the top layer, take out a few potatoes and push it back again. Since there is no digging, the plants will continue to grow the remaining tubers as if nothing had happened!
Scatter the tops remaining after harvesting early potatoes over the remaining ridges.
Leave the herbal compost remaining on the surface after the final harvest into the winter without digging.
There is no need to water, feed, or weed potatoes planted in this way. There is also no need to dig up the soil either in spring or autumn. Kizima's method is well suited for summer residents suffering from back pain, hernias and other problems with the spine. Take note!
Protecting beds from frost is an important procedure. To protect the crops, it is necessary to cover them with hay. You can use newspapers and wrapping paper for cover.
For shelter, you can use newspapers and wrapping paper.
The top of the bed must be covered with bags. You should not use film; the crops will begin to rot.
As soon as the threat of frost has passed, the bags should be removed and the bed should be covered with weeds. Grass can only be laid on hay or paper to protect the seedlings. Throughout the summer, crops must be covered with weeds. Crops need to be hilled with mown grass.
As soon as the potatoes bloom, tubers will begin to appear on the stolons. During this period, it is necessary to pick off all flowers. This will help the tubers to be larger.
Landing Features
Gardeners have been planting potatoes in the ground for years, applying fertilizers and treating them with chemicals. Galina Kizima introduces innovation in this regard, inviting summer residents to try planting tubers in a compost heap on the surface of the soil. The beds do not need to be watered, weeded, or fertilized. The potatoes themselves do not need to be buried or dug up. In addition, if necessary, you can take a small part of the crop, and the rest of the bush continues to grow and form tubers without visible damage.
Practicing gardener Kizima took into account the peculiarities of the growth and development of potato crops in her observations.
According to her method, potatoes are laid directly on the ground, covered with mown grass or hay. As the bushes grow, the stems are covered with straw or weeds from another part of the site. Under no circumstances should tubers be exposed. They will begin to turn green, accumulating substances harmful to the human body.
Skeptics consider this method unaesthetic, since from the outside the potato beds appear unkempt. Galina herself advises carrying out a series of works sequentially:
- Preparation of planting material.
- Planting.
- Caring for plants.
- Harvesting.
She describes each point in detail in her writings.
The essence of Galina Kizima’s method for planting and growing potatoes
Everyone knows that usually planting potatoes turns into deep digging of the soil while simultaneously burying seed tubers in holes. According to Kizima's method, digging is not used at all: the tubers are laid out on the surface and covered with a fertile mixture, often just compost.
Galina Kizima is the author of many popular books for “lazy” gardeners
Advantages and disadvantages of the method
Potato tubers form on so-called stolons - underground shoots. For this to happen, a certain shading is required by the roots at depth, the required amount of nutrients in the soil and moderate humidity. All this can be created without digging holes, but simply by covering the tubers laid out on the ground with the right amount of nutrient mixture, even dried grass. Of course, after this moderate watering and other agrotechnical measures are required, but physically they are easier to carry out than with the traditional method.
Of course, work on potatoes is still necessary, but it is much easier to do than with traditional cultivation
It is also important that with this technology it is possible to easily carry out selective harvesting, raking a thick layer of mulch and selecting the largest young tubers. In a loose layer of mulch, potatoes warm up better, as a result of which the crop ripens earlier, and with the necessary moisture, it can be even larger. The advantages of the method are:
The advantages of the method are:
- no need for digging;
- absence of fertilizing operation;
- increasing the quantity and quality of tubers;
- ease of harvesting.
Another advantage is that the harvest can be obtained a little earlier: after all, planting according to the Kizima method is possible already when the soil surface dries slightly; In the usual case, you have to wait for it to warm up to a considerable depth.
Perhaps the only relative disadvantage is that the moisture content of the substrate will have to be monitored more closely: potatoes will grow in such an environment without watering at all, but in order for the harvest to be really large, timely moisture will be required in many regions.
In many regions of Russia it will still be impossible to do without irrigation.
What types of potatoes can you use?
There are no fundamental restrictions on the choice of varieties for planting using the method under consideration. It is known that there are very different varieties in terms of ripening time. For example, early ones (Zhavoronok, Vega, Bryansk early, etc.) are ready for harvest within two months after emergence, for mid-early ones (Nevsky, Charodey, Fakel, etc.) it takes 70–80 days, and late ripening ones (Bryansky red Atlant, etc.) are ready for harvest so late that they are not grown at all in the northern regions.
It is optimal to plant several varieties with different ripening periods, alternating them in rows. At the same time, in the middle zone it is better to use the earliest and mid-ripening varieties, in the north - early and mid-early. Any tubers are prepared for planting within a month or a month and a half. The best seed potatoes are the size of a chicken egg. In addition to the usual germination carried out in the sun, the author of the method advises making a transverse cut on the tuber a week before planting.
Tubers are germinated using conventional technology
Step-by-step instruction
The method is accessible and simple; the bed does not need to be fertilized, watered or hilled.
Timing and technology of planting work
The sprouted tubers are laid out over a selected virgin plot in the garden. There is no need to dig up the soil or remove weeds. Lay out the potatoes in 2 rows with a distance of 40-50 centimeters between them. Between tubers, 20-25 centimeters is enough. We get a bed of any length with a width of 80-100 centimeters.
Small tubers need to be placed in 2-3 pieces. Large potatoes are cut in half lengthwise, the cut is allowed to dry for a couple of days, and then placed in the beds. The number of eyes on a tuber can be increased by cutting the potato crosswise a week before planting, or removing a thin layer of peel across the bottom of the potato.
Important: this operation will awaken the reserve buds of the tuber.
Then the bed is covered with a layer of hay. Straw is not used - it is too attractive for rodents; plastic film is not suitable because it does not allow the tubers to breathe.
See also
Description of the potato variety Bullfinch, planting and care rules
Read
If there is no hay, dry leaves, grass and even paper will do. The covering material must be dry and allow air to pass through to the tubers. If there is a threat of return frosts, the bed is additionally insulated with burlap, spunbond, and lutrasil. As the weather gets warmer, the covering material is removed.
Garden bed care
Then all the weeds collected on the site during the season are laid out on the garden bed. It is necessary to ensure that when the compost layer shrinks, the growing tubers are not exposed. Kizima advises pouring slop between the rows. The moisture released during the decomposition of weeds is sufficient for potato bushes; they do not need watering or hilling.
When the plants bloom, it is necessary to tear off the inflorescences so that the plant devotes all its energy to the formation of root crops. You can leave one inflorescence per bush so that you know when to harvest the first harvest. To harvest potatoes, lift the layer of covering material, collect the tubers and return the grass to its place. The potato bush will continue to grow.
In the fall, you should simply lift a layer of compost and harvest, and leave the remaining grass in the beds until the next season.
Preparation of seed material
Step-by-step cultivation of potatoes according to Galina Kizima’s method is based on adherence to technology. The first step is thorough washing of the planting material. Use water whose temperature is +40 + 40 C. The second step is to place the tubers in a bowl of water. Store them there until the temperature of the liquid becomes +20 + 22 C. Further actions:
- add 2 teaspoons of potassium permanganate to a container of water in which the planting material is immersed;
- stir the water until it turns uniformly pink;
- the tubers lie in the container for another 15 minutes;
- the seed is removed and washed;
- the tubers are dried.
The next step is to treat the potatoes with Fitosporin. It is diluted in water at a ratio of 1:2. The resulting mixture is poured into the seed for 30 minutes. The final touch is to remove the potatoes and dry them.
On a note! It is forbidden to wash tubers after treatment with the Fitosporin substance.
How to prepare potatoes for planting?
Preparatory work should begin 30-45 days before the expected landing day. Tubers the size of a chicken egg are selected. If the tubers are smaller, then they are placed in 2-3 pieces to ensure the number of stems necessary for a normal harvest.
See also
Instructions for using the Apache remedy for the Colorado potato beetle, how to breedRead
Potatoes must be sprouted; at the time of planting, the sprouts should be 4-5 cm in length. First, the selected planting material is washed, then soaked in water, the temperature of which is +45 ⁰C. The tubers are kept in it until the water cools to +18-20 ⁰С. At this point, add a separately diluted solution of potassium permanganate. The water in the container with the potatoes should turn slightly pink.
Leave the root vegetables in the solution for 15 minutes. Then the water is drained and the tubers are washed. As an option, use Fitosporin. Dilute a weak solution and keep the tubers in it for 30 minutes. Then take it out of the water and dry it. In this case, additional rinsing is not necessary.
The tubers are kept in direct sunlight for 21 days, turning green, thus the summer resident protects the potatoes from pests and rodents that are afraid of corned beef. It is produced under the skin of tubers, under the influence of the sun.
There are several options for this process; summer residents place jars of potatoes on the windowsill and constantly turn them. Or put it on a newspaper on the windowsill.
The last stage of preparing planting material is germination. To do this, the tubers are placed in a cardboard box. Lay out in one layer, covering with newspaper, then the next layer of potatoes, then newspaper again, and so on as many layers as the container allows. The whole process will take 2-3 weeks.
Galina Kizima advises planting potatoes after the bird cherry blossoms.
Answers to the most popular questions about potatoes
Potato
Is it possible to grow potatoes from seeds?
It’s not worth it from your own, because it will take three years. Now on sale there are seeds of hybrid potatoes, from the seeds of which potatoes are grown in one season, but they do not get small nodules, but quite a good harvest of medium-sized tubers. Such potatoes are grown through seedlings in the same way as tomato seedlings.
Is it possible to break out prematurely sprouted sprouts?
It is necessary, otherwise the growing stem will begin to take nutrients from the tuber. Moreover, this should be done as early as possible, while the sprout is small. Usually, with an interval of 10-15 days, the next bud from the same eye will awaken to growth. After breaking it out, the third kidney will awaken. Each tuber has 8-12 eyes, and each eye has three buds. So, each of the 10 eyes will produce three sprouts in turn.
However, there are varieties (for example, Nevsky) in which the second sprout from the eye appears very late (more than a month). Therefore, you should not break out their sprouts shortly before planting - the tubers may not sprout at all, and small potatoes will immediately begin to form on them right on the mother tuber.
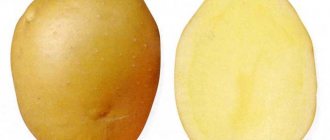
What is the difference between white-fleshed tubers and yellow-fleshed tubers?
Traditionally, tubers, regardless of skin color, have white flesh in varieties bred in Russia, the USA and England. Dutch and German varieties, as a rule, have yellow flesh with a high content of carotene - accordingly, it is healthier and more tasty.
The pulp of the tubers is white or yellow
Is it possible to grow two potato crops in one season?
You can, if you have a small plot, this will give you savings on planting space. To do this, in early March, after processing, cut off the apical part from the planting tubers, put them on greening for 20 days and then plant them as seedlings. Keep the remaining parts of the tuber in a cold place (+4°C) so that they do not germinate in advance. At the end of April, place them in the light to green up. After 20-25 days, cut each tuber into three parts so that each part has approximately the same number of sprouts. Plant in boxes for germination for seedlings.
In early May, plant the seedlings grown from the tops on prepared beds with insulated soil under double lutrasil and hill them up. Start digging up large tubers in mid-June. And at the end of June - beginning of July, remove the entire crop. A bed of early potatoes from the top part of the tubers will be freed in early July. It can be used for spinach, radishes, or for planting late beet seedlings or sowing carrots (they will still have time to grow before the end of October). This bed is also suitable for sowing black radish or lettuce. Or plant winter garlic on it, but not in September - October, but at the end of August, on the 25th-26th. I was not mistaken, exactly at the end of August, but there are some nuances, read about them in the section about garlic (fifth year in the garden without any difficulty).
At the beginning of June, after the night frosts have passed, plant the grown potatoes from the main tubers according to the usual 30x70 cm pattern, and hill them well. When planting seedlings, you need to make holes so deep that 3-4 leaves remain above the soil surface, and cover the rest of the stem with soil. The planted seedlings should be watered. You will harvest the crop for winter storage from this bed in early September.
Is it possible to grow a barrel of potatoes from four tubers?
No, you can’t, not only from 4, but also from 8 tubers. Every plant is capable of producing a crop within certain limits, and no amount of care can force it to yield beyond its potential. In addition, potato stolons grow on a stem no longer than 40-60 cm. It is to this height that potatoes should be hilled.
Planting potatoes in barrels. Photo by user Ekimkina Nadezhda
I once read an article in the magazine “Homestead Farming” that in a barrel without a bottom you can grow a full barrel of potatoes from just 4 tubers. To do this, pour 20 cm of fertile soil onto the very bottom of the container, place 4 sprouted tubers on it and sprinkle soil on top. Then, as the tops grow, gradually add any light debris on top, mixed with soil, until the barrel is full. From time to time the potatoes had to be watered and fed. The author claimed that when you tip the barrel on its side after the crop has ripened, it will be full of potatoes. Imagine my disappointment when the potatoes in my barrel were only in the top layer of soil, only 40-50 cm deep!
Dear seven-dacha residents! This publication is an excerpt from Galina Kizima’s book “The most complete book of a reasonably lazy summer resident. Secrets of an easy harvest." If you are interested in it, you can purchase the book in the official store of the publisher.
Description of the method
Dr. Mittleider developed a special method of growing not only potatoes, but also a number of other crops. Its main purpose is to create optimal conditions for harvesting a good harvest from a small area. But to really get a lot of potatoes, the technique must be followed in the smallest detail. Even the most insignificant, at first glance, mistake can lead to all efforts being wasted. We are talking about the following significant points:
loosening of the soil is not carried out throughout the growing season - digging is necessary only once; It is not allowed to swap row spacing and beds; Fertilizing the crop is allowed exclusively with mineral fertilizers; an important condition is regular watering of potatoes (growing according to the Mitlider method must be abandoned if the water supply system is not well equipped; the lighting of the area must be ideal (in the shade the yield will decrease significantly); the beds should not be located on slopes - they must be located horizontally; the soil should in no case be rocky or depleted.
Important! All of the above rules must be followed not only impeccably, but also with mandatory consideration of the climatic characteristics of the region. At the same time, you should not switch to planting potatoes according to Mitlider
The number of beds should increase gradually. The optimal number of beds to start with is no more than five or six. However, their length should not exceed 7-8 meters.
Before planting, the beds should be dug up as thoroughly as possible, removing weed roots. Then the surface is leveled. The final formation of the beds is carried out only after fertilizing has been applied, already directly on the day when planting takes place.
Growing Potatoes
The bed in which potatoes are planted must be level, so it is strongly recommended to use twine and pegs. A border should be provided around the perimeter. It shouldn't be too tall. The size of the beds and their parameters should be approximately as follows:
- bed width – 45 cm;
- bed length – 4-8 m;
- row spacing – 0.7 m;
- side height – 10 cm.
The beds and row spacing should be at the same height. If you cannot level the soil, you can divide the planting area into several more parts. Each part should be fenced off using sides.
Potato planting material should be planted in two rows, trying to maintain a minimum distance to the edges of the bed.
Planting potatoes using the Mitlider method has several advantages:
- there is no need to loosen the soil;
- no hilling of beds required;
- the area for planting is saved;
- the harvest increases;
- Growing potatoes is possible on any soil and in any region, regardless of climatic conditions.
Among the disadvantages of growing potatoes using the Mitlider method, the following can be noted:
- Areas on slopes, in lowlands, with stagnant water and with peat are not suitable for planting;
- a large amount of money is spent on the purchase of mineral fertilizers;
- Potatoes should be planted exclusively in sunny places; in the shade, the crop will be saturated with nitrates.
Planting technique
The size of the root crops and the scheme of planting them on the site are of great importance. Maintaining the width of the beds and the distances between the bushes ensures a good harvest. Wide spacing between the rows allows sunlight to envelop each bush, and the roots are not limited in growth by neighboring holes.
Preparing tubers and seedlings
You can plant potatoes on the site in the form of tubers or seedlings. In both cases, you will get a good harvest; its quality does not depend on the form of planting. But the seedlings ripen faster, you will dig up the harvest a few weeks earlier. You can read more about growing seedlings in our article.
Preparing tubers for planting using the Mittleider method
Before any planting method, tubers are prepared. Preparation is carried out in several stages:
Selection. The largest root crops are selected, those that are small are eliminated
Pay attention to the health of the tuber; Selected tubers are soaked in heated water (about 60 degrees Celsius) for fifteen to twenty minutes; Repeated soaking in a solution of potassium permanganate or copper sulfate for ten minutes; After soaking, the tubers are dried and laid out in containers in one layer and exposed to the sun. They are treated with a superphosphate mixture once every seven days.
Can be sprayed from a spray bottle; As soon as the eyes appear, the potatoes are ready. The tubers are cut into 3-4 parts, so that each has one or two eyes.
Sprouted eyes on a tuber
If you choose the method of directly planting tubers on the plot, then the potatoes are ready. If you prefer seedlings, then plant the cut root crops in boxes with soil.
A mixture of sawdust, richly soaked in copper sulfate (0.2% aqueous solution), is laid out on their bottom. The layer height is 3 centimeters. Potatoes are laid out on it close to each other. On top they are again covered with sawdust, the layer this time should be 1 centimeter thick. The boxes should be stored at low temperatures (up to 14 degrees Celsius) until the first shoots appear.
Sprouted tubers are cut into several parts
In this state, the potatoes are ready for planting. Two hours before planting, water the root crops generously with a ready-made nutrient complex (its composition is universal, the solution can be purchased at any gardening store).
Planting prepared tubers on the site
How to properly care for seedlings
As soon as the first shoots appear, measures are taken to obtain strong seedlings.
- The sprouts immediately begin to be watered with a weak solution of mineral fertilizers (1 tsp per 3 liters of water) instead of water.
- Nitrogen is excluded from fertilizing because it speeds up the growth of seedlings.
- Phosphorus and potassium are added to the fertilizer.
- Feeding with mineral complexes is alternated with diluted Ecofus, a unique fertilizer created on the basis of algae from the White Sea.
- The seedlings must be provided with 12 hours of daylight; if necessary, they are additionally illuminated with special lamps.
When and how to harvest
By learning how to plant potatoes using the Kizima method, you can get a good harvest. However, cleaning work should be carried out correctly. You can start harvesting the moment the flowers become limp.
First you need to move the compost, select large tubers, and return the compost to its place. This will allow you to harvest again after some time.
After all the potatoes have been collected, the tops need to be dried. It should not be placed in a compost heap. This is due to the fact that the tops contain corned beef, which is destroyed under the influence of sunlight.
Alexander, 34 years old:
“I’ve been using Galina’s method for 3 years now. I don't understand why they call him lazy. Covering crops with hay requires a lot of effort. I would especially like to note the harvest, the potatoes are clean and large.”
Galina Kizima's method is gaining popularity every year. Many summer residents use it in their difficult task.