Rules for planting Chili on the windowsill
This vegetable can be grown from young seedlings or seeds. In the second case, there is a greater chance of getting a rich harvest, the taste that was originally planned. It is important to choose the right soil and container for planting Chili, follow the rules of care, and provide the plant with a suitable microclimate.
Landing dates
You can sow pepper seeds all year round. Experienced gardeners claim that the most fruitful is spring sowing (early or mid-March). The harvest is rich, and the pepper is uniformly hot and fiery. The planting time is determined individually, taking into account the characteristics of a particular variety.
The following varieties are distinguished:
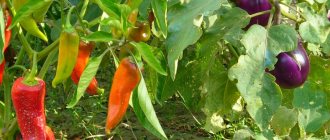
- Early ripening varieties are planted in mid-February and bear fruit in late May - June. Early varieties include Ogonyok, Medusa, Aladdin, Tabasco.
- Mid-season ones are planted in early to mid-March. These include the Holly Fish and the Queen of Spades.
- Late varieties are sown in the second half of March. This is Confetti, Bell, Salute, Variegated Troll.
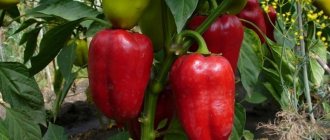
Traditionally, Ogonyok, Tabasco and Bell are grown on the windowsill. Other varieties are less in demand at home.
Selecting a location
The vegetable bears fruit well in greenhouse conditions and in open ground. Under favorable conditions, the harvest is rich, the pods are one to one, attractive in appearance. Valuable recommendations:
- Maintain the optimal temperature in winter – 18 degrees, in summer – 20-25 degrees.
- Grow the shrub in the light, but avoid exposure to ultraviolet radiation, otherwise its yield will decrease.
- Avoid drafts; when ventilating, temporarily move the pot to a quiet, windless place.
Preparing the container and soil
An excellent option for planting Chile is cells made of pressed peat. A separate container is provided for each seedling, since the plant needs space. As an alternative, boxes made of wood, plastic containers, disposable tableware, and medium-sized flower pots are used.
A prerequisite is the presence at the bottom of the container of drainage with a layer of 3-4 cm. Alternatively, river sand, expanded clay, charcoal or crushed slate are selected. The root system must breathe, and stagnation of moisture contributes to its further rotting.
The yield depends on the quality of the soil. To prepare a nutrient mixture, mix 2 parts each of peat, compost, turf soil, 1 part each of vermiculite and sand. Stir, place on top of the drainage, do not compact.
The soil must be disinfected before planting. How to do this - read here.
Selection, preparatory activities and planting of seeds
Before purchasing, make sure the seeds are suitable for home growing. Industrial varieties are more often used for open areas and greenhouses. They definitely don’t bear fruit on the windowsill.
Buy seeds from well-known manufacturers, do not skimp on your purchase. After opening the package, carefully examine each grain. They should be large, light, without suspicious spots, plaque, or deformation. Do not use doubtful seeds for sowing; they will still not give a good harvest.
Disinfect seeds before planting. To do this, dip them in a weak solution of potassium permanganate for 15 minutes. Remove and dry naturally. To increase the viability of each grain and the chances of germination, place it in gauze pre-moistened with water until young shoots appear.
When healthy seedlings grow from the seeds to 10-15 cm in height, transplant each into a separate pot. Follow these landing rules:
- Place drainage at the bottom with a layer of 3 cm.
- Place a small amount of soil on top.
- Make holes 5-7 cm deep.
- Place the plant with its roots in the ground in the center.
- Fill in and secure the stem.
- Water thoroughly with water at room temperature.
- Cover the container with cling film until the first shoots appear.
- The next watering is after 7 days, when the roots have expanded.
If the seedlings are over-watered in the first week, the root system begins to rot and the growth of the chili pepper stops. Severe drought is also harmful - it slows down growth and reduces yields.
Picking
When the seedlings get stronger and a young plant with 2-3 leaves is formed, transplant it into a separate pot. This process is called picking. Immediately after transplantation, the plant temporarily slows down its growth. Then why is this necessary? Picking strengthens and branches the root system, which in the future has a positive effect on productivity.
Valuable recommendations before and after picking:
- water the seedlings with water to plant the plants with their root system in a coma of earth;
- plant the seedlings with their roots in the central part of the permanent pot;
- after transplanting, water generously and do not touch for a week;
- Make sure that after picking the soil above the root system does not dry out.
Growing peppers by cuttings
To preserve all the properties of the chili pepper variety chosen for planting, replace sowing seeds with cuttings. Sequencing:
- Cut cuttings up to 10 cm from young shoots without fruit.
- Before planting, soak the branches for a day in a zircon solution (3 drops per 0.5 cup of water).
- Plant in the ground to a hole depth of 5-7 cm.
- Cover with soil and compact lightly.
- Water the plant generously.
- Replant as you grow (each time choose containers larger than the previous ones).
Preparing seeds for planting in the ground
Growing from seeds is the easiest way to get seedlings. Seeds can be pre-germinated or planted directly into the ground. If the seeds are obtained independently, they should first be prepared:
- inspect, discard small and damaged ones;
- soak in salted water and remove the surfaces, then rinse;
- soak in a solution of potassium permanganate for disinfection.
If the seeds were purchased in a good store and there are no complaints about their appearance, you can skip the above procedures. The selection and sanitary processing of seed material was carried out by the manufacturer.
To germinate, hot pepper seeds need to be placed between layers of wet cloth, napkin or cotton pad. Since the volume of water absorbed by such material is small, it should be wrapped in plastic film or a bag to prevent evaporation. Place the package or container with seeds in a dark, warm place for one or two days and monitor its condition - open it from time to time to ventilate, to prevent mold from appearing.
Maintenance and care
Chili peppers do not like sudden changes in temperature and drafts; they ripen faster under conditions of moderate humidity, light and heat. Mandatory conditions for its content:
- temperature during the day – 23-25 degrees, at night – at least 18 degrees;
- daylight hours - from 15 to 18 hours;
- the soil is moist, loose, but without excess moisture.
To make caring for peppers easy, use only healthy seeds or strong seedlings. Otherwise, even if you follow the planting rules, you can’t count on a rich harvest.
Temperature and lighting
The vegetable is best grown in spring and summer, since the days last longer and the plant needs light. Without light, the ovary is not accepted; the plant is small and rarely bears fruit. If you plant peppers in autumn or winter, create additional lighting - 1 hour in the morning and evening using special lamps (fluorescent, infrared or LED).
The plant is heat-loving, so maintain the indoor temperature at 22-25 degrees. You can harden seedlings at the stage of formation of 6 leaves - take the seedlings out to the balcony for 15-20 minutes, gradually increase this time interval. In this case, the chili pepper tolerates seasonal cooling better.
Watering and humidity
Water the soil as the top layer dries. Don't overdo it, or the roots will rot. After watering, allow time for excess liquid to drain into the tray, then remove it immediately.
When air humidity is low, the plant suffers. To maintain its vital activity and fertility, regularly spray the leaves with a spray bottle. Use water at room temperature. In summer, water the bushes daily, in winter 3-4 times a week.
Top dressing
With regular feeding of seedlings, the bush bears fruit better. The composition of fertilizers depends on the stage of the growing season of chili pepper:
- with intensive growth of green mass, choose organic or mineral fertilizers with nitrogen;
- During the formation of buds and fruits, give preference to fertilizers with a high concentration of potassium and complex fertilizers with fluorine.
Feed the plant once a week. Be sure to dilute concentrated fertilizers with water at the rate of 3-4 g per 1 liter of water.
Shaping and pinching
In the fall, after harvesting, shorten the crown by a third. This rejuvenation stimulates the future growth of pepper and its fruiting. During the winter period, the root system and branches are strengthened, the pepper regains its strength after the harvest season.
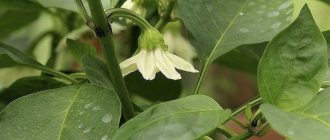
Flowering and pollination
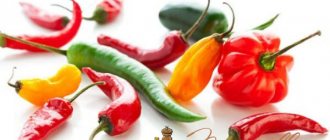
There are 2 types of chili - the inflorescences of which are self-pollinated or require forced irrigation with pollen. For balcony maintenance, it is advisable to choose the first option. Self-pollinating varieties include Medusa, Indian Summer, Ogonyok, and Ryabinushka.
Exotic varieties such as Filius blue, Variegated fish, Tabasco, etc. need additional pollination. In this case, shake each flowering so that the pollen falls on the uterus and the ovary of future fruits is formed.
Shake the pot periodically as the chili peppers bloom. In this way, the fruiting of the bush increases.
Common diseases
At home, pests quickly multiply on bushes, especially those that eat leaves. Low humidity, stable temperatures, lack of wind and natural competitors contribute to the spread of such diseases. Another danger is fungi and mold that appear on the surface of the soil and in unused volumes of soil.
On a note!
For this reason, containers that are too large should not be used. The excess volume will sour and become an “incubator” for diseases.
The spider mite appears first. It feeds on young leaves and flowers, so it is especially dangerous in the first stages of growth. The first sign is curling of the greens. Then a thin and transparent web becomes noticeable. To destroy the pest, you can sprinkle the soil with tobacco from a regular cigarette or spray the entire bush with phytoverm.
When young shoots appear, aphids become active. It can destroy established peppers in just a couple of days, so even at the beginning of flowering you need to carefully inspect the plantings. The main accumulation of the parasite will be localized on the inside of the leaf. A white coating and yellow dots may be noticeable here. During active reproduction, aphids form into clumps, and when observed, they move noticeably. Treating the bush itself will not produce results, since the insect lives in the soil. Watering with a weak solution of ammonia will be useful: 5 ml per 1 liter of warm water. The procedure is repeated twice with a break of a week.
Bacteria that cause a disease called “blackleg” are especially dangerous for hot peppers. One of the signs is blackening of the trunk at the base and slower growth. Gradually, a black coating will become noticeable and will actively spread. As a result, the bush stops receiving food and dies. The disease cannot be treated, but it is important to isolate infected plantings in a timely manner. The best prevention is the correct watering regime. If the soil does not have time to dry, it is better to refuse moisturizing.
Reproduction
Chili peppers of any variety reproduce in 2 ways:
- By cuttings . To do this, young shoots are cut off and kept in water until the root system is formed. Then they are planted separately, like a young plant.
- Seeds . They are bought in gardening stores, after processing they are buried in the ground and watered. All that remains is to wait for the first shoots. The seedlings are transferred to a new, larger pot.
It is recommended to replant the chili pepper annually in a large container, otherwise the bush will stop bearing fruit. Not immediately, but harvest volumes are noticeably decreasing with each season.
Fertilizing seedlings
The very first thing to do before sowing seeds is to prepare the soil for planting. Among fertilizers containing plant nutrients mainly in the form of organic compounds, manure and peat compost have proven themselves to be the best. For one square meter of land you need to apply from 3 to 4 kg of fertilizer. To return organic matter to the soil, it must be fertilized with straw with the addition of nitrogenous substances. Straw helps increase humus and improve soil structure. With this feeding, pepper seeds are well received.
To get healthy and strong seedlings, you need to feed the peppers correctly and in a timely manner. Thanks to a well-developed root system, which is formed by receiving the necessary microelements even at the development stage, plants adapt well to unfavorable environmental conditions. At this stage, you cannot stop feeding.
Urea and superphosphate are the most effective fertilizers for young plants, which cannot be said about potassium chloride. Its use can destroy seedlings.
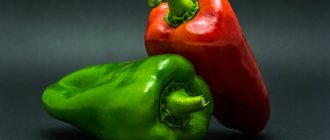
Harvesting
Productivity depends on the variety; for example, small-fruited pepper produces 100 pods per season. The plant does not bear fruit immediately. The first harvest can be harvested only after 2-3 years (with proper and regular care). On average, fruiting lasts for 5 years. Later, the number of pods per season decreases significantly.
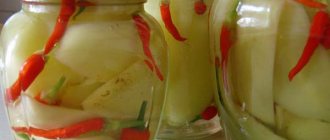
There are several periods of ripeness, which differ in the color of the Chili pods - at first it is green, but then turns red. In a cold place, the fruits are stored for several months without losing their beneficial properties. If desired, the pods can be frozen, pickled, or consumed fresh.
Natural fertilizers
(adsbygoogle = window.adsbygoogle || []).push({});
You can also feed hot peppers using folk remedies:
- Nettle infusion. A solution is prepared from one liter of water, 100 ml of nettle infusion and 20-30 grams of ash.
- Tea supplement. Mix 3 liters of water with one glass of brewed black tea and leave for 5 days.
- Banana fertilizer. The peel of this exotic fruit contains potassium. You can make a tincture from it or dry it well and crush it into powder. The crushed particles are added to the soil, and the plants are watered with the tincture. A tincture is prepared based on 3 liters of water and 2-3 banana peels. Everything is placed in one container and infused for three days. Important! If the soil was fertilized with banana peels, it is not advisable to use preparations containing potassium.
- Egg shells placed in compost are considered a good natural fertilizer. You can also make a tincture from it. For 3 liters of water you will need the shells of 3-4 eggs. You need to infuse the crushed shells in water for at least three days and always in a dark place. It is better to fertilize with eggs when growing seedlings.
- Onion peel tincture. Prepared at the rate of 20 g of husk per 5 liters of water. Before feeding peppers with it, it must be infused for 4-5 days.
- Green tea made from plantain, nettle, woodlice, dandelion, coltsfoot. Chop all the plants and add cold water. After a week, feed the peppers with vitamin tea at the rate of 1 liter of herbal tea per plant.
Of course, fertilizing with ash has a positive effect on hot peppers. Being a source of potassium and phosphorus, it stimulates plant growth and improves the taste of fruits. Peppers fed with ash are able to adapt to unfavorable environmental conditions.
Diseases and pests of chili pepper
Pepper has a strong immune system. Due to the specific aroma, the risk of interference from harmful insects is also minimal. And yet, under certain conditions, the plant can get sick and die. Among the provoking factors:
- Black leg . The reason is excessive watering of the bush. Saving peppers is problematic, so it is better to immediately determine the time and frequency of watering.
- Spider mite . The reason is the activity of the parasite in dry air. Due to lack of oxygen, the leaves turn yellow, dry out and fall off. Treatment is effective if fungicidal drugs are used.
- Midges . The reason is that insects appear from neighboring crops. The plant must be thoroughly treated with soapy water.
- Plant aphids. The reason is a violation of the care regimen. Parasites feed on young shoots and can cause the death of the entire bush.
Black leg of pepper
Spider mite on pepper
Black midge is the enemy of many plants, and pepper is no exception.
Aphids on a pepper leaf
To minimize the risk of disease, carry out preventive spraying of bushes with low concentration fungicidal preparations.
Secrets for growing chili peppers
For beginning gardeners, the plant does not begin to bear fruit even after 3 years. To avoid mistakes, follow the recommendations of professionals:
- In winter, place the pepper on the windowsill on the south side, and if there is not enough light, use artificial lighting.
- When flowers appear, keep chili pepper bushes at a distance. For better ovaries, shake the crowns regularly.
- To ensure seedlings germinate quickly, place them on a well-lit surface and increase daylight hours.
- To speed up fruiting, control watering. The soil should not be dry, but excess moisture is also harmful.
Advantages and disadvantages of home growing
Before you decide to have your own vegetable garden on the windowsill, study the advantages and disadvantages of such an idea. Start with the positives:
- good harvest without nitrates;
- excellent taste of homemade pepper;
- fruiting for 5 years;
- ease of care;
- strong plant immunity;
- aesthetic appearance of the bush;
- prevention of viruses, influenza, ARVI.
There are some disadvantages that it is also better not to forget about before buying chili pepper:
- small fruits;
- fruiting once a year;
- the need for space on the windowsill;
- additional lighting;
- not always the desired taste.
Choosing a variety
The following varieties are suitable for growing indoors:
- Treasure Island;
- Martin;
- Sweeties;
- Firstborn;
- Firstborn of Siberia;
- Pepper for the boss.
All of these varieties are small-leaved , and therefore they feel great when grown on a windowsill, where, unlike open air, there is little sunlight.
In addition, the listed varieties are self-pollinating , which means they can form fruits in the room.