For many people, the arrival of spring is associated with the beginning of gardening work. But what to do if you don’t have your own plot of land, but you still want to grow your favorite vegetables with your own hands? In this case, for growing, for example, sweet peppers at home, a balcony is suitable.
Pepper is a very moisture-loving and light-loving plant that easily tolerates light shading. A balcony is suitable for growing it: located on the south, east or west side. To get a pepper harvest on a balcony located on the shaded side of the house, you will need to organize additional lighting.
How to prepare a balcony for growing peppers
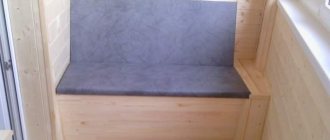
To grow garden crops on the balcony, the most open and illuminated place is allocated, usually against the wall on both sides of the window or right next to the glazing. The balcony is equipped with :
- shelving;
- shelves;
- high tables.
You can make them yourself from bars and boards or weld them from pipes, you can use them. The distance between the shelves is calculated in such a way that boxes and pots fit freely on them, and there is enough space for plants to grow.
Also, for growing peppers, mini greenhouses designed for balconies are used . They are convenient because in early spring, when the air temperature is low, seedlings are grown in them, and when it gets warmer, the film cover is removed and the greenhouse is used as a regular rack for boxes with peppers. You can make this design yourself.
Advice. On too sunny days, the heat inhibits the development of peppers, and the leaves may droop from the heat. At such moments, plants need light shading, so you should equip the windows with blinds or light curtains.
Pepper propagation by cuttings
It is important to do cuttings if you want to propagate vegetation. To make cuttings, the shoots on which 2-3 leaves have developed are cut from the overgrown mother bush. The cutting must have at least 2 internodes. Immerse the cutting in a glass of water for a couple of days to stimulate root growth.
Pepper cuttings
Prepare a container for planting: pour in soil mixed with vermiculite, make 3-4 cm indentations. Lower the cutting into the center, sprinkle with earth on all sides, press the stem with your fingers. Water the soil a little and cover the cuttings with a bag to create a greenhouse effect. If this is not done, it will be more difficult for the plant to adapt. Cuttings can take 3 to 4 weeks to take root. They are watered with warm water a couple of times a week. When the plants have matured and become stronger, the covering material is removed, gradually hardening the young seedlings.
Keep in mind that it is not difficult to grow chili peppers by cuttings, but not all branches will take root, some will wither, and the strongest ones will remain.
Growing peppers at home
Features of growing peppers on the balcony
When growing vegetables on the balcony, you need to take into account that the crop is heat-loving and light-loving . Otherwise, this process is no different from the process of growing ordinary seedlings.
Soil preparation
You can prepare the soil for pepper yourself by mixing peat with sand and humus, or you can purchase it in a store. Suitable soil is intended for planting tomatoes, eggplants and peppers. Before filling wooden boxes or plastic cups with soil, it must be disinfected. It is enough to pour boiling water over the ground. A drainage layer must be poured onto the bottom of the container.
Containers for growing seedlings
How to grow pepper seedlings:
- wooden boxes;
- peat cups;
- peat tablets;
- special cassettes;
- plastic cups.
Seed preparation
Pepper seeds germinate very slowly and unevenly, so to speed up this process, they should be prepared for sowing. In the first ten days of February, the seeds are soaked in a weak solution of potassium permanganate for 3 hours. After this time, the floating seeds are thrown away, and only those that have sunk to the bottom are taken for germination.
How to prepare pepper seeds for sowing:
- The seeds are dried and soaked in the growth stimulator Zircon or Epin. When carrying out this procedure, you should monitor the dosage of the prepared solution. Zircona is diluted in water at the rate of 1 drop per 300 ml of water, and Epin - 1 drop per 100 ml of water. Processing time in both cases is 18 hours.
- The seeds are placed in a white cotton cloth, folded in several layers and soaked in warm water. Then the wet bundle is wrapped in a plastic bag and left in a warm place, usually near a heating radiator.
- After 3 days, the fabric can be unrolled and the condition of the seed can be checked. If a small part of the seeds sprouted, they are left for another 1-2 days.
- After germination, the seeds undergo hardening, which will help future plants survive replanting. They are placed on the bottom shelf of the refrigerator and left for 3 days, after which the seed is completely ready for sowing.
Picking seedlings
Picking is carried out after the appearance of five true leaves . The strongest seedlings are selected.
The picking process, step by step, looks like this:
- Prepared containers with soil are filled with cold water 24 hours before the procedure.
- A depression is made in the soil.
- A couple of hours before picking, the seedlings are irrigated.
- The seedling is carefully removed from the soil, along with the soil. Its root is pinched by a third. Carefully placed in a new container. The main root should not bend in the hole, and the leaves should rise 15–20 mm above the ground.
- The bud is compacted around the seedling and watered with warm water.
- In new containers, seedlings are placed on a warm windowsill.
Hardening of seedlings
14 days before transplanting young plants into pots, a hardening procedure is carried out . They are taken out into the open air, but only if the temperature outside is high enough. You can leave them for the whole day and bring them indoors in the evening.
In addition to the hardening procedure, it is recommended to fertilize with potassium salt seven days before transplanting, and treatment with growth stimulants the day before planting. This way the seedlings will receive protection from diseases and will be more resistant to the external environment.
Pepper transplant
Transplantation is carried out with the appearance of the 12th true leaf . The kidneys should also be visible in the sinuses. Usually the height of such seedlings is about a quarter of a meter. This is what 55-day-old seedlings look like.
They are planted in a permanent place in wide ceramic pots . This material will provide temperature support for the root system at a certain comfortable level. The soil used is the same as for seedlings, and the process looks similar to picking, but without pinching the root.
Peppers are transplanted on a cloudy day so that the sun does not oppress young plants that have undergone a stressful operation. If the weather is too hot, you should slightly shade the windows using blinds.
Transplanting:
- The soil in prepared boxes with soil and in containers with seedlings is well moistened.
- A hole is made in the ground with a plastic or wooden stick.
- The root of the plant is pryed with a stick as deep as possible and removed with a small lump of earth.
- Using scissors, trim the tip of the root to no more than ¼ of its length.
- Taking the sprout with your fingers, it is placed in the prepared hole up to the cotyledon leaves.
- The stick is stuck into the soil at a distance of 2-3 cm from the plant at an angle, and with a slight movement the soil moves towards the stem.
- Carefully taking the sprout with two fingers, pull it up so that the cotyledon leaves are 2 cm above the soil. Thanks to this, the root in the ground will straighten out and take a vertical position.
- The soil at the base of the sprout is gently pressed down with your fingers.
Reference. Seedlings are planted in pots with a capacity of 2 liters one root at a time, and in boxes at a distance of 30 cm from one another.
Now the planted plants are left on a slightly shaded balcony for 2-3 days , and they are provided with an air temperature of 19-21°C. Colder temperatures will promote the formation of blackleg at an early stage of development, which in most cases leads to the death of young plants. You should also maintain moderate soil moisture at this stage of cultivation to prevent root rot.
Growing a Rich Harvest
Depending on the air temperature outside and on the balcony (loggia), the initial stage of its development and growth of bell peppers, as a rule, takes place on the windowsill of the apartment. Containers with young plants should be taken out of the house onto the balcony and placed in a permanent place no earlier than the air temperature reaches the optimal values mentioned above. Otherwise, the pepper will stop growing, and the flowering plant will shed its flowers and not form ovaries.
Having placed containers with plants on the balcony in permanent places where they grow, it is necessary to organize optimal lighting. If the side of the house is south (sunny), it will be enough to install a reflective screen made of frosted foil or white matte film behind the bushes. If the Sun is a rare guest on the balcony, it is necessary to equip artificial lighting at the rate of 250-300 W per 1 sq. m of plants. For this, fluorescent daylight lamps are usually used in a combination of 2 warm light lamps + 1 fluorescent (neutral) light lamp. Such a “package” of lamps has a color temperature close to the color temperature of the midday Sun (5400 K). As an additional source of infrared radiation, an incandescent lamp with a power of 60-100 W can be included in a package of fluorescent lamps. At the same time, it should be placed at such a distance from the tops of the plants that it does not cause burns.
The optimal method of watering is watering from a pan, when water and nutrients flow to the roots from below, and are not washed out of the soil, as is the case when watering from above. Pepper is quite drought tolerant. But this does not mean that you can forget to water it. The plant especially urgently needs watering during the period of fruit formation and development. At the same time, fertilizing with organic and mineral fertilizers is carried out (optional). A plant that has been properly cared for during its growing season produces an abundant harvest of fruits of the correct form characteristic of this variety. If the fruits are curved, elongated, or have flaws, this indicates a deficiency of one or more essential growth factors.
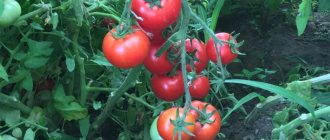
If you grow bell peppers on the balcony of your home, the risk of pest damage is minimal. However, it should be remembered that sweet peppers are affected by the same pests as tomatoes: tomato bollworm (caradine bollworm), nematodes (roundworms), cotton bollworm (butterfly), viral, fungal and bacterial diseases.
Therefore, close proximity to tomatoes is not advisable.
Particular attention should be paid to the possibility of cross-pollination of plants with sweet and hot fruits. If they are close together, all the fruits will be hot
Growing different varieties of only sweet peppers on the same balcony will also not work. All fruits on the plants will be of an “average” indefinite shape, different colors and uncharacteristic taste. Therefore, grow only one variety.
Rules for caring for peppers on the balcony
As mentioned earlier, pepper is a heat-loving plant. For normal growth and development of the crop, it is necessary to maintain the daytime temperature at +25...+27°C, and the night temperature at +10...+15°C. In the summer, the crop can live peacefully on the balcony, but with the arrival of cold weather, it is advisable to move it to the southern windowsill, away from drafts.
A light-loving plant needs a twelve-hour day of light . During the day, it is recommended to turn the pot of pepper on different sides towards the window. When daylight hours are short, use white fluorescent lamps.
Important! Diseased, dry shoots and leaves, as well as branches without fruits, should be promptly removed.
Watering
Bell peppers love moisture; if there is a lack of it, the walls of the fruit become thin and lose their taste . Since the root system is close to the soil surface, it should be watered in small portions. During the period of flowering and ovary development, about 1 liter of water per day is poured under each bush. Particularly abundant watering is carried out on hot days, sometimes up to 2 liters per day.
Advice. On hot days, you can spray the air on the balcony, but you should make sure that the leaves remain dry by night.
Mulching the soil will help retain moisture in the soil . Chopped straw or peat is used as mulch. Since the root of the plant is located near the surface, it is better not to loosen, or do it carefully so as not to damage the roots. Mulching can partially replace loosening.
Feeding
During the growing season, peppers are fed three times:
- a week after planting the seedlings;
- at the beginning of flowering;
- when the first ovary appears.
Complex fertilizers for vegetable crops are used for fertilizing. Since in a cramped space with a lack of soil, plants may not receive enough useful elements, additional fertilizing is carried out :
- during the period of active growth, nitrogen fertilizers are applied to the soil;
- From the moment the ovaries appear, fertilizers containing phosphorus are added.
Pruning and shaping the bush
With proper care, the pepper begins to branch, releasing new shoots . Rapid plant growth can negatively affect the yield, so the bush must be formed correctly.
Pinching of the bush is carried out when it reaches 100 cm in height . In this way, its growth is regulated. For normal growth and development of shoots, at the moment the buds appear, the lowest ones are removed (one per stem). Side shoots and leaves are regularly removed up to the first branch.
Tips for forming a bell pepper bush:
- All stepsons appearing in the leaf axils are removed.
- All leaves below the first branch are cut off.
- The bush is formed from only two shoots.
- The first flowers are removed at the bud stage.
- On a weaker branch, the tip is pinched above the first ovary.
A month before the end of the growing season, around mid-August, all the tops are pinched off and the plant's growth stops. Thanks to this, already formed ovaries develop faster, and new ones that do not have time to mature do not appear.
If tall varieties of peppers are grown on the balcony, you need to leave more space for them to form , and also tie them up as they grow. A peg is stuck next to the trunk, and the stems of the plant are tied to it with a soft rope. The shoots should be tied under the ovary so that the ripening peppers do not pull the shoots down and they do not break under the weight of the growing fruits.
Transfer
Balcony peppers are transplanted annually in the spring. You can leave the pot the same or take a larger size. The bush is removed from the old container by transshipment (the earthen ball is not destroyed so that the roots are not injured). A two-year-old plant is no longer replanted, but is replaced with a new one, since the crop is two-year-old.
Disease and pest control
Any disease or lack of microelements immediately affects the appearance of the foliage.
Note! Peppers grown on the balcony are practically not damaged by pests, and with proper preparation of seeds and care for adult plants, they are not affected by diseases.
Problems encountered when growing peppers on the balcony:
- the leaves curl and are framed by a dry edging (indicates a lack of potassium, you need to add potassium nitrate or potassium sulfate);
- the foliage is small, grayish in color (lack of nitrogen, you need to feed with ammonium nitrate containing 35% nitrogen);
- the inner part of the foliage has a purple tint (lack of phosphorus, 16–18% phosphoric acid is added);
- the bush has acquired a marbled tint (lack of magnesium, add magnesium sulfate with watering);
- leaves with a white dot, the stem has turned black (moisture stagnates in the pot, watering should be reduced);
- the plant is covered with small cobwebs (spider mites have settled in, they are treated with karbofoska or keltan, they are also used for preventive purposes).
Important! Do not use potassium chloride and potassium salt, they are harmful to the root system of peppers.
How to care for mature plants
Basic pepper care consists of watering, fertilizing and loosening the soil. Sometimes there is a need for protection from diseases and pests.
Watering and fertilizing
Bell pepper is demanding on soil moisture. With a lack of water, the fruits form slowly and their taste becomes less pronounced. But excessive hydration is dangerous for it. The frequency of watering is approximately once every 2 days.
To prevent moisture from the soil from evaporating too quickly, mulch the surface with peat, humus or finely chopped straw.
The presence of all nutrients in the soil is an important condition for the proper growth of pepper and a rich harvest. Carry out the first feeding 2 weeks after picking the seedlings. In the future, fertilize once every 15–20 days.
To avoid burning the roots, pour the fertilizer only into moist soil, after preliminary watering.
For fertilizing, you can use ready-made special mixtures or the following compositions:
Herbal infusion
Nettle
Plantain
Clover
Infusions of nettle, plantain, and clover are useful for pepper. Add 2 - 3 handfuls of raw materials per 1 liter of water. Heat the mixture to a boil and leave until it cools completely. Dilute the resulting infusion in a ratio of 1:3. Use this fertilizer before the ovaries begin to form.
Variety selection
Not all varieties are suitable for growing vegetables at home. They should be short, no more than 100 cm, and with small leaves, so that the process of photosynthesis occurs efficiently in limited light.
Features of varieties for balconies
To grow a vegetable in non-standard conditions, you need to be careful when choosing a variety. Suitable for balconies :
- Peppers that bear fruit for a long time. Hot peppers produce crops over a longer period of time than bell peppers.
- With non-spreading roots. Otherwise, the culture may not have enough space in the container and will die.
- Determinants. Tall bushes will not take root in pots. It is desirable that the height of the bush is 40-50 cm.
For reference! It is advisable that the balcony faces the west, east or south so that the plants have enough light.
Hot peppers should not grow together with sweet ones, otherwise cross-pollination will occur and the flavors will mix . On the balcony you can cultivate not only decorative, but also edible varieties of hot pepper, not so beautiful, but productive. The bushes of such plants are usually taller than average, so they will require large containers. Ornamental peppers can grow in a 1.5 liter pot, while garden peppers need about 12.
Vegetables that are grown on the balcony only in summer are considered annual.
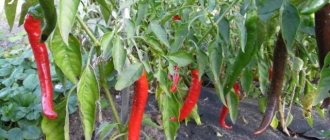
Hot balcony peppers
One of the most popular is the variety of hot pepper known as “Ogonyok”. But other varieties of the pungent family deserve no less attention:
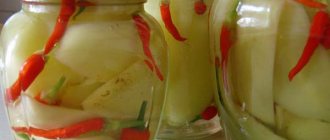
- Hungarian yellow . This variety does not look very original at home, but is good for the balcony. Distributed throughout the world. It produces voluminous yellow or red fruits weighing about 60 g. You can collect the planting material yourself; ripe red peppers are suitable for this. Canned food and various dishes are prepared from the fruits. The variety is early ripening and cold-resistant. The harvest can be harvested 3 months after planting. The bushes are low, up to 50 cm.
- Orange Jalapeño . Seeds germinate in 14 days. The size of the fruit is 8 cm. The fruits begin to form 2 weeks after planting and are formed until the beginning of autumn. Sowing is carried out to a depth of 6 mm in a container 10 cm high. The seedlings are transplanted when they extend to 10 cm and have at least 2 leaves. Spicy variety: 2.5 – 9 units on the Scoville scale.
- Early Jalapeño . The fruits ripen quickly, hence the name. The fruits are thick-walled, conical in shape with a blunt end. Sharpness – 8 units. It is grown in the same way as the previous variety.
- Purple Jalapeño . Jalapeno Purpl is sometimes popularly called purple. It is distinguished by dense juicy fruits with a pungency of up to 8 units. Large peppers are very popular in cooking.
- Yellow Jalapeño . Pepper with early ripening. During development, the fruits change color from green to yellow. They can be harvested when they are technically mature. The fruits are formed 8 weeks after planting in a large container. Sharpness: 2.5-10 units.
- Magic bouquet . The name of the variety appeared due to this peculiarity of the fruits: they are collected in bunches of 5-10 pieces and directed upward. Pepper is classified as mid-early. The height of the bush is approximately 75 cm. The fruits are thin, their length is 10 cm, weight - 15 g, the color of mature pods is red. You can collect them green. The variety is used in cooking and is a good medicine.
- Fire volcano . Early ripe pepper. The height of the bush is 120 cm, which is impractical for a small balcony. The main advantage of the variety is its high yield. The fruits are large, and this is greatly appreciated by gardeners of the former USSR. Pod length 20 cm, weight 25 g. Ripe fruits are red. The variety is an excellent ingredient in various dishes, preserves and seasonings.
For reference. Jalapeño (correctly spelled: "Jajapeno"). His homeland is Spanish-speaking Mexico. These are several varieties, varying in color (from purple to red), degree of pungency and ripening time. In general, the group is considered large-fruited and medium in pungency.
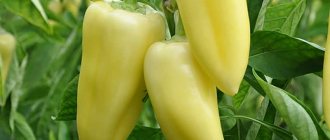
Sweet balcony peppers
Among the sweet varieties, we can recommend the following::
- Maikopsky 470 . High yielding pepper. The growing season is 110-120 days. The height of the bush is 45 cm. The shape of the pods can be different: tetrahedrons or pyramids. Ripe fruits are dark red, have juicy pulp and a sweet taste.
- Winnie the Pooh . Small pepper. The mass of juicy fleshy fruits is approximately 45-60 grams. The walls have a thickness of 5-8 mm. Fruit ripening time is 107-115 days. The bushes are low, only 30 cm, and look like indoor plants.
- Mysterious Island . One of the earliest varieties. The harvest can be harvested on the 85th day after planting. The height of small bouquet bushes is 35-45 cm. The pods are collected in a bouquet, and their noses point upward. One fruit weighs up to 80 g.
- Dwarf . A real balcony option. This is a sparsely leafy determinant with a height of up to 40 cm. The weight of the pod is 50-60 g. The fruits have the shape of a blunt cone. The thickness of the pulp is 6-8 cm. The variety is characterized by a high content of ascorbic acid.
- Agapovsky . An early variety with a growing season of 100 days. Large peppers weigh up to 120 g. Medium, neat bushes produce prism-shaped fruits. The pods are covered with smooth, shiny skin.
- Firstborn of Siberia . A variety adapted to difficult climates is also suitable for balconies. The height of the spreading semi-standard bushes is approximately 45 cm. The mass of pyramidal peppers is 40-68 g. The walls are dense, 8-10 mm thick. Environmental changes do not affect crop yields.
- Pinocchio . A common hybrid with conical, smooth, dark red fruits that look very attractive. Wall thickness 7-8 mm. The flesh of the peppers is juicy and sweet. The height of the bush reaches 1 m, so the plant needs support.
- Watercolor . A sweet variety with oblong pods 10-15 cm long. Very light pods (20-30 g) contain a lot of sugar. The height of the bush is 50-80 cm, the foliage is average. The plant produces a bountiful harvest: 30-60 fruits per bush. The color of the fruit is red-violet.
- Treasure Island . The main advantage of the variety is its rapid adaptation to external conditions. The fruits are shaped like a blunt cone and weigh 50-60 grams. They are covered with a smooth skin, and inside there is a fleshy, pleasant-tasting pulp. The color of the peppers is red with a purple tint. Bush height 40-60 cm.
- Gift from Moldova . Sweet pepper with drooping conical red fruits. Standard bushes with a height of 40 cm will be a good decoration for the balcony. The average fruit weight is 100-145 g. The variety is classified as mid-season.
Interesting things on the site:
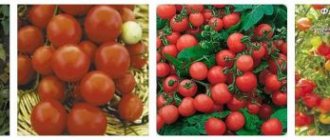
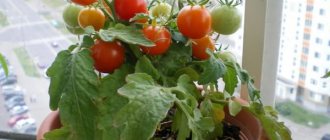
Is it possible to grow tomatoes on the balcony?
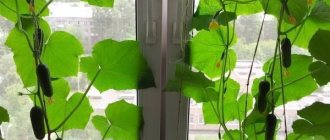
Is it possible to grow cucumbers on the balcony?
Planting peppers
Prepared and processed seeds are wrapped in a damp cloth or gauze, placed in a plastic bag, and stored in a warm and dark place. The first shoots appear on days 7-10. During this period, it is important to ensure that the tissue with the seeds does not dry out.
After the first signs of germination appear, the seeds are transplanted into the ground. To do this, the prepared cups are filled 1/3 with a drainage layer. Pebbles, broken bricks, and fragments of ceramics can be used as drainage.
The seeds are laid on the surface of the soil, lightly sprinkled with soil and sprayed with warm water. Future seedlings are covered with glass or film and again put away in a warm and dark place. On the 7-8th day, after the first shoots appear, the pots with seedlings are transferred to a sunny place away from temperature changes and drafts. After 1-2 true sheets appear, the glass or film is removed.
Helpful information
Daria Vorontsova
Amateur gardener. He is interested in growing various greens at home.
You can grow seedlings without pre-soaking, sowing the seeds directly into the ground or peat bowls. In this case, seedlings will appear much later, approximately 20-25 days after sowing.
Additional recommendations
Some tips on how to grow a strong, well-bearing plant on the balcony:
- Varieties intended for home cultivation are self-pollinating, so if you decide to collect seeds yourself, do not keep bushes of different varieties nearby.
- With the appearance of the first ovary, thin it out so that 3-4 fruits remain. This way you won't overload the plant.
- To obtain seeds for next year, collect ripe fruits. Carefully trim the stalk and remove the seed pod. Leave the seeds to dry for 4-5 days at a temperature of +25°C to +30°C; after separating the seeds, place them in paper bags and store in a dark, warm place. The shelf life of seeds is up to 5 years.
- Pepper is a biennial plant, but once a year it requires replanting in new soil.
Harvesting
It is recommended to immediately cut off ripe fruits with a knife so as not to overload the bush. You can wait for biological ripeness or collect it technologically. Most varieties ripen well when cut. Timely harvesting reduces nutrient costs and increases productivity.
If you want to collect your own seed, you need to make sure that it is not a hybrid, since the characteristics of the new plant can be very different from the mother plant. Dry cut ripe peppers for 4 days at +25-30 °C, then cut in half and collect the seeds. If necessary, dry it completely, put it in a paper envelope, sign the date of collection and variety, and put it in a dark, dry place. The shelf life of seeds is 5 years.
Growing bell peppers at home on a windowsill is much easier than in open ground, since if the process is properly organized there are no unfavorable factors. The choice of variety also affects the yield - there are varieties specially bred for home use.
Pepper is a healthy product with unsurpassed taste. The fruit contains active substances necessary for the full functioning of the human body. There are a huge number of species and hybrids of this plant in the world. Gardeners all over the world love to grow this unpretentious bush.
I consider bell pepper one of the most popular and delicious plant varieties. It can be grown not only in open ground, but also on a balcony or windowsill. Growing bell peppers at home is not difficult. In return, he will give you tasty and aromatic fruits.
How to grow sweet peppers at home will tell you certain rules, guided by which, the plant will begin to bear fruit abundantly.
Reviews
This is what experienced “balcony” gardeners say about growing crops at home, the varieties planted and caring for the crop.
Lyudmila Borisovna, Bryansk : “I often grow “Gift of Moldova” on the balcony and have already mastered all the nuances of caring for the variety. For cooking, it is indispensable for us. The peppers are beautiful and uniform, and we love stuffing them. There are no major difficulties with it, just remember to feed it and water it drip-wise. It bears fruit consistently and has never failed.”
Nailya, Izhevsk : “In 2013, I dug up hot peppers from the garden and planted them on the balcony. I have been collecting fruits for 2 winters already. It looks beautiful and you can always eat juicy peppers. The flowers are just a sight for sore eyes!”
Tamara, Tutaev : “I never had a dacha, but I wanted vegetables, so I adapted a balcony for this purpose. Most of all, I like to plant determinate peppers - they are not capricious and it is very profitable to grow them. Mine generally like hot peppers, especially Jalapeños. I have other crops growing on my balcony. It is quite possible to organize a small vegetable garden at home; everyone around me was convinced of this.”
Video tips from experienced gardeners
How to grow bell peppers on a city balcony:
Vegetable garden on the balcony:
Thus, a competent approach to choosing a variety, monitoring the microclimate on the balcony and proper care will allow you to get a good harvest of pepper on several square meters of area. Of course, it will not save your family budget, but it will certainly please you with its presence. Add to it a few pots of herbs, indoor tomatoes - and a delicious salad will not keep you waiting even in winter!
YOU MAY ALSO BE INTERESTED
Readiness #1
A few words about seeds
- In order for your “cool pepper” to be truly cool and not get sick, keep the seeds in potassium permanganate (2%) and soak in a solution of “Zircon” (1 drop per 300 ml of water) or “Epin” (2 drops per 100 ml ). Soaking time is at least 24 hours.
- Place the seeds in damp gauze and send them to a warm but dark place for three days. Temperature can vary between +20 – +25 °C.
Do not allow the seeds to dry out and constantly moisten the gauze with warm water.
Setting the stage
GreenUp - soil for seedlings (price - from 103 rubles)
The soil should have an acidity of 6.0 to 7.0; soil that is too acidic requires liming. If you take soil from the garden, prepare it in advance. Apply organic fertilizers, and in the fall - potash and phosphorus.
To prepare the soil yourself, take turf soil, humus and sifted sand in a ratio of 2:1:1.
I take turf soil where clover grows, add ash (1 cup for every 5 kg of soil) and dolomite flour (lime) at the rate of 8 grams per 0.5 kg of soil.
For peppers, you can purchase special soil “Ogordnik” or “Terra-Vita”.
From personal experience I can say that hydrogels for home gardening have an excellent effect. When mixed with soil, they absorb excess moisture, making the soil loose.
Comparison table of ready-made soils