What it is?
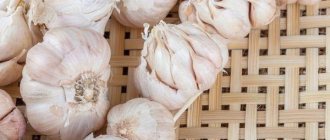
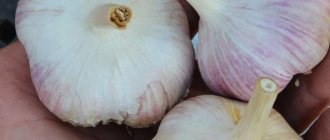
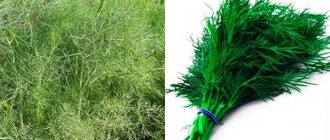
Spring garlic is a frost-resistant perennial plant of the lily family . It has a complex ovoid bulb, which is shrouded in several dry films. The bulb itself consists of cloves (so-called seeds), also covered with films. Garlic has tough, narrow leaves and a straight stem.
White or purple flowers are collected in inflorescences - an umbrella, in which small 3 mm bulbs develop. The plant has a specific smell. Spring garlic is called spring garlic because it is planted in the spring after the soil thaws.
This is the first difference from winter crops, which are planted in September-October. In spring varieties, the number of cloves is greater and they are arranged chaotically. This garlic does not have a stem in the middle.
Spring garlic has a soft stump with a small thickness, while winter garlic has a hard and thick stump . Winter varieties can withstand frosts of -20°C, while spring varieties have low frost resistance. We talked in more detail about the differences between winter and spring garlic in a separate article.
As you know, garlic is often used to treat various diseases, but we should not forget about contraindications, and also that sometimes this plant causes an allergic reaction in adults and children. You will find more information about this in separate articles on our portal.
Features of spring garlic
Summer, or as it is called, spring garlic, is planted in the spring. The harvest is harvested at the end of August or at the beginning of September, depending on climatic conditions and characteristics of the variety.
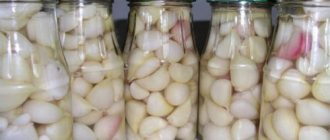
In small heads, up to 16-20 teeth of different sizes are formed. Spring varieties do not produce shoots (the exception is the Gulliver variety), and are inferior to winter garlic in head size, clove size, and yield indicators. But such a vegetable can be stored for a long time (up to a year), without losing its taste and pungency.
It is believed that the dense pulp of the slices of summer varieties contains more useful substances. We wrote in detail about the differences between spring (spring) garlic and winter garlic in this article.
Since plants do not shoot arrows, it is not possible to use air bulbs for propagation. The only planting option is cloves, but since there are a lot of them in the bulb, there are no problems with planting material.
On a note! Summer varieties planted on open ground ridges are resistant to return frosts and are not afraid of spring cold snaps.
Like many other vegetable crops, garlic is classified according to ripening time and divided into three main groups (indicated in days):
- early - 80-100;
- mid-season - 100-115;
- late - over 115.
A large number of spring varieties of vegetables have been bred, while many summer residents grow garlic without even knowing which variety is growing on the plot. It is recommended to rejuvenate old plantings every 3-4 years and purchase seed material from specialized nurseries and collectors.
The best varieties
All varieties of spring garlic developed today are distinguished by their good tolerance of spring frosts. There are many varieties of spring garlic that gardeners love to grow. These include:
- Abrek;
- Kledor;
- Elenovsky;
- Aleysky;
- Victorio;
- Ershovsky.
Let's look at the features of each variety.
Abrek
One head of the Abrek variety most often contains 15 cloves , which are formed into a flattened-round bulb weighing 30 g. It is covered with white dry scales. The pulp is dense, white and pungent in taste.
The Abrek variety is considered the best due to its high yield of up to 1 kg/m2 and long-term storage of up to 7 months. In many ways, Aleysky garlic is considered the best because of its resistance to sudden temperature changes.
Kledor
The elite mid-season variety Kledor has a head with a diameter of 5-6 cm, which contains about 20 cloves. They are arranged in a spiral. The pulp of garlic is white-cream, dense structure, mildly spicy taste . This variety stores well, stores well and has excellent taste.
Important : the Kledor variety is very resistant to bacterial and fungal diseases.
Elenovsky
The shape of the Elenovsky garlic bulb is rounded-flat or rounded . Weighs 30-40 g. It most often contains 25 pieces of creamy pink semi-sharp cloves. The shelf life can be up to 2 years. The variety is characterized by high yield per 1 hectare - up to 3.7 tons of bulbs.
Aleysky
With proper care, Aleisky garlic gives a good harvest. The heads are dense, weighing up to 35 g, and have a bitter taste. On average there are 19 pieces. It is well preserved, but is not resistant to fusarium and bacterial rot.
Victorio
Victorio garlic has a moderately pungent taste and yellowish-white, dense bulbs . Their weight reaches 40 g, they have from 10 to 13 cloves. Garlic keeps well for 8 months. Advantages: high yield and disease resistance.
Ershovsky
The Ershovsky variety has small snow-white heads containing from 18 to 25 semi-sharp cloves. This garlic stands out:
- high productivity;
- excellent immunity to diseases;
- versatility in use.
Caring for spring garlic after planting in the ground
Spring garlic is a crop that, although it can fight frosts, does not like them very much, therefore, planting will need to be delayed until the air temperature stops dropping below 5°C.
After the landing takes place, you will need to carry out only a few regular procedures:
- watering;
- feeding;
- loosening the soil;
- removing weeds from the soil.
Loosening the soil
Mulching
However, two of the above problems can be solved at once through mulching - covering the ground with mulch, which can be:
- agro-fabric;
- sawdust;
- straw;
- hay;
- humus;
- peat;
- spruce branches, etc.
Not only will mulch prevent weeds from growing, it will also retain moisture in the soil, which you should abundantly supply spring garlic with throughout most of the growing season. The thickness of the layer covering the ground should ideally be at least 3 centimeters.
You can mulch garlic using various materials, the most affordable of which, perhaps, is straw, which is sold everywhere for mere pennies.
Peat prices
peat
Watering
What else needs to be done is to water the beds properly. The smarter you apply moisture to them, the more abundant the harvest you will get.
Table 3. How to water garlic correctly
| First growth phase | Second growth phase |
In the first phase of garlic growth, when the crop is growing green mass, watering should be especially abundant. A signal that you are not watering your garlic enough can be the tips of the tops, which:
| The second part of the growing season involves active growth of the bulbous part, therefore, heavy watering should be replaced with moderate ones. So, provided that it periodically rains outside, it is better not to water it additionally at all, otherwise excess moisture will lead to the development of various diseases typical of this crop. |
The amount of watering of garlic should correspond to the growth and development phase of the plant we are considering.
Fertilizing beds
As soon as each garlic seedling produces several leaves, it is time to add nitrogen-containing fertilizers to the soil, for example:
- solution of mullein and water;
- humus in its pure form;
- mineral industrial mixtures;
- an infusion of herbs collected from the garden.
Please note: it is strictly forbidden to use fresh manure, as this environment is too aggressive for garlic.
Two weeks after the first feeding procedure, you will have to repeat everything, preferably using liquid feeding.
At the end of June, garlic begins to form cloves, therefore, it is very important to saturate it with potassium and phosphorus in a timely manner:
- industrial production;
- contained in simple wood ash left after lighting the stove.
Garlic must be fertilized not only before planting, but also many times after it is placed in the ground.
The application of mineral fertilizers must be carried out with great care, since their excess in garlic will directly harm your health.
Prices for mineral fertilizers
mineral fertilizers
Agricultural cultivation technology: step-by-step instructions
How to grow a good harvest of large garlic? To do this, you must adhere to the growing rules.
Landing
Spring varieties reproduce only by teeth . You need to take teeth:
- whole;
- large ones weighing 3-6 grams or more;
- elastic.
When planting, they do not need to be peeled. When growing in open ground, it is not recommended to take cloves for planting from a head that contains 2-3 of them; such garlic is considered degenerate. Experienced gardeners advise disinfecting planting material in a solution of potassium permanganate or copper sulfate 12 hours before planting.
Before planting, the ground must be leveled, loosened, and furrows 3-4 cm deep made. The cloves are planted with their bottoms down; there is no need to press them in . The distance between large specimens should be 10-12 cm, medium ones - 8 cm. The garlic is sprinkled with earth on top and lightly compacted.
Water and be sure to mulch. To do this, you can take straw or sawdust. Many people use a layer of peat, humus or rotted compost. The thickness of the mulch layer is 2-3 cm.
Experienced gardeners sometimes try to plant spring garlic with bulblets collected from winter varieties , selecting for this the highest quality ones. These are produced by the largest plants. When the caps on the bulbs crack, they are removed completely from the garden bed and hung to dry. After 3-4 weeks, when the leaves dry, the heads with bulbs are carefully removed from the stem. Store at room temperature.
1-1.5 months before planting, they are sorted out, wrapped in paper, put in a bag and put in the refrigerator. This process is called vernalization. If this is not done, then small immature bulbs will grow from them.
Tip : It is not recommended to plant garlic next to onions, because these crops are affected by the same diseases.
We recommend watching a video about planting spring garlic:
Care
When growing this garlic in open ground, it must be provided with the necessary care . The soil must be constantly loosened and weeds removed so that water and nutrients can reach the roots faster. It is necessary to water abundantly when growing greenery, namely in the first phase of development. In the second half, the soil needs moderate watering, otherwise the garlic will rot or get sick. The next day after watering or rain, the bed must be loosened.
The application of organic and mineral fertilizers helps accumulate the nutrients needed by garlic. After the shoots appear, nitrogen fertilizers are used, and when the feather grows to 6-10 cm, you can fertilize:
- mullein diluted in water 1:10;
- urea – 1 tbsp. l. for 10 liters of water;
- diluted bird droppings 1:12;
- ammonium nitrate 15 g per 10 liters of water.
During the summer, garlic should be fed 2-4 times with phosphorus-potassium fertilizers . Mulching garlic in early spring helps create excellent conditions for its growth and development. The main thing is that the mulch is light.
Harvesting and storage
Garlic is considered ripe if its lower leaves begin to droop to the ground and dry out, and the upper leaves turn yellow. They remove it when the weather is dry and sunny outside. It is best to dig with a small pitchfork.
Garlic should be dried for 10-15 days in a special place under a canopy. Avoid exposing it to sun and rain. There is no need to immediately cut off the leaves and roots. Do this after drying. After the garlic has dried, it is sorted out, separating the rotten ones .
The harvest must be divided into small, medium and large garlic. They are stored in:
wooden boxes;- mesh bags;
- cardboard boxes;
- plastic pallets.
The yield of garlic depends on the selected variety, which is most suitable for climatic conditions , as well as on:
- compliance with the main agricultural growing conditions;
- carrying out measures to prepare for planting;
- quality of the land and fertilizers used.
It is noted that the yield depends on the size of the garlic cloves planted; if the variety was chosen correctly and all planting and care conditions were met, then on average the yield per 1 hectare reaches 5-15 tons, per 1 hectare - 50-150 kg.
We recommend watching a video about harvesting and storing spring garlic:
Care
Caring for spring garlic is easy . The plant needs watering and fertilizing, loosening the soil, and removing weeds. Mulching the area with humus, peat or rotted compost makes maintenance easier.
Abundant watering is needed only in the first phase of growth , when the vegetable is growing green. Drying or yellowing feather tips indicate insufficient moisture.
After 6-7 feathers grow, a garlic bulb begins to form . During this period, watering is reduced. Excess water leads to disease and rot. The day after watering or rain, the soil is loosened.
In the second half of August, watering is stopped.
Tying garlic feathers
Tying garlic leaves into a knot is one way to increase yield . The point of the procedure is that at the last stage of growth, all the nutrients go to the bulb, and not to the leaves. However, there is no scientific confirmation of the effectiveness of this method.
Tying is carried out several days before harvesting . First you need to carefully weave the braid, and then make a knot at the end, being careful not to damage or tear the feathers. Don't forget to wear gloves to avoid damaging your hands.
Fertilizer application
Fertilizing spring garlic begins as soon as the first green shoots appear from the ground . The more leaves are formed in April-May, the larger the bulb is formed.
Nitrogen fertilizer is applied first. This can be a solution of mullein in a ratio of 1:10, bird droppings in a ratio of 1:12, herbal infusion, humus or mineral fertilizer. After 14 days, fertilizing is repeated.
At the end of June - beginning of July, the plant begins to form a bulb. Now it's time to apply potassium-phosphorus fertilizers (for example, an infusion of wood ash). Such feeding is done until mid-August.
Harvesting and storing spring garlic
The drying of garlic feathers in August indicates the ripening of the bulb . Garlic is ready for harvest. Cleaning is carried out in dry, warm weather.
The dug up bulbs are shaken off the ground and placed in a dry, ventilated place . It is preferable to arrange the heads in rows or hang them.
After the green leaves have dried, they are cut off at a distance of 4-5 cm from the bulb . Store garlic in fabric bags or cardboard boxes in a cool, dry place. If the necessary conditions are met, the vegetable can be perfectly stored for up to two years without losing its beneficial properties.
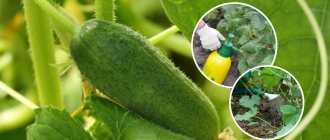
Disease and pest control
The phytoncides contained in garlic do not save the plant from pests and diseases.
Spring garlic is attacked by hoverflies, onion flies, moths, thrips, stem nematodes, root mites and garlic mites.
The appearance of insects is prevented by fertilizing with ammonium sulfate . If pests do appear, the affected plants are removed by carefully digging them out along with the roots.
Culture is not immune from diseases . This can be black mold, fusarium, downy mildew and white rot. The main cause of such diseases is excess moisture in the soil and poor-quality planting material.
Spring garlic
Possible problems during cultivation
It must be borne in mind that spring garlic cannot adapt well to other environmental conditions . Therefore, it is recommended to grow those varieties that are adapted exclusively to local conditions.
Another problem is the possibility of damage by fungal diseases, which means it is necessary to carry out preventive measures. They consist of treating the cloves with fungicides and providing ventilation for growing plants.
Important : stem nematode can cause great damage to garlic plantings. It dries up because the worms feed on its juice.
How to plant garlic correctly
For a decent harvest, you need to take into account several important points: soil type, location, choice of material and air heating during sowing.
Did you know? Garlic plantings have their advantages: they are not disturbed by insects and most animals.
Deadlines
Planting time depends on the variety taken:
- winter landing . This is done from the end of September until the first frost, so that before frost sets in the sprouts can strengthen, but not rise to the surface. Only if such conditions are met will the plant be able to withstand frost and produce a harvest in the spring;
- spring _ Grow immediately after the snow melts (April). This garlic tolerates cold well and can germinate when the soil warms up to +6°C. A good harvest is obtained by early planting, and the head must develop before the onset of heat, otherwise it will be small.
Choosing a landing site
The place of cultivation is of no small importance. It should be bare, well lit and level. If the garden is located in a lowland, then you can make a hill for the garlic beds - this way you can avoid moisture retention. It is not very good if the site is on a slope. Then there is a possibility of soil being washed away, which negatively affects the yield.
As for the soil, it should be sandy loam soil with a neutral degree of acidity.
Experts in the field of agricultural technology say that garlic cannot be grown in the same area for more than two years in a row. The reason for this is the good survival of many pathogenic bacteria that infect the crop.
It’s good if the following crops were previously grown on the site:
- zucchini;
- peas;
- early varieties of cabbage;
- beans;
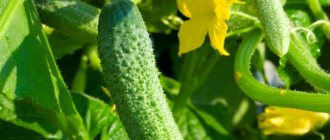
- cucumbers;
- cauliflower.
It is not recommended to place garlic rows after onions, carrots, potatoes or garlic - common pests and infections persist in the soil.
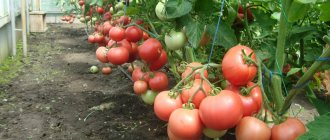
In such a zone, vegetables can be grown no sooner than after 4-5 years. Important! The proximity of peppers and tomatoes has a positive effect on the development of garlic.
Preparing the bed
The key step after choosing a location is preparing the soil for planting. If you plan to grow winter varieties, preparation must be carried out at least 14 days before sowing. If it is planned to cultivate a spring variety, then the soil is prepared in the fall. At least 1-2 days before planting, the site will have to be dug up again.
The planting area must be dug up (deeply, to the full extent of a shovel) and fertilized. At the same time, plant residues and weeds are removed. As a result, a good planting area should be leveled, loose and clean.
If the site is not fertile, you can create optimal conditions yourself. Acidic soil should be limed (1 cup of lime per 1 square meter). To improve drainage characteristics, peat, sand and sawdust are mixed into the soil.
To improve the nutritional qualities of the soil, rotted manure (1 bucket per 1 square meter), droppings (1 liter per 1 square meter), and ash are added to it. Instead of droppings, it is allowed to use phosphorus fertilizer at the rate of 30 g per 1 square meter. meter and potassium salt (20 g per 1 square meter).
Important! Beds for winter varieties are fertilized in September, for spring varieties - in early March.
Selection and preparation of planting material
50% of growing success depends on correctly selected material. The main indicators of the high quality of the upcoming harvest are its dryness and elasticity.
When choosing planting bulbs, you should know:
- The material must contain large heads . However, they should not show any damage or signs of deterioration. The ideal option is cloves of the same size.
- It is not advisable to take heads with 3-4 cloves , as this may indicate degeneration of the culture. It is better to plant heads with five or more teeth.
- When choosing winter garlic, you should pay attention to purple-striped varieties . They are more frost-resistant and not so demanding on growing conditions.
- There is no need to chase new varieties . It is better to give preference to a zoned species that is already adapted to local conditions.
- Do not take onions with burnt bottoms . There should also be no cracks on the bottom, which indicate signs of infection.
- Small cloves will not grow into large ones . But you can grow young greens from them.
- When sorting out the planting material, select the largest bulbs , and put the small ones aside. Damaged, rotten, wrinkled, with yellow spots or rotten ones are thrown away.
Did you know? Garlic has long been considered a useful plant, and in ancient times it was used against snake bites and many diseases (cholera, plague).
To enhance growth vigor, the slices are placed in warm water or a low concentration nitroammophosphate solution before planting. The bulbs should not be kept soaked for a long time - one night is enough.
In order to disinfect and increase resistance to infections, you can treat planting material with salt, copper sulfate (1%) or potassium permanganate (1%) for 20-30 minutes. A solution of wood ash and water (0.3 kg per 2 liters) is no less effective. The composition is boiled, cooled, the light part is drained, in which the teeth are soaked for an hour.
Basic rules for preparing seed:
- 30 days before planting, it is placed in a cool (-3-+2°C) room;
- removed and disinfected the day before;
- placed in a growth stimulator (“Potassium Humate”, “Epin”) for 12 hours.
To make spring varieties germinate faster, they are germinated.
To do this, the bulbs are placed in a fabric cover moistened with water, which is wrapped in polyethylene and left for 48 hours. Did you know? Garlic began to be cultivated in Egypt more than 5 thousand years ago, where it was included in the diet of workers involved in the construction of the pyramids. And in Greece it was used as a steroid for Olympians and warriors.
Planting process
Garlic does not have developed roots; it requires a small feeding area.
Since the same ones are taken to grow large heads, they need to be planted widely. The optimal distance between bulbs is 10-12 cm, and between beds - 20-25 cm. Smaller ones can be planted more densely.
When planting, consider the following points:
- Winter varieties are buried deeply (at least 5 cm), and spring varieties are buried 1-2 cm . During spring planting, greater depth significantly delays the process of crop ascension (therefore, delays their growth and formation).
- The teeth are lowered bottom down . It is from this part that the roots are subsequently formed.
- The soil should not be compacted after planting . It is not recommended to press spring varieties into the ground, as this will inhibit the growth of the root system. Ideally, prepare vertical grooves along the row in advance, where the bulbs can be lowered and carefully covered with soil.
- The soil is watered after sowing , but if the soil really lacks moisture.
In areas with a cold climate, winter varieties provide additional cover. Use straw, branches, hay, sawdust or special materials.
All about diseases and pests
Like all garden crops, spring garlic is susceptible to various diseases . The most common include:
- cervical rot;
- bacteriosis;
- green mold;
- yellow dwarfism.
The causative agent of cervical rot in the tissue of the head mainly penetrates through various mechanical damage. The disease is not immediately noticeable; signs appear at the beginning of storage, most often in September. Measures to combat this disease are to dry the garlic in the sun before planting. When trimming the head, be sure to leave a neck of 3-6 cm.
Bacteriosis also occurs during storage . On the diseased heads, grooves or sores are visible that go from the bottom upward. The bulbs acquire a yellow-pearl color. The reason may lie in violation of storage conditions or improper preparation of garlic before planting.
Green mold affects the tissue of the cloves, which become soft. They are covered first with a white and then with a green coating.
The main sign of yellow dwarfism is that the leaves and peduncle of the plant begin to turn yellow . The garlic looks very small. This disease is transmitted by aphids.
Garlic can be damaged by pests such as:
- onion fly;
- nematodes;
- onion sharpener;
- onion leaf beetle.
To combat them, pesticides are used.
Want to know more about the varieties of garlic? Read our articles about wild, Chinese and black.
Technique and timing of planting spring species in spring
- In the spring, while the soil still retains some moisture, the garlic bed prepared in the fall is loosened and the cloves are placed in the soil. It is very important to monitor the level of soil moisture. It should not be too wet, as this will lead to rotting of the teeth.
- The distance between plantings should be sufficient for the healthy formation of the vegetable, so 8-10 cm are maintained between cloves, and 25-30 cm between rows. In this case, it is better to plant large cloves separately from small ones. This will make maintenance and cleaning much easier.
- From small cloves you can get excellent greens, which have a lot of useful properties and excellent taste. For planting such garlic, you can safely select an area in a shady or semi-shady place. In such conditions, garlic feathers will retain their juiciness and delicate taste longer.
- To prevent the culture from being delayed in development, the teeth should not be too deep when planting. It is optimal that their top is at a depth of 2 cm.
- The bed should be mulched with peat so that the plantings do not overheat in the sun. This will also help avoid the formation of crust, retain the necessary amount of moisture, prevent the growth of weeds and eliminate the need to loosen the soil. In addition to peat, hay or straw can be used for effective mulching.
Now you know when and how to properly plant spring garlic in open ground in the spring.