Views: 851
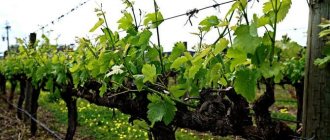
For pears, it is better to prefer loose soil; it should allow air and moisture to pass through, but with a small amount of clay to retain moisture at the roots. In the garden, choose the south, southwest or west side for it. The place should be clear, but not sultry. Due to the specifics of the root system, the pear loves moisture, but if the air is continuously intense with water vapor, the tree begins to hurt.
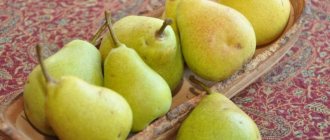
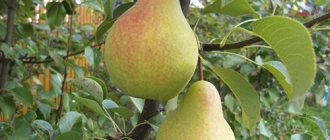
The pear is less frost-resistant than some other fruit trees, so it more often dies during severe winter frosts. Maybe it is because of this that gardeners have begun to pay less and less attention to this type of tree. Despite this, the pear is a fairly common fruit tree that can produce up to 50 kilograms of harvest annually.
Expert opinion
Anton Markin
The roots of a pear can go into the ground to a depth of 1 meter, and the trunk can rise up to 10 meters above the ground. Therefore, to plant a pear, you need to choose an area with a deep humus layer. Also, the place for the pear should be well lit, but at the same time as protected as possible from strong winds.
Pear varieties
Pears are classified according to the following criteria:
- fruit size (large, small);
- fruit shape (pear-shaped, spherical, flattened, shortened round);
- by shelf life (summer, autumn and winter).
They are also classified according to color, pulp texture, and type of fruit surface.
The degree of frost resistance affects the choice of growing location.
Heat-loving varieties grown in the south of Russia include:
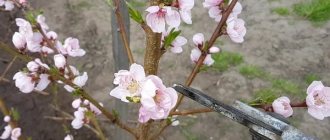
Ilyinka . Early variety. Tall trees that bear fruit no earlier than 7 years. Average yield. The fruits are yellow with a slight blush and ripen in July.
Talgar beauty . Late, medium-growing productive crop. It has large pear-shaped fruits with a sweet but rough taste.
Melting . The variety is summer, resistant to fungal diseases and pests. The fruits are sweet, yellow in color with red streaks.
The following varieties are suitable for the Moscow region and central Russia:
Yakovlev's favorite . Autumn crop, medium-growing, scab-resistant. The fruits are large, juicy, with a delicate texture.
Elegant Efimova . An autumn variety, medium-sized, high-yielding, unpretentious to growing conditions. The fruits are sweet and sour, medium-sized and red in color.
Rogneda . Refers to winter-hardy crops with a pyramidal or round crown. Sweet, aromatic fruits ripen at the end of August.
Successful selection gradually shifted to the North, where scientists developed highly winter-hardy varieties:
Decabrinka . A young, high-yielding variety with autumn ripening. The sweet and sour fruits are medium in size and have a delicate aroma. Fruiting occurs in the 7th year.
Lel . High-yielding summer variety. The fruits are greenish-yellow, juicy with a sweet and sour taste. Can be stored for no more than 3 days.
Uralochka . Early-growing, medium-growing summer crop. Ripe fruits are yellow in color and have a sweet and sour taste. They are stored for up to two months.
Pear seedlings grown in the Urals and Siberia, in addition to frost resistance, are resistant to diseases and are not affected by pear mites.
When to plant?
Planting pears should begin with choosing the optimal time for planting. In different regions, pears are planted at different times.
In the north of Russia, it is recommended to plant pear trees in the spring, before the buds open, i.e. until the end of April. Then the seedling will take root before the onset of cold weather and will survive the winter well. In the south of the country, spring comes earlier, so the optimal time for planting pears is considered to be the beginning of autumn.
It is also important to choose the right pear varieties, which are divided into three types:
- early maturation;
- mid-season;
- late.
The first type is ideal for the Black Earth Region; it includes varieties such as “Yellow Summer”, “Tonkovetka” and “Lada”. The varieties “Bessemyanka” and “Autumn Bergamot” are suitable for planting in the middle zone. Late-ripening varieties such as “New Year’s”, “Venus” and “Severyanka” are also suitable.
Pear soil requirements
Pears can grow on slightly acidic, and northern varieties even on acidic soils. Reacts poorly to alkaline soil. With a lack of iron, zinc, boron, manganese, zinc, frost resistance is lost. Possible chlorosis.
The crop does not like excess sand, and swampy, clayey soils and peat bogs can lead to death.
Soddy-podzolic loams are suitable for seedlings. The soil should be quite loose and moist. Grows well on light forest soils.
The site is being prepared in the fall. Fertilizers are applied depending on the type of land.
For 1 sq. m of podzolic loam, up to 60 g of superphosphate, 6 kg of organic matter, 15 g of potassium are added.
Sod-podzolic soil is fertilized with compost, superphosphate, and potassium. Liming can be done.
Sandy soil is diluted with clay and humus.
If the soil is clayey, then there is no point in improving it. Over time, the root system will grow and fall into the clay layer. Such places are unsuitable for planting.
Disease Prevention
It is better to prevent pests and other damage than to treat the tree. What can be done:
- To prevent cracks, wrap the trunk with newspapers or reeds or spruce branches for the winter.
- To prevent fungus and other pests, you need to treat the pear with a solution of iron or copper sulfate in the spring.
- To ensure there are no parasites, you need to spray the plant with insecticides in the spring. For example, “Calypso”, “Pirinexom”. After flowering, you need to repeat the treatment.
Another important condition for good yield is that you need to deal with foliage thickening in a timely manner. The fight against thickening is carried out in early spring. It is necessary to cut off excess branches in the crown of the tree. In the fall, the procedure can be repeated, but only after all the leaves have fallen.
Friends, I told you about how to grow a pear. I hope you will take my advice and you will grow a healthy, beautiful tree that will produce an excellent harvest.
And if you have your own tips for growing pears, please share them.
Selection and preparation of pear seedlings for planting
It is recommended to buy seedlings in specialized nurseries and large gardening farms. You should not purchase seedlings older than 2 years; they may not take root.
An annual plant has 1 or 2 side branches 12 cm long, and a biennial plant has several branches about 30 cm long, the roots are the same length. They are worth paying special attention to. They must be elastic, well developed, and free of growths and damage. If the seedling was not purchased in a container, then during transportation it is advisable to cover the roots with a damp rag and periodically moisten it.
The trunk should not have any damage or signs of disease.
Before planting, the roots are cut to 10 cm and kept in a honey solution, mullein infusion or water.
How to choose a seedling?
Professionals advise using two-year-old seedlings for planting. When selecting seedlings, special attention is paid to the condition of the tree itself; the young shoot should be elastic and not dry, with smooth bark of the same color.
The height of the seedling is usually 70-80cm. The roots should be moist and light when cut. In order not to make a mistake in your choice, we advise you to look at photos of pear seedlings that have successfully taken root.
Preparations for planting should begin by immersing the root system of the seedling in a container with a solution of a root stimulant, for example, kornevin. It should also be added to the water that will be poured into the planting hole. Long roots on the sides and in the center are cut off by ten centimeters before planting, and leaves, if any, are torn off.
Choosing a location on the site
A flat, elevated place is suitable for growing. Lighting and water conditions depend on the height of the site. The depth of groundwater must be at least 2 meters. Places with natural ruggedness, hollows, and ravines are not suitable.
Since the tree is tall, with a fairly voluminous crown, the planting area must have sufficient area. The size of the place depends on the variety. Pear does not like shading. The process of photosynthesis occurs most intensively in the morning on the southeastern and eastern slopes.
Do not plant in lowlands where cold air accumulates. This has a detrimental effect on flowering. The accumulation of groundwater leads to rotting of the root system.
Cold winds also cause damage, so it is advisable that the area is closed from them.
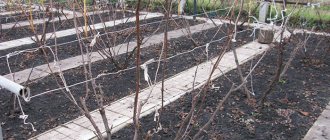
Care after landing
A fruit plant requires constant monitoring, plowing the soil around it, plucking weeds, and watering. In winter, without insulation, a pear can die. Therefore, it is necessary to wrap it in pest-treated burlap.
The top of the hillock is covered with straw, which is pre-mixed with wormwood. Such actions will not only save the tree from the cold, but will also scare away annoying mice.
Every year after planting, it is worth mixing fertilizers containing minerals, vitamins and useful elements into the soil. Before feeding, it is important to know the type of pear and its age. These parameters help you choose the right tools.
For prevention purposes, it is necessary to pollinate the trunk and roots every spring with urea, which will protect against pests.
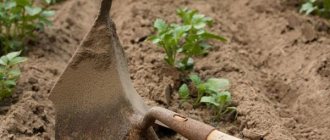
Preparation of planting holes
2–3 weeks before planting, the soil on the site is dug up, freed from weeds, and planting holes are prepared.
The holes are dug half a meter deep and 1 meter in diameter. The walls of the pit should not be smooth; notches are made on them. The top layer is mixed with organic matter. Compost is a good choice as it will not only fertilize but also loosen the soil. If the land on the site is prepared in advance, then the roots of the seedling are sprinkled with the removed fertile layer.
Gardeners practice the following scheme for filling holes: the bottom is filled with humus, a layer of sand is added, superphosphate and potassium sulfate are added.
To avoid shading, the distance between the holes should be equal to the height of the mature tree.
Do not bury the roots. The neck of the tree should be 5 cm above the ground.
It is easier to plant with two people. To ensure that the trunk is perpendicular to the ground, the assistant must hold the seedling as level as possible while burying.
A stake is dug near the center of the hole and a pear is tied to it. After digging, watering and mulching with peat, manure, and sawdust are carried out. To better retain moisture, a hole is made along the edge of the circle around the trunk.
The most favorable conditions for planting are in September or October. At the end of April, before the beginning of the growing season, seedlings are often planted in the northern regions. By winter, the culture has time to take root and gain strength. It is better to prepare the holes in the fall so that the soil settles and becomes compacted.
Growing pears from seeds at home
It is quite possible to grow a full-fledged tree from a seed at home, but there is no guarantee that the resulting fruits will have the same taste. In most cases, the grown seedling still has to be grafted.
To get a seedling from seeds, you need to do the following (Figure 13):
- Select seeds from ripe fruit, place them in a bowl of hot water and rinse thoroughly. After this, the seeds are dried with a paper napkin.
- Peat is poured into a plastic bag, moistened and seeds are placed on the surface. The bag is tied and placed on the bottom shelf of the refrigerator. The bag should remain refrigerated for three months, but the peat should be moderately moistened periodically.
- With the arrival of spring, the bag is taken out and placed in a bowl of water at room temperature for two days. In two days, the hard shell of the seeds will dissolve, and they can be transplanted into flower pots.
Figure 13. Growing seedlings from seeds
Planting is carried out in a nutritious and loose earth mixture and placed on a well-lit windowsill. It is advisable that the seedlings are not damaged by direct sunlight. Transplantation into open ground is carried out when the height of the plants reaches 30 cm.
Method of planting a pear seed by the bark
Grafting a seed into the bark of an adult tree will not give any results. To do this, you should use a cutting, bud or sprouted seedling.
This method allows you to obtain a varietal tree grown from a seed or cutting at home. The grafting site must be rewound with natural thread and regularly monitored to ensure that the area does not rot or become damaged.
How to care for a pear
Fruit crop care consists of the following activities:
- watering;
- feeding;
- crown formation;
- sanitary anti-aging pruning:
- taking measures to protect against diseases and pests;
- preparation for winter.
Closer to frost, the soil is mulched with ash, peat, and straw to insulate the root system. The trunk and bases of skeletal branches are whitewashed.
Young seedlings tolerate frosts worse than adult pears, so they especially need shelter. They are covered with spruce branches and wrapped on top with burlap, paper, and spunbond. Secure with ropes and wire.
When snow falls, it is raked and placed in a snowdrift around the trunk.
If snowfalls are heavy, it is recommended to shake the snow off the branches so that they do not break off under its weight.
If winters are mild, then to insulate an adult pear, it is enough to mulch the circle around the trunk.
Watering and fertilizing
Young seedlings are watered weekly, taking into account weather conditions; adult fruit-bearing trees must be watered monthly before and after flowering, after harvesting and at the beginning of leaf fall. A groove is dug around the trunk, into which water is gradually poured at the rate of 2 buckets per 1 square meter. m of soil.
To prevent intense evaporation, the tree trunk circle should be mulched. Straw windrows retain moisture well.
Young seedlings begin to be fed only the next year. They need nitrogen to grow. The best first feeding would be spraying with a urea solution (500 g per 10 liters of water). This procedure is performed until the kidneys swell.
If this moment is missed, then nitrogen is applied by the root method. You can use urea and saltpeter.
For active growth of young shoots, adult plants also need nitrogen. It is applied before the buds swell, before flowering, and after it.
You can make an infusion of 0.5 kg of chicken manure and 10 liters of water, leave for 5-7 days, then dilute 1/10 and pour it over the circle around the trunk. A solution of 10 liters of water and 200 g of urea is also suitable.
After flowering, in order to improve the quality of the fruit, the pear is fed with nitroammophos. An adult plant needs 70–90 g of complex mineral fertilizer. It is mixed with soil and introduced into the groove around the barrel.
The tree must be fed with phosphorus and potassium during fruit formation.
It is advisable to use foliar feeding in rainy weather. The roots stop absorbing minerals, and nutrients are more easily accessed through the leaves.
Throughout October, mineral fertilizers, excluding nitrogen, are applied to increase frost resistance. The mixture consists of 15 g of potassium chloride, 30 g of superphosphate. Fertilizer is applied in dry form during digging or a solution is made. It would be useful to add wood ash.
To avoid burning the roots, you should not apply several types of fertilizers at the same time.
If mineral fertilizers are applied every year, then it is enough to fertilize with organic matter once every 3 years.
Crown formation
To obtain a rich harvest, it is necessary to annually form the crown and make sanitary and anti-aging pruning. The usefulness of the procedures is as follows:
- the crown is strengthened;
- the quality of the skeleton and cortex improves;
- the tree is rejuvenated;
- access of light to the ovary increases;
- the fruiting period is extended;
- fruit volume increases;
- makes harvesting easier;
- disease prevention.
If you neglect pruning and crown formation, the garden pear will run wild.
Tierless formation of pear crown
The tiered method involves a uniform, balanced arrangement of skeletal branches.
The formation of the crown of an overwintered seedling begins in the spring when the buds swell.
At a distance of 40 cm from the ground, all the growth is cut off to form a standard. Above is the trunk, which is called the conductor. He is the leader and ensures the growth of the plant. One eye is left at the border between the trunk and the conductor; the next two eyes will be located in a spiral at a distance of 25 cm from each other, balancing the trunk.
To prevent the tree from growing very tall, the leader is pruned by 20–35 cm, the leadership goes to the top branch. Over time, 2–3 shoots of the second order are formed.
The advantage of this method is the good connection of the branches with the conductor. The disadvantage is the presence of an overly thick crown.
Whorled-tiered formation of the pear crown
If the formation of skeletal branches occurs in two tiers with a distance between them of up to 1 meter, then this method is called whorled-tiered.
In each tier, 3 to 5 branches are laid from adjacent buds. The more there are, the greater the distance between the tiers.
With this method, the crown is formed quickly and easily. The disadvantage is a possible break due to the weak connection between the crown and the conductor.
1st year after planting
The lower branches are cut off and a trunk is formed at a height of 40–45 cm from the ground. At a height of 60–90 cm, 3–4 branches are left on opposite sides of the conductor. They are formed equal in length, the excess ones are removed.
20 cm above the topmost bud of the first tier, the conductor is cut.
2nd year after planting
The formation of the 1st tier ends. The skeletal branches are left unchanged, and the growth formed between them is removed. Shoots that grow above the first tier need to be shortened.
3rd year after planting
The second tier is formed. To do this, in the spring, all shoots are removed at a distance of 40 cm from the first tier. Two buds are selected on opposite sides of the trunk. To prevent shading, the buds should be located in the spaces between the branches of the lower tier.
The remaining branches between the selected buds are removed. Later, the branches of the second tier are cut off and aligned with each other in length.
The conductor is shortened by 20 cm.
4th year after planting
The conductor is cut 40 cm above the uppermost skeletal branch.
All skeletal and some branches between tiers are cut by 1/3. The rest of the growth on the trunk, in tiers, is removed.
5–6 years after planting
The culture reaches its optimal height - 3–3.5 m. The guide is cut just above the upper skeletal branch.
With a correctly formed crown, branches of the 2nd order should be 80–90 cm from the conductor and at least half a meter from each other.
Thinning of the crown is carried out, including small pruning of formed branches. The growth is left at least 30 cm long; it is necessary for fruiting.
To form a strong crown, ropes are tied to the middle of the skeletal branches of the first tier and to the guide, forming a horizontal plane. The same procedure is performed with the second tier, but a year later.
Ropes are cut only after lignification, when the tier will remain in a horizontal plane without its help.
When pruning branches of the second tier, they are made shorter than those on the lower tier.
Sanitary maintenance pruning of pear
Every spring and after leaf fall, the crown of the fruit crop is inspected. Remove diseased, damaged, drying branches. Branches growing upward, inward, at an acute angle to the trunk are pruned.
It is not recommended to leave stumps, they contribute to the spread of rot. The cutting areas are treated with garden varnish.
The trimmed part of the crown is disposed of.
Rejuvenating pear pruning
If mature trees experience fruit shredding and the formation of young shoots decreases, it’s time to do anti-aging pruning.
It is held in the fall, not earlier than October. The branches are cut back by a third, at least 40 cm. Pruning stimulates the growth of new growth. The trunk is shortened to a side branch in order to redistribute nutrients.
After such procedures, the crop is rejuvenated, the crown is renewed, normal fruiting is resumed, and the quality of the fruit improves.
Preventive measures to protect against pests and diseases
To prevent diseases and the negative impact of pests, preventive measures are used in the garden every year in spring and autumn. These include the following activities:
- Complete agrotechnical work such as fertilizing, fertilizing, and watering. These works make the plant strong, hardy, and increase resistance to disease.
- Cleaning the garden area from fallen leaves, rotten fruits, and debris.
- Loosening, mulching the soil around the trunks.
- Regular weeding.
- Timely sanitary pruning of the crown.
- Mandatory disposal of damaged branches and areas of bark. Treatment of cut areas with garden varnish, fungicides, and copper sulfate.
- To prevent sunburn, cover the trunk with lime in spring and autumn.
- Cleaning hollows from debris. Filling them with crushed stone, filling them with cement mortar.
- Spraying before buds open, two weeks after leaf fall, with 3% Bordeaux mixture or copper sulfate.
- Carrying out preparatory activities for wintering. Tying spruce branches to the trunk will protect the trees from rodents.
If you follow all preventive measures, the likelihood of diseases and pest damage will decrease by 70–80%. It is very important to initially select the right disease-resistant variety suitable for a particular region.
Whitewashing and trimming
The second important agrotechnical technique is whitewashing the pear trunk in late February-early March. However, the event is carried out if it was not carried out in the fall or was washed away during the winter or has peeled off significantly. In this case, whitewashing is called renewing.
After winter comes the optimal time to trim fruit plants in the garden, and pear is no exception. The first thing to do is sanitary pruning. In this case, broken, dry branches that have not survived to the heat are removed.
The haircut is then carried out for the following:
- formation of the correct crown in young seedlings;
- adult plants undergo thinning, stimulating pruning.
Trees that have been bearing fruit for a long time receive a rejuvenating effect.
Methods of grafting pear trees
In addition to the pear itself, the rootstock can be apple, quince, or shadberry.
Gardeners vaccinate in different cases:
- if you wish, experiment, create a new variety;
- if the tree breaks, but the root system remains intact;
- lack of space on the site;
- when there is a shortage of planting material of a rare variety.
First of all, prepare the rootstock. A month before the procedure, it is hilled up; just before grafting, the seedling is watered and freed from growth.
Copulation
The easiest way, accessible even to novice gardeners. It consists of connecting oblique cuts of the rootstock and scion of the same diameter, fixing them with film or electrical tape. For better sealing, the grafting site is lubricated with varnish on top of the winding material. If the grafting is successful, then after 14 days the scion buds will begin to develop.
Into the cleft
This method is best for rejuvenating an old garden. The vaccination is done in early spring. The trunk and crown are cut down, leaving only a small stump. A split is made on it up to 5 cm deep. A cutting is inserted into it with an oblique cut, and the trunk is tied with binding material.
When docking, you need to make sure that the cambium layers match. The grafting site is lubricated with garden varnish. If the diameter of the trunk allows, you can plant two cuttings at the same distance from each other.
After successful grafting, the scion will sprout within three weeks. If the grafting is unsuccessful, the cutting will dry out.
Under the bark
The method is quite simple. The grafting is done in May, when the bark is easily separated from the cambium. The rootstock is shortened and the lower branches are removed. The bark is trimmed in the longitudinal direction by 4 cm. The scion is cut with an oblique cut. Opposite this cut on the reverse side there should be a kidney. When the scion is connected to the rootstock, this bud is located in the center of the graft, which is tied and lubricated with garden varnish.
Budding
Vaccination is carried out in August before the end of the growing season. The method is widely used due to its high survival rate. A bud with a layer of bark and wood is cut from an annual shoot. An incision is made in the bark of the rootstock into which the bud is inserted. The grafting site is fixed and covered with garden varnish. The bud and rootstock must be genetically compatible.
By the bridge
This type of grafting is used to save the garden when the bark is damaged by rodents, sunburn and frost. It is quite labor-intensive and beyond the power of every gardener. Vaccination is carried out after the snow melts. Annual cuttings serve as scion. Their diameter depends on the area of damage.
For small areas, cuttings with a diameter of up to 4 cm are suitable. All buds are removed from them, and oblique cuts are made at both ends. Two cuts are made on the bark above and below the damaged area of the rootstock, into which sections of the cutting are inserted. The scion should be arched.
The grafting sites are secured with strips of fabric soaked in varnish and wrapped with the prepared material.
Ablactation
This method is used to form creeping forms, renew crowns, and create hedges. Vaccination is carried out throughout the growing season, but it is preferable to do it in the spring.
The scion and rootstock, with the same diameters, are cut lengthwise by 5 cm and placed next to each other. If the size of the rootstock is larger, then a cut is made on it, and the scion is inserted into it. The vaccination sites are fixed and coated with varnish.
On the first day after vaccination, watering is necessary. The shoots growing below the graft are removed. If the bandage is too tight, it needs to be loosened. It is completely removed only after a year.
Additional seasonal treatments
There are also procedures that are not mandatory, but which need to be carried out in the spring. This includes tree replanting and grafting.
Transfer
If the pear tree was not planted in the right place, it can be replanted. This applies to young trees, up to 5 years old. They can take root if the transplant procedure is carried out correctly.
Replant if the original pear is:
- planted close to groundwater;
- placed in partial shade or full shade;
- suffers from too close proximity to other cultures.
In order to move a pear to a new place, you will need to carry out several activities to prepare the place and the plant itself.
| Preparing the site | The area must be leveled, fertilized and a hole made in advance. The same fertilizing is applied to it as during the main planting. |
| Preparing a seedling | The seedling is watered in advance, then carefully dug out. The roots are taken out with a lump of soil in order to damage them less. |
Planting is carried out using standard technology. After moving, you need to water it with Kornevin’s solution to increase survival rate.
Graft
Spring is the best time for vaccination.
Spring is a good time for vaccination. It is carried out to increase the diversity of varieties, improve the taste of fruits, or save a dying crop.
Everyone chooses the method of vaccination at their own discretion. Experience and the ultimate goal of the event play a role here. It is necessary to graft trees when the temperature has already returned, but the growing season has not yet begun.
Then, with the beginning of the movement of juice, active growth of plants will begin. But if frost returns, then the grafting site can be hidden.
Pear diseases
The culture is susceptible to quite a large number of diseases. Let's look at the most common ones.
Scab
Spots that are barely visible to the eye appear on the trunk, leaves, and flowers, which gradually increase to 3 cm. The yield decreases. The fruits are crushed and become hard.
The disease is infectious and common in temperate climates. Its occurrence is facilitated by high soil moisture, closely spaced plantings, and the susceptibility of the variety. They fight the disease with fungicides.
Fruit rot (Moniliosis)
A fungal disease that causes rotting of the fruit pulp. First, a small spot appears, which grows and affects him entirely. Spoiled fruit is a source of infection for neighbors. Rot affects a weakened plant or fruit with mechanical damage. Grows well in cold rainy weather.
It is impossible to stop the rotting process. You can only prevent it by taking preventive measures.
Cytosporosis
Trunk rot affects old weakened trees. The cause of development may be improper care during dry summers and sunburn.
The bark turns dark red and dries out. Trimming the affected areas and treating the cut areas with copper sulfate will help prevent the development of cytosporosis.
Black cancer (Antonov fire)
First, orange tubercles appear on the branches, the buds do not open, and then the branch dries out. A sticky substance pours out from cracks in the bark. These are signs of black cancer. It is widespread in the Urals, in the Non-Black Earth regions. Affects the bark, crown and fruits.
The disease occurs due to mechanical damage and low winter temperatures. Spores of parasitic fungi can get into damaged plant tissue, then new formations grow in the wounds and they do not heal. At the initial stages of cancer development, it is necessary to cut out and burn the affected areas, and treat the cut areas with garden varnish and fungicides.
How to protect against scab
The most common disease to which pears are susceptible is scab. It develops only on this plant and is capable of destroying the entire crop. This fungus reproduces most actively in humid and warm climates.
It is not difficult to recognize scab. The fungus becomes active in the spring. Then the leaves first turn red and then turn black. At the first sign of redness, you need to start fighting the fungus. Products containing copper are suitable for this. For example, Bordeaux mixture. You can buy it at a gardening store.
The treatment of pears with Bordeaux mixture is carried out in 3 stages:
Before flowering - 3% solution.
After flowering - 1% solution.
A month before harvest - 1% solution.
The solution is applied to the leaves with a spray bottle. The fungus dies only upon direct contact with the Bordeaux mixture.
Pear pests
In addition to diseases, insects cause considerable damage to trees. Let's talk about the most common types.
Pear gall mite
A very small insect, no more than 0.2 mm long. In spring it penetrates into the tissue of young leaves from the underside. These places are affected, swellings called galls appear. The leaf dries up and dies. Before flowering, after flowering and in October, spray with infusions and decoctions of natural insecticides.
Green aphid
It sucks out the juice of buds and leaves, after which they curl and fall off. Before flowering, the crop is treated with nitrophen, after flowering it is fumigated with tobacco smoke and sprayed with a soap solution.
Pear sucker
Sucking of cell sap by these insects leads to shedding of the ovary and loss of yield. They get rid of honeydew using the same methods as aphids.
In addition to diseases and insects, rodents cause great harm to the crop. Hares and mice feed on tree bark in winter. For the winter, gardeners cover the trunk with spruce branches.
To protect against hares, which eat bark at a height of up to 1.5 m, you need to dig a high metal mesh around the trees.
The standard can be coated with a mixture of clay and mullein. The smell will repel rodents.
Growing a pear is quite troublesome, but exciting. If you approach planting and care with all responsibility, then a rich harvest will be a worthy reward for your work.
Top dressing
After two years, it’s worth thinking about feeding. For this purpose, a groove is dug around the trunk in a ring, 40 cm deep. Fertilizer is poured into the resulting groove. Mineral fertilizers are best suited for this, or you can use complex baits.
To increase productivity, branches are pruned in the spring, but do not overdo it - in many varieties the crown forms independently.
Having spent time and effort on growing a pear, after the required period, you will be able to collect a lot of tasty and ripe fruits. Surely, every housewife has her own secret recipes for compotes and jam from delicious pears.
Rodent protection
When growing pears, planting and caring for which is not particularly difficult, do not forget about protection from rodents. Mice love to chew on bark, so using repellents and protecting the trunk with fine mesh for the winter will not be superfluous. A simple folk method works well. Place dried branches of common bird cherry under the crown and stick into the soil. Mice won't even come close. In winter, this method works worse; comprehensive protection is necessary.
Finally, I would like to note that increasing the winter hardiness of heat-loving crops is one of the main areas of work for breeders. Thanks to their efforts, many fruit trees are conquering new territories. We have collected for you the TOP 8 most frost-resistant varieties of pears.